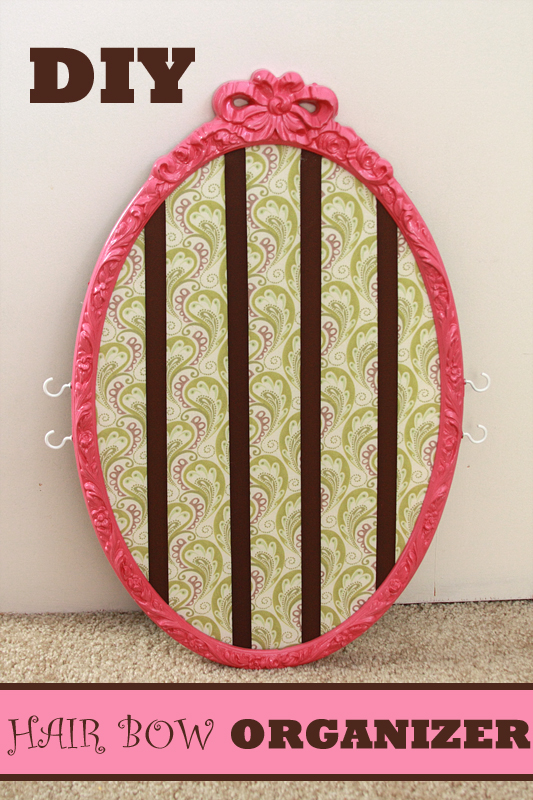
I for one, cannot believe that we're already in November. Seriously. Where did October go? BUT, being that we're now in November we can start looking at Christmas presents! I know you probably want to knock me a good one in the head for even suggesting such a thing, but if you're going to go the DIY route for presents, it doesn't hurt to get an early start.
That said, we have a new little niece to get presents for this year, and seeing as her mom loves her some hair bows and head bands, this gift idea came pretty easily. (Poking around on Pinterest doesn't hurt either.)
I think the best part of making this is hunting down just the right frame to use. I got lucky at the first thrift store I stopped at and found a... not so pretty three-piece vanity mirror set. It was gold and tacky, but with some spray paint it would turn back into something cute and girly (not to mention I got 3 mirrors out of the deal so I was actually able to make 3 of these if I wanted).
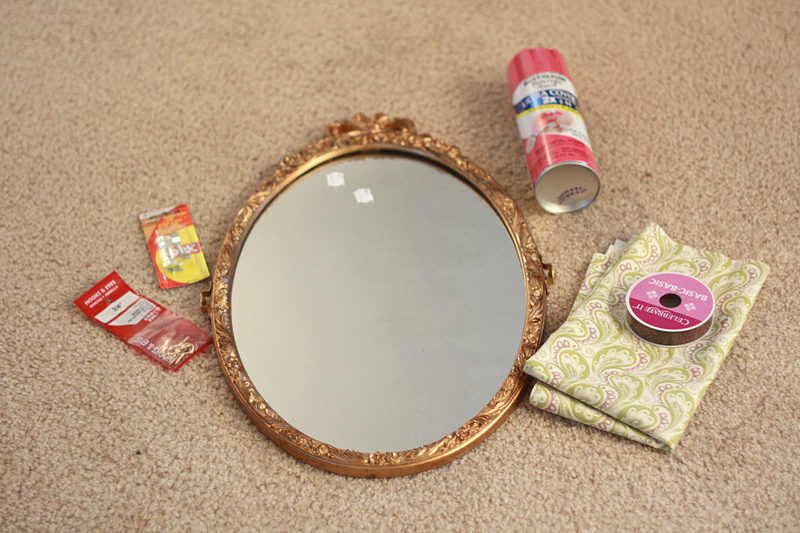
Things you need
Old picture frame or mirror (can be found at Goodwill for cheap)
Spray paint
1/2 yard of fabric (or roughly a little bigger than your frame)
Hot glue gun
5/8" - 7/8" grosgrain ribbon (I opted for grosgrain as satin may snag on the clips)
Scissors
Small screw-in hooks (about 3/4")
Picture hanger (if needed)
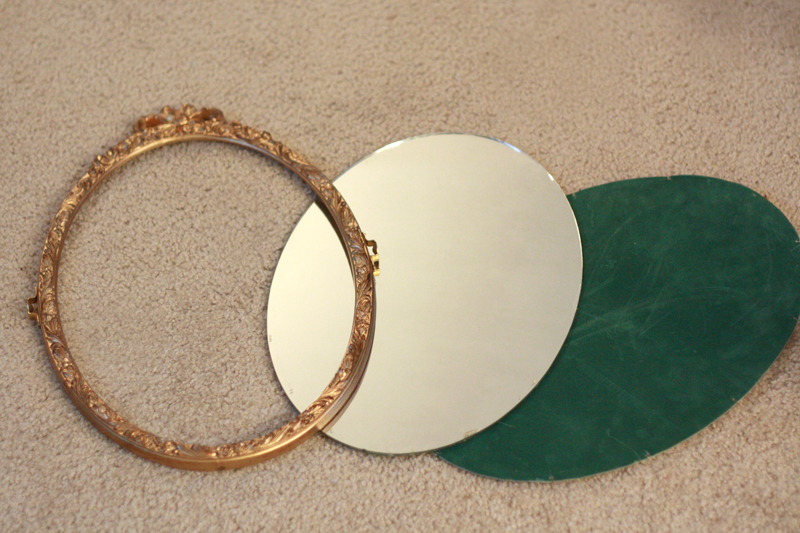
First things first. Disassemble your picture frame/mirror, making sure to keep all the parts (frame, backing, and glass or mirror).
Spray paint a couple coats onto your frame (front and back) until completely covered. Follow the directions on the can for drying and re-coating times.
Now, gather up your frame, glass/mirror, and fabric. (Doesn't that frame already just look a million times better?)
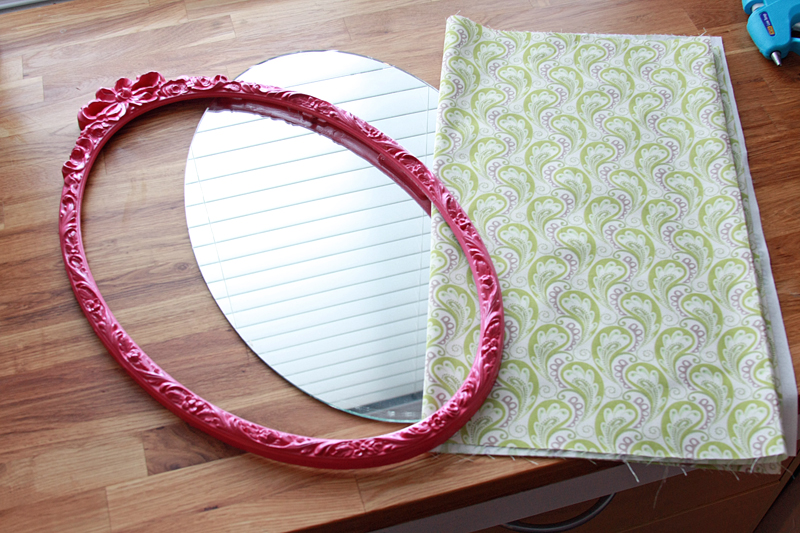
Lay out your fabric right side down. Place your glass/mirror facing down on top of the fabric, with any patterns on the fabric running in the direction desired.
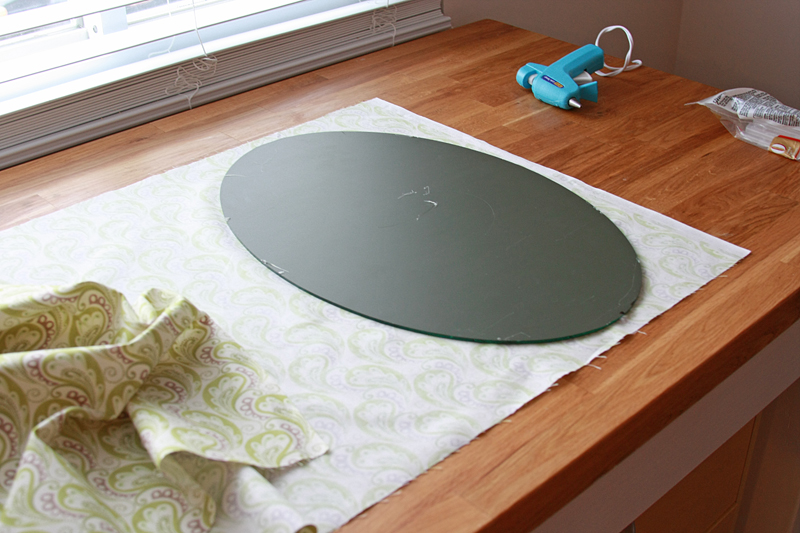
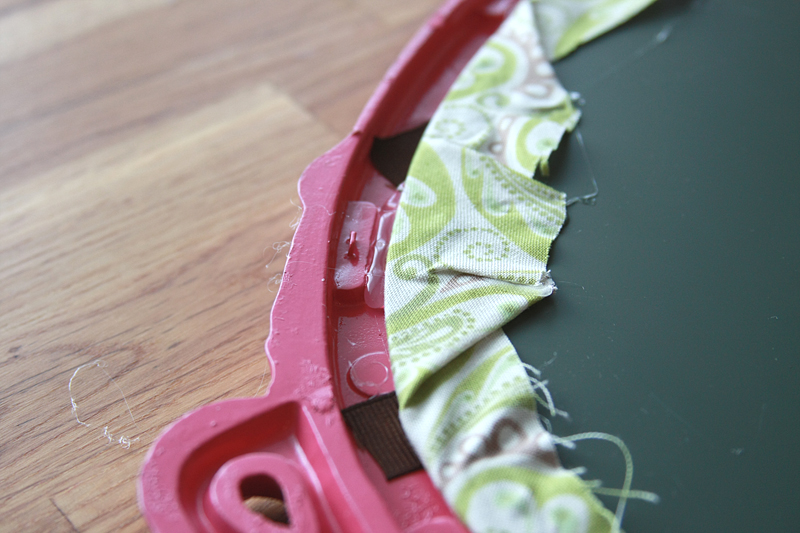
Pull the material taut and begin hot gluing the edges to the back of the glass/mirror. This is obviously much easier if you're working with a square piece of glass.

Continue all the way around the glass, don't worry about those bumps and folds on the backside. As long as the material is laying flat on the front side of the glass, that's all the matters. Cut off any excess fabric.
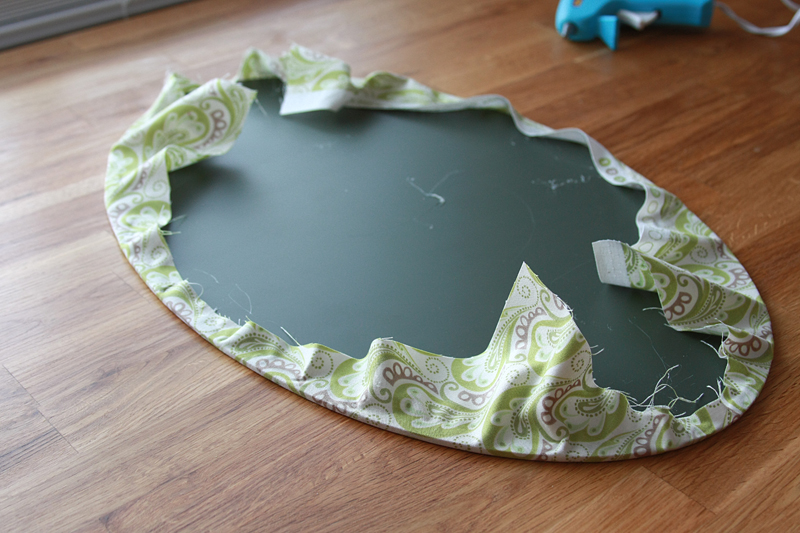
Now it's time to go back and take care of all those bumps I told you not to worry about. And the only reason we're doing this is so the back lays flat when we put it back on, so no need to make this look pretty. I just folded any extra material over and glued it down. (Another reason I use a low-temp hot glue gun is so when I get the glue on my fingers it hurts, but it's not ridiculously painful and leaves blisters.) And hey, if you're using a square piece of glass, you can skip this all together!
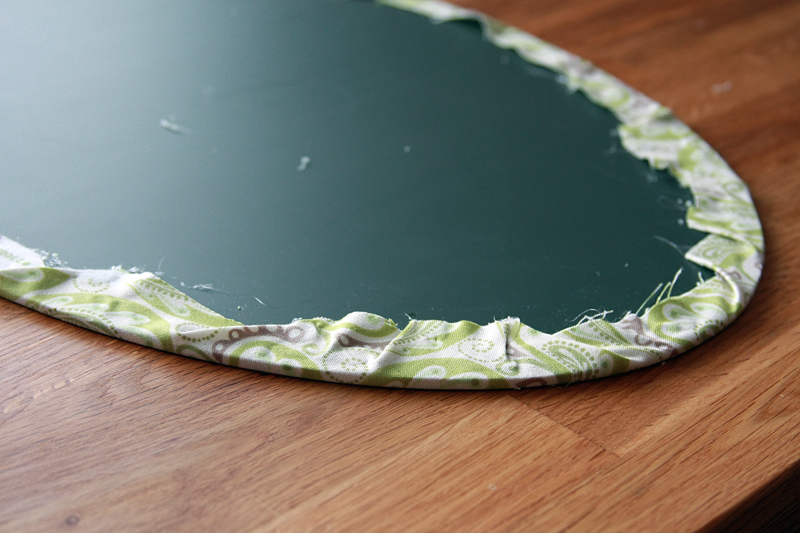
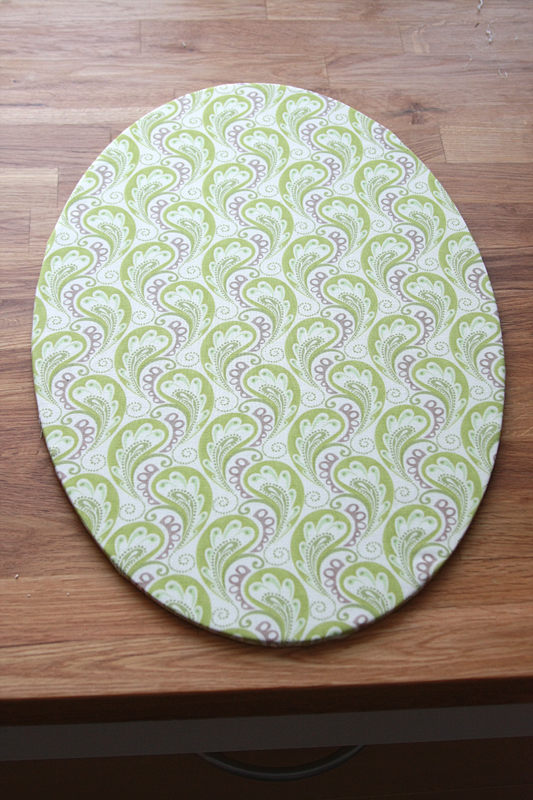
Alright, flip it over and check out your handy work. Even if the edges aren't perfectly smooth that's okay, the frame will cover this up. Go ahead and set the covered glass piece aside.
For the next step, I was going to tell you to measure out your width and do some math to figure out how many strips you want going down your frame, but honestly, it's really just easier to eyeball it with the same results. Especially when you're not working with a square piece. However, you do want about 2" between each ribbon (I did from about center to center of the ribbons... roughly). This gives your pretty bows and hair pieces room to breathe.
So, cut a few strips (I decided to go with 4) of ribbon and lay them length-wise across the back of your frame. Make sure you have enough ribbon to reach completely across and leave little "tails" for you to glue to the frame.
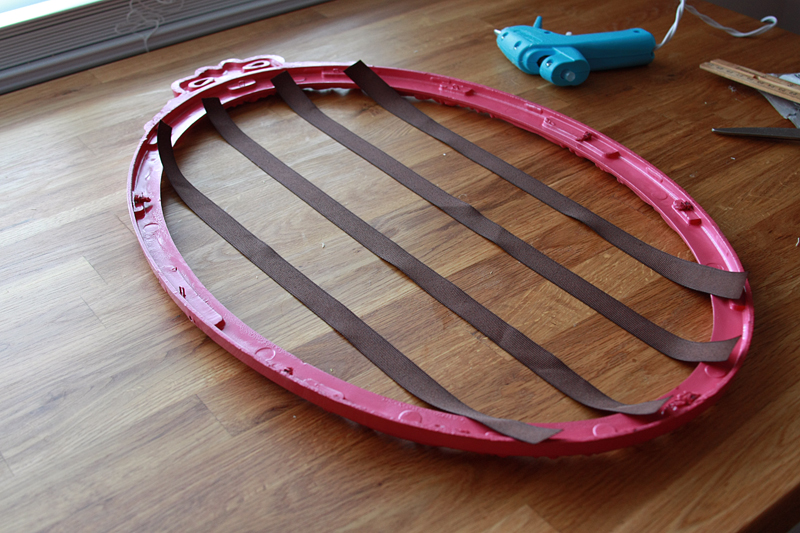
Once you have your ribbon where you want it, begin gluing the tails down to the back of the frame. (There should be a small lip on all frames where the glass and backing rest so they don't fall through the opening. This is the part of the frame I'm referring to.)
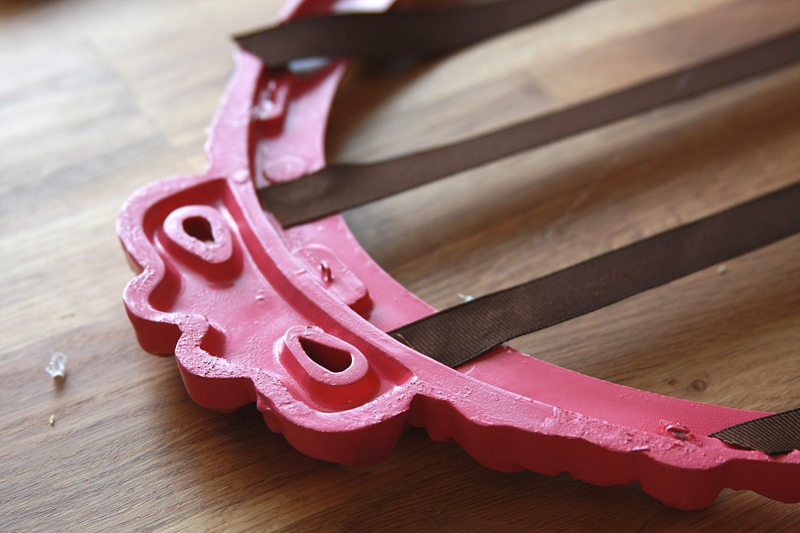
Once you have all your ribbons glued down, cut off any excess that sticks out above that lip on the frame.
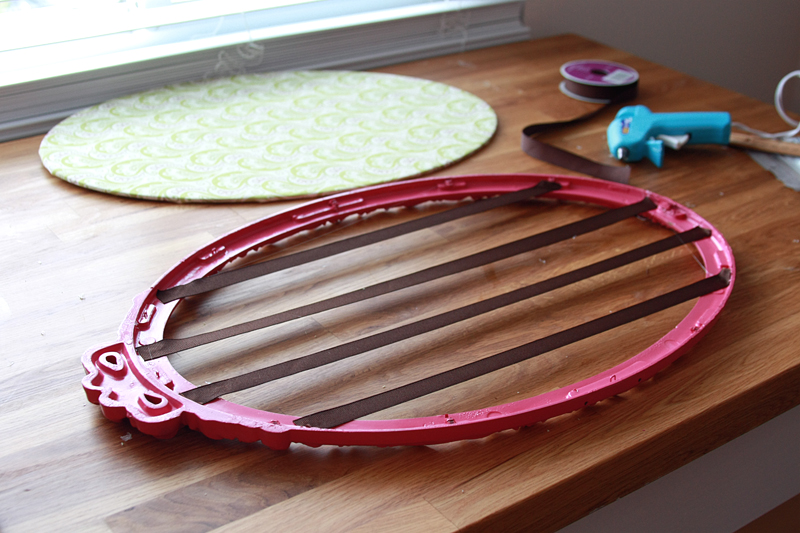
When all the glue is completely dry, place your covered glass piece back in the frame, right side down. We're just making sure everything still fits.
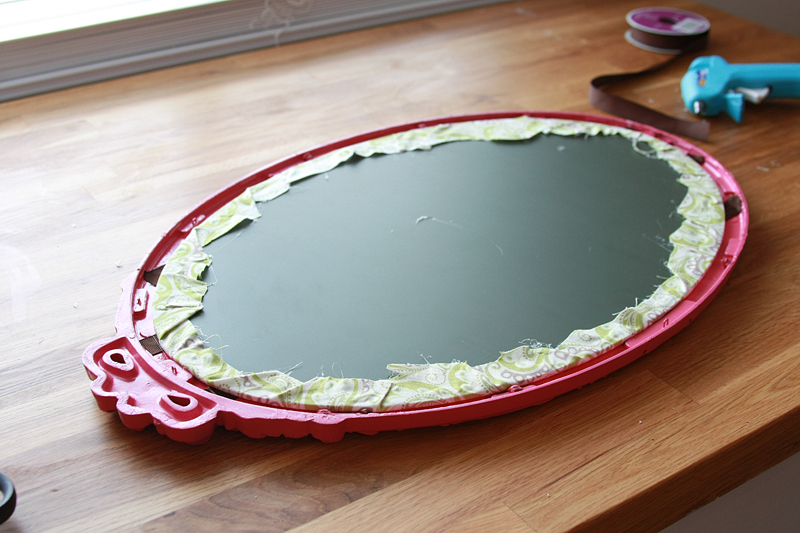
If you're using a typical picture frame, with a back that slides in and hold the glass in place, you can skip this next part. If you're like me and the backing was stapled on and you have no way to re-staple it, go ahead and secure your covered glass into place with glue.
Slide the back into your frame, and you can call it a day! Unless you went with a mirror, then glue your backing on with a ridiculous amount of hot glue. If you also happen to be missing a way to hang up your masterpiece, attach a picture hanger with either crazy glue or hot glue. Just make sure to get it on nice and straight. (You can find the metal picture hanger piece at Lowe's or Home Depot.)
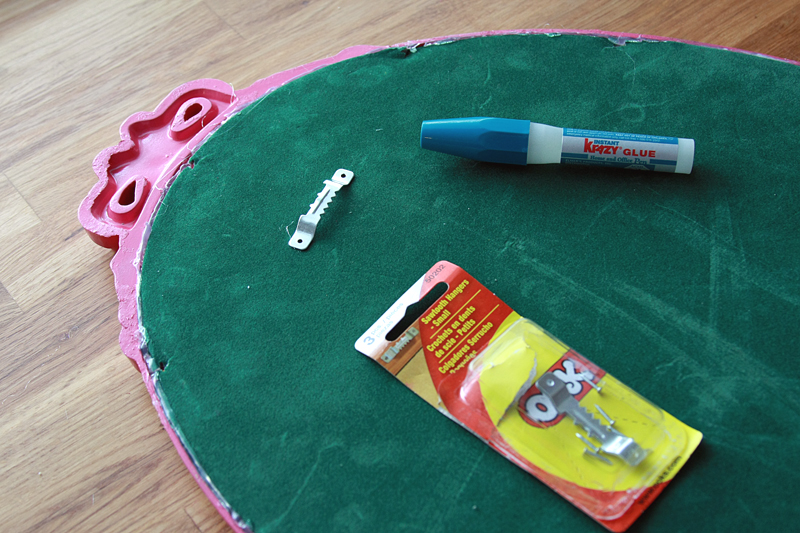
Now, one last thing, and this is completely optional. Since my niece has no hair to speak of, my sister loves to use thin stretchy bands to clip her hair pieces onto. I decided to add little hooks to hold those. Luckily, I already had pre-drilled holes from where the mirror attached to the other pieces of the vanity set, but you can also just screw them into the frame along the bottom.
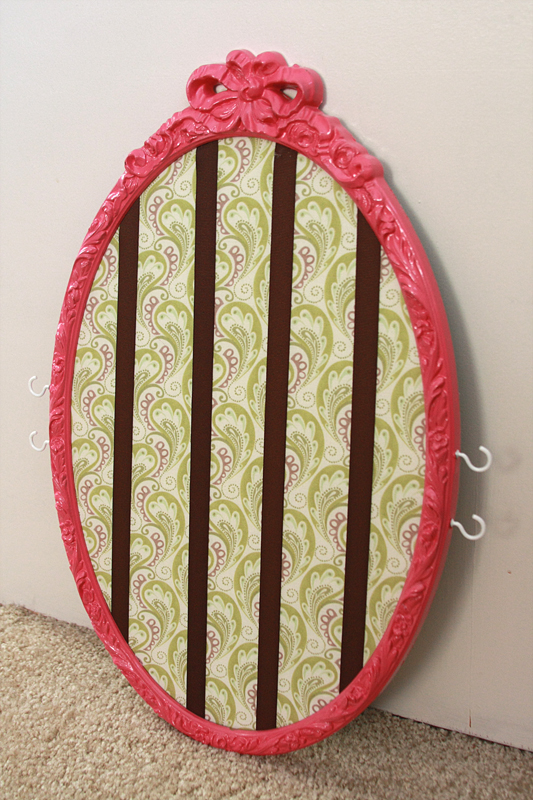
Annnnnd you're done! All that's left is for you to clip on some fancy hair bows.
Final price to make your own Hair Bow Organizer?
1 thrift store picture frame (1 @ $3.00) = $3.00
1 can spray paint (1 @ $3.87) = $3.87
1/2 yard fabric (1 @ $4.50) = $4.50
1 spool grosgrain ribbon (1 @ $3.99) = $3.99 (I bought this at full price, you can totally get this for much cheaper and you don't even need close to a full spool)
1 8-pk "cup" hooks (1 @ $0.97) = $0.97 (Can find these at Lowe's, Home Depot, or even Walmart)
1 pk sawtooth picture hanger (1 @ $1.94) = $1.94
Final Price = $18.27
Well, this time around it's really going to vary, mostly due to the price of your frame. Mine ended up being about $8, but that included 3 frames. I'm going to ball park $3 for the frame, as that was about the price of some of the other ones I saw there. What fabric you get (and how much) will also really affect the price as well. Mine was full price, so once again, bust out that 40% off coupon and you can do this much cheaper.
Thanks Danielle! It has definitely helped us stay a little more organized!
ReplyDeleteMarlene
Info site for Movers in San Antonio