Thursday, November 29, 2012

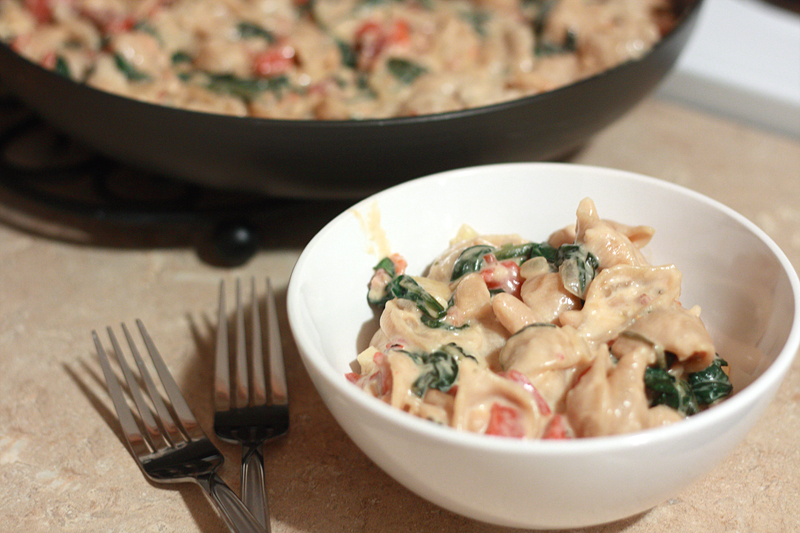
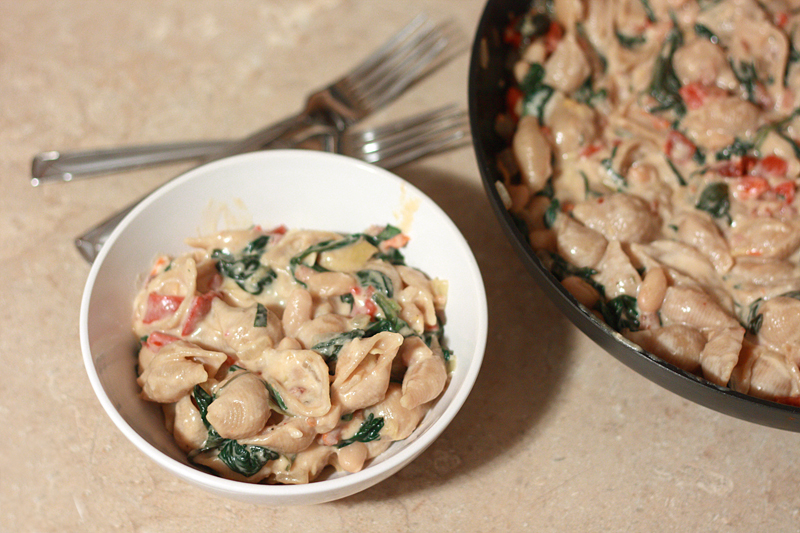
Tuscan White Bean Pasta


Oh my goodness. Is it just me or has the past week or two just flown by? Maybe it just me, as we had visitors and a baby shower the weekend before Thanksgiving, followed by leaving the day after our guests for my parent's house for the.day.of.food.and.all.things.fattening.

Needless to say, it's been a whirlwind around here, and even though I've put away most of the things we've received from both our showers, our living room is still strewn with baby things. Oh, who am I kidding? It's everywhere, not just the living room.

Sometimes though, you just need to stop. Back up. And take a breath. Back away from all the holiday hub-bub and just have a day here and there of "the usual". No leftover cranberry sauce infused this, or leftover turkey sandwich that. Just a nice normal dinner that's actually somewhat good for you. I mean, there's even green stuff in it. Which totally makes up for all that pumpkin pie, or cookies to come.

Tuscan White Bean Pasta
Adapted from: How Sweet Eats

2 cups whole wheat pasta
1/4 cup pancetta, chopped
1 cup onion, diced
3 cloves garlic, minced
6 ounces fresh baby spinach
1 (12 ounce) jar roasted red pappers, drained and diced
1/2 cup sun-dried tomatoes, diced
1/3 cup artichoke hearts, chopped
1 (15 ounce) can cannellini beans
10 fresh basil leaves, julienned
1 tablespoon butter
1 tablespoon all-purpose flour
1 (15 ounce) can low-fat evaporated milk
1/2 cup 1% milk
3 tablespoons grated Parmesan cheese

Bring a saucepan of water to a boil over high heat. Cook pasta according to package instructions.

In a large skillet over medium-high heat, cook the pancetta until crispy and most of the fat has rendered. Transfer to a paper towel-lined plate and let drain.

Reduce heat to medium-low. Add the onions and cook 3-5 minutes, or until softened. Add the garlic and spinach, stirring until spinach wilts. Toss in roasted red peppers, sun-dried tomatoes, artichokes, and beans. At this point the pasta should be finished cooking and drained; add to the mixture. Reduce heat to low, stirring occasionally.

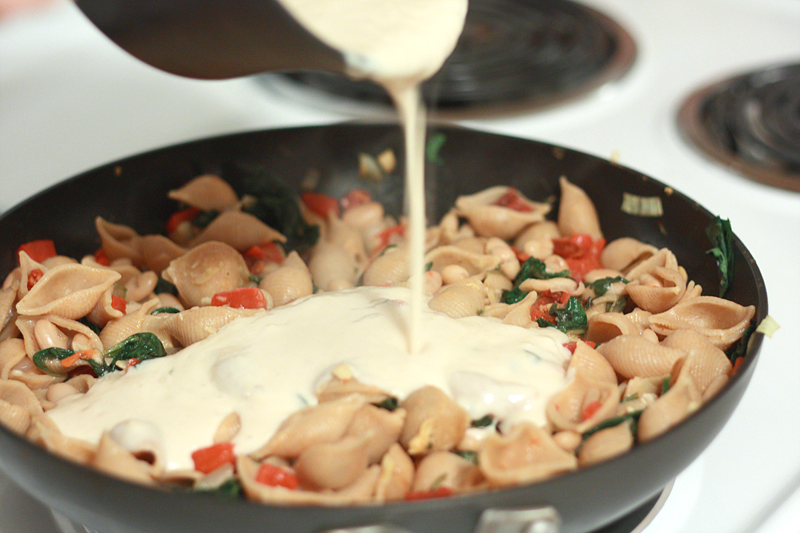
In a small saucepan, melt the butter over low heat. Once melted and pan is hot, whisk in flour until no lumps remain, and mixture is golden and fragrant. Pour in evaporated milk and regular milk. While whisking continuously, bring the mixture to a boil over medium-high heat, then reduce heat to a simmer. Stir frequently for 5-7 minutes, or until the mixture has thickened to desired consistency. Reduce heat to low and stir in Parmesan cheese and basil. Season with salt and pepper if desired.


Serves: 6


I actually made this a while back, and seemed to remember liking it... but when you're making multiple new meals a week, things tend to blend into one another. So I gave this another shot, and I am so glad I did. It's creamy and satisfying, perfect for the winter, but not overwhelmingly so that all you feel like doing is sitting on the couch in your favorite pair of stretchy pants. Though that's not always a bad thing. I love how colorful this dish is -- reminds me with every bite that there's something healthy going on, and healthy tastes absolutely fantastic.


Nutrition Facts
Serving Size 523g
Amount per serving
Calories 624Calories from fat 88
% Daily Value
Total Fat 9.8g15%
Saturated Fat 3.2g16%
Cholesterol 31mg10%
Sodium 990mg41%
Total Carbs 95.1g32%
Fiber 22.7g91%
Sugars 12.8g
Protein 35.2g
Vitamin A 84%Vitamin C 33%
Calcium 43%Iron 48%

Friday, November 16, 2012

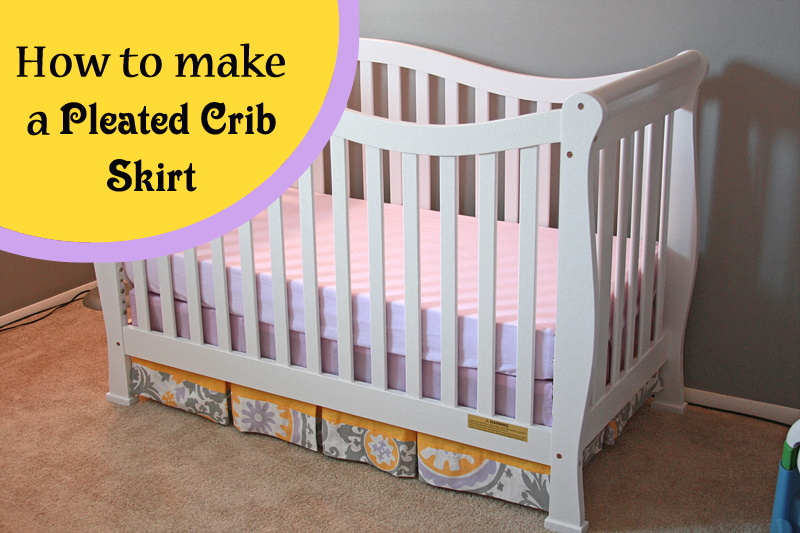
Crafty Fridays: How to Make a Pleated Crib Skirt


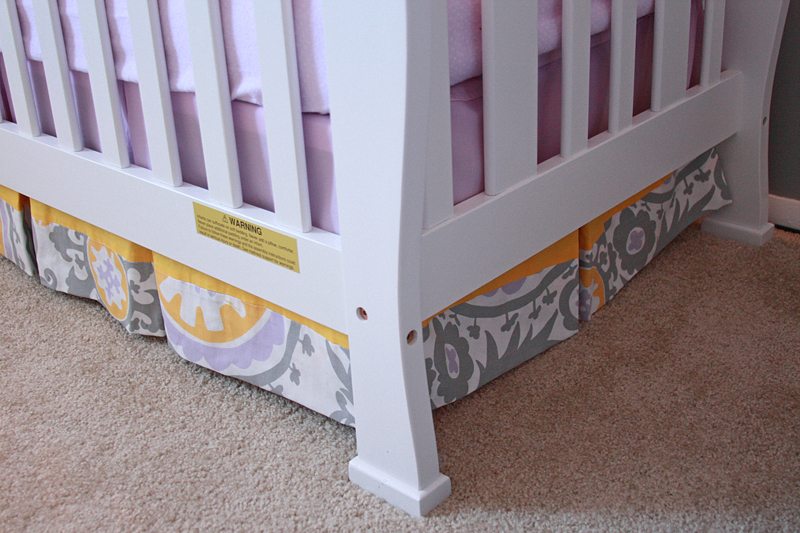
One of the favorite things for people to pick out for their nursery is the crib bedding. The crib is usually one of the main focal points of the room, therefore it is one of the places you really want to emphasize the character or theme.

There are a lot of tutorials out there for very simple crib skirts -- some as basic as taping a piece of fabric to the mattress frame. Of course, I had to fall in love with the pleated kind, so above and beyond the no-sew tutorial we go. I actually had a pattern for a crib skirt from something else I was doing a few years ago and I finally had a reason to pull it back out. Now, pattern directions usually end up confusing me at some point, make no sense at others, and never give me nice straight cut pieces.

So I measured my own pieces and figured out all the directions for you. Aren't I so nice?

First things first:

Things You Need

3 yards for the base and "upper skirt"
3/4 yard for the "middle skirt"
2 yards for the "lower skirt"
3 spools of thread (1 each that matches the upper, middle, and lower fabrics)
Good scissors
Pins
Measuring tape (preferably the long heavy duty kind)
Yardstick or other long straight edge
Dressmaker's pencil


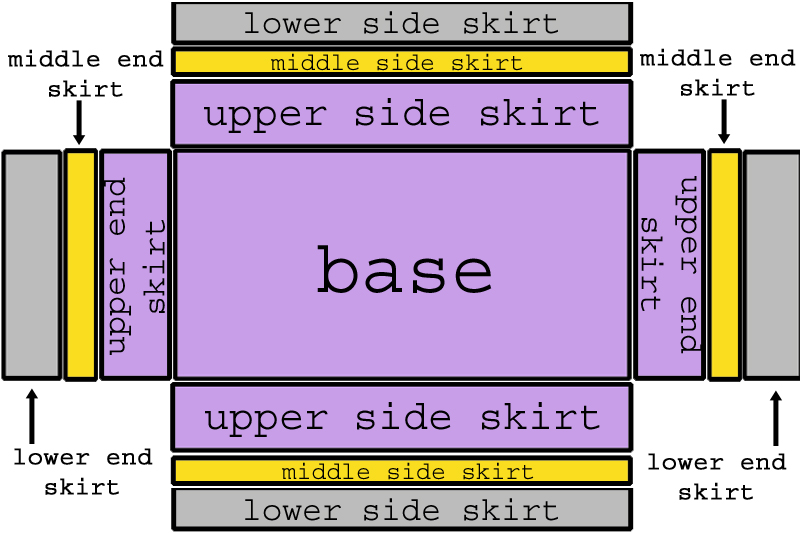
Next, let's talk terminology, just so we don't get confused with what's what.


Alright, are we good? Let's get started.

Begin by making sure the very top of your fabric is straight (use your yardstick or other long straight edge lined up with another straight edge to form a "T" to make a nice straight cut across the top).

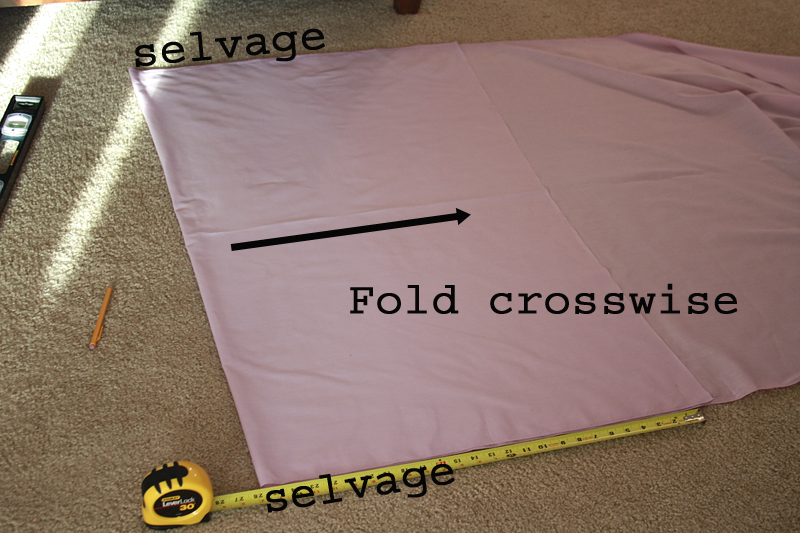
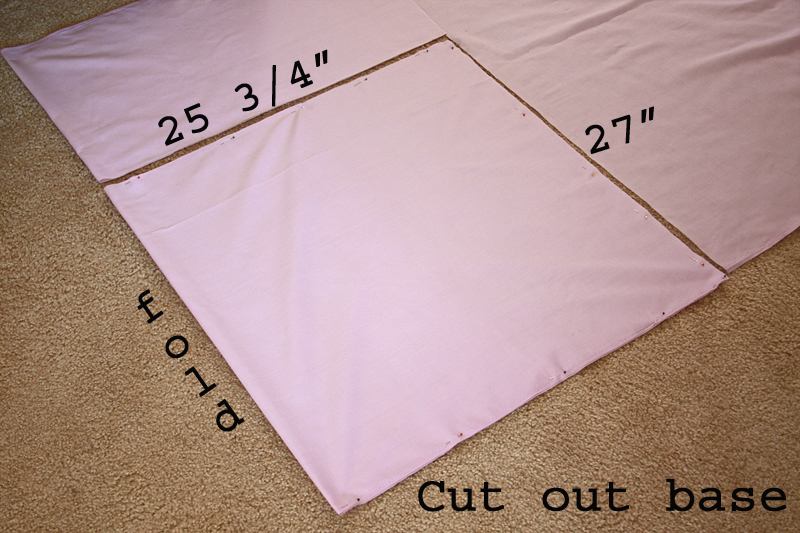
Spread out the fabric for the base and upper skirt portions so it's open from selvage to selvage. Fold the fabric crosswise at least 26".


Starting in the bottom corner (one side is the fold the other is the selvage), measure 27" down the fold. Place a mark on the fabric. Continue doing this every couple of inches working your way down the selvage until you reach the end of the piece of fabric you have folded over. Connect your marks to form a straight line parallel to the selvages.

Repeat this only measuring 25 3/4" from the fold to the end of the piece of fabric. The drawn line should be parallel to the fold. Pin every few inches along the inside of your square, except on the folded edge. This will keep your fabric from shifting while you cut. Cut along the lines. Unpin and open up the fabric. You now have the base of your skirt.


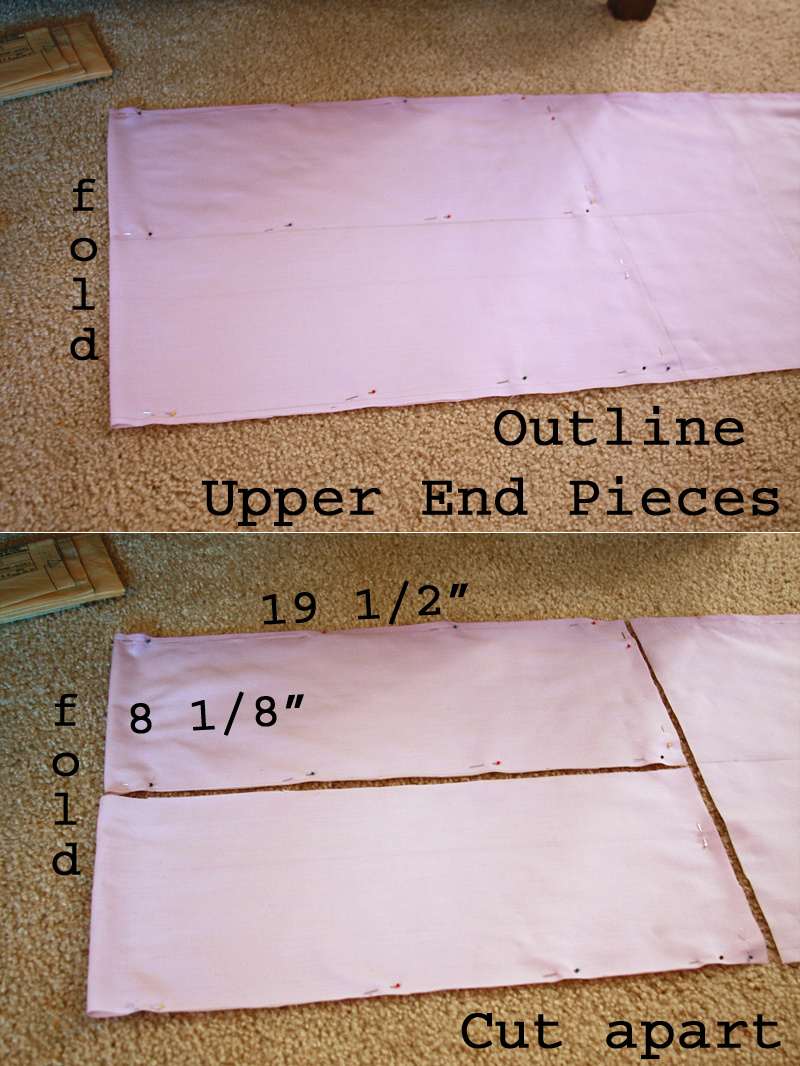
Using the remaining piece of fabric still folded over, measure out your two Upper End Skirts in a similar fashion. Each piece should be 8 1/8" wide along the fold and 19 1/2" long. After you line, pin, and cut, remove the pins and you should have two 8 1/8" x 39" rectangles.


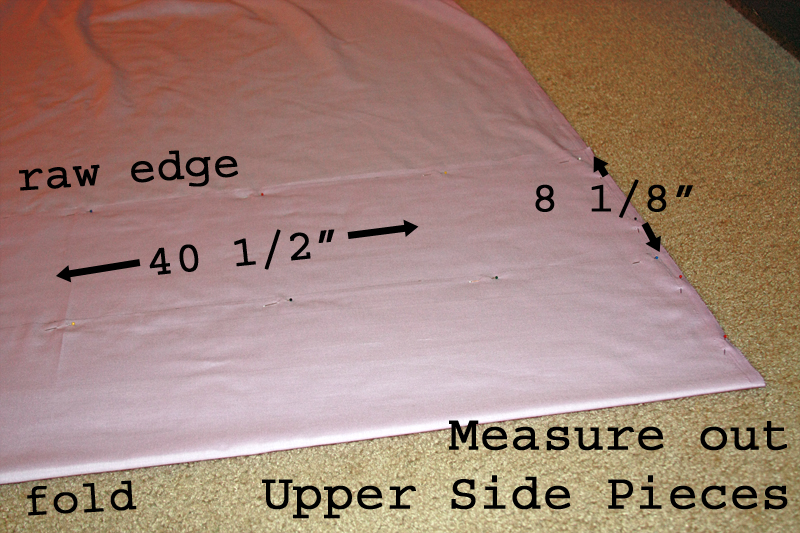
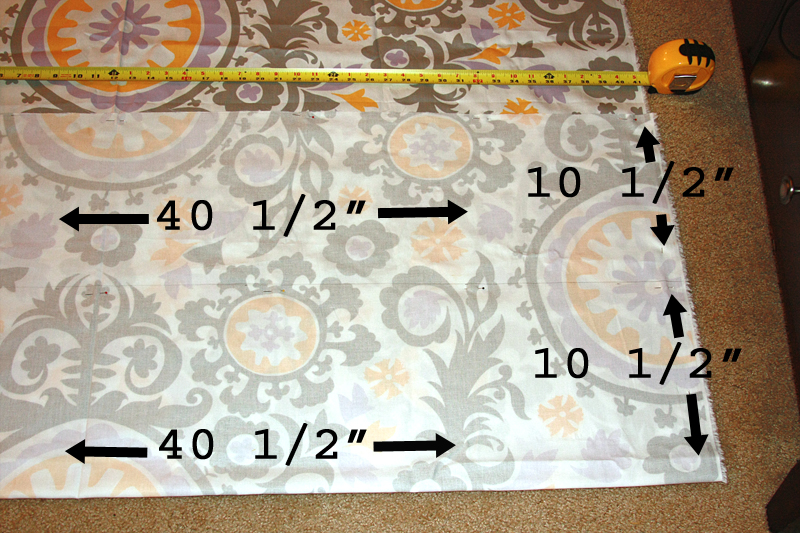
As you folded your fabric over for the base and Upper End Skirt pieces, fold your fabric crosswise again, about 16 1/2 - 17" wide. Measure out two 40 1/2" by 8 1/8" rectangles (the bottom rectangle will have one side on the fold). Pin around the edges of both rectangles.


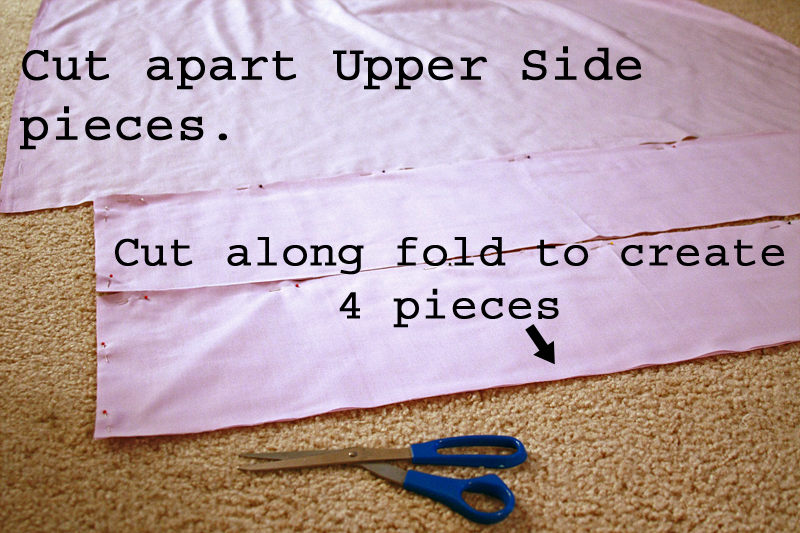
Cut along drawn lines. This will give you two rectangles plus one rectangle with a fold. Cut along the fold to make 4 equal 8 1/8" x 40 1/2" rectangles. Unpin.


Set any remaining fabric aside for another project. Lay out the fabric for the middle skirt pieces. Fold fabric crosswise about 9 1/2". Measure out two 3" x 40 1/2" rectangles, and one 3" x 39". Pin along each rectangle. Cut out rectangles, cutting along the fold as before. You should now have four 3" x 40 1/2" rectangles and two 3" x 39" rectangles. Unpin. Set any remaining fabric aside.

Repeat for a third time with your final piece of fabric for the lower skirt pieces. Layout the fabric and fold crosswise about 32". Measure and line two rectangles that are 10 1/2" x 40 1/2" and one rectangle that is 10 1/2" x 39". Cut apart and along fold. You should have four 10 1/2" x 40 1/2" rectangles and two 10 1/2" x 39".


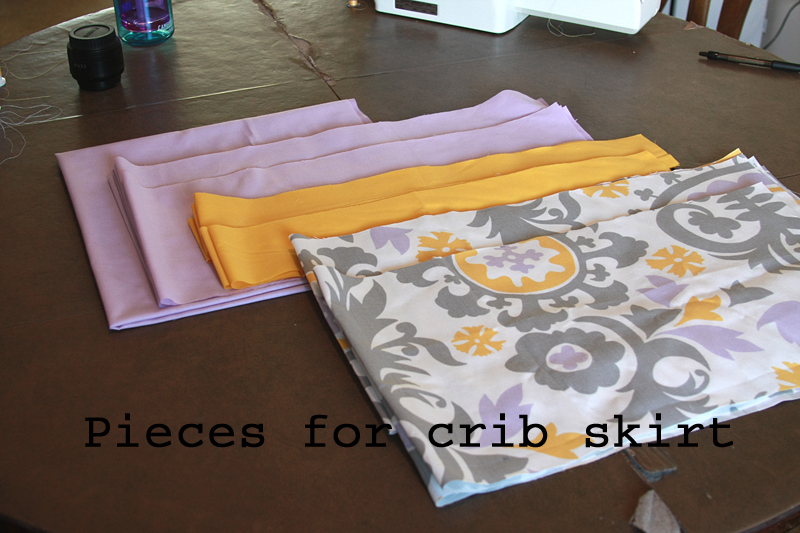
Let's recap. You should have the following:

(1) Base piece - 27" x 51 1/2"
(2) Upper End Skirt Pieces - 8 1/8" x 39"
(4) Upper Side Skirt Pieces - 8 1/8" x 40 1/2"
(2) Middle End Skirt Pieces - 3" x 39"
(4) Middle Side Skirt Pieces - 3" x 40 1/2"
(2) Lower End Skirt Pieces - 10 1/2" x 39"
(4) Lower Side Skirt Pieces - 10 1/2" x 40 1/2"

Iron each piece to remove any wrinkles.


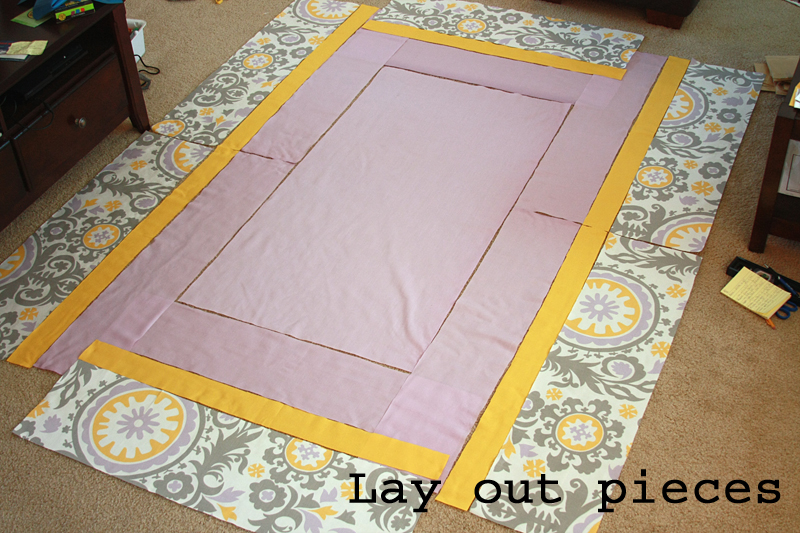
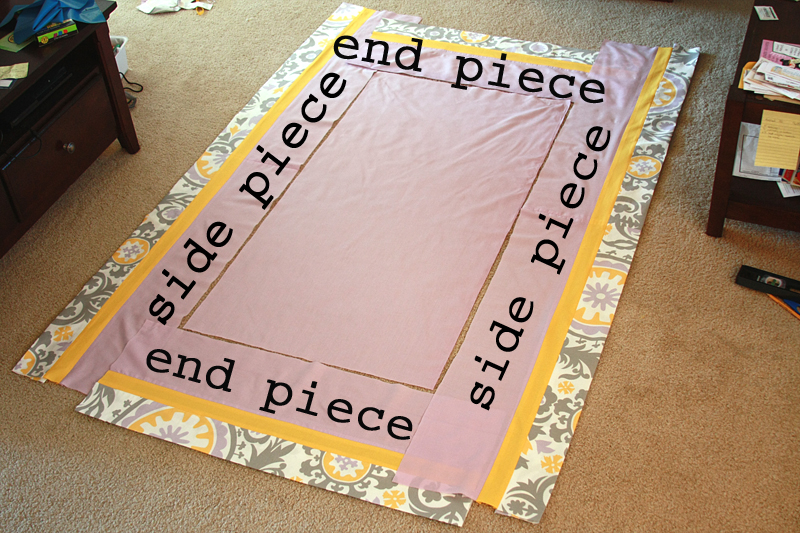
Before you begin sewing, lay out all your pieces in the correct locations and all right side up (pattern-side or side without pencil marks facing up).


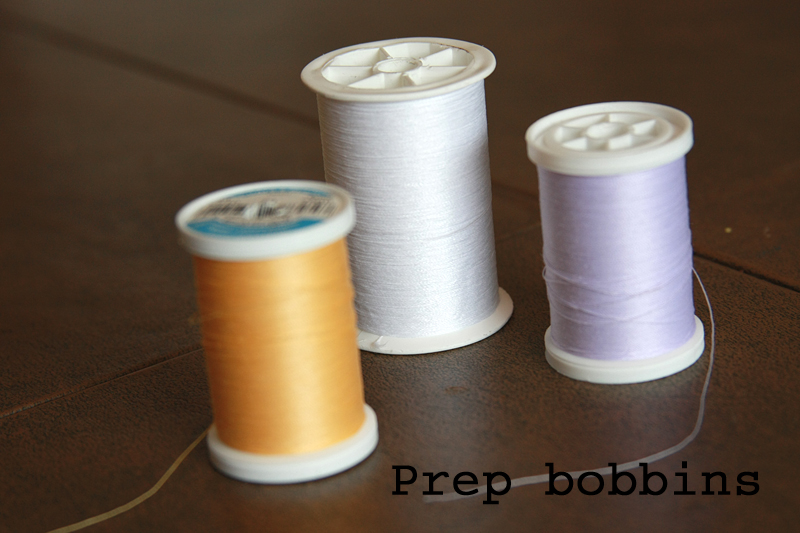
You also may want to prep 3 separate bobbins to go with your thread to make changing out the color easy.


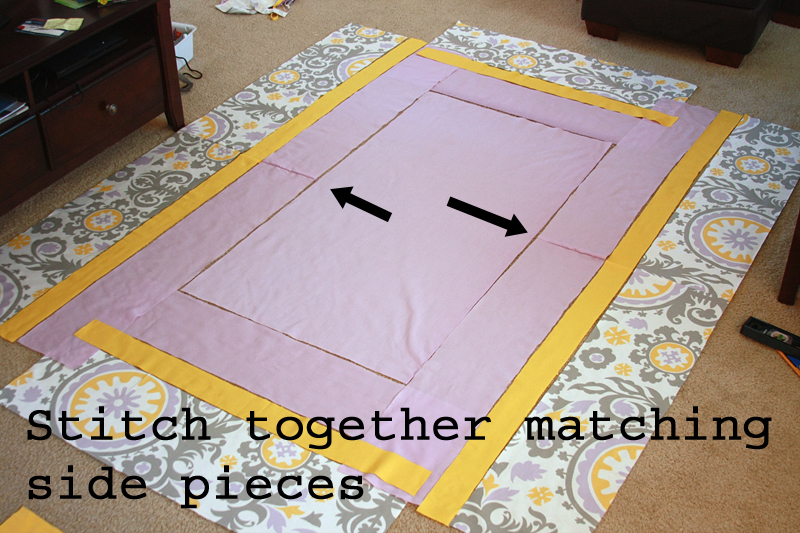
Now, remove two Upper Side Skirt Pieces that are on the same side. Place them with right sides facing each other. Pin one short side together; this will be a seam running down the middle of the side of the skirt. Match the top thread and bobbin up to the upper skirt color (in my case lavender) and sew the two pieces together with a 1/2" seam allowance.

Repeat this with all the remaining side pieces. Make sure you switch the thread/bobbins out to match the corresponding side skirt piece. You should now have 6 total side pieces.


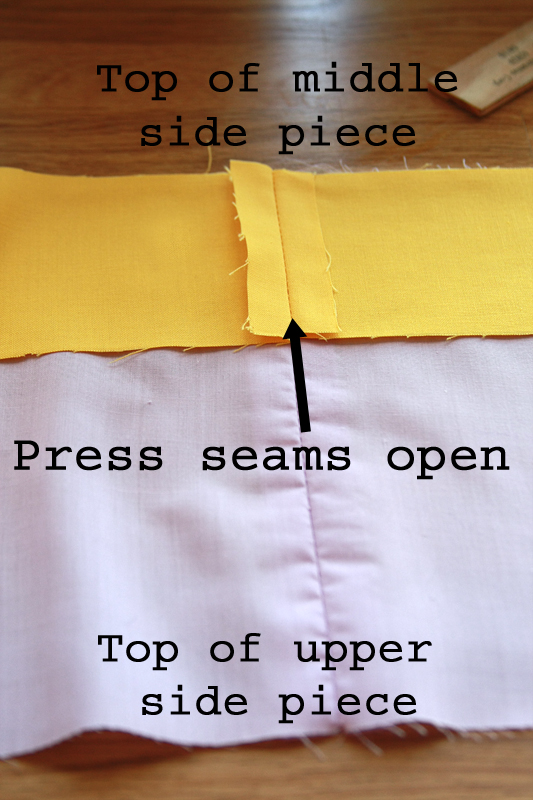
Press each seam open flat.

Lay out one upper side piece right side up. Place one middle side piece right side facing down on top of it, lining up the top edge of the middle side piece with the bottom edge of the upper side piece.


Switch out the top thread to match the top fabric color and the bobbin to match the bottom. You don't have to, but I like to do it "just in case". Sew the middle side piece to the upper side piece with a 1/2" seam allowance.

Repeat with the upper and middle pieces from the other side. Press seams open.

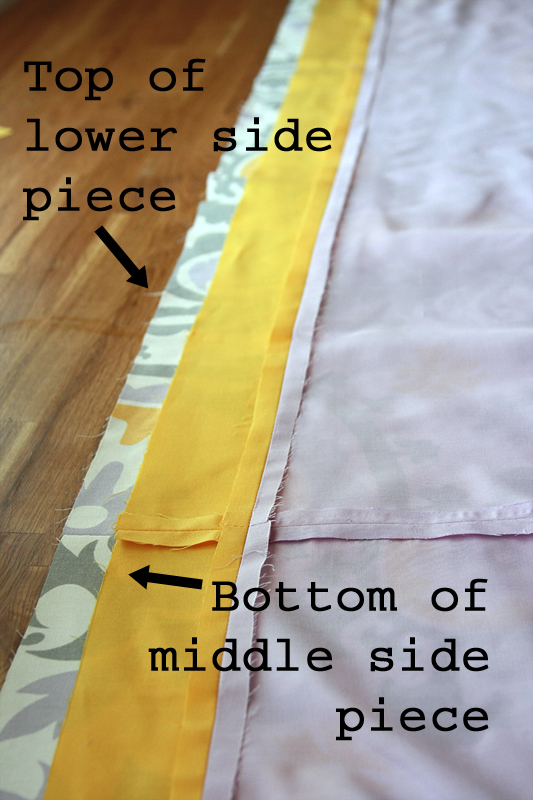
Lay out a lower side piece, right side up. Place one of the upper/middle side pieces on top, right side facing down. Line up the bottom of the middle side piece with the top of the lower side piece. Make sure all the center seams line up.


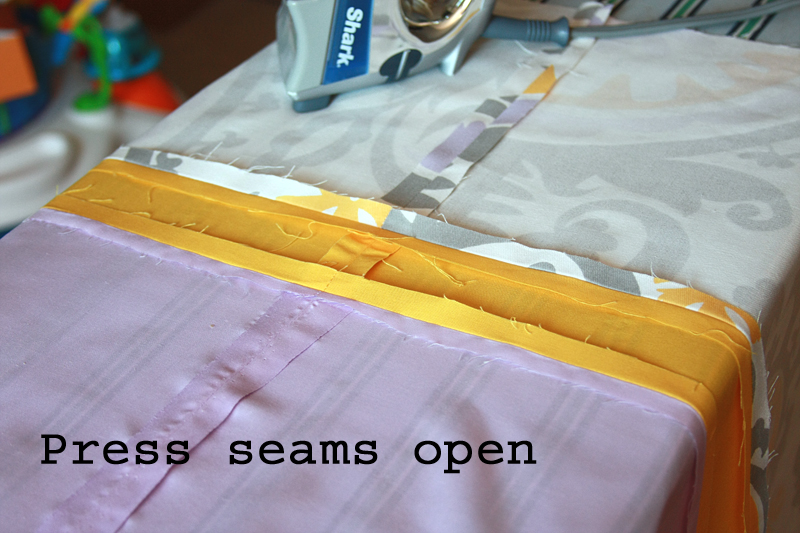
Switch out your top thread and bobbin again to match the fabric. Sew side pieces together. Repeat with remaining side pieces. Press all the seams open. You should now have only two side pieces. Repeat the procedure of attaching the upper, middle, and lower pieces with your end pieces.


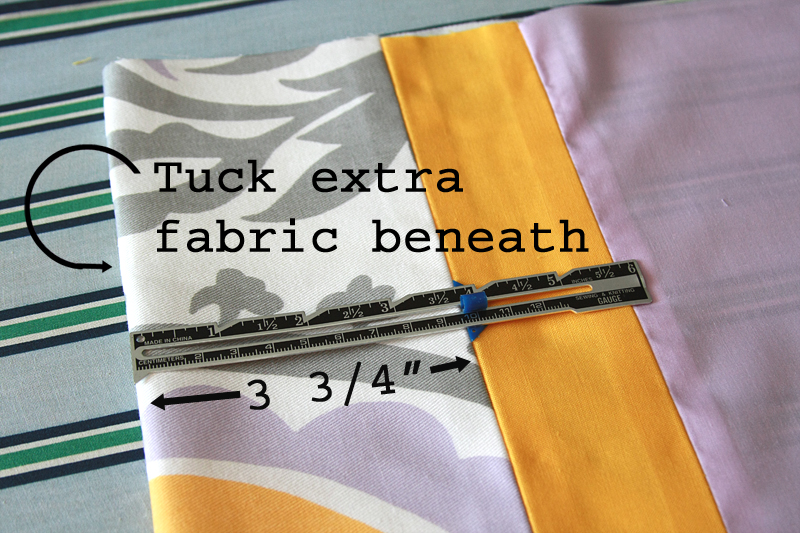
Now, instead of simply hemming up the bottom of the lower side piece, we're going to do an "invisible hem". Basically, our goal is not to see any stitches when looking at the crib skirt. So, with one of the side pieces laying right side up, fold the lower side piece under until only 3 3/4" of fabric remains. Press to hold in place.


Flip your side panel over. Tuck the extra loose fabric from the lower side piece underneath itself to form a finished edge. This edge should completely cover the seam between the lower and middle side pieces plus a little wiggle room (I made the fold roughly even with the raw pressed edge of my middle side skirt, so about a 1/2" above the seam). Press fold and repeat with the remaining side piece and both end pieces.
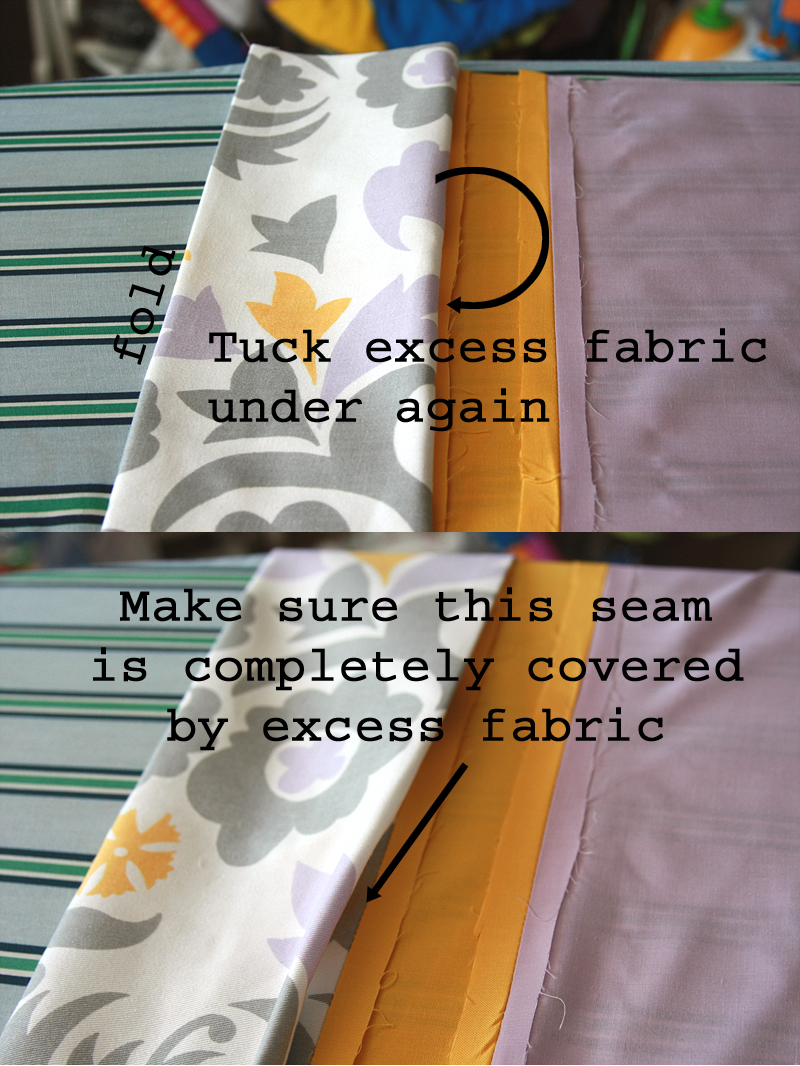

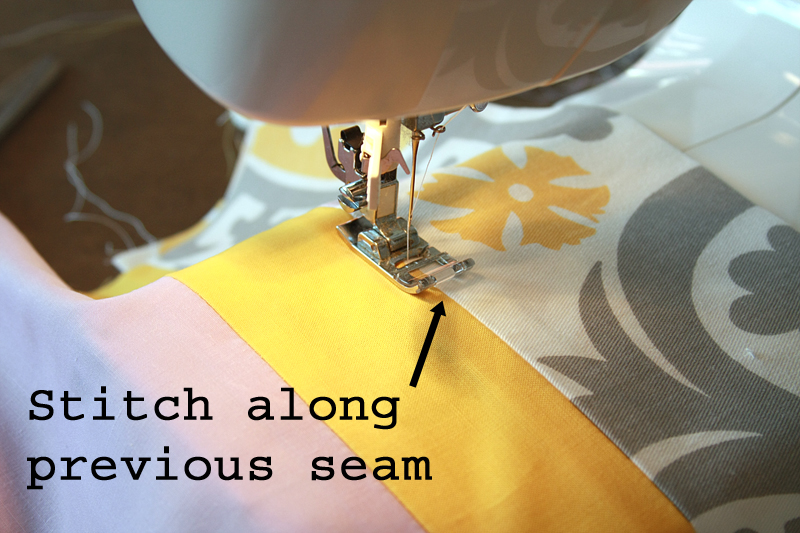
Now to form our "invisible hem". Take your side or end piece with the folded and pressed lower piece. Place the piece right side up and line up the seam between the middle and lower pieces directly underneath your machine needle (you want to use the thread that will show up the least on either piece of fabric, just in case you wander off the seam). The folded piece should be lying flat underneath, covering the original seam, so it will be included in the new one. Remembering to back tack, start stitching slowly, trying to keep your needle following the original seam as much as possible. Repeat with remaining pieces.


While we're here, let's go ahead and hem the sides of each side/end piece. Remember, we're only working with the short edges right now, leave the long raw edge alone.

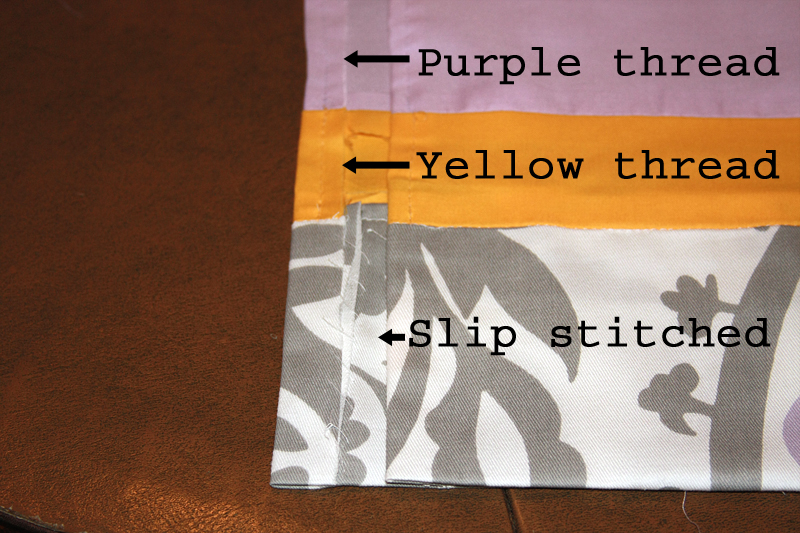
Fold each raw side over 1/2". Press. Using your first thread color, back tack, stitch down the length of your upper piece, and back tack again.

Repeat on the middle piece using the matching thread.

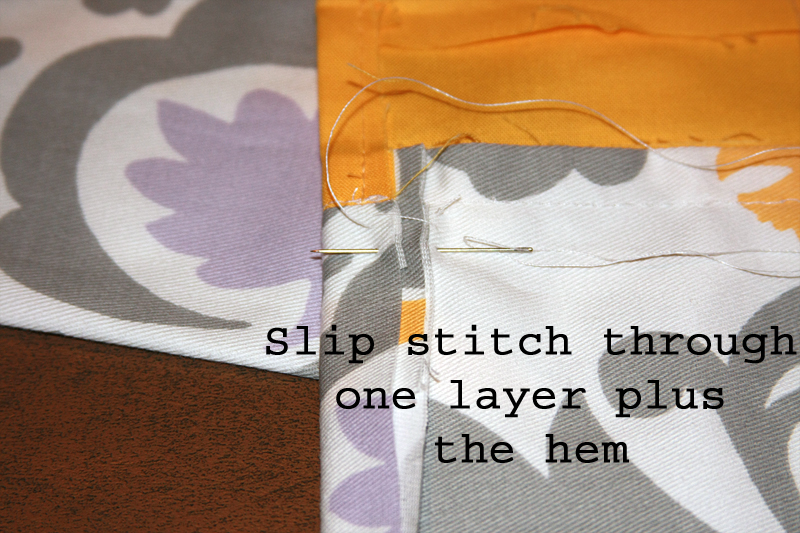
For the bottom "invisible" hem, use a slip stitch to prevent any stitching from showing on the front of the skirt.


To slip stitch, simply start with a hand needle and thread tied off at the end. Run the needle down through the back layer of the "invisible" hem (the side currently facing up) then up through the hem along the side. Repeat down the length of the "invisible" hem.

Repeat along the remaining short unfinished sides.


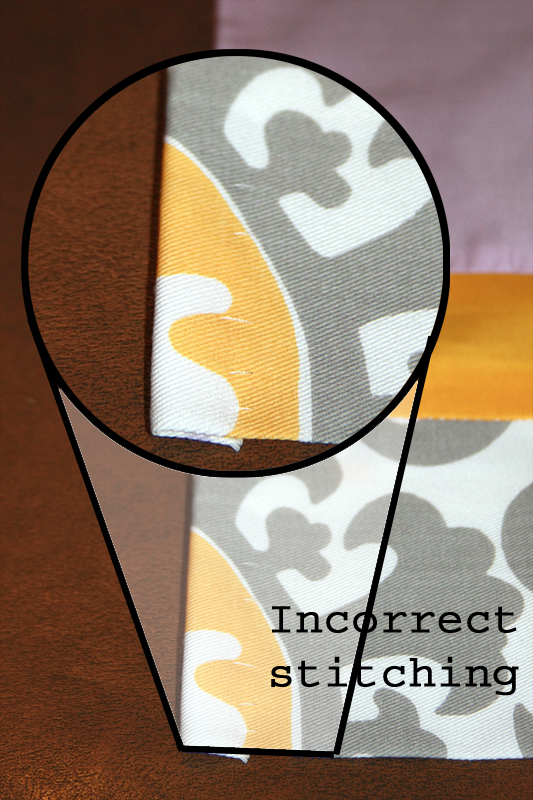
You know you are doing it wrong when you flip it over and see this on the front (do as I say, not as I do):


So, now we have 2 finished side pieces and 2 finished end pieces. All that's left is to add the pleats, then attach to the base.


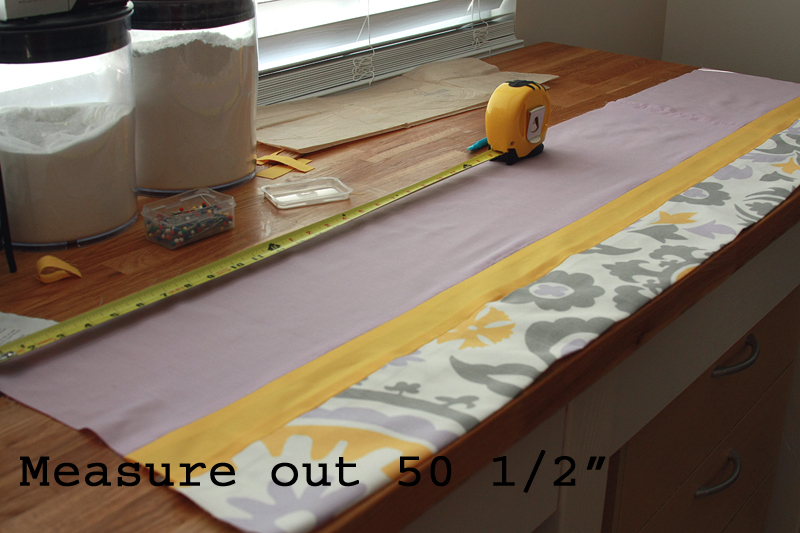
Let's start with a side piece. Measure out 50 1/2" with your tape measure, and lay it next to your side piece (right side up) on a flat surface. As you can see, the side piece is definitely longer than your tape measure. Starting at the top left corner of your piece, measure 19 1/4", and make a small mark. This is going to be the center of your first pleat. The seam down the middle will be the center of your second pleat. Measure 19 1/4" from the opposite top corner of your piece, and this will be the center of your third pleat.


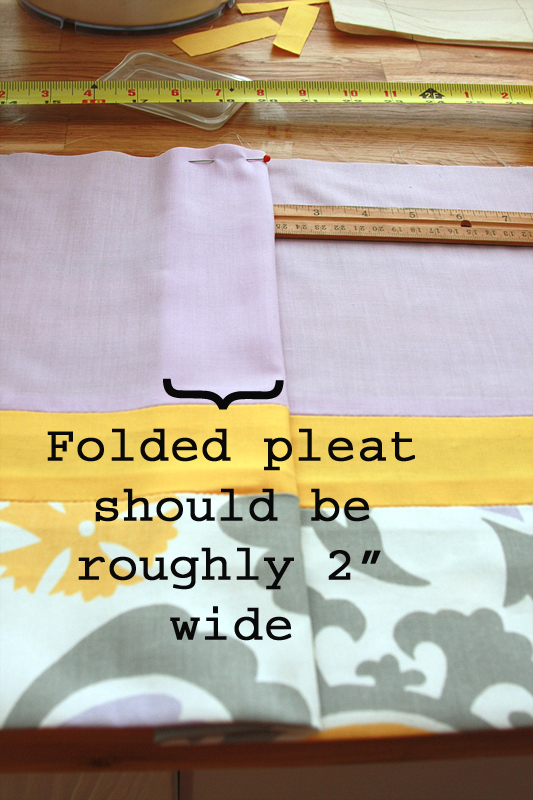
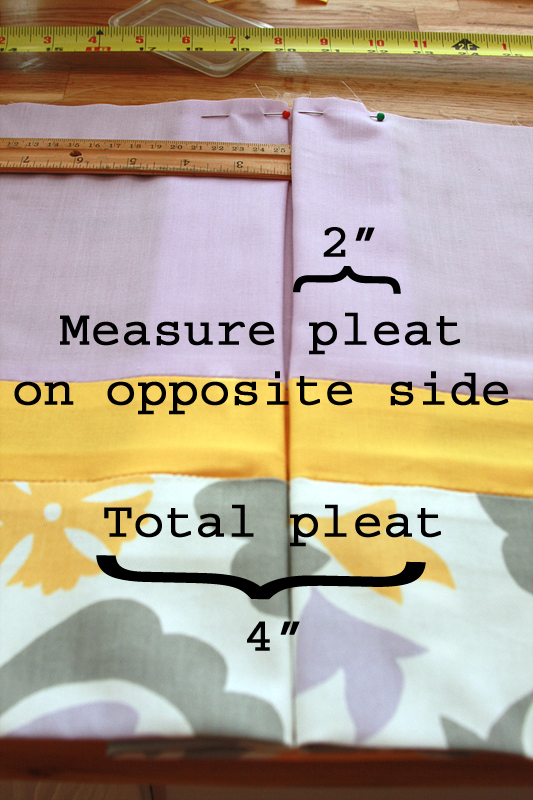
Using the center marks, measure out another 4" to each side. For the first pleat, you will have marks at 15 1/4", 19 1/4", and 23 1/4". Pinch the fabric at the 15 1/4" mark and gently pull it towards your center mark at 19 1/4". This should create a 2" fold. Pin the fabric into place. Continue to fold the fabric 2" down the width of the piece. Pin into place.


Repeat with on the opposite side of the center mark. (Pull the 23 1/4" mark in to the 19 1/4" mark.) You should now have one pleat with folds about 4" wide.


Repeat with remaining two center pleat marks. You should now have 3 pleats pinned into place. Measure out 50 1/2" on your measuring tape again. Place the 24 1/4" line even with your center seam. If the piece extends past either the 0" or 50 1/2" lines, adjust your pleats (use folds on both sides of the center marks and keep the center seam aligned with the 24 1/4" line) until your piece reaches 50 1/2". Pin all pleats into place, then press folds with an iron.


Repeat with remaining side piece. For the end pieces, there will be one pleat in the center (instead of three).

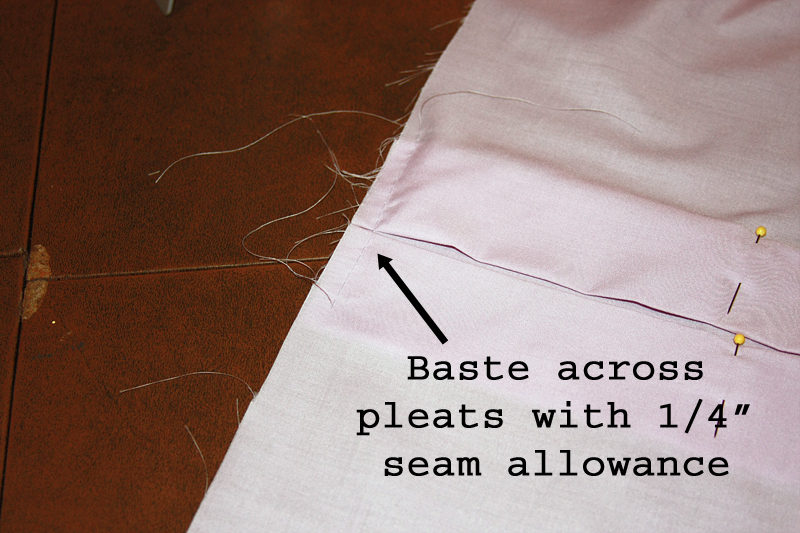
Once all your pleats are pinned into place, set your sewing machine to the longest stitch setting. Baste across each pleat with a 1/4" allowance. (This is so when we flip this piece over to attach it to the base you're not running over any pins.)


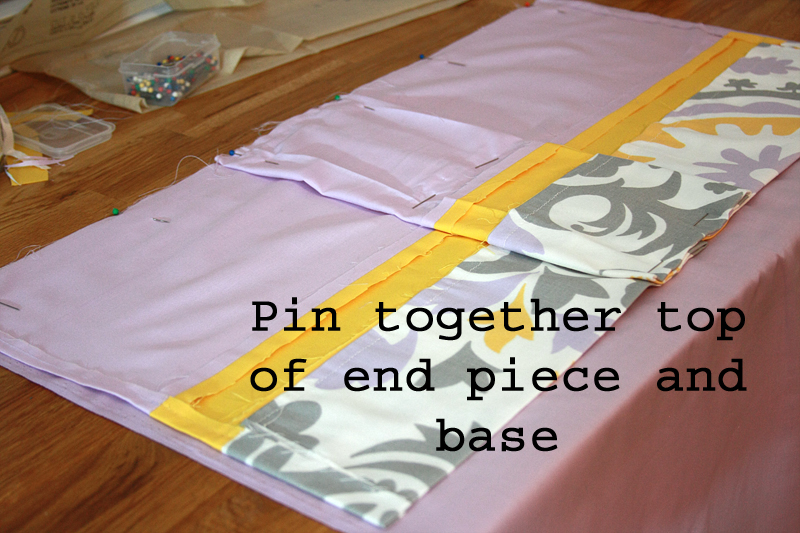
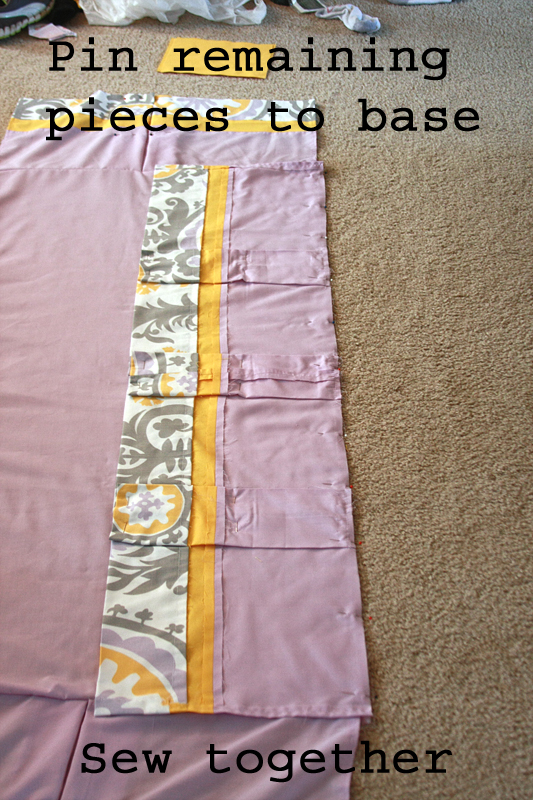
Starting with either a side or an end piece, place the piece face down on top of the base, lined up with a corresponding side. Pin pieces together. You should have a 1/2" overhang from your base on either side of your side/end piece. Sew pieces together (the width of the piece, not including the extra overhang).


Repeat with remaining 3 pieces.


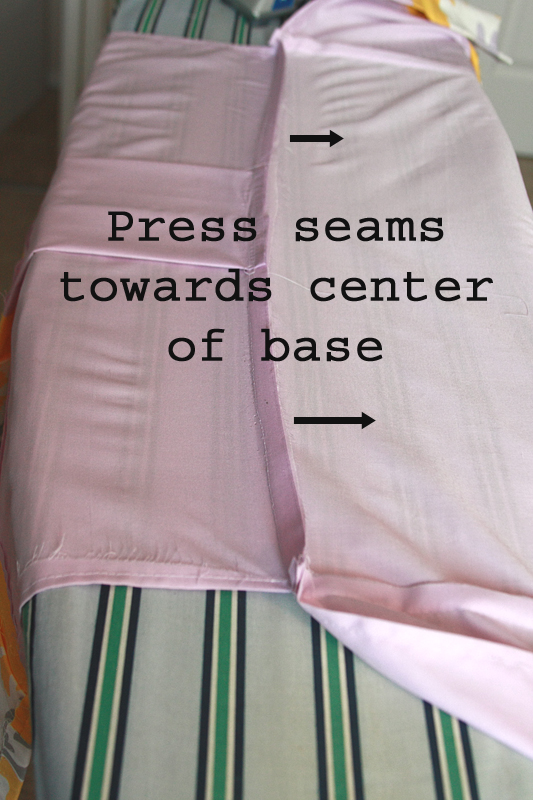
Once all of your side and end pieces are attached, press your newly formed seams towards the center of the base.


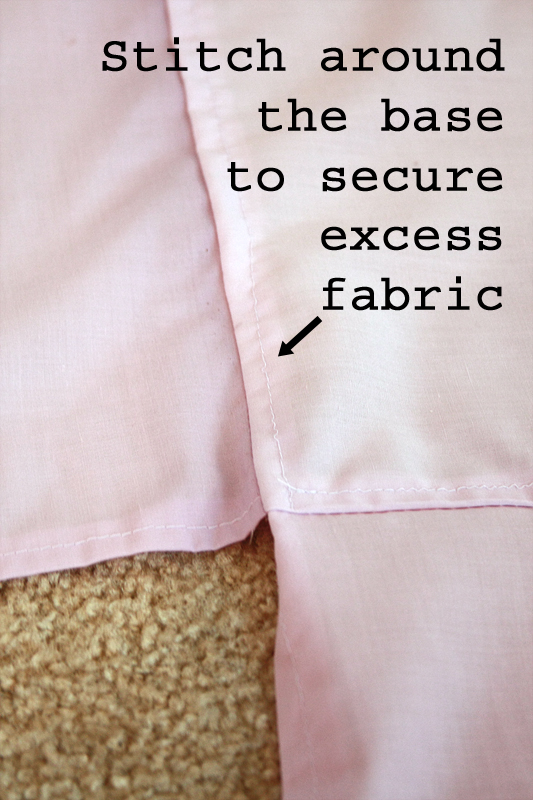
Flip your crib skirt over and stitch around the edge of the base with a 1/4" allowance to affix the seams to the base (this helps to give it a nice finished look).


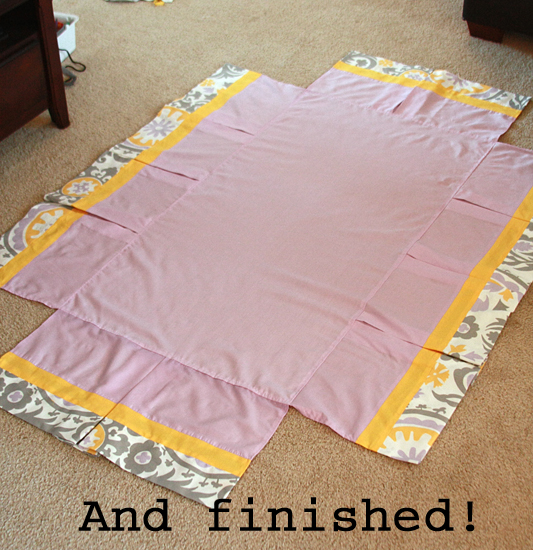
Lay out your crib skirt to make sure everything is in the appropriate place and facing the correct way.


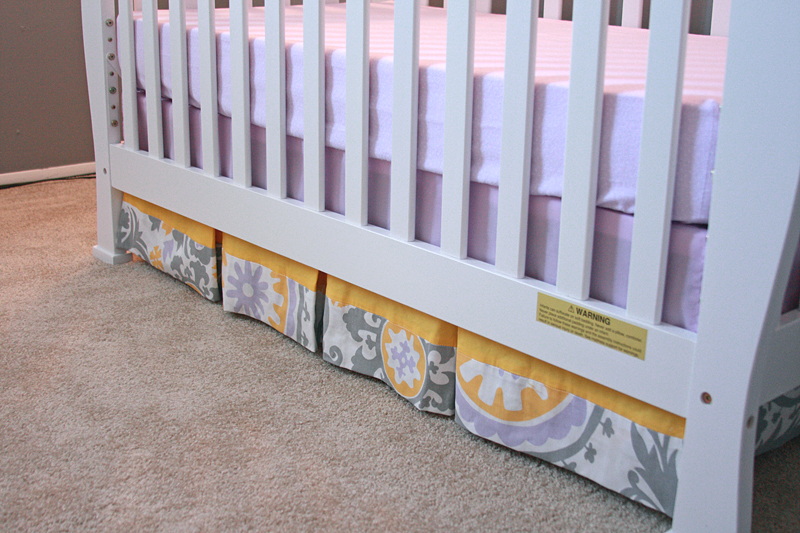
Place the crib skirt in your crib and enjoy!


While this style of crib skirt is a little more work and costs a little bit more than just placing a single piece of fabric across the bottom of your crib, I tend to think it's worth it. It's not like I'm biased or anything... :)

Let's take a look at the price breakdown, shall we?

3 yards cotton broadcloth @ $1.50/yd = $4.50
3/4 yards cotton fabric @ $5.59/yd = $4.19
2 yards cotton twill @ $5.61/yd = $11.22
3 spools of thread @ $1.26/spool = $3.78

Final Price = $23.69


Even though I got all of my fabrics on sale, two of them weren't the cheapest out there to begin with, so as always, you can make this for even less.
Wednesday, November 14, 2012

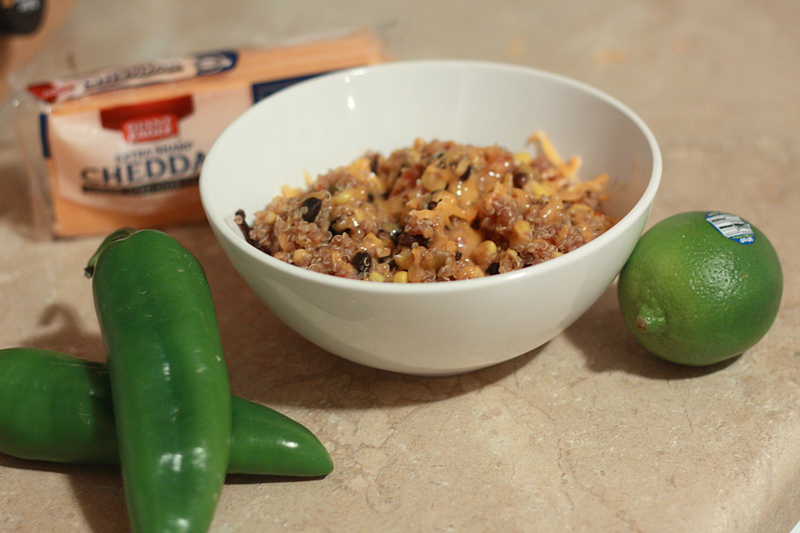
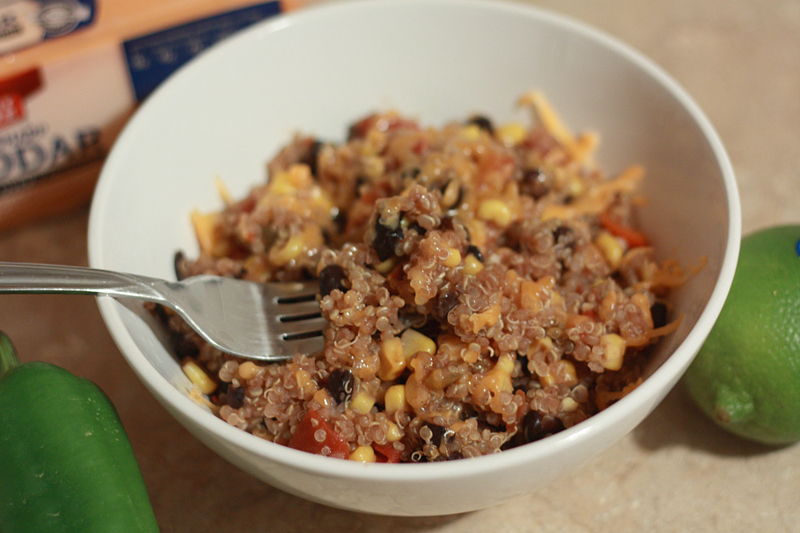
Mexican Quinoa


Ever since finding out I was pregnant, it feels like so much more of what I do is under scrutiny. "You can now eat for two!" "Don't eat for two, all you really need is 300 more calories per day." "Are you exercising enough?" "Are you exercising too much?" "Are you eating soft cheese/deli meat/insert new no-no food here?"

There's so many do's and don'ts that it can be a little overwhelming at times, not to mention hard to remember. Or keep straight which things are old wives tales and which are actually based on current research. Sometimes I feel like my diet is a hot mess. Okay, well, sometimes it really is a hot mess... littered with old Halloween candy wrappers.
However, there are certain key items that are important to try and include more of in your diet, such as iron, calcium, and protein. You know, the things I am not that great at getting a ton of. After tracking my protein intake for a class I was taking over a week's time, I realized I really needed to get back on the healthy eating bandwagon. While I do like all kinds of meat, I get annoyed with having to cook it a lot of times (read: I am lazy). Enter quinoa. High in fiber (another great thing for pregnant ladies) and protein. Okay, maybe not quite as high as say... a steak, but better than downing some mac'n'cheese. Add in some beans and we've definitely upped our health factor here.

Mexican Quinoa
Adapted from: Annie's Eats

1 tablespoon olive oil
2 cloves garlic, minced
1/3 cup hot cherry peppers, diced (I used the jarred variety)
1 cup uncooked quinoa, rinsed and drained
1 1/4 cups vegetable broth (or reduced-sodium, fat-free chicken broth)
1 (15.5 ounce) can black beans, rinsed and drained
1 (15.5 ounce) can diced tomatoes, with juices
1 cup frozen corn
1/2 teaspoon kosher salt
2 tablespoon lime juice
1/2 cup shredded sharp cheddar

Optional add-ins: Salsa, sour cream, cilantro

In a medium saucepan over medium-high heat, warm the olive oil. Saute the garlic and peppers until fragrant, about 1 minute. Stir in the next 6 ingredients (through kosher salt). Bring mixture to a boil, then cover and reduce heat to medium-low. Simmer for 25 minutes, or until all the liquid has been absorbed. Remove from heat and stir in the lime juice. Top each serving with 2 tablespoons of shredded cheese and any additional add-ins.

Serves: 6


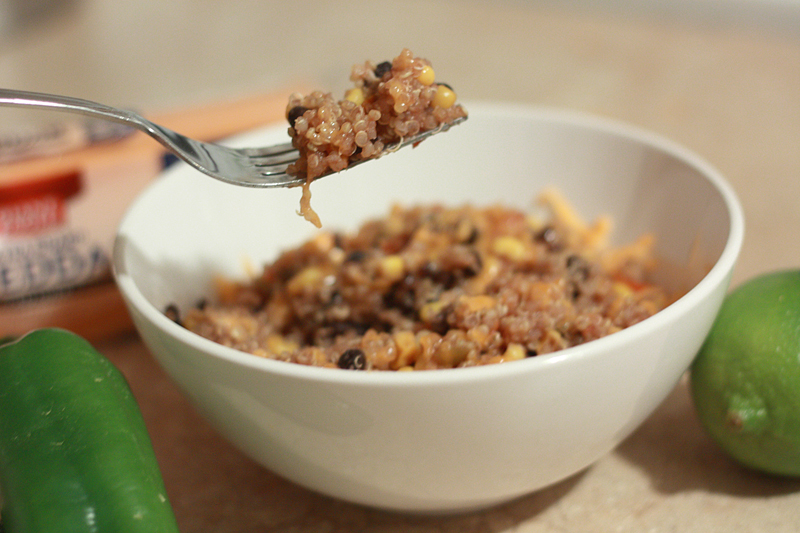
I've actually made a very similar dish in the past, but the addition of peppers and lime juice really carries this over to the Mexican flavor side. I was a little worried that this might not be quite heavy enough for an entree for Adam, but surprisingly, it was. Well, after he doubled the amount of cheese, but I digress. Both of us really enjoyed the flavor of this dish, and I'm sure I'll be pulling this one out again to make myself feel just a smidge better between the gluttony of the holidays.

Nutrition Facts
Serving Size 273g
Amount per serving
Calories 451Calories from fat 79
% Daily Value
Total Fat 8.7g13%
Saturated Fat 2.9g15%
Cholesterol 10mg3%
Sodium 441mg18%
Total Carbs 71.9g24%
Fiber 14.6g58%
Sugars 4.6g
Protein 24.1g
Vitamin A 16%Vitamin C 23%
Calcium 18%Iron 30%

Friday, November 9, 2012

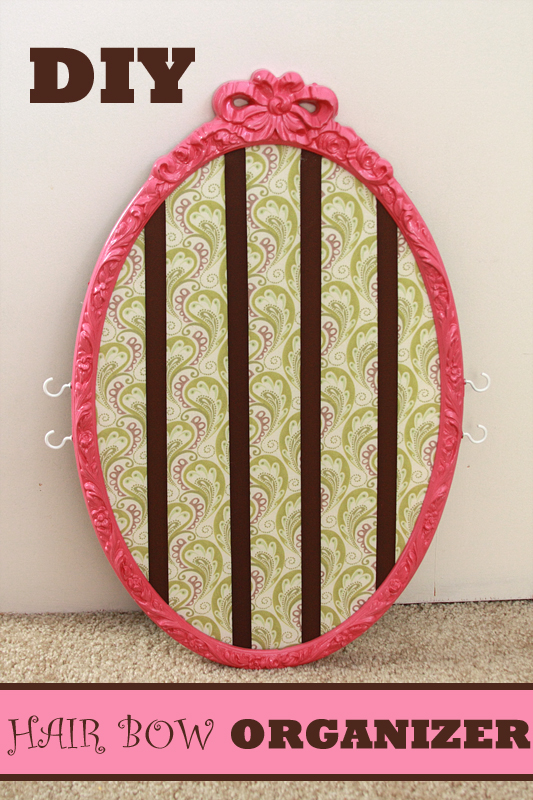
Crafty Fridays: DIY Hair Bow Organizer


I for one, cannot believe that we're already in November. Seriously. Where did October go? BUT, being that we're now in November we can start looking at Christmas presents! I know you probably want to knock me a good one in the head for even suggesting such a thing, but if you're going to go the DIY route for presents, it doesn't hurt to get an early start.
That said, we have a new little niece to get presents for this year, and seeing as her mom loves her some hair bows and head bands, this gift idea came pretty easily. (Poking around on Pinterest doesn't hurt either.)

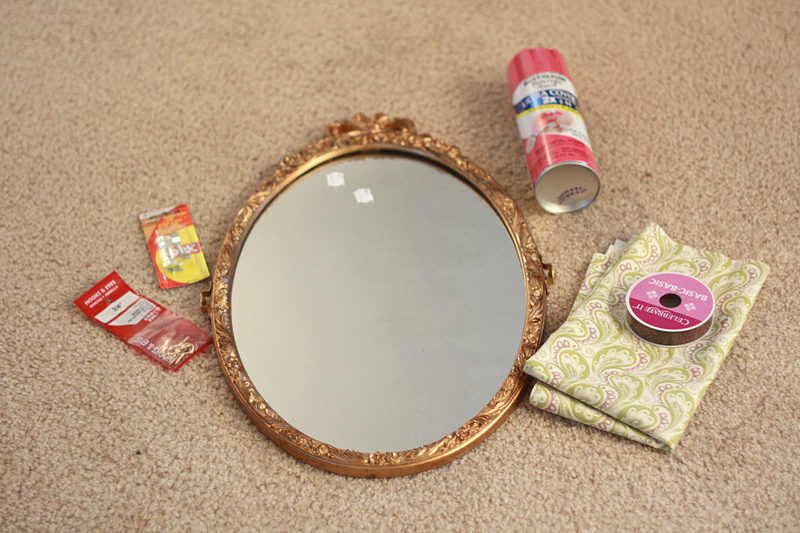
I think the best part of making this is hunting down just the right frame to use. I got lucky at the first thrift store I stopped at and found a... not so pretty three-piece vanity mirror set. It was gold and tacky, but with some spray paint it would turn back into something cute and girly (not to mention I got 3 mirrors out of the deal so I was actually able to make 3 of these if I wanted).


Things you need

Old picture frame or mirror (can be found at Goodwill for cheap)
Spray paint
1/2 yard of fabric (or roughly a little bigger than your frame)
Hot glue gun
5/8" - 7/8" grosgrain ribbon (I opted for grosgrain as satin may snag on the clips)
Scissors
Small screw-in hooks (about 3/4")
Picture hanger (if needed)


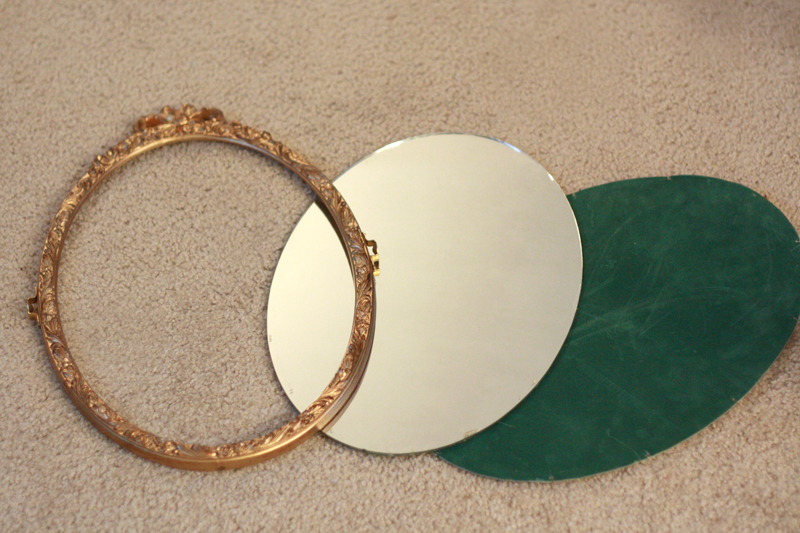
First things first. Disassemble your picture frame/mirror, making sure to keep all the parts (frame, backing, and glass or mirror).


Spray paint a couple coats onto your frame (front and back) until completely covered. Follow the directions on the can for drying and re-coating times.

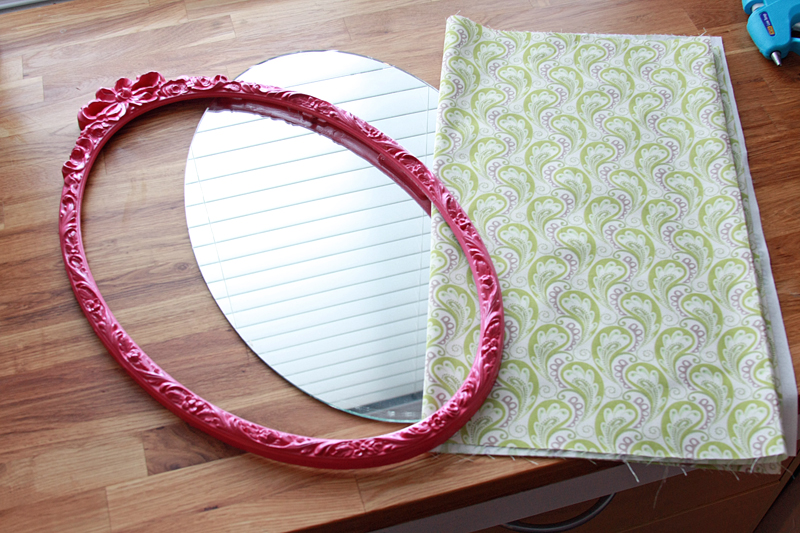
Now, gather up your frame, glass/mirror, and fabric. (Doesn't that frame already just look a million times better?)


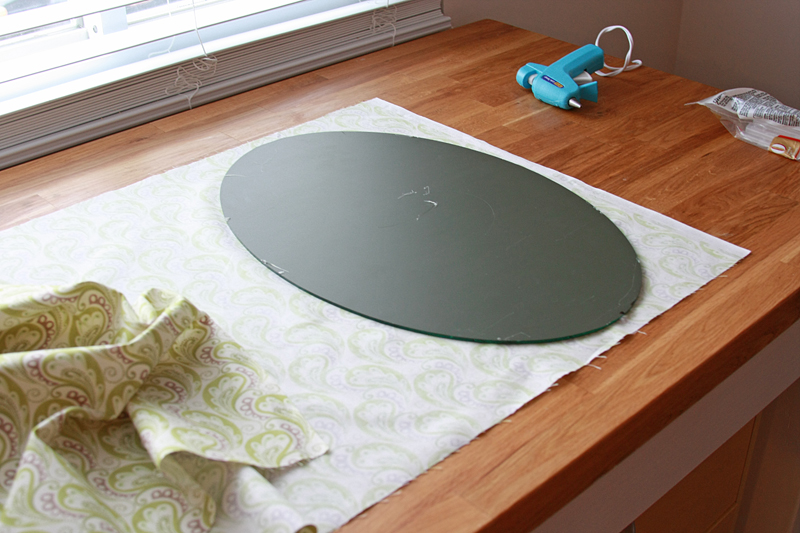
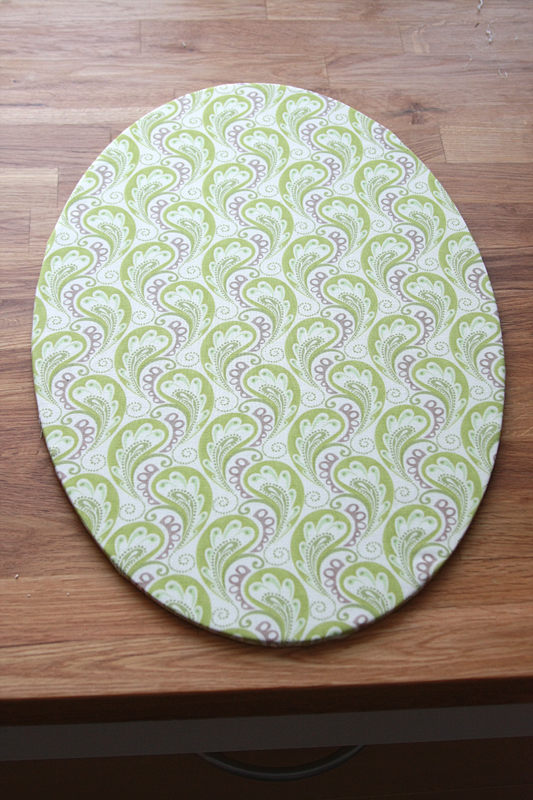
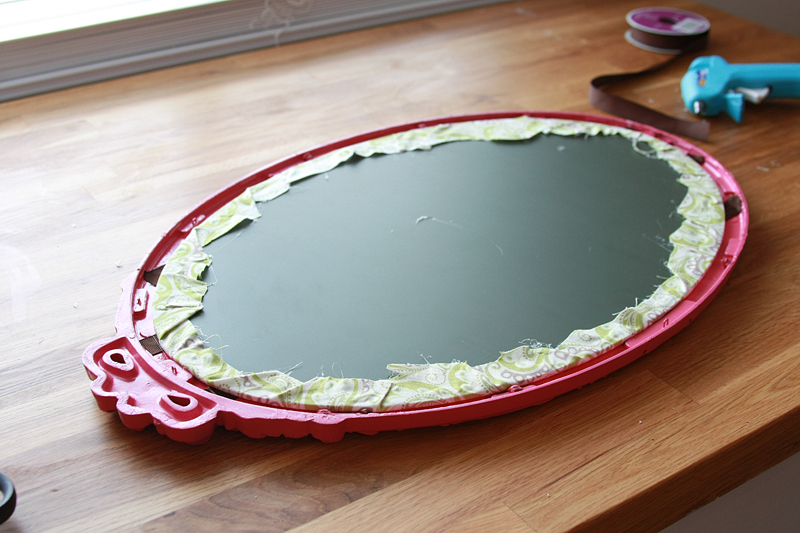
Lay out your fabric right side down. Place your glass/mirror facing down on top of the fabric, with any patterns on the fabric running in the direction desired.


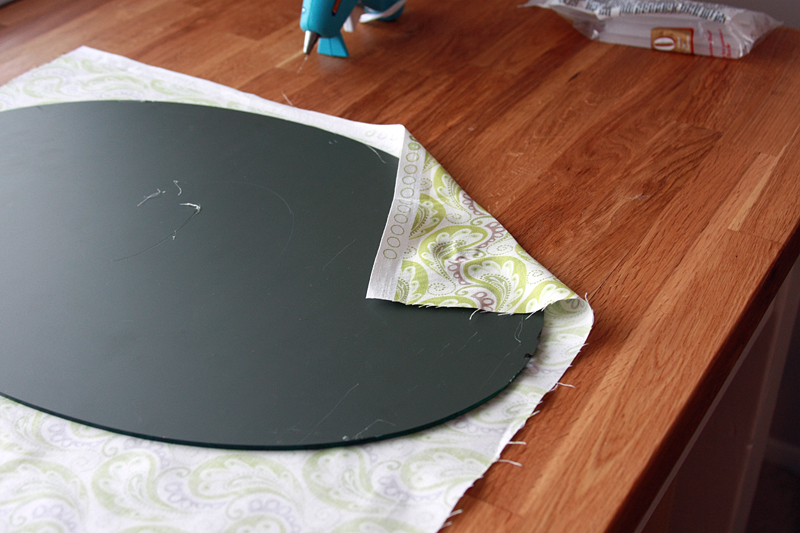
Pull the material taut and begin hot gluing the edges to the back of the glass/mirror. This is obviously much easier if you're working with a square piece of glass.


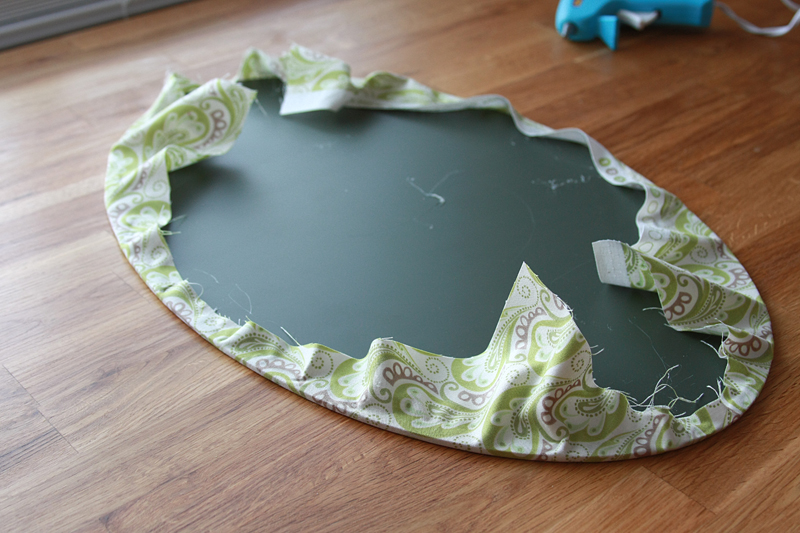
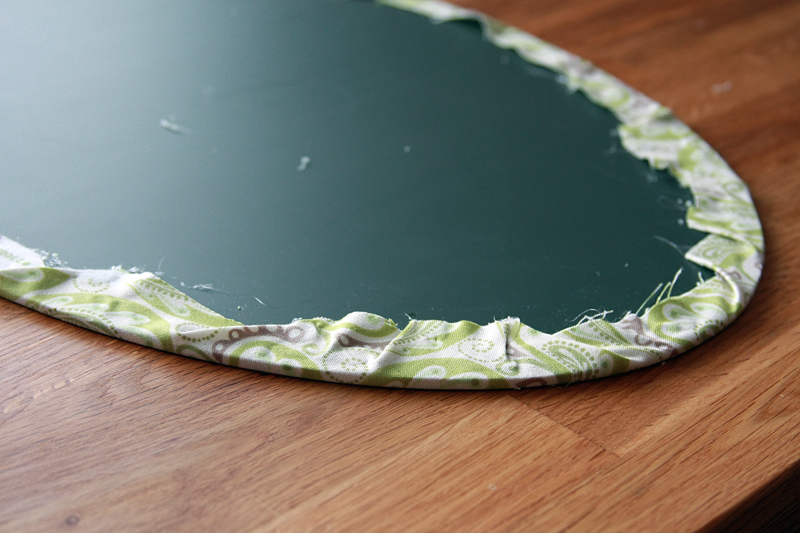
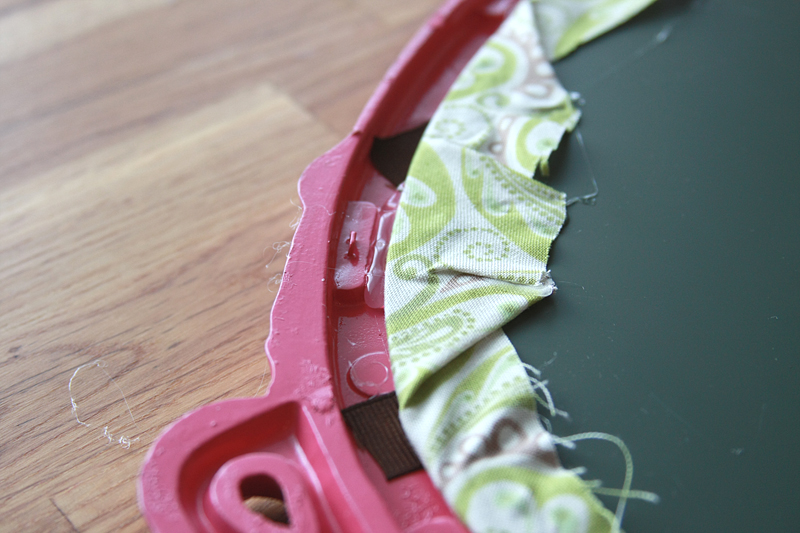
Continue all the way around the glass, don't worry about those bumps and folds on the backside. As long as the material is laying flat on the front side of the glass, that's all the matters. Cut off any excess fabric.


Now it's time to go back and take care of all those bumps I told you not to worry about. And the only reason we're doing this is so the back lays flat when we put it back on, so no need to make this look pretty. I just folded any extra material over and glued it down. (Another reason I use a low-temp hot glue gun is so when I get the glue on my fingers it hurts, but it's not ridiculously painful and leaves blisters.) And hey, if you're using a square piece of glass, you can skip this all together!


Alright, flip it over and check out your handy work. Even if the edges aren't perfectly smooth that's okay, the frame will cover this up. Go ahead and set the covered glass piece aside.


For the next step, I was going to tell you to measure out your width and do some math to figure out how many strips you want going down your frame, but honestly, it's really just easier to eyeball it with the same results. Especially when you're not working with a square piece. However, you do want about 2" between each ribbon (I did from about center to center of the ribbons... roughly). This gives your pretty bows and hair pieces room to breathe.

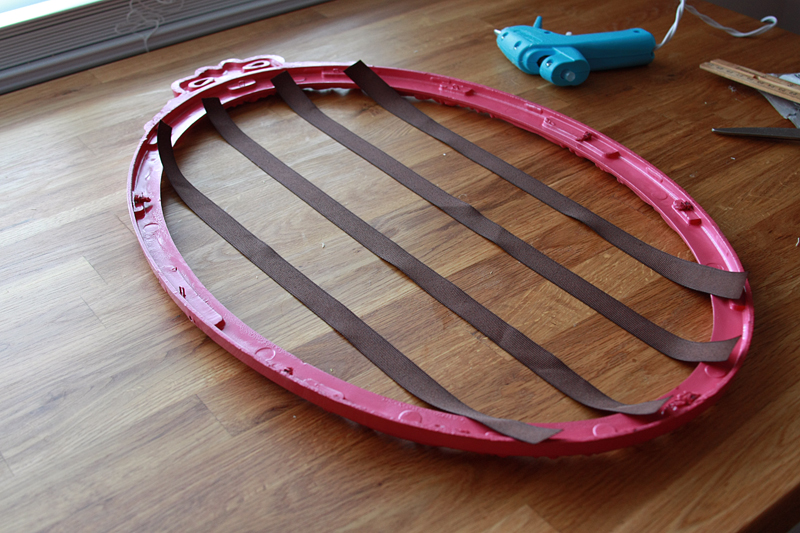
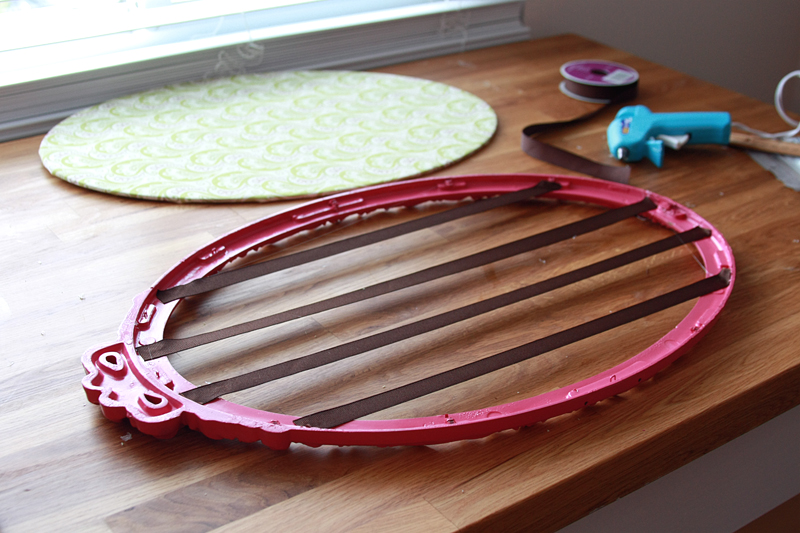
So, cut a few strips (I decided to go with 4) of ribbon and lay them length-wise across the back of your frame. Make sure you have enough ribbon to reach completely across and leave little "tails" for you to glue to the frame.


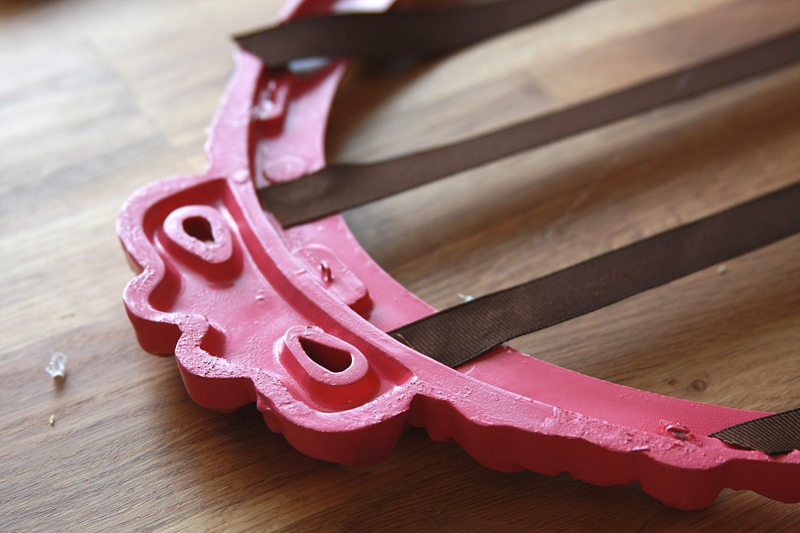
Once you have your ribbon where you want it, begin gluing the tails down to the back of the frame. (There should be a small lip on all frames where the glass and backing rest so they don't fall through the opening. This is the part of the frame I'm referring to.)


Once you have all your ribbons glued down, cut off any excess that sticks out above that lip on the frame.


When all the glue is completely dry, place your covered glass piece back in the frame, right side down. We're just making sure everything still fits.


If you're using a typical picture frame, with a back that slides in and hold the glass in place, you can skip this next part. If you're like me and the backing was stapled on and you have no way to re-staple it, go ahead and secure your covered glass into place with glue.


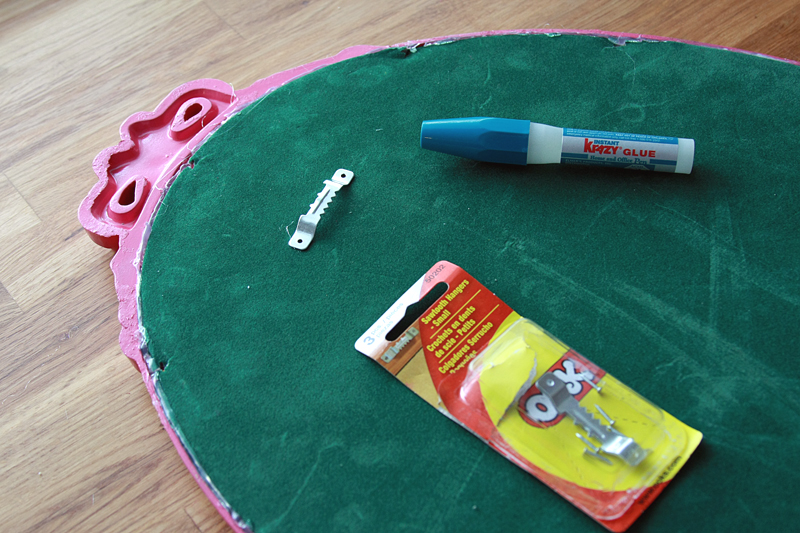
Slide the back into your frame, and you can call it a day! Unless you went with a mirror, then glue your backing on with a ridiculous amount of hot glue. If you also happen to be missing a way to hang up your masterpiece, attach a picture hanger with either crazy glue or hot glue. Just make sure to get it on nice and straight. (You can find the metal picture hanger piece at Lowe's or Home Depot.)


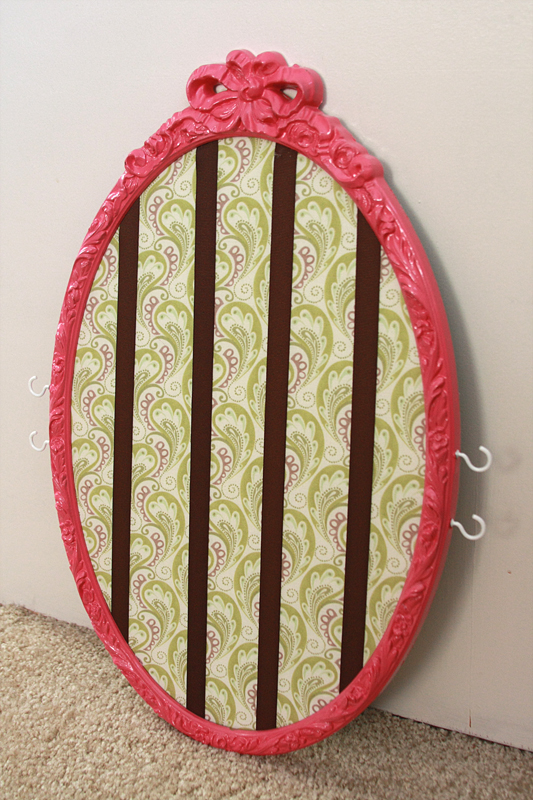
Now, one last thing, and this is completely optional. Since my niece has no hair to speak of, my sister loves to use thin stretchy bands to clip her hair pieces onto. I decided to add little hooks to hold those. Luckily, I already had pre-drilled holes from where the mirror attached to the other pieces of the vanity set, but you can also just screw them into the frame along the bottom.

Annnnnd you're done! All that's left is for you to clip on some fancy hair bows.


Final price to make your own Hair Bow Organizer?

1 thrift store picture frame (1 @ $3.00) = $3.00
1 can spray paint (1 @ $3.87) = $3.87
1/2 yard fabric (1 @ $4.50) = $4.50
1 spool grosgrain ribbon (1 @ $3.99) = $3.99 (I bought this at full price, you can totally get this for much cheaper and you don't even need close to a full spool)
1 8-pk "cup" hooks (1 @ $0.97) = $0.97 (Can find these at Lowe's, Home Depot, or even Walmart)
1 pk sawtooth picture hanger (1 @ $1.94) = $1.94

Final Price = $18.27


Well, this time around it's really going to vary, mostly due to the price of your frame. Mine ended up being about $8, but that included 3 frames. I'm going to ball park $3 for the frame, as that was about the price of some of the other ones I saw there. What fabric you get (and how much) will also really affect the price as well. Mine was full price, so once again, bust out that 40% off coupon and you can do this much cheaper.