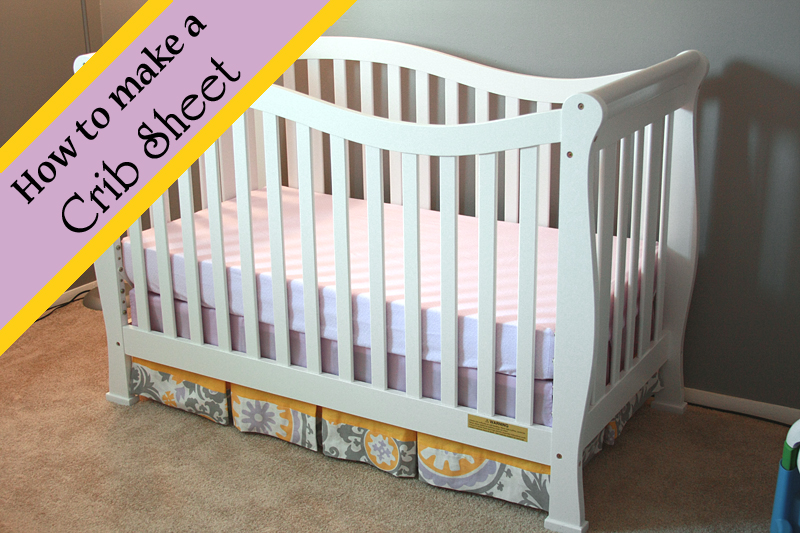
Several weeks ago, I posted how to make a crib skirt, but I kind of left you hanging on the rest of the crib.
Honestly, when I first thought I might try tackling making things for the nursery, the crib sheet was not on the list. I mean, it involved adding elastic after all. No way I wanted to go there.
But then... I couldn't find anything to match my fabric except white -- and yawn, how boring. After searching through a few tutorials, I begin to realize that maybe, just maybe making my own sheets wouldn't be quite as hard as I thought.
And you know what? So right. This is actually one of the easiest projects for the nursery yet. Don't worry - you don't have to actually attach the elastic to the fabric, only to itself. Which isn't only super easy, but ends up looking better in the end.
Things You'll Need
2 yards fabric (washed and dried)
90" elastic, 1/4"-3/8" width
Spool of thread in matching color
Scissors
Tape measure
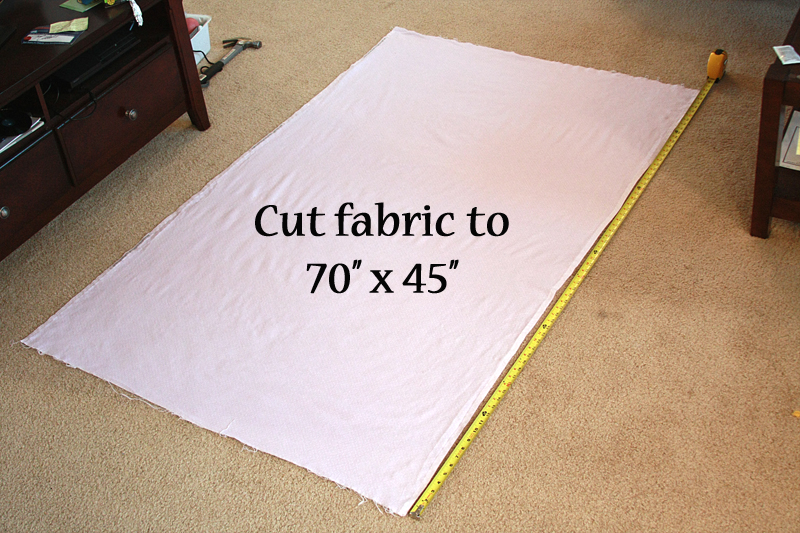
Start by laying out your fabric and cutting it down to 70" x 45". (If your fabric is only 44" wide, that works too.)
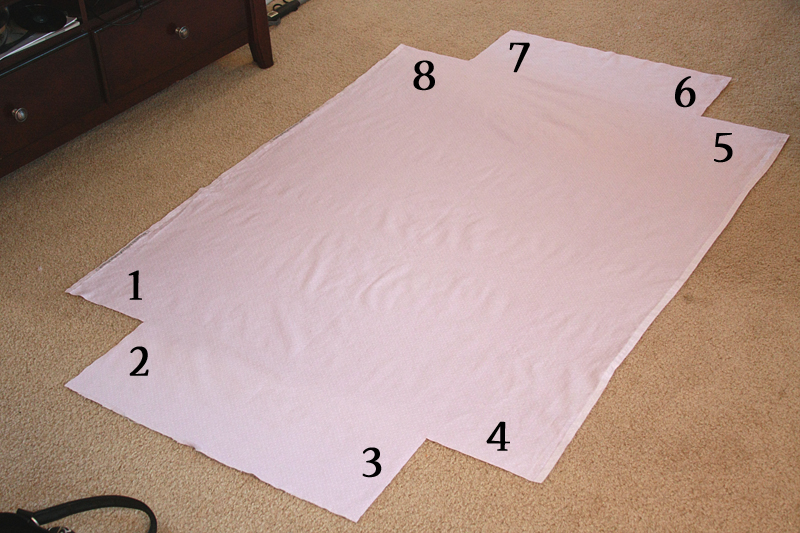
Fold your fabric lengthwise with right sides facing each other. Measure and cut out 8 3/4" x 8 3/4" squares from each corner.

If you open your fabric back out, it should look like this:
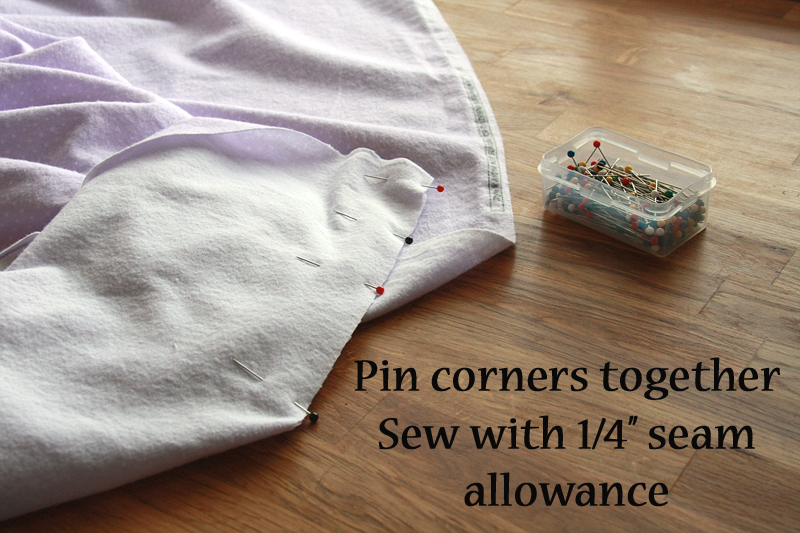
Pin your corners together, right sides facing each other. (i.e. 1 & 2, 3 & 4, etc.) Sew together with a 1/4" seam allowance.
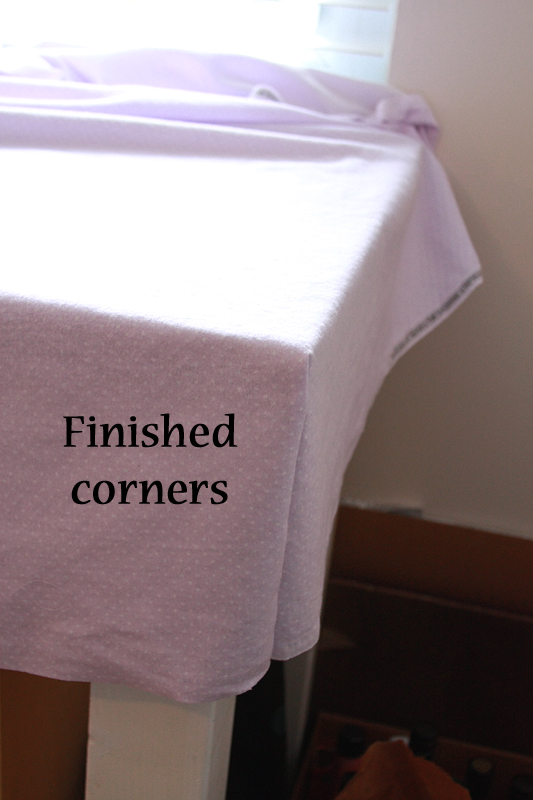
Once flipped right-side out, they should look like this:
Fold over the edges 1/4" and press. (Note: I like to press all of the corner seams down going the same way - this makes threading the elastic through much easier later on.) Sew fold down, making sure to back tack both at the start and end.
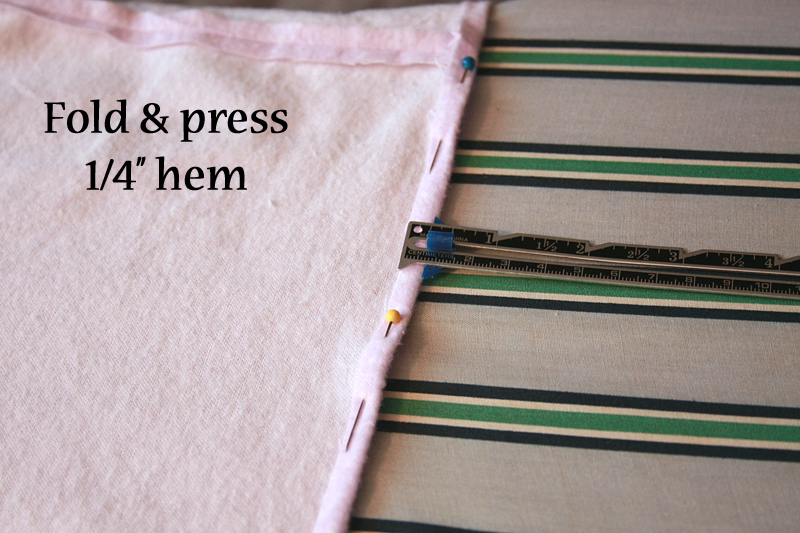
Fold hem over 1/2" and press. Stitch hem down, staying close to the outside edge. Leave a 2-3" gap between the start and end of your hem so you can thread the elastic through.

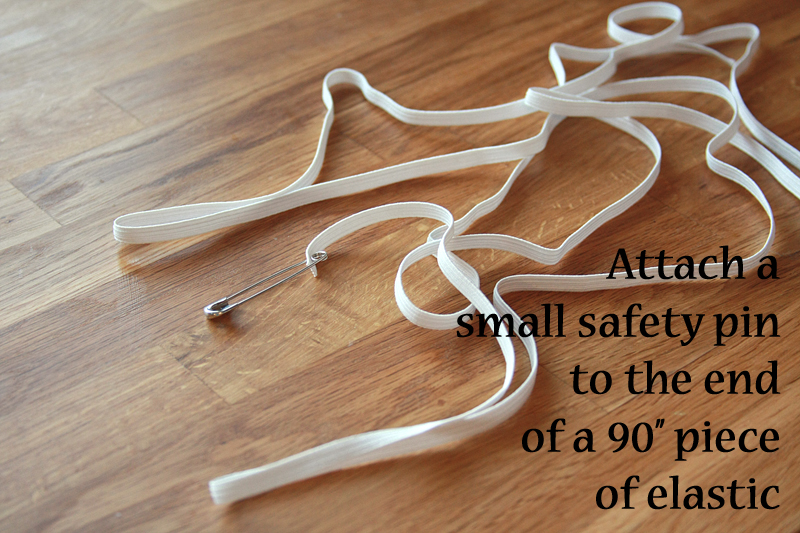
Attach a small safety pin to the end of your 90" elastic.
Then attach the far end of the elastic to the fabric with a pin. Thread the safety pin through your 1/2" hem, pulling the elastic the entire way around the sheet until the pin comes out the other side. (Remember pressing down those corner hems all in the same direction? Thread through in the same direction so your safety pin doesn't get stuck as you go around the corners.)

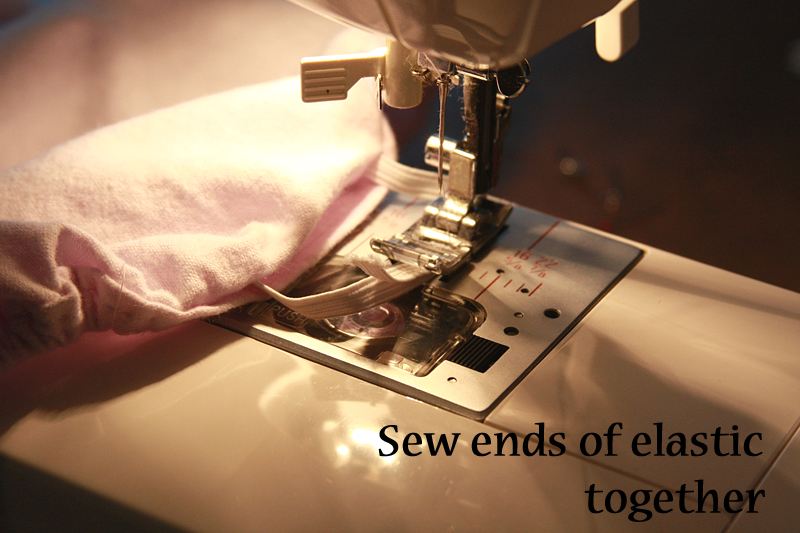
Once you've made it back around, overlap the ends of your elastic about 1". Sew together. You can either use your machine or stitch by hand. Tuck elastic up into the hem like the rest of the elastic, and sew your hem shut (careful not to sew over the elastic).
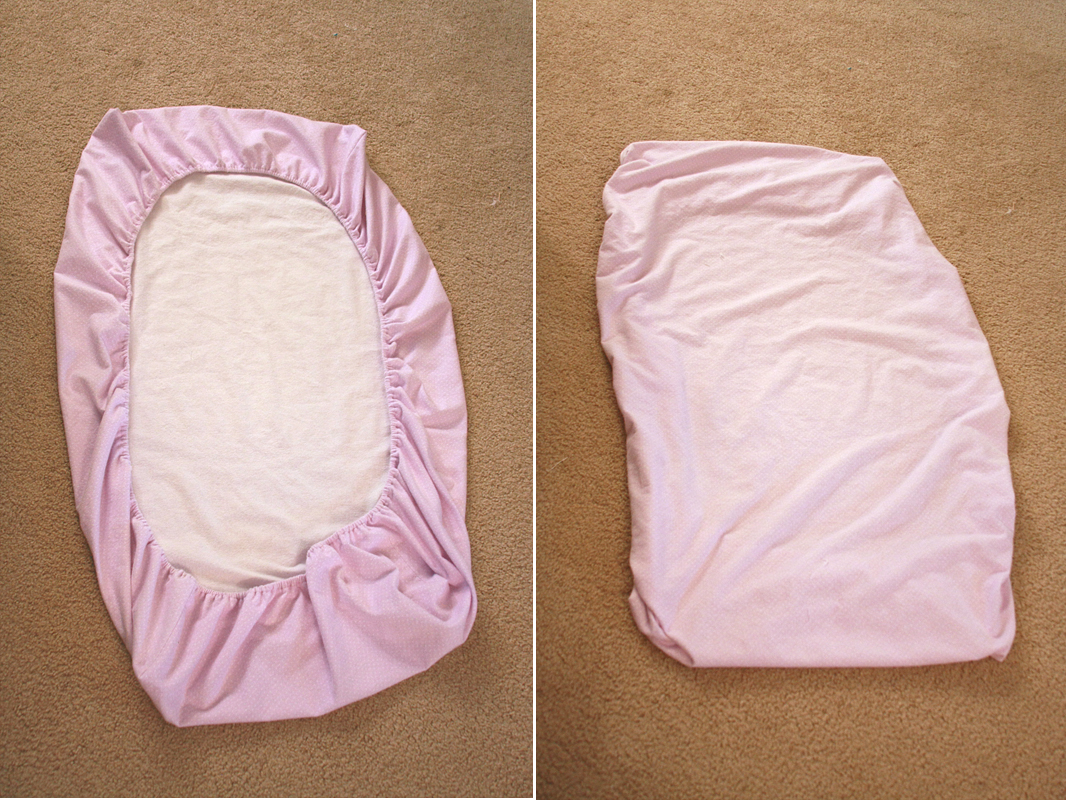
And what do you know? That's it. Done. Finished. Told you it was easy.
Without taking pictures, this takes roughly 2-3 hours to do. If you don't press your hems (or even just eyeball them) you could cut even more time off. The longest part of the whole thing is pulling the elastic through the hem. Nothing that can't be done while watching your favorite TV show. :)
Final price to be able to choose your own sheet?
2 yards fabric @ $3.49/yd = $6.98
1 spool of thread @ $2.99/spool = $2.99
1/3 package 1/4" wide elastic @ $1.98 = $0.66
Final Price = $10.63
So it may not quite be as cheap as what you could find at somewhere like Walmart (unless you find an awesome sale at the fabric store), but it is roughly on par with what you can find at Babies R Us. And it has the plus that you can pick out the exact fabric you want instead of settling.
What type of fabric do you use for the sheet?
ReplyDeleteFor the one in the tutorial, I used flannel, though I've since made one from just plain old cotton fabric and it works great as well.
DeleteGreat tutorial! Thanks so much for all the detail and images!
ReplyDeleteThanks for this! Your tutorial was easy to follow, and you were right- this crib sheet is easy to make! I made a brown one for my baby boy due beginning of Dec and posted a picture of it on my 31 week pregnancy recap
ReplyDeletehttp://weregrowingby2feet.blogspot.com/2013/10/31-weeks.html
Glad it was easy to do! It looks great!
DeleteAwesome. Thanks for showing us it's not hard! Project complete.
ReplyDelete