Thursday, October 18, 2012

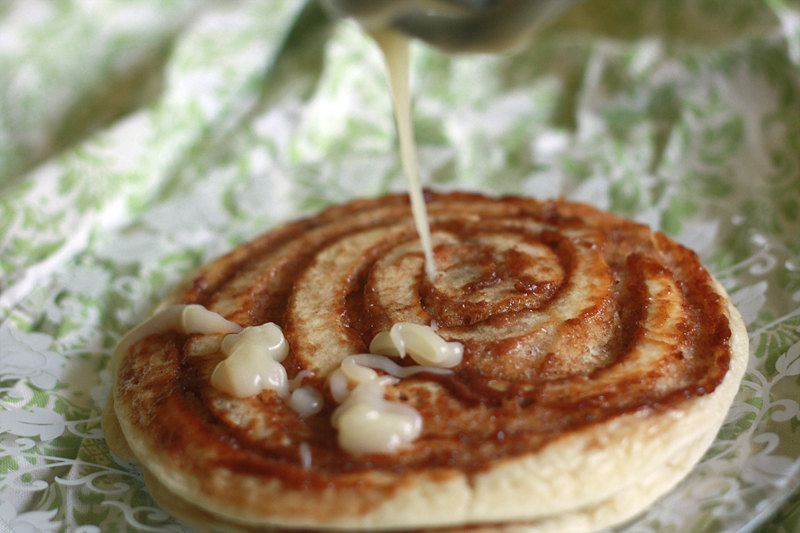
Cinnamon Roll Pancakes


Oh. Hello there. Why yes, as a matter of fact I do still exist. Things have been kind of crazy and hectic around these parts starting this summer and that coincided with me completely losing any motivation to keep up with the blog.

Where did I go? Well, we moved, had guests, traveled, traveled, had guests, put on a week-long youth soccer camp, my Grandmother passed away which involved more traveling, traveling again, running a half marathon, and now coaching our middle school soccer team.

And last but definitely not least, we found out we were expecting!

Which may or may not explain my zero lack of desire to be any where close to the kitchen -- at least for the first 20 weeks or so. The past few weeks I've gotten a little more motivation and we are slowly reverting back to using a weekly meal plan instead of eating out all.the.time.

Now that we're closing out our soccer season, hopefully things will get a little easier and we're not rushing around trying to figure out what to eat at 6:30 at night. Which I hate.

So anyways...

About these Cinnamon Roll Pancakes. Back in the spring, while my parents were visiting, we took them to a local breakfast joint where my mom and I discovered how delicious these could be. I am such a huge fan of regular cinnamon rolls, but the time spent making the dough for them just isn't breakfast friendly.

But these? These taste so close to the real thing, without having to wait for all that rising dough nonsense.

Cinnamon Roll Pancakes
Adapted from: Baker Becky

1 1/2 cups all-purpose flour
3 1/2 teaspoons baking powder
1 teaspoon kosher salt
1 tablespoon granulated sugar
1 1/4 cups 1% milk
1 egg
3 tablespoons butter, melted

4 tablespoons butter, melted
1/2 cup brown sugar, packed
1 tablespoon ground cinnamon

4 tablespoons butter
2 ounces reduced-fat cream cheese, at room temperature
3/4 cup powdered sugar
1/2 teaspoon vanilla extract

Preheat griddle or large skillet to medium heat.

Combine flour, baking powder, and salt in a medium bowl. Whisk in the milk, egg, and 3 tablespoons butter until all the dry ingredients are moistened. A few small lumps are okay.

In a quart-size ziploc bag, add 4 tablespoons butter, brown sugar, and cinnamon. Seal bag, then shake and mix to combine ingredients.

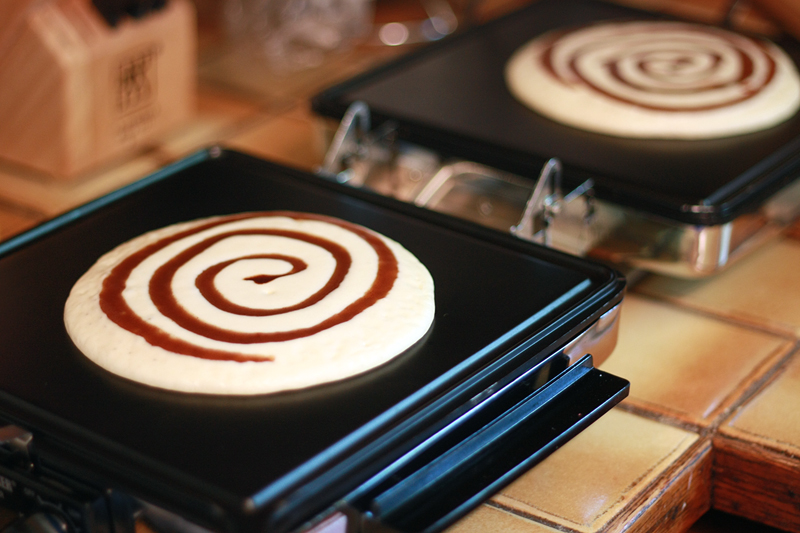
Once the griddle is fully heated, coat with non-stick spray. Add about 1/4 cup of batter to the griddle, forming a circle. Snip off a small corner of your ziploc bag. Once the pancake begins to bubble, add the cinnamon filling.

Starting from the middle of the pancake, begin piping a cinnamon filling swirl in larger and larger circles around the pancake, taking care not to get too close to the edge. Flip the pancake over and cook for another 2 minutes, or until the bottom is golden brown. Repeat with remaining batter and filling.

While pancakes are cooking, melt the remaining 4 tablespoons of butter in a small saucepan over low heat. Remove from heat and whisk in the cream cheese until smooth. Add the powdered sugar and vanilla extract, whisking until glaze is completely smooth. Top pancakes with cream cheese glaze and serve warm.


Serves: 4 (serving size: 2 pancakes)
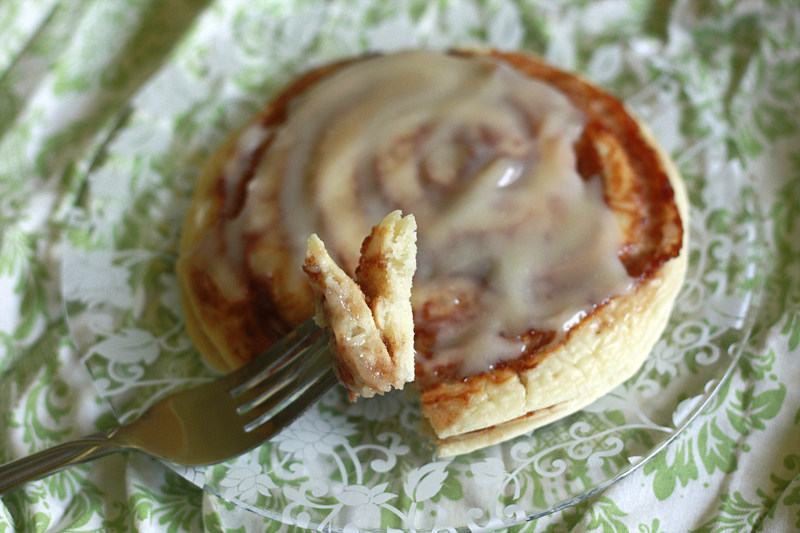

So totally NOT your healthy "good start" breakfast, but this occasional treat is definitely worth the splurge. It's just so gooey, and cinnamony, and, and. Awesome.

Do it.


Nutrition Facts
Serving Size 239g
Amount per serving
Calories 726Calories from fat 351
% Daily Value
Total Fat 39.0g60%
Saturated Fat 24.1g120%
Cholesterol 144mg48%
Sodium 908mg38%
Total Carbs 86.9g29%
Fiber 2.3g9%
Sugars 47.1g
Protein 10.3g
Vitamin A 27%Vitamin C 0%
Calcium 35%Iron 18%

Thursday, May 31, 2012

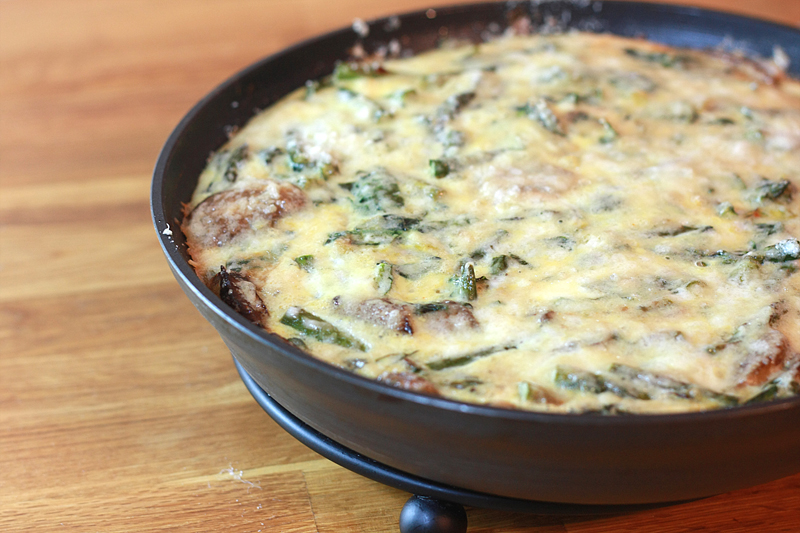
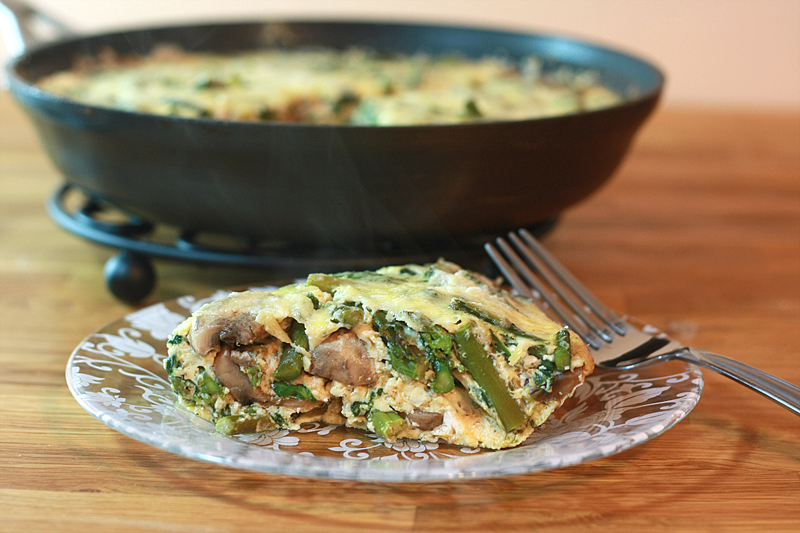
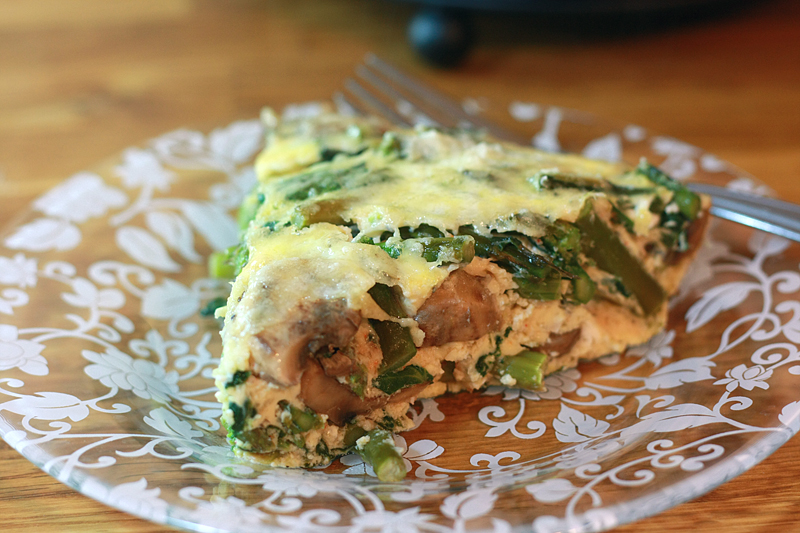
Cheesy Fritatta with Spinach, Asparagus, & Mushrooms


I am so.bad. when it comes to eating vegetables. I have a strong desire to want to love veggies, but I just can't. I've realized that right now, I'm not one of those people who can snack on bell pepper strips and goes for the Veggie Delight at Subway.

And I have to live with that. Whoa is me. Let me tell you, opting for strawberries and apples instead is soooo difficult. (Maybe that's my problem?)

Since I'm in the take-it-or-leave-it camp when it comes to veggies, I find I have to trick myself into eating them. Or just force myself to buy them, then let the guilt take over when I see them looking sad and lonely in the produce drawer.

So the day before they bite the dust for good, I opt for the best hodge-podge-get-rid-of-my-veggies meal I can think of. A fritatta. See, anything goes when it comes to fritattas, and it still works. Spinach? Yup. Peas? Yes. That shriveled stinky thing in the corner of the drawer? Well, maybe pass on that one.

Cheesy Fritatta with Spinach, Asparagus, & Mushrooms
Adapted from: Home Skillet

2 tablespoon butter
1 leek, diced
5 ounces fresh baby spinach, chopped
12 ounces (1 bunch) asparagus, cut into 1-inch pieces
8 ounces mushrooms, sliced
5 whole eggs
4 egg whites
1 1/4 cups grated Asiago cheese, divided
1/4 cup grated Parmesan cheese, divided
1/8 teaspoon crushed red pepper flakes
1/8 teaspoon smoked paprika
1/4 teaspoon kosher salt
1/4 teaspoon ground black pepper
1/4 cup fresh basil, chopped
1/3 teaspoon dried thyme

Preheat oven to 325 degrees F.

Melt butter in a 10-inch ovenproof skillet over medium heat. Cook the leeks for 5 minutes, or until soft. Increase heat to medium-high. Add the asparagus and mushrooms, cook for 3 minutes. Stir in the spinach, cooking for 2-3 minutes or until wilted. Toss with salt and pepper.

Meanwhile, in a large bowl, whisk together whole eggs, egg whites, 1 cup Asaigo, 2 tablespoons Parmesan, spices, and herbs. Pour egg mixture into the skillet and sprinkle with remaining cheeses.

Transfer skillet to the oven and bake for 35 minutes, or until the edges are golden brown and eggs are set.


Serves: 4


For the most part, fritattas are quick and easy -- the longest part is baking them. But at least you're free to catch up on other things in the meantime.

While good by itself, Adam and I love to use a dash here and there of Sriracha with this. Odd, maybe. But trust me on that one.


Nutrition Facts
Serving Size 226g
Amount per serving
Calories 234Calories from fat 142
% Daily Value
Total Fat 15.8g24%
Saturated Fat 8.6g43%
Cholesterol 171mg57%
Sodium 587mg24%
Total Carbs 7.2g2%
Fiber 2.4g10%
Sugars 2.9g
Protein 17.9g
Vitamin A 71%Vitamin C 21%
Calcium 29%Iron 18%

Thursday, May 17, 2012

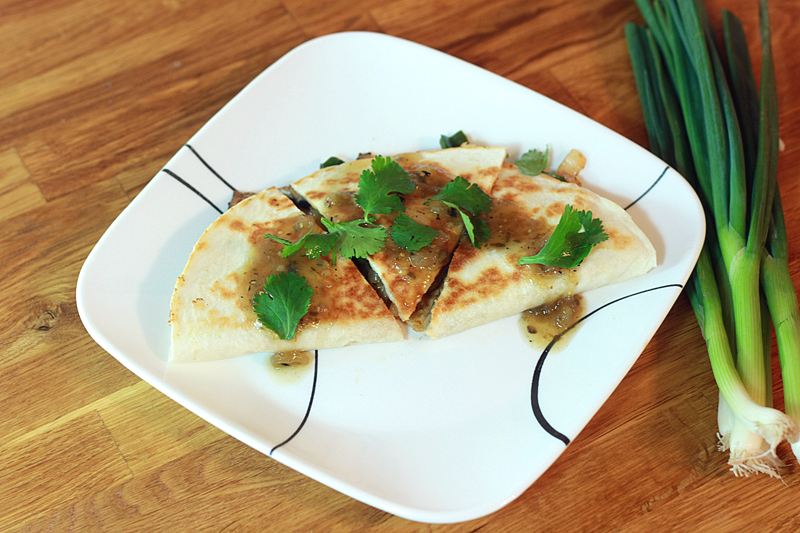
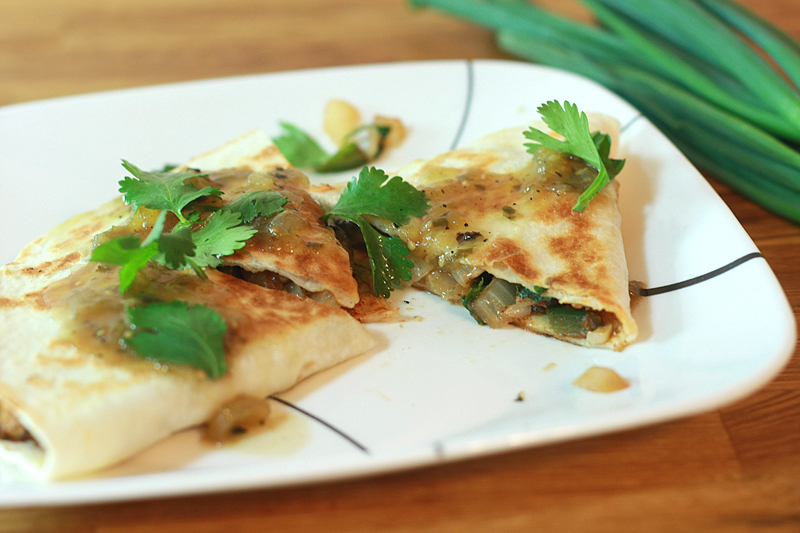
Mushroom Poblano Quesadillas


I might have missed posting something for Cindo de Mayo.

I may have missed celebrating Mother's Day on the ol' blog.

But. But. I have been busy.

Like stalking this site like no other.

Taking a few of these.

Um, and no. That's not me. I'm on the other side of the camera.

And still working on that study of mine for school.

Then I realized I needed to eat. Non-fast food. Oh please no more fast food for a while. My lazy butt needs to get in gear.

As always, quick and easy recipe to the rescue. Hallelujah.

Mushroom Poblano Quesadillas
Adapted from: Liv Life

1 tablespoon canola oil
1 cup onion, diced
8 ounces mushrooms, sliced
1 poblano pepper, diced
3 cloves garlic, minced
1 teaspoon ground cumin
1 teaspoon dried oregano
1/2 teaspoon kosher salt
1/4 teaspoon ground black pepper
2 tablespoons fresh cilantro
4 (10-inch) flour tortillas
1 cup shredded pepper jack cheese
2 green onions
1/4 cup salsa verde

In a large skillet over medium heat, warm the oil. Add the onion, mushrooms, and poblanos. Cook for about 5 minutes, or until mushrooms have released their juices and they have evaporated. Stir in the garlic, cumin, oregano, salt, pepper, and cilantro. Cook for 1-2 minutes, or until fragrant.

Heat another large skillet over medium-high heat. Spray with non-stick cooking spray (or wipe lightly with a oil coated paper towel). Place one tortilla in the pan. Sprinkle 1/4 cup cheese over one half of the tortilla. Top with 1/4 of the vegetable and spice mixture and 1/4 of the green onions. Fold tortilla in half, pushing down slightly. Continue cooking until underside of the tortilla is golden brown and cheese is melty. Flip over and cook a couple minutes more until golden brown on both sides.

Place another large skillet over medium high heat and oil pan lightly. Lay a tortilla flat on the pan and add a handful of cheese over 1/2 of the tortilla. Working quickly, add desired amount of the veggie mixture. Sprinkle with more cheese and top with a sprinkle of chopped scallions. Fold the tortilla in half and cook until the tortilla is browned and the cheeses are beginning to melt. Flip the tortilla and cook an additional few minutes until that side is browned and the cheese is fully melted.

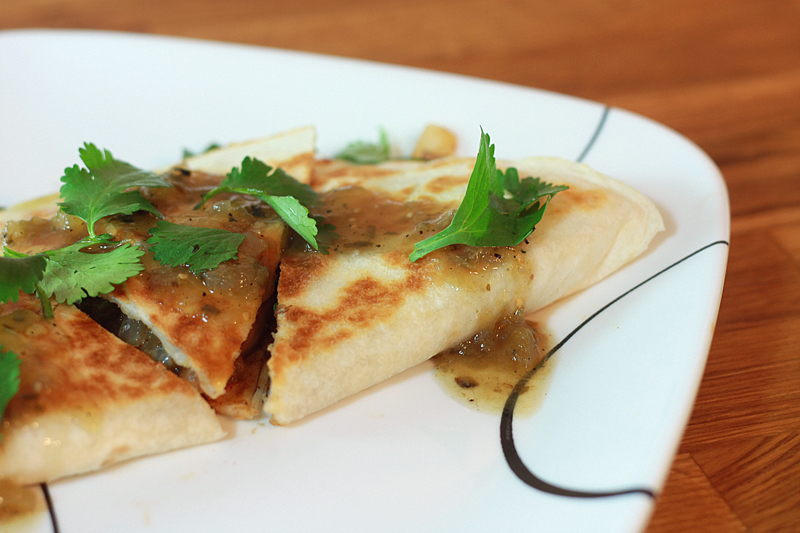
Cut quesadillas in thirds and top with salsa verde.


Serves: 4


Of course, coming from Liv Life, I knew these were going to be delicious. And they totally did.not.disappoint. As is, they are great. Awesome.

Yet somewhere in the back of my mind I feel like a little bit of chicken or some black beans (or both?) would really add some nice heft to these. I mean, if you need some for anyone in your house that still eats like a teenage boy.


Nutrition Facts
Serving Size 226g
Amount per serving
Calories 394Calories from fat 163
% Daily Value
Total Fat 18.1g28%
Saturated Fat 8.4g42%
Cholesterol 30mg10%
Sodium 1187mg49%
Total Carbs 44.1g15%
Fiber 2.8g11%
Sugars 5.2g
Protein 16.0g
Vitamin A 13%Vitamin C 59%
Calcium 34%Iron 22%

Sunday, April 29, 2012

Pardon the Dust

If you are unable to see any of the pictures on the site, don't worry! I am in the process of switching over my hosting site, so things should be up and running sometime tomorrow. Hold tight and keep checking back!

Wednesday, April 25, 2012

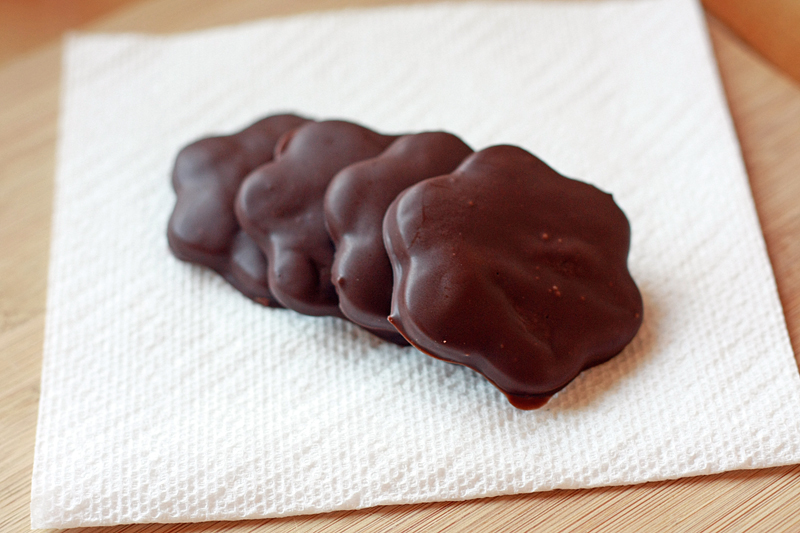
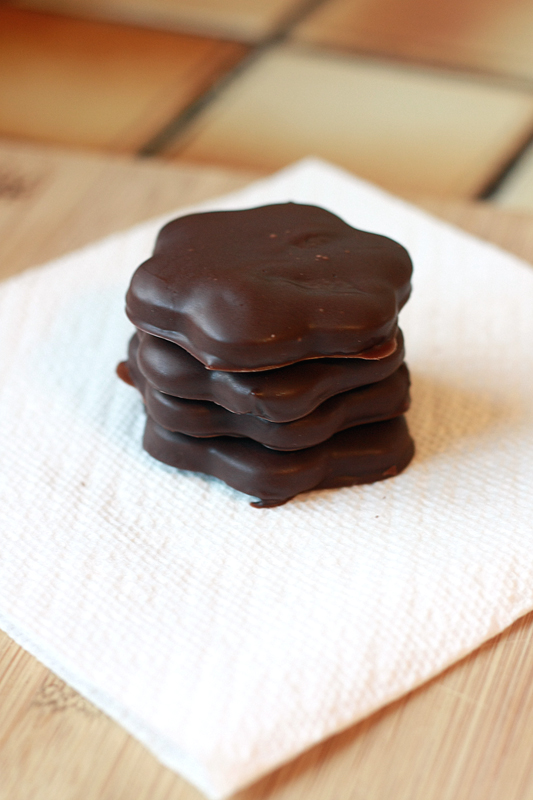
Thin Mint Cookies


Oh. My. Has it been a while. Let's just say my life has exploded over the past few weeks. Between starting the subject recruitment and data collection for my thesis and then finding out that our landlord sold the house we're in (meaning, hey you have a month or so to find a new place!) things have been busy busy.

And busy busy means lots of macaroni and cheese and fast food for dinner. Blech. But we're not here to talk about dinner today. Today, we focus on cookies. Because cookies make everything better. (Maybe not perfect, but definitely better.)

Girl Scout cookie season is over. And I missed it. Much like I have the past few years. I totally need a reminder for these things. Maybe it's a good thing I don't know about when these sales occur though. I can go through an entire sleeve of Thin Mints in one sitting without even batting an eye. True story.

While debating what to serve for dessert for a baby shower I was hosting with a friend, we decided to go Girl Scout themed since the mom-to-be loves her some Samoas. But we couldn't just be happy with Samoas-flavored fudge -- we wanted variety, and because we have a problem with making too much food. But really, who doesn't love Thin Mints? If you don't, well, that's just information you need to keep to yourself.

Thin Mint Cookies
Adapted from: my Katrina's Kitchen

1 cup butter, at room temperature
1 cup powdered sugar
1 teaspoon vanilla extract
1/2 cup unsweetened cocoa powder
1/2 cup dutch-processed cocoa powder
3/4 teaspoon salt
1 1/2 cups all-purpose flour

14 ounces mint-flavored dark chocolate candy melts

The the large bowl of a mixer, cream the butter until light and fluffy. Slowly add in the powdered sugar, mixing on low until just combined. Increase the mixer speed and continue to cream until well blended. Stir in the vanilla, salt, and both cocoa powders. Add the flour, 1/2 cup at a time until fully incorporated. Mixture may be on the crumbly side.

Turn dough out onto a clean work surface, kneading together until smooth. Separate dough into 2 portions, flattening each into a disk. Wrap in plastic wrap and chill for 10 minutes.

Preheat oven to 350 degrees F. Line two baking pans with parchment paper and set aside.

Remove one of the chilled dough disks from the fridge. Lightly dust counter with flour and roll dough out to about 1/8-inch thickness. Cut out cookies and transfer to a prepared baking sheet. Repeat with remaining dough until baking pan is full. Bake for 10 minutes. Allow cookies to cool on pan for 5-10 minutes, then transfer to a wire rack to cool completely.

While cookies are baking, prepare chocolate coating. Heat the chocolate melts in a small bowl according to package instructions. Stir every 20-30 seconds until chocolate becomes smooth. Dip each cooled cookie in the chocolate face down, then flip right-side up and remove from bowl, shaking any excess chocolate off (a fork works great here). Place on a wax paper covered baking sheet to set. Once the sheet is full place in fridge for about a 1/2 hour to finish setting the chocolate.


Makes: about 3 dozen cookies (serving size: 1 cookie)


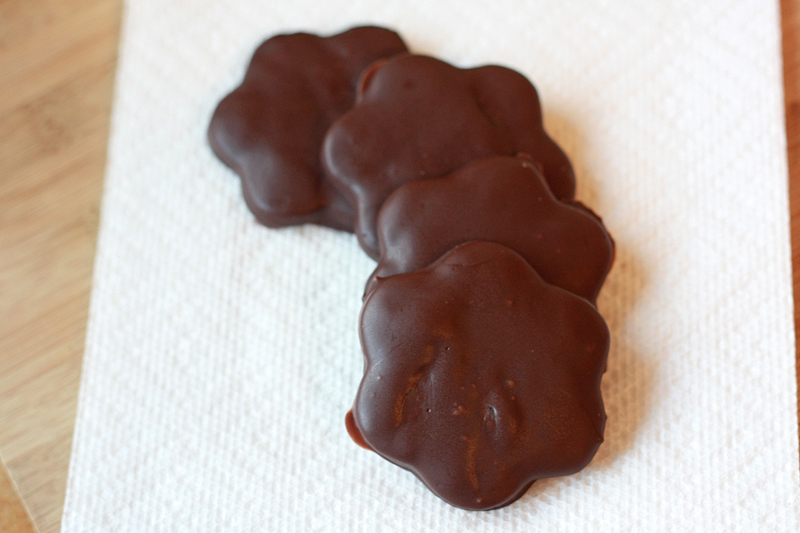
Even though these took a little while to make, and even though I have a severe dislike for dipping things, I might have to concede that it was totally worth it. The cookies had just the right amount of firmness and the chocolate coating provided just the right amount of mint flavor. I dare say these might actually be better than the original. Except for the fact that the originals only involve me opening the package to eat them... but I digress.


Nutrition Facts
Serving Size 29g
Amount per serving
Calories 135Calories from fat 80
% Daily Value
Total Fat 8.9g14%
Saturated Fat 6.3g31%
Cholesterol 14mg5%
Sodium 90mg4%
Total Carbs 15.1g5%
Fiber 1.4g6%
Sugars 8.8g
Protein 1.6g
Vitamin A 3%Vitamin C 0%
Calcium 1%Iron 6%

Sunday, April 15, 2012

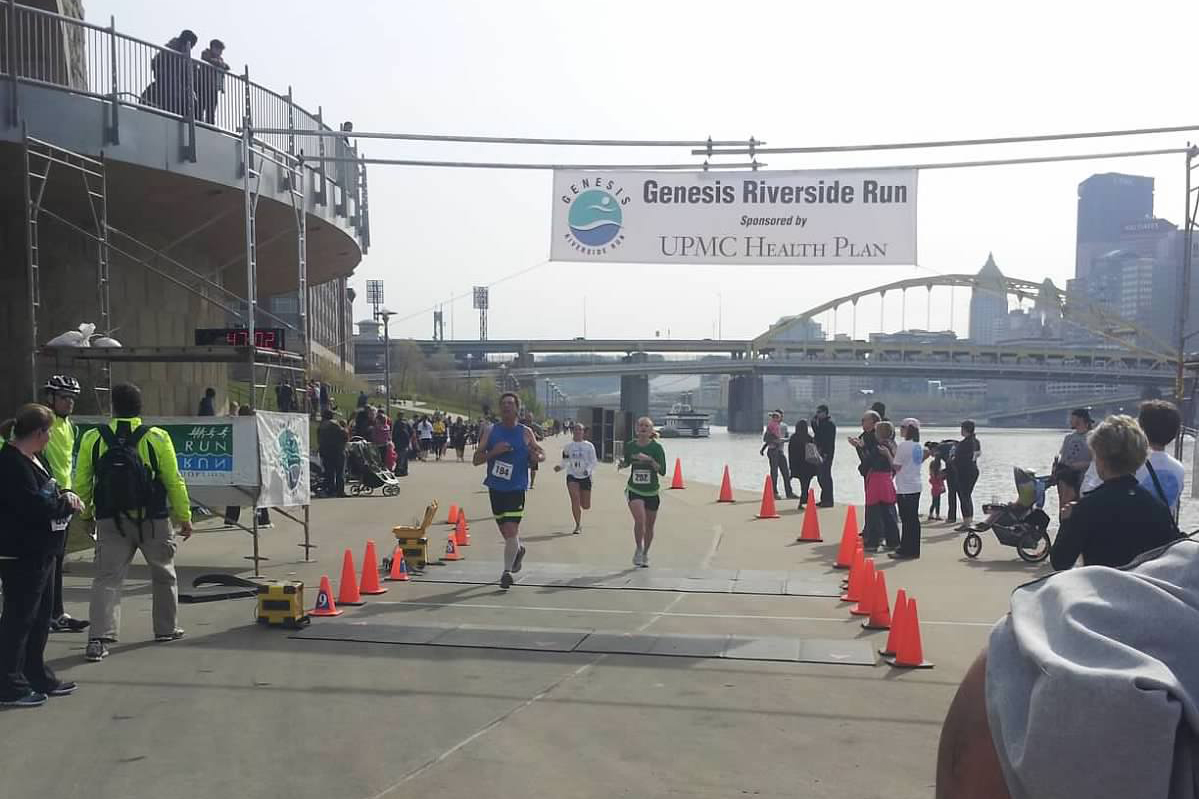
Riverside Genesis 10k Race Recap

Oh. Hi there.

Pardon the lull in posting this past week. I may or may not have been waterparkin' it up with these two little goobers.


But, but, when I got back from my week-long hiatus, I had a 10k race facing me. (We won't even get into the ridiculously hot and tiny workout room at the hotel or the parents who brought their children in to play around on the machines.) I had kind of taken it easy in the two weeks between my half and this race, and I was a little on the nervous side that I had lost some of my speed and endurance.

Going into the race, I set three goals for myself:

Goal #1:  48:00 (7:43 min/mi)
Goal #2:  46:00 (7:24 min/mi)
Goal #3:  Top 5 in Age Group

McMillian "Goal": 48:55 (7:52 min/mi)

Even though I was feeling slightly under-prepared, the day of the race came, and the weather was slightly chilly, but still great. I had specifically picked out this race based on the fact it was almost completely flat and ran along the river giving a nice scenic view. Perfect for a nice fast race.


Unlike my previous two races, Adam and my parents were going to participating with me (in the 5k) which was kind of a nice change. We arrived at the race nice and early (around 8:00am for a 9:00am start) in order to pick up our race bibs and chips and hop in the port-a-potty before the line got too ridiculously long (which it did).


Soon enough, though, it was time to head to the start. Adam and I wiggled our way in closer to the start than usual (keying off my start from my half). Once the gun went off (or when they shouted "go!") we soon found we probably could have started even farther up.

After the usual bob & weave for the first half mile, I kind of fell in pace with the other runners around me, while Adam took off. I came through the 1 mile around 7:33 - right about where I wanted. I'm not exactly positive what compelled me to speed up like crazy during mile 2, but I knew after seeing 6:43 on the clock I had to slow down. My stomach was starting to act up a bit and I was terrified of getting horrible cramps. Another girl was running about my pace, just ahead of me, and I told myself to just keep up with her.

Miles 3 and 4 came in right under 8:00 minutes each, and I had pulled up next to the girl and we continued to run together up until the very end of the race. Luckily, my stomach cramps went away somewhere between mile 3 and 4, which was a huge sigh of relief.

We picked up the pace in mile 5, coming through in 7:39, but I could tell I wasn't going to be able to hang on to the pace for much longer. Somehow I managed to keep up with her for the remaining mile, despite feeling like I was losing my endurance, and fast.

I wasn't able to see the finish until I was well within a quarter mile, which made judging when to start my "kick" a little difficult. Not that there was much of one anyway. But I gave what I had left and crossed the line with a chip time of

46:57

I may have missed hitting goal #2, but I was more concerned with beating goal #1 since it was faster than I was expecting to be able to go.


As for goal #3. See, chip timing is a funny thing. I was super excited to find out when they posted the results by clock time that I had finished 3rd in my age group (out of 66). However, it wasn't until they were announcing the awards that a girl who started and finished behind me actually beat me by 1 stinking second, putting me into 4th. As bummed as I was that I wouldn't be taking home a medal, I'm still thrilled that I ended up in the top 5.

What I was even more excited about, is that I unofficially smashed my previous 5k post-college PR. I came through mile 3 at 22:10, and adding roughly another minute for the 0.1 puts me at 23:10 -- an entire minute faster than my previous PR of 24:09 from back in October. And that rivals some of my times from running cross-country in high school. Woot!

Friday, April 6, 2012

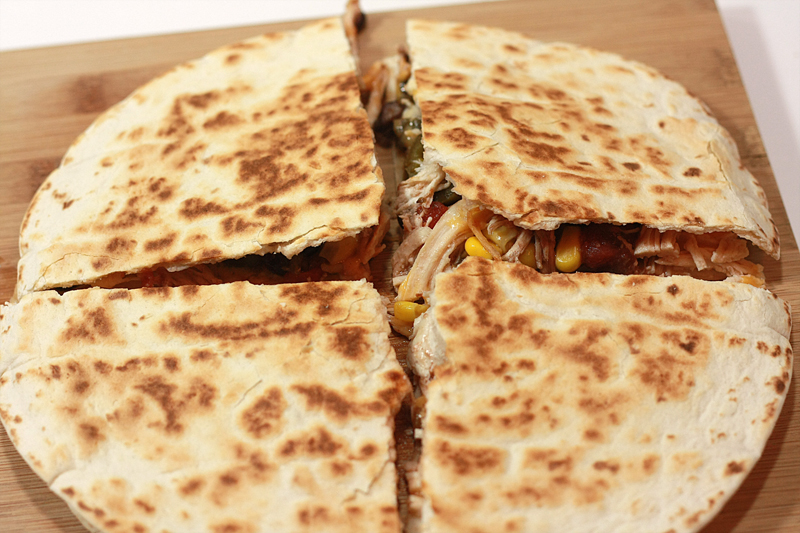
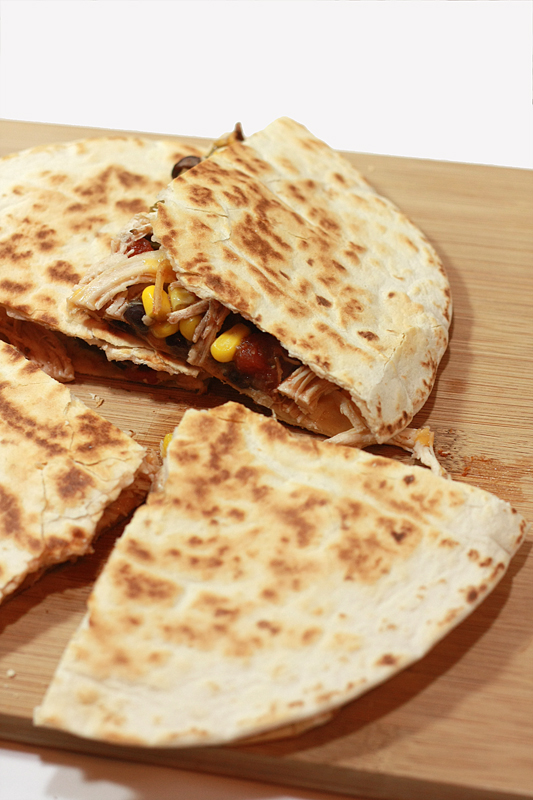
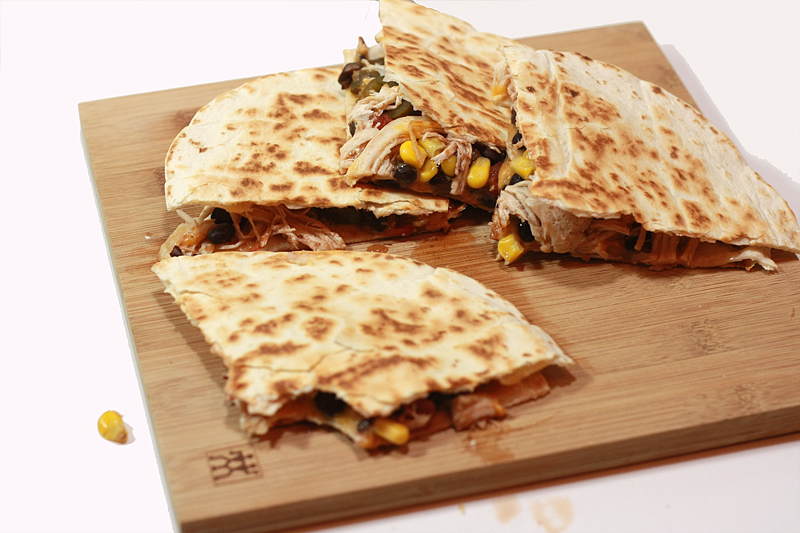
Spicy Chicken Quesadillas


While the majority of food popping up in my reader as of late has been very Easter oriented, I am headed in the other direction.

Quick. Simple.

Mexican.

-ish.

Okay, I don't even know if that's "the other direction", but whatevs. Doesn't matter.

What does matter, is that this is totally a weekday dinner. Nothing fancy to see here. It might not be fancy, but it totally gets the job done. Satisfying. Filling. Easy enough to get you in and out of the kitchen in 20 minutes or less and back to that comfy couch to zone out the rest of the night.


Spicy Chicken Quesadillas
Adapted from: my Cooking Light, January 2012

1 cup shredded cooked boneless skinless chicken breast
1/3 cup medium salsa
1/4 cup black beans, drained and rinsed
1/4 cup frozen corn, thawed
1 1/2 tablespoons pickled jalapeno peppers, chopped
8 (6-inch) flour tortillas
1 cup Monterey Jack cheese, shredded

In a medium bowl, toss together chicken, salsa, beans, corn, and jalapenos. Spread 4 of the tortillas out on a work surface. Divide chicken mixture evenly between tortillas, spreading to cover. Sprinkle each quesadilla with 1/4 of the cheese. Top with remaining quesadillas.

Heat a large skillet over medium high heat. Spray pan with cooking spray, then add one quesadilla to the pan. Cook for 1 minute on each side, or until golden brown. Transfer quesadilla to a plate and repeat with remaining 3 quesadillas.

Coat pan with cooking spray. Add 1 quesadilla to pan; cook 1 minute on each side or until golden. Remove from pan, and repeat with remaining quesadillas.


Serves: 4


For a quick and easy dinner, this was pretty tasty. I'm not going to lie here, it might not have been the downright tastiest quesadillas ever, but for the simplicity, I'd definitely make these again.


Nutrition Facts
Serving Size 133g
Amount per serving
Calories 281Calories from fat 109
% Daily Value
Total Fat 12.1g19%
Saturated Fat 6.3g31%
Cholesterol 56mg19%
Sodium 362mg15%
Total Carbs 21.7g7%
Fiber 3.7g15%
Sugars 1.6g
Protein 21.4g
Vitamin A 6%Vitamin C 1%
Calcium 25%Iron 9%

LinkWithin

Related Posts with Thumbnails
 
Pin It button on image hover