Showing posts with label Low Cholesterol. Show all posts

Wednesday, December 5, 2012

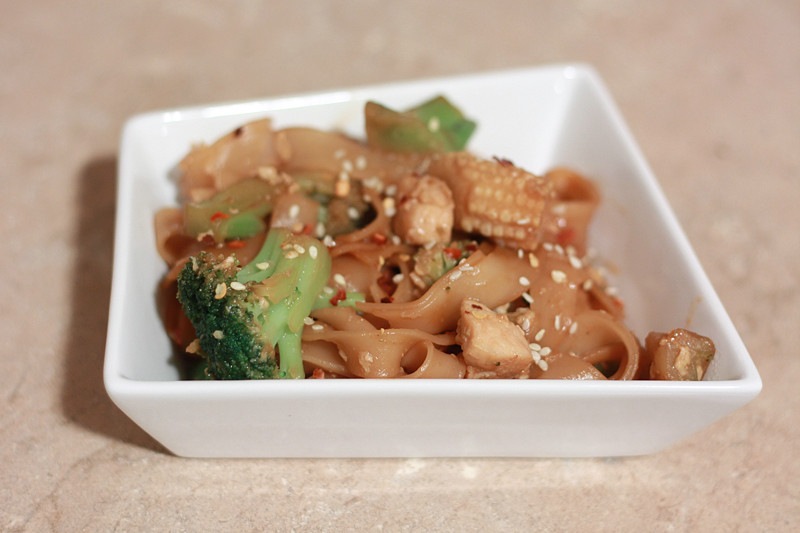
Pad Se Eew


If it's one thing I almost always overlook when trying to plan my weekly menus, it's Asian food. I'm not exactly sure why, as they come together fairly easily and are delicious. Oh, maybe it's due to half the recipes needing "this" added at just the right moment, or "that" needing to be cooked only mere seconds before it's too far gone. It kind of stresses me out.

But then I end up eating the dishes and remember that yes, it is so totally worth it to make it at home. Especially when the only other close option is greasy Americanized Chinese food that is way overpriced. Or delivery pizza that arrives barely lukewarm. Don't even get me started on that.

I'm not sure how I even came across this recipe, as I've never heard of Pad Se Eew before. Just one of those lucky times when a great recipe just randomly pops up while perusing a site, I guess. So, I'm going to go out on a limb here and say this probably isn't overly authentic, but honestly, I don't really care. It was definitely tasty and hit the spot.
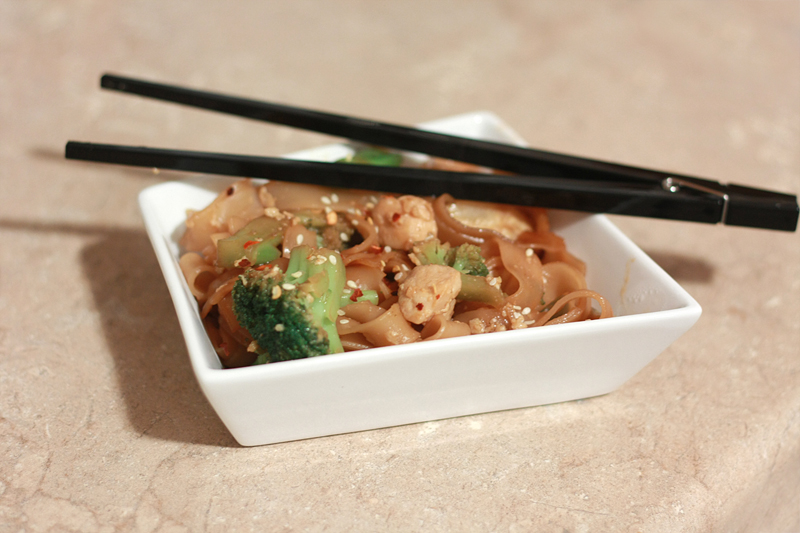
Pad Se Eew
Adapted from: Allrecipes.com

6 tablespoons soy sauce
2 tablespoons granulated sugar
2 teaspoons Sriracha
1 tablespoon olive oil
4 cloves garlic, minced
6 ounces chicken tenders, cut into bite-sized pieces
16 ounces frozen cut broccoli
1 (15 ounce) can baby corn
1 pound dried flat rice noodles
1 egg, beaten
1/4 teaspoon sesame seeds
1/2 teaspoon red pepper flakes

In a small saucepan over medium-low heat, combine the soy sauce, sugar, and Sriracha. Simmer until the sugar dissolves into the sauce, about 5 minutes. Remove from heat and set aside.

Bring a large pot of water to a boil over high heat. Boil noodles for 3-4 minutes or as according to package instructions. Drain.

In a large skillet or wok over medium heat, warm the oil. Add the garlic and chicken to the pan, cooking until chicken is no longer pink, about 7-8 minutes. Stir in the broccoli and cook for about 3-4 minutes. Add the baby corn, and continue cooking until broccoli is heated through. Add the noodles to the skillet, and pour the sauce over top. Continue to cook and stir until the sauce begins to thicken.

Make a small space on the side of your pan, and add the egg. Scramble the egg, making sure it is cooked thoroughly, then stir it in with the rest of the mixture.

Serve topped with sesame seeds and red pepper flakes.


Serves: 4
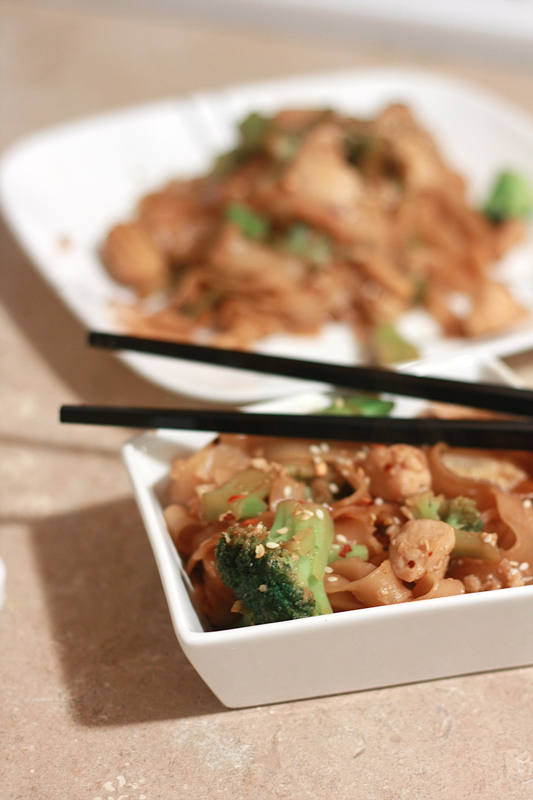

One of the other great things about this recipe is, outside the rice noodles, you most likely already have all the other ingredients in your pantry. Okay, except the chicken, that would be kind of gross. I love it when I am able to make an Asian dish without having to run all over the place looking for hard to find ingredients.

Both Adam and I really enjoyed this dish, although I made my noodles right when I first started (instead while I was cooking the chicken/veggies) so they ended up being kind of clumpy and hard to separate by the time I wanted to use them. Lesson learned.


Nutrition Facts
Serving Size 427g
Amount per serving
Calories 714Calories from fat 88
% Daily Value
Total Fat 9.8g15%
Saturated Fat 2.1g10%
Cholesterol 79mg26%
Sodium 1670mg70%
Total Carbs 129.5g43%
Fiber 7.5g30%
Sugars 12.7g
Protein 24.0g
Vitamin A 7%Vitamin C 76%
Calcium 7%Iron 15%

Thursday, November 29, 2012

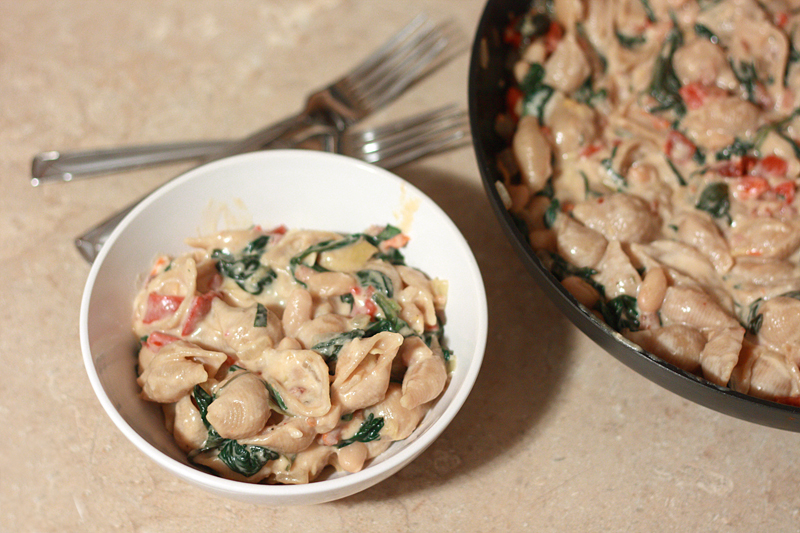
Tuscan White Bean Pasta


Oh my goodness. Is it just me or has the past week or two just flown by? Maybe it just me, as we had visitors and a baby shower the weekend before Thanksgiving, followed by leaving the day after our guests for my parent's house for the.day.of.food.and.all.things.fattening.

Needless to say, it's been a whirlwind around here, and even though I've put away most of the things we've received from both our showers, our living room is still strewn with baby things. Oh, who am I kidding? It's everywhere, not just the living room.

Sometimes though, you just need to stop. Back up. And take a breath. Back away from all the holiday hub-bub and just have a day here and there of "the usual". No leftover cranberry sauce infused this, or leftover turkey sandwich that. Just a nice normal dinner that's actually somewhat good for you. I mean, there's even green stuff in it. Which totally makes up for all that pumpkin pie, or cookies to come.

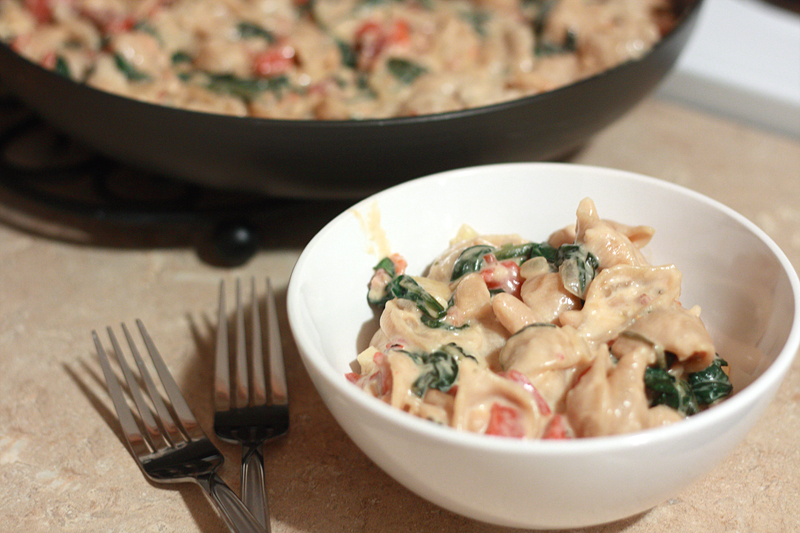
Tuscan White Bean Pasta
Adapted from: How Sweet Eats

2 cups whole wheat pasta
1/4 cup pancetta, chopped
1 cup onion, diced
3 cloves garlic, minced
6 ounces fresh baby spinach
1 (12 ounce) jar roasted red pappers, drained and diced
1/2 cup sun-dried tomatoes, diced
1/3 cup artichoke hearts, chopped
1 (15 ounce) can cannellini beans
10 fresh basil leaves, julienned
1 tablespoon butter
1 tablespoon all-purpose flour
1 (15 ounce) can low-fat evaporated milk
1/2 cup 1% milk
3 tablespoons grated Parmesan cheese

Bring a saucepan of water to a boil over high heat. Cook pasta according to package instructions.

In a large skillet over medium-high heat, cook the pancetta until crispy and most of the fat has rendered. Transfer to a paper towel-lined plate and let drain.

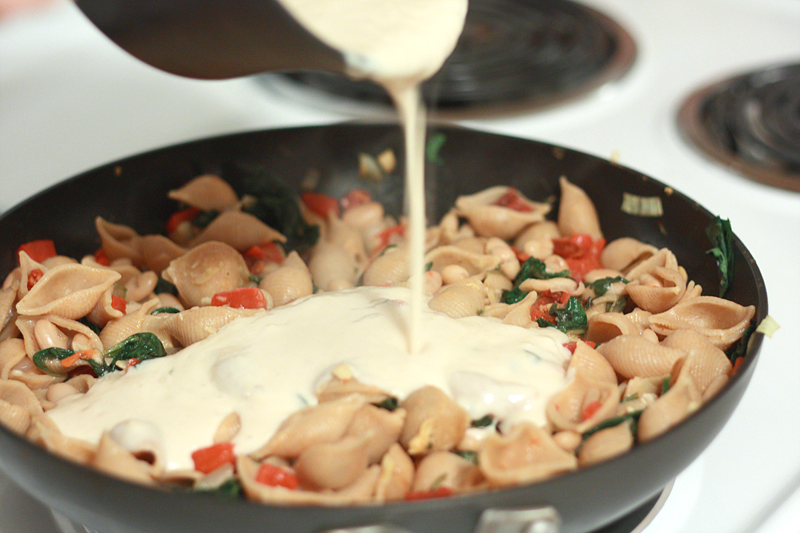
Reduce heat to medium-low. Add the onions and cook 3-5 minutes, or until softened. Add the garlic and spinach, stirring until spinach wilts. Toss in roasted red peppers, sun-dried tomatoes, artichokes, and beans. At this point the pasta should be finished cooking and drained; add to the mixture. Reduce heat to low, stirring occasionally.

In a small saucepan, melt the butter over low heat. Once melted and pan is hot, whisk in flour until no lumps remain, and mixture is golden and fragrant. Pour in evaporated milk and regular milk. While whisking continuously, bring the mixture to a boil over medium-high heat, then reduce heat to a simmer. Stir frequently for 5-7 minutes, or until the mixture has thickened to desired consistency. Reduce heat to low and stir in Parmesan cheese and basil. Season with salt and pepper if desired.


Serves: 6


I actually made this a while back, and seemed to remember liking it... but when you're making multiple new meals a week, things tend to blend into one another. So I gave this another shot, and I am so glad I did. It's creamy and satisfying, perfect for the winter, but not overwhelmingly so that all you feel like doing is sitting on the couch in your favorite pair of stretchy pants. Though that's not always a bad thing. I love how colorful this dish is -- reminds me with every bite that there's something healthy going on, and healthy tastes absolutely fantastic.


Nutrition Facts
Serving Size 523g
Amount per serving
Calories 624Calories from fat 88
% Daily Value
Total Fat 9.8g15%
Saturated Fat 3.2g16%
Cholesterol 31mg10%
Sodium 990mg41%
Total Carbs 95.1g32%
Fiber 22.7g91%
Sugars 12.8g
Protein 35.2g
Vitamin A 84%Vitamin C 33%
Calcium 43%Iron 48%

Wednesday, November 14, 2012

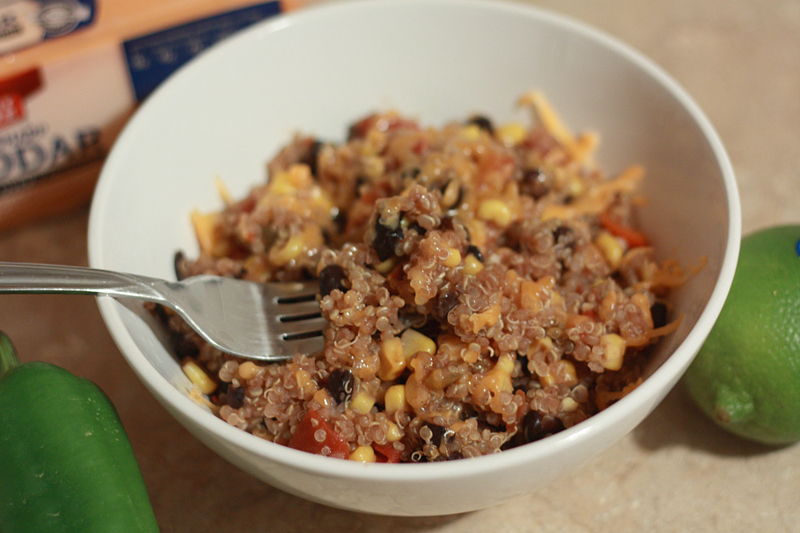
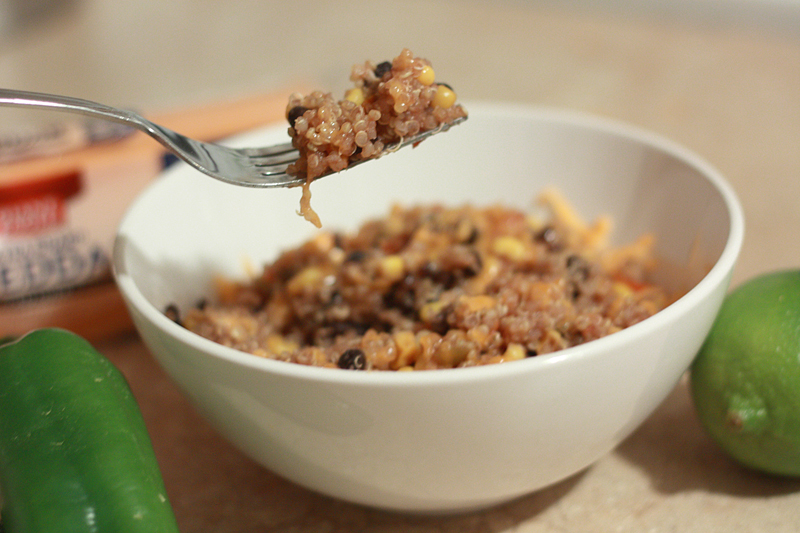
Mexican Quinoa


Ever since finding out I was pregnant, it feels like so much more of what I do is under scrutiny. "You can now eat for two!" "Don't eat for two, all you really need is 300 more calories per day." "Are you exercising enough?" "Are you exercising too much?" "Are you eating soft cheese/deli meat/insert new no-no food here?"

There's so many do's and don'ts that it can be a little overwhelming at times, not to mention hard to remember. Or keep straight which things are old wives tales and which are actually based on current research. Sometimes I feel like my diet is a hot mess. Okay, well, sometimes it really is a hot mess... littered with old Halloween candy wrappers.

However, there are certain key items that are important to try and include more of in your diet, such as iron, calcium, and protein. You know, the things I am not that great at getting a ton of. After tracking my protein intake for a class I was taking over a week's time, I realized I really needed to get back on the healthy eating bandwagon. While I do like all kinds of meat, I get annoyed with having to cook it a lot of times (read: I am lazy). Enter quinoa. High in fiber (another great thing for pregnant ladies) and protein. Okay, maybe not quite as high as say... a steak, but better than downing some mac'n'cheese. Add in some beans and we've definitely upped our health factor here.

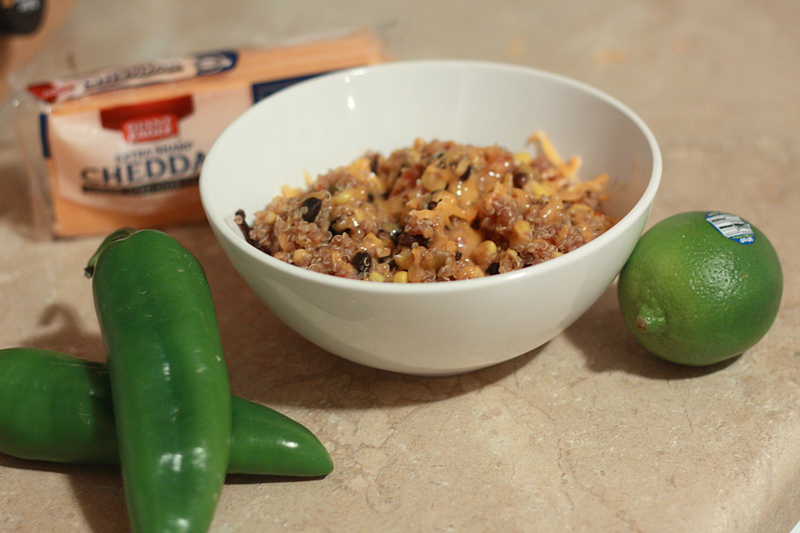
Mexican Quinoa
Adapted from: Annie's Eats

1 tablespoon olive oil
2 cloves garlic, minced
1/3 cup hot cherry peppers, diced (I used the jarred variety)
1 cup uncooked quinoa, rinsed and drained
1 1/4 cups vegetable broth (or reduced-sodium, fat-free chicken broth)
1 (15.5 ounce) can black beans, rinsed and drained
1 (15.5 ounce) can diced tomatoes, with juices
1 cup frozen corn
1/2 teaspoon kosher salt
2 tablespoon lime juice
1/2 cup shredded sharp cheddar

Optional add-ins: Salsa, sour cream, cilantro

In a medium saucepan over medium-high heat, warm the olive oil. Saute the garlic and peppers until fragrant, about 1 minute. Stir in the next 6 ingredients (through kosher salt). Bring mixture to a boil, then cover and reduce heat to medium-low. Simmer for 25 minutes, or until all the liquid has been absorbed. Remove from heat and stir in the lime juice. Top each serving with 2 tablespoons of shredded cheese and any additional add-ins.

Serves: 6


I've actually made a very similar dish in the past, but the addition of peppers and lime juice really carries this over to the Mexican flavor side. I was a little worried that this might not be quite heavy enough for an entree for Adam, but surprisingly, it was. Well, after he doubled the amount of cheese, but I digress. Both of us really enjoyed the flavor of this dish, and I'm sure I'll be pulling this one out again to make myself feel just a smidge better between the gluttony of the holidays.


Nutrition Facts
Serving Size 273g
Amount per serving
Calories 451Calories from fat 79
% Daily Value
Total Fat 8.7g13%
Saturated Fat 2.9g15%
Cholesterol 10mg3%
Sodium 441mg18%
Total Carbs 71.9g24%
Fiber 14.6g58%
Sugars 4.6g
Protein 24.1g
Vitamin A 16%Vitamin C 23%
Calcium 18%Iron 30%

Wednesday, November 7, 2012

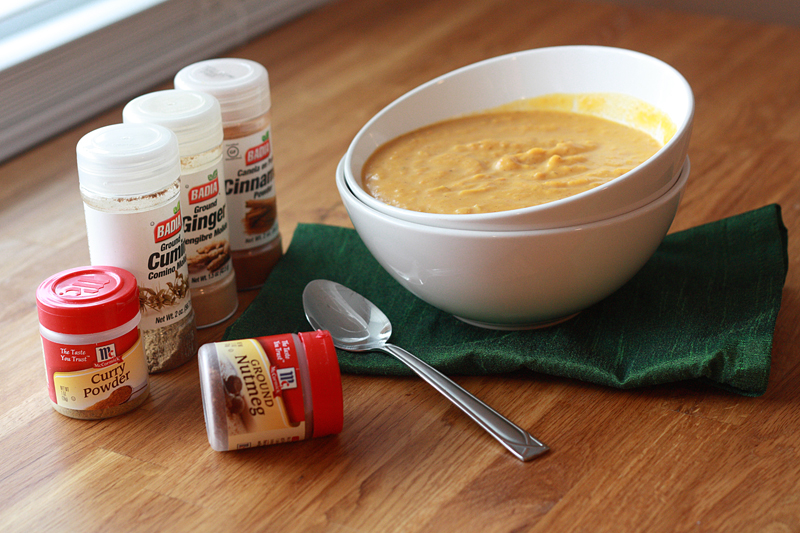
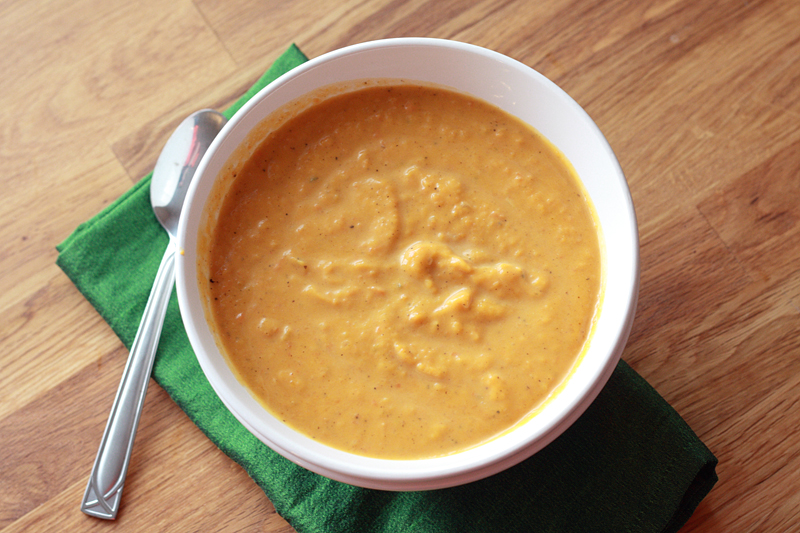
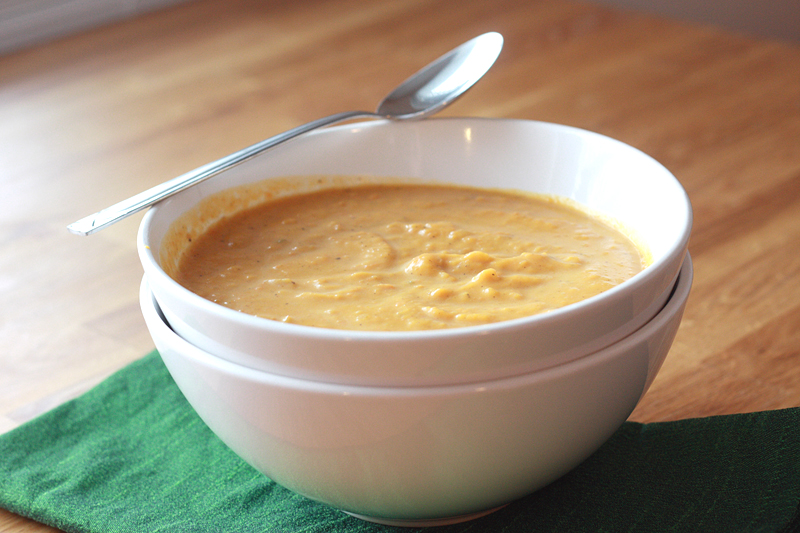
Butternut Squash Soup


Speaking of comfort food, I have been massively crushing on any and all kinds of soup as of late. It never fails, every time we go out to Panera, I get a large bowl of Chicken Noodle soup and a baguette. Even when it was 80+ degrees out in the middle of August.

Now that the weather is going full on chilly, it's time for everybody else to enjoy what I have been for months. For the past year or two, I keep telling myself I am going to try my hand at a butternut squash soup, and it never happens. Then squash is out of season and I'm forced to wait until the leaves starting turning colors again. Not this year.

I thought I had a recipe all picked out and ready to go when I got started, but one thought led to another, and all of a sudden it was totally and completely different. I just added a bit of this here, that there, and doesn't this sound like it would go in great with all the flavors? I have to admit, I'm not sure I've ever been happier with an original dish outcome.

Butternut Squash Soup
Original Recipe

1 medium to large butternut squash (about 4-5 pounds whole)
1 1/2 tablespoons brown sugar
3 tablespoons butter, divided
1 stalk celery, diced
1 cup onion, diced
3 cloves garlic, minced
1 cup carrots, diced
4 cups fat-free, reduced-sodium chicken broth
1/2 teaspoon kosher salt
1/2 teaspoon ground black pepper
1/4 heaping teaspoon ground ginger
1/4 teaspoon ground cinnamon
1/2 teaspoon ground curry
1/8 teaspoon ground nutmeg
1/2 teaspoon ground cumin
1/4 cup heavy cream

Preheat oven to 400 degrees F. Line a rimmed baking sheet with aluminum foil. Cut the squash in half lengthwise and scoop out the seeds. Top each half with 1 tablespoon butter (cut into pieces), and about 3-4 teaspoons of brown sugar. Place squash in oven and roast for 1 hour.

Once the squash is done roasting, melt the remaining 1 tablespoon butter in a large pot over medium heat. Add the celery, onion, garlic, and carrots. Saute for about 5 minutes, or until the vegetables begin to soften. Add the chicken broth to the pot. While the broth is coming to a simmer, scoop out the squash and add it to the pot, discarding the skin. Cover pot, reduce heat to medium-low and let simmer for 40 minutes.

Transfer mixture in batches to a blender to puree until smooth, or use a hand blender. Add seasonings and spices to taste (add more ginger or cayenne pepper if you want the soup to have a little kick). Stir in the heavy cream and serve.


Serves: 6


This soup is thick and hearty, and I added close to (if not more than) a 1/2 teaspoon of ginger, so it definitely had a bit of a bite to it. The flavors all come together -- the sweet mixed with the savory, in such a perfect fall-ish way. Almost for a minute making me wish winter baking wasn't just around the corner. (But who am I kidding, cookies trump soup any day.)


Nutrition Facts
Serving Size 444g
Amount per serving
Calories 202Calories from fat 72
% Daily Value
Total Fat 8.0g12%
Saturated Fat 4.9g24%
Cholesterol 22mg7%
Sodium 563mg23%
Total Carbs 33.5g11%
Fiber 5.7g23%
Sugars 8.9g
Protein 3.7g
Vitamin A 549%Vitamin C 85%
Calcium 13%Iron 11%

Thursday, May 17, 2012

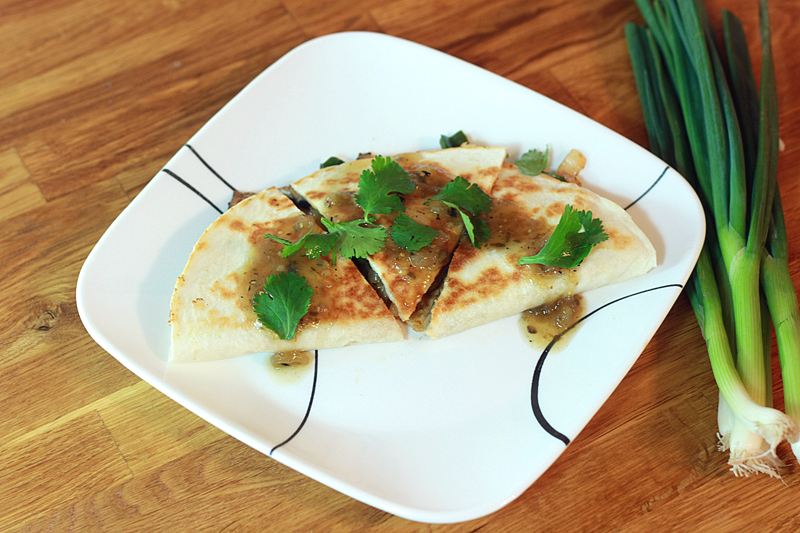
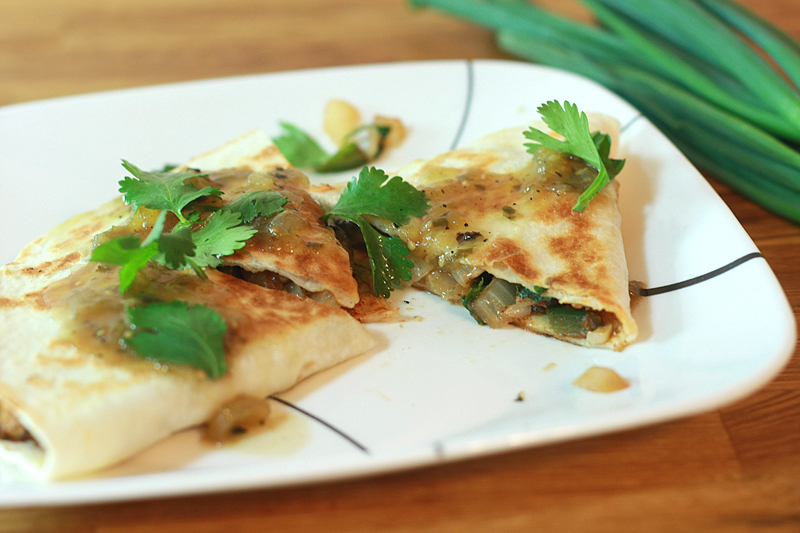
Mushroom Poblano Quesadillas


I might have missed posting something for Cindo de Mayo.

I may have missed celebrating Mother's Day on the ol' blog.

But. But. I have been busy.

Like stalking this site like no other.

Taking a few of these.

Um, and no. That's not me. I'm on the other side of the camera.

And still working on that study of mine for school.

Then I realized I needed to eat. Non-fast food. Oh please no more fast food for a while. My lazy butt needs to get in gear.

As always, quick and easy recipe to the rescue. Hallelujah.

Mushroom Poblano Quesadillas
Adapted from: Liv Life

1 tablespoon canola oil
1 cup onion, diced
8 ounces mushrooms, sliced
1 poblano pepper, diced
3 cloves garlic, minced
1 teaspoon ground cumin
1 teaspoon dried oregano
1/2 teaspoon kosher salt
1/4 teaspoon ground black pepper
2 tablespoons fresh cilantro
4 (10-inch) flour tortillas
1 cup shredded pepper jack cheese
2 green onions
1/4 cup salsa verde

In a large skillet over medium heat, warm the oil. Add the onion, mushrooms, and poblanos. Cook for about 5 minutes, or until mushrooms have released their juices and they have evaporated. Stir in the garlic, cumin, oregano, salt, pepper, and cilantro. Cook for 1-2 minutes, or until fragrant.

Heat another large skillet over medium-high heat. Spray with non-stick cooking spray (or wipe lightly with a oil coated paper towel). Place one tortilla in the pan. Sprinkle 1/4 cup cheese over one half of the tortilla. Top with 1/4 of the vegetable and spice mixture and 1/4 of the green onions. Fold tortilla in half, pushing down slightly. Continue cooking until underside of the tortilla is golden brown and cheese is melty. Flip over and cook a couple minutes more until golden brown on both sides.

Place another large skillet over medium high heat and oil pan lightly. Lay a tortilla flat on the pan and add a handful of cheese over 1/2 of the tortilla. Working quickly, add desired amount of the veggie mixture. Sprinkle with more cheese and top with a sprinkle of chopped scallions. Fold the tortilla in half and cook until the tortilla is browned and the cheeses are beginning to melt. Flip the tortilla and cook an additional few minutes until that side is browned and the cheese is fully melted.

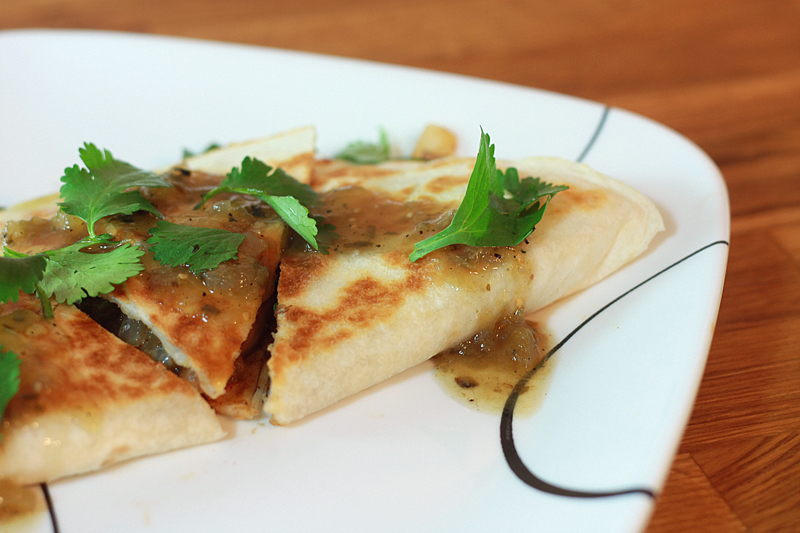
Cut quesadillas in thirds and top with salsa verde.


Serves: 4


Of course, coming from Liv Life, I knew these were going to be delicious. And they totally did.not.disappoint. As is, they are great. Awesome.

Yet somewhere in the back of my mind I feel like a little bit of chicken or some black beans (or both?) would really add some nice heft to these. I mean, if you need some for anyone in your house that still eats like a teenage boy.


Nutrition Facts
Serving Size 226g
Amount per serving
Calories 394Calories from fat 163
% Daily Value
Total Fat 18.1g28%
Saturated Fat 8.4g42%
Cholesterol 30mg10%
Sodium 1187mg49%
Total Carbs 44.1g15%
Fiber 2.8g11%
Sugars 5.2g
Protein 16.0g
Vitamin A 13%Vitamin C 59%
Calcium 34%Iron 22%

Wednesday, April 25, 2012

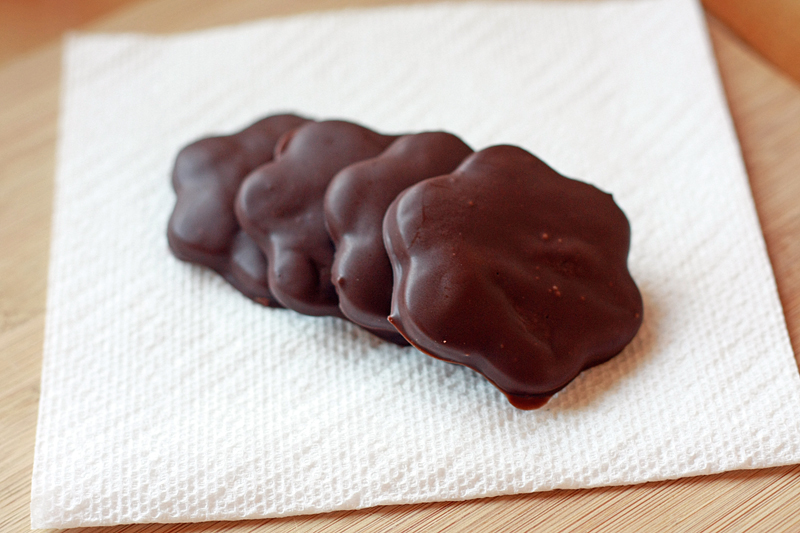
Thin Mint Cookies


Oh. My. Has it been a while. Let's just say my life has exploded over the past few weeks. Between starting the subject recruitment and data collection for my thesis and then finding out that our landlord sold the house we're in (meaning, hey you have a month or so to find a new place!) things have been busy busy.

And busy busy means lots of macaroni and cheese and fast food for dinner. Blech. But we're not here to talk about dinner today. Today, we focus on cookies. Because cookies make everything better. (Maybe not perfect, but definitely better.)

Girl Scout cookie season is over. And I missed it. Much like I have the past few years. I totally need a reminder for these things. Maybe it's a good thing I don't know about when these sales occur though. I can go through an entire sleeve of Thin Mints in one sitting without even batting an eye. True story.

While debating what to serve for dessert for a baby shower I was hosting with a friend, we decided to go Girl Scout themed since the mom-to-be loves her some Samoas. But we couldn't just be happy with Samoas-flavored fudge -- we wanted variety, and because we have a problem with making too much food. But really, who doesn't love Thin Mints? If you don't, well, that's just information you need to keep to yourself.

Thin Mint Cookies
Adapted from: my Katrina's Kitchen

1 cup butter, at room temperature
1 cup powdered sugar
1 teaspoon vanilla extract
1/2 cup unsweetened cocoa powder
1/2 cup dutch-processed cocoa powder
3/4 teaspoon salt
1 1/2 cups all-purpose flour

14 ounces mint-flavored dark chocolate candy melts

The the large bowl of a mixer, cream the butter until light and fluffy. Slowly add in the powdered sugar, mixing on low until just combined. Increase the mixer speed and continue to cream until well blended. Stir in the vanilla, salt, and both cocoa powders. Add the flour, 1/2 cup at a time until fully incorporated. Mixture may be on the crumbly side.

Turn dough out onto a clean work surface, kneading together until smooth. Separate dough into 2 portions, flattening each into a disk. Wrap in plastic wrap and chill for 10 minutes.

Preheat oven to 350 degrees F. Line two baking pans with parchment paper and set aside.

Remove one of the chilled dough disks from the fridge. Lightly dust counter with flour and roll dough out to about 1/8-inch thickness. Cut out cookies and transfer to a prepared baking sheet. Repeat with remaining dough until baking pan is full. Bake for 10 minutes. Allow cookies to cool on pan for 5-10 minutes, then transfer to a wire rack to cool completely.

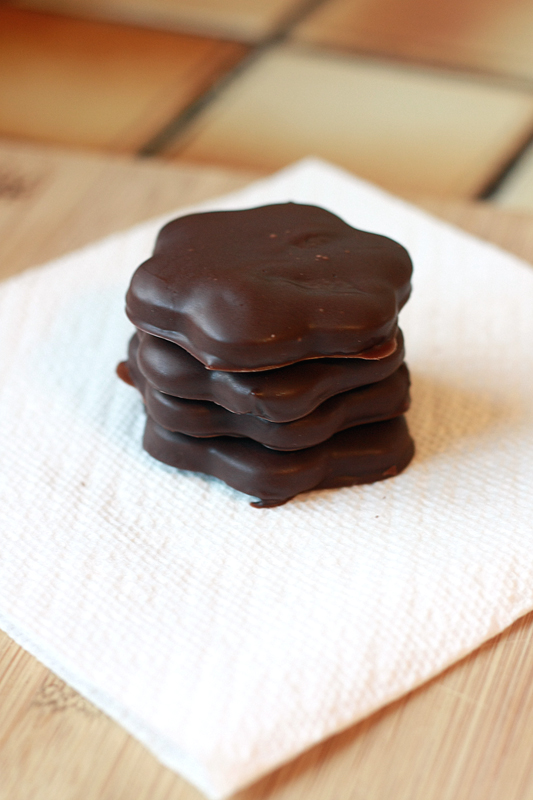
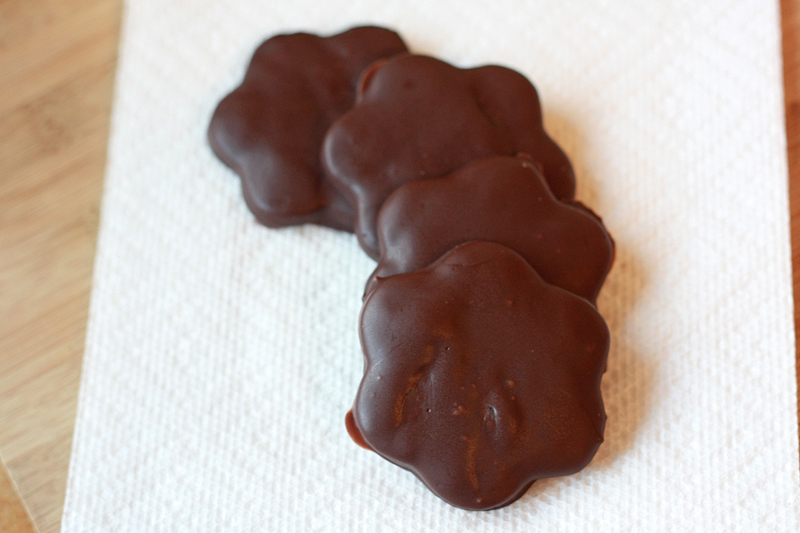
While cookies are baking, prepare chocolate coating. Heat the chocolate melts in a small bowl according to package instructions. Stir every 20-30 seconds until chocolate becomes smooth. Dip each cooled cookie in the chocolate face down, then flip right-side up and remove from bowl, shaking any excess chocolate off (a fork works great here). Place on a wax paper covered baking sheet to set. Once the sheet is full place in fridge for about a 1/2 hour to finish setting the chocolate.


Makes: about 3 dozen cookies (serving size: 1 cookie)


Even though these took a little while to make, and even though I have a severe dislike for dipping things, I might have to concede that it was totally worth it. The cookies had just the right amount of firmness and the chocolate coating provided just the right amount of mint flavor. I dare say these might actually be better than the original. Except for the fact that the originals only involve me opening the package to eat them... but I digress.


Nutrition Facts
Serving Size 29g
Amount per serving
Calories 135Calories from fat 80
% Daily Value
Total Fat 8.9g14%
Saturated Fat 6.3g31%
Cholesterol 14mg5%
Sodium 90mg4%
Total Carbs 15.1g5%
Fiber 1.4g6%
Sugars 8.8g
Protein 1.6g
Vitamin A 3%Vitamin C 0%
Calcium 1%Iron 6%

Thursday, March 29, 2012

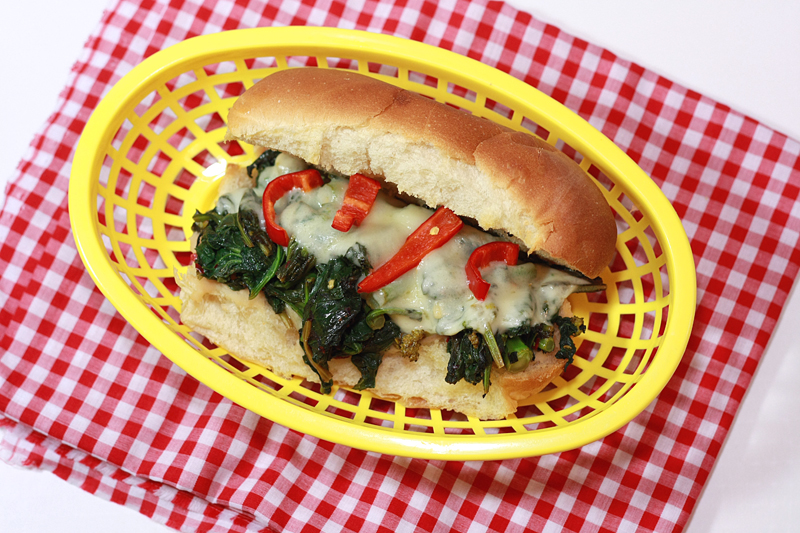
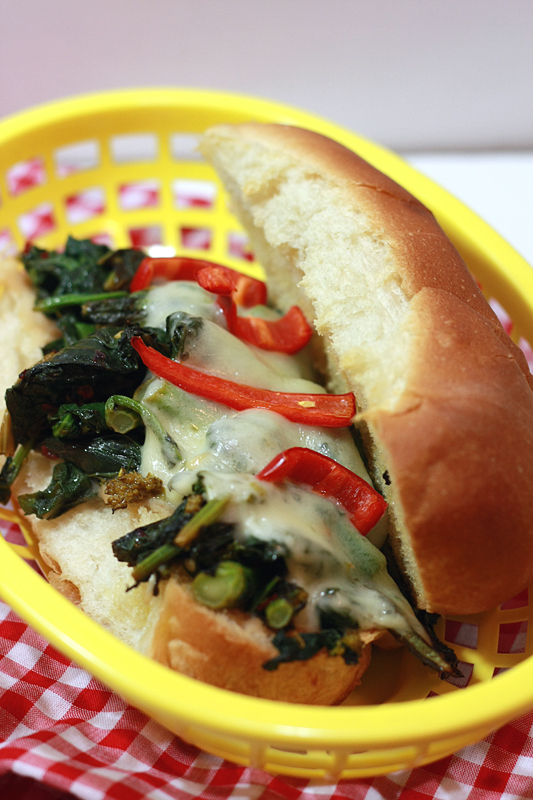
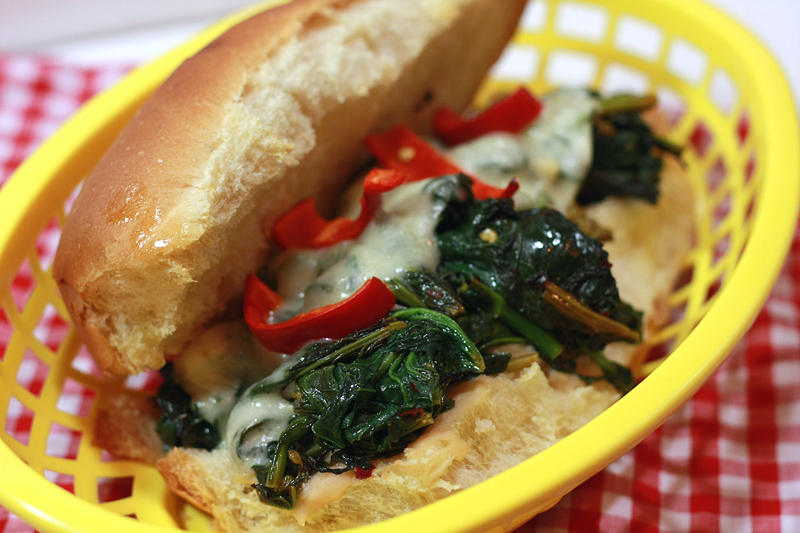
Broccoli Rabe & Provolone Grinders


Now usually, I'm not a huge sandwich for dinner kind of person. I mean, sure, I've stopped my fair share of times at Quiznos or Subway for dinner, but most of the time I tend to think sandwich = lunch.

Every once in a while though... I change my mind. Or maybe I get in a sandwich mood and am just far too lazy to put that much work into my lunch. I'm only creative when it comes to dinner. True story.

But for some reason these grinders caught my eye. Maybe it was because they were chalk full of veggies and no meat? Definitely unprecedented in this house. As far and sandwiches go anyways.

Broccoli Rabe and Provolone Grinders
Adapted from: Bon Appetit, February 2012

6 tablespoons olive oil, divided
3 cloves garlic, thinly sliced
1/2 teaspoon crushed red pepper
1 (15-ounce) can cannellini beans, undrained
1/2 teaspoon kosher salt
1/4 teaspoon ground black pepper

4-5 pounds broccoli rabe (rapini), ends trimmed
1/2 teaspoon kosher salt
1/4 cup olive oil
20 cloves garlic (1 head), thinly sliced
1 1/2 teaspoons crushed red pepper
3 tablespoons lemon juice
1/4 teaspoon ground black pepper
8 6-8" French Rolls, cut in half lengthwise
8 slices Provolone cheese
1 red jalapeno pepper, thinly sliced

In a small saucepan over medium-low heat, warm 3 tablespoons oil. Add garlic and 1/2 teaspoon crushed red pepper flakes to pan; cook 4 minutes, or until garlic is golden and fragrant. Stir in beans with liquid. Bring mixture to a simmer and cook 10 minutes, or until liquid thickens. Transfer to a food processor, adding 3 tablespoons oil. Process until smooth. Season with 1/2 teaspoon salt and 1/4 teaspoon black pepper.

Meanwhile, bring a large pot of water to a boil over high heat. Cook broccoli rabe, 1 bunch at a time for 2 minutes, transferring to a baking sheet to cool, allowing water to return to a boil between batches. Once cool, squeeze dry and coarsely chop.

Drain pot and wipe out with a dry paper towel. Place back on stove and lower heat to medium. Add 1/4 cup oil, garlic, red pepper flakes; cook 2-3 minutes, or until garlic is golden and fragrant. Add broccoli rabe, cooking 4-5 minutes, or until stem pieces are just turning tender. Stir in lemon juice. Season with 1/2 teaspoon salt and 1/4 teaspoon black pepper. Transfer mixture to a rimmed baking sheet and let cool.

Preheat oven to 400 degrees F. Open rolls and arrange face up on two baking sheets. Drizzle with olive oil. Spread bean puree on the bottom half of each roll, top with a slice of cheese, then chile slices. Toast rolls, 7-10 minutes, rotating pans after 5 minutes. Divide broccoli rabe evenly among rolls, slice, & serve.


Serves: 8


Man, for a sandwich, it's kind of a bit of work. You can definitely break it down into making the puree and blanching the broccoli rabe beforehand and storing it in the fridge... but I mean, really? For a sandwich? That's kind of overkill.

While it was tasty, I'm not sure I'd revisit this another time. I like my sandwiches quick and easy.


Nutrition Facts
Serving Size 470g
Amount per serving
Calories 835Calories from fat 260
% Daily Value
Total Fat 28.9g44%
Saturated Fat 7.2g36%
Cholesterol 29mg10%
Sodium 1368mg57%
Total Carbs 112.3g37%
Fiber 15.7g63%
Sugars 5.7g
Protein 39.7g
Vitamin A 196%Vitamin C 228%
Calcium 57%Iron 48%

Tuesday, March 20, 2012

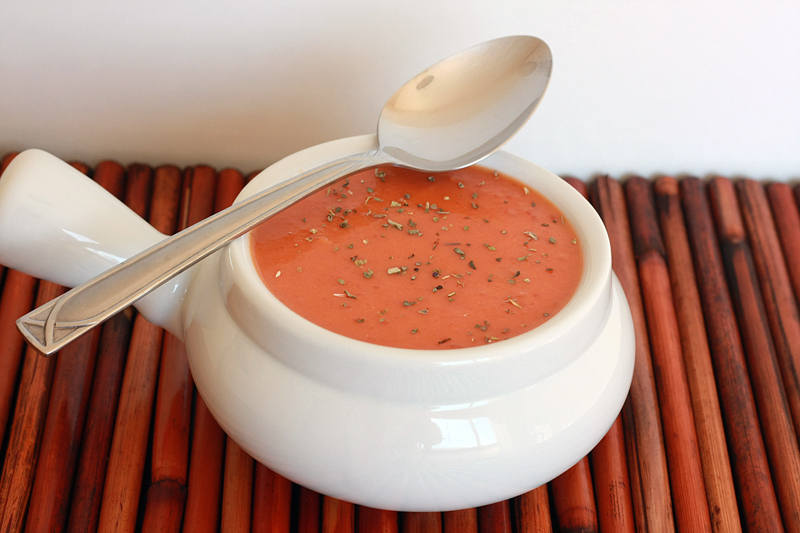
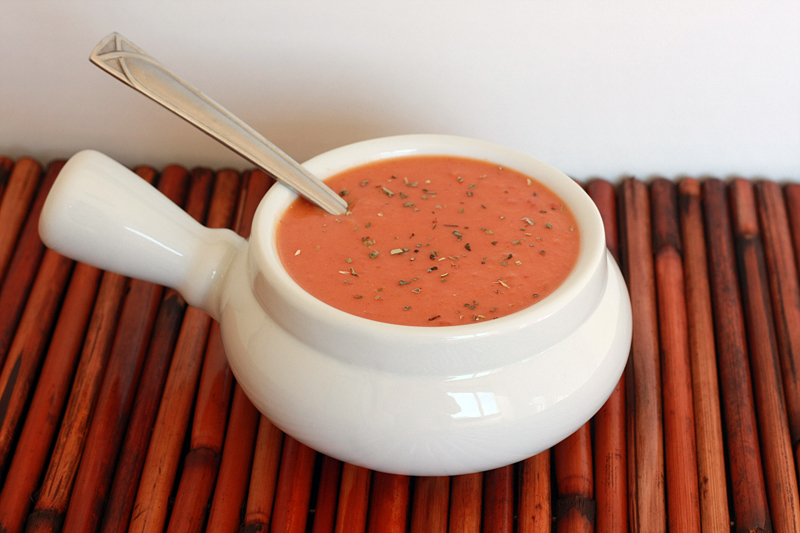
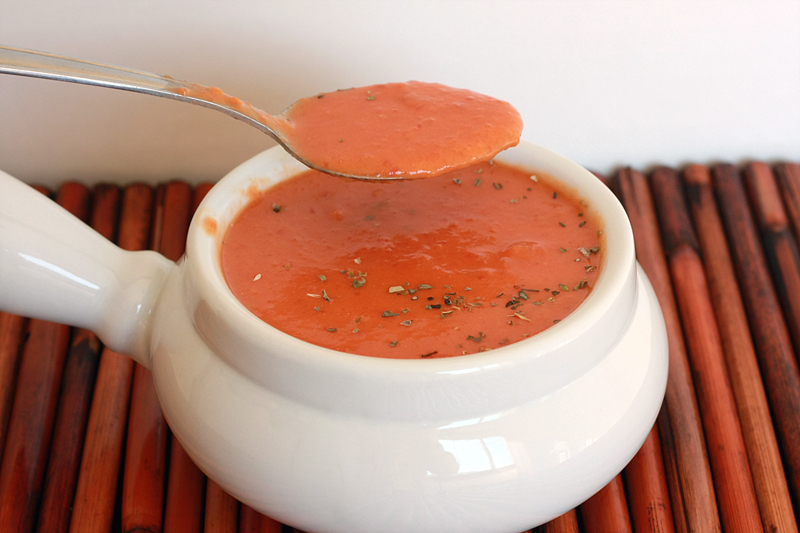
Slow Cooker Tomato Soup


If there was one meal I could feed to Adam every day that he would never complain about, it would be grilled cheese and tomato soup. So much so that I've started stockpiling those red and white cans of tomato soup in the pantry for when one of "those days" rolls around. Right next to the blue box blues.

Yes, even my pantry has it's own dirty little secrets.

Like most things, the homemade version is way better than store-bought. However, also like most homemade things -- this takes a bit longer than the open-can-dump-in-bowl-place-in-microwave store-bought variety. Even in the slow cooker form.

BUT, if you're actually craving tomato soup and not just pulling it out of thin air as a last minute dinner option, then making it yourself is really the way to go. Trust.

Campbell's doesn't give you the option to leave things slightly chunky or ridiculously smooth. It doesn't have the extra nuance from the bay leaves, cayenne pepper, and sherry. And it most certainly doesn't have that lovely extra bit of creaminess, even if you use milk instead of water. It.just.doesn't.

But this does. And it's fantastic. Which is why you should really hope for a rainy day soon. I mean, if you really need that excuse and all.

Slow Cooker Tomato Soup
Adapted from: Pass the Sushi

2 tablespoons butter
3 (14.5 ounce) cans diced tomatoes, drained and juices reserved
2 cups onion, diced
1 tablespoon brown sugar
1 tablespoon tomato paste
1/2 teaspoon kosher salt
1/4 teaspoon ground black pepper
2 tablespoons all-purpose flour
3 cups fat-free reduced-sodium chicken broth
2 dried bay leaves
1/2 cup light cream
2 teaspoons cooking sherry
1/8 teaspoon ground cayenne pepper

In a large skillet over medium-high heat, melt butter. Stir in tomatoes (without juice), onion, sugar, tomato paste, salt and pepper. Cook until tomatoes become lightly browned and dry, 8-10 minutes. Whisk in flour and cook for an additional minute. Slowly pour in 1 cup chicken broth, whisking constantly. Pour tomato mixture into a slow cooker (with no plastic liner).

Add the remaining chicken broth, reserved tomato juice, and bay leaves, stirring to combine. Cover and cook on low, 4-6 hours.

Remove bay leaves and lower heat to "warm". Puree soup in the slow cooker with an immersion blender until smooth (or transfer in batches to a regular blender, then return to slow cooker). Add the cream, sherry, and cayenne and still until fully combined. Add additional chicken broth if soup is too thick.


Serves: 6


The only thing I forgot to do when making this was to throw in the rind from some Parmesan cheese to add another layer of flavor in this soup. Dang it. Next time. And according to the hubby, there will most definitely be a next time. If you happen to make this (which why isn't it on your to-make list already?), try it out for me and let me know how that goes. Just make sure to pull out any remaining rind before pureeing away.

Oh, and happy day -- the homemade version is actually lower in calories and sodium than the Healthy Request canned version (1 cup vs. 1 cup). A little more saturated fat, but I think taste totally trumps that in this case.


Nutrition Facts
Serving Size 388g
Amount per serving
Calories 144Calories from fat 67
% Daily Value
Total Fat 7.5g12%
Saturated Fat 4.5g22%
Cholesterol 21mg7%
Sodium 275mg11%
Total Carbs 17.0g6%
Fiber 3.5g14%
Sugars 8.9g
Protein 3.9g
Vitamin A 41%Vitamin C 50%
Calcium 5%Iron 8%

LinkWithin

Related Posts with Thumbnails
 
Pin It button on image hover