Showing posts with label Asian. Show all posts

Wednesday, December 5, 2012

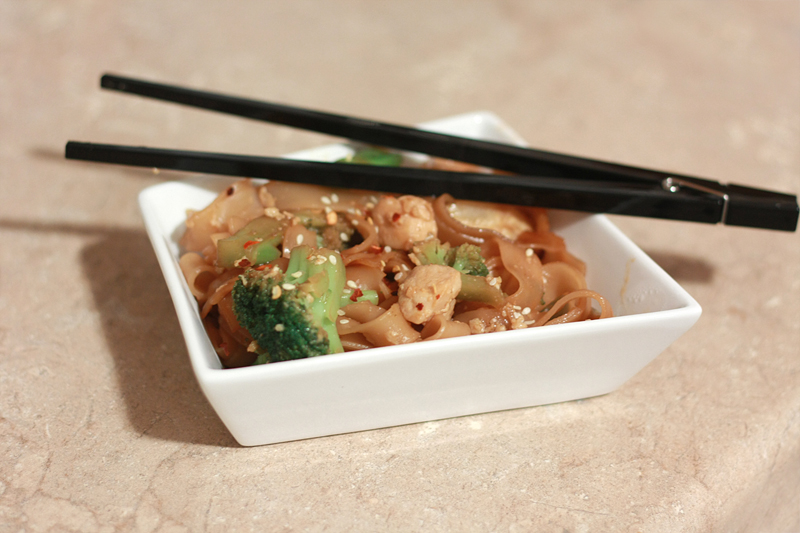
Pad Se Eew


If it's one thing I almost always overlook when trying to plan my weekly menus, it's Asian food. I'm not exactly sure why, as they come together fairly easily and are delicious. Oh, maybe it's due to half the recipes needing "this" added at just the right moment, or "that" needing to be cooked only mere seconds before it's too far gone. It kind of stresses me out.

But then I end up eating the dishes and remember that yes, it is so totally worth it to make it at home. Especially when the only other close option is greasy Americanized Chinese food that is way overpriced. Or delivery pizza that arrives barely lukewarm. Don't even get me started on that.

I'm not sure how I even came across this recipe, as I've never heard of Pad Se Eew before. Just one of those lucky times when a great recipe just randomly pops up while perusing a site, I guess. So, I'm going to go out on a limb here and say this probably isn't overly authentic, but honestly, I don't really care. It was definitely tasty and hit the spot.
Pad Se Eew
Adapted from: Allrecipes.com

6 tablespoons soy sauce
2 tablespoons granulated sugar
2 teaspoons Sriracha
1 tablespoon olive oil
4 cloves garlic, minced
6 ounces chicken tenders, cut into bite-sized pieces
16 ounces frozen cut broccoli
1 (15 ounce) can baby corn
1 pound dried flat rice noodles
1 egg, beaten
1/4 teaspoon sesame seeds
1/2 teaspoon red pepper flakes

In a small saucepan over medium-low heat, combine the soy sauce, sugar, and Sriracha. Simmer until the sugar dissolves into the sauce, about 5 minutes. Remove from heat and set aside.

Bring a large pot of water to a boil over high heat. Boil noodles for 3-4 minutes or as according to package instructions. Drain.

In a large skillet or wok over medium heat, warm the oil. Add the garlic and chicken to the pan, cooking until chicken is no longer pink, about 7-8 minutes. Stir in the broccoli and cook for about 3-4 minutes. Add the baby corn, and continue cooking until broccoli is heated through. Add the noodles to the skillet, and pour the sauce over top. Continue to cook and stir until the sauce begins to thicken.

Make a small space on the side of your pan, and add the egg. Scramble the egg, making sure it is cooked thoroughly, then stir it in with the rest of the mixture.

Serve topped with sesame seeds and red pepper flakes.


Serves: 4
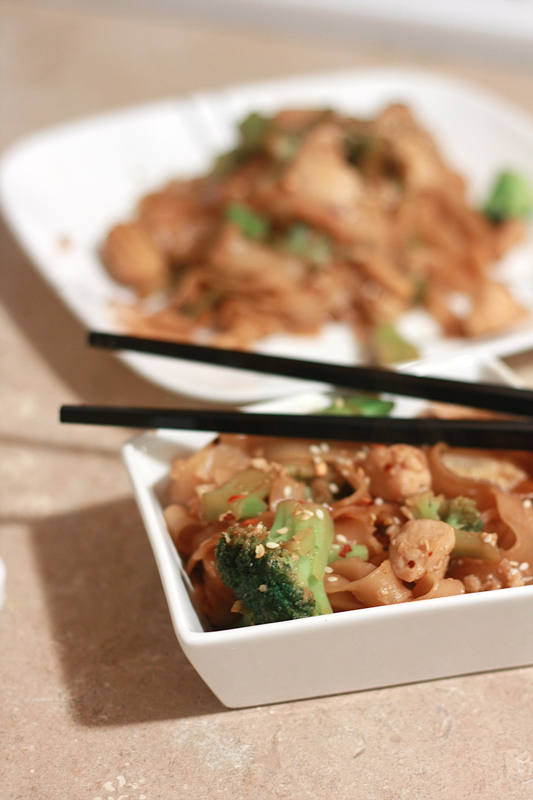

One of the other great things about this recipe is, outside the rice noodles, you most likely already have all the other ingredients in your pantry. Okay, except the chicken, that would be kind of gross. I love it when I am able to make an Asian dish without having to run all over the place looking for hard to find ingredients.

Both Adam and I really enjoyed this dish, although I made my noodles right when I first started (instead while I was cooking the chicken/veggies) so they ended up being kind of clumpy and hard to separate by the time I wanted to use them. Lesson learned.


Nutrition Facts
Serving Size 427g
Amount per serving
Calories 714Calories from fat 88
% Daily Value
Total Fat 9.8g15%
Saturated Fat 2.1g10%
Cholesterol 79mg26%
Sodium 1670mg70%
Total Carbs 129.5g43%
Fiber 7.5g30%
Sugars 12.7g
Protein 24.0g
Vitamin A 7%Vitamin C 76%
Calcium 7%Iron 15%

Wednesday, February 15, 2012

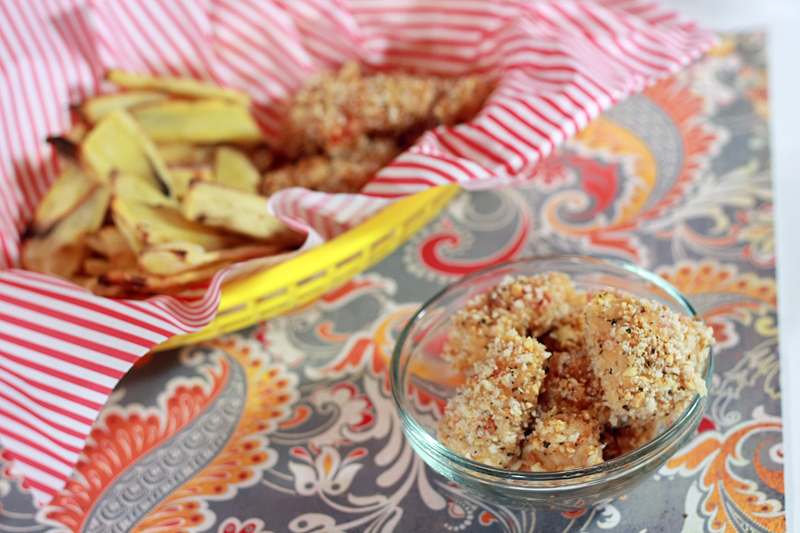
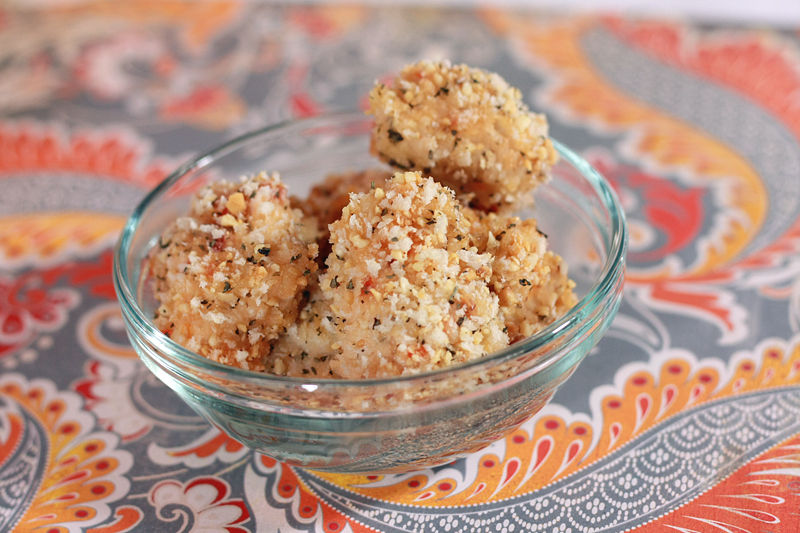
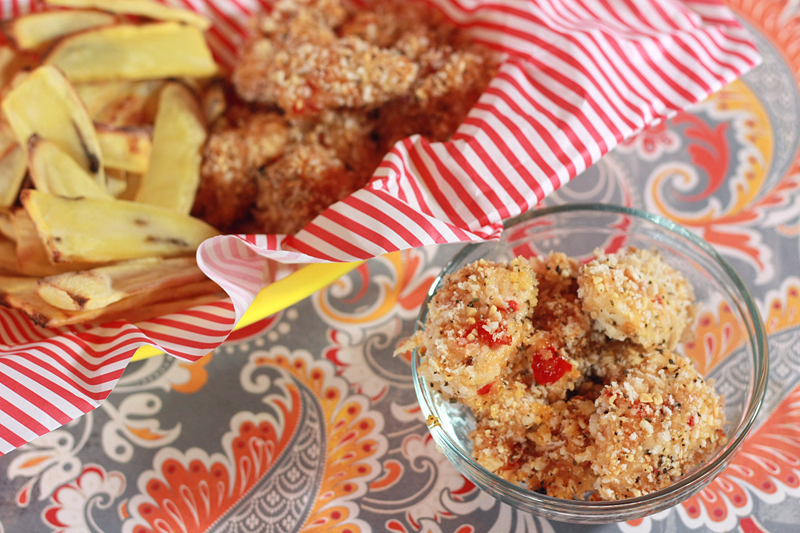
Spicy Thai Chicken Nuggets


Chicken nuggets to American children is like peanut butter to jelly. Or chocolate. Even if the parents are completely pro non-hormone, non-fried, do-not-dare-feed-that-McDonald's-to-my-child, I'm sure the child has had, in some form or fashion, a chicken nugget. And they.love.them.

Admission: I still get chicken nuggets whenever we go to Chick-Fil-A. I pink puffy heart them.

There's a reason children people love them so much -- they're portable, easy to eat, and the good ones are seasoned well, juicy, and flavorful. But the buck doesn't have to stop there when it come to chicken nuggets. Clearly people have figured this out when it comes to chicken wings, and let's face it, boneless chicken wings is just a grown-up name for large chicken nuggets.

So there's absolutely no reason we can't bring home a little bit of that flavor to a healthier, non-fried version. Chicken nuggets for adults don't have to be plain Jane breadcrumb-crusted pieces of chicken any more.

Spicy Thai Chicken Nuggets
Inspired by: The Realistic Nutritionist

3 (4 ounce) boneless skinless chicken breasts
2/3 cup mild sweet Asian chili sauce (such as Maggi)
1 tablespoon garlic chili paste (sambal oelek)
1/2 cup panko
1/4 cup lightly salted peanuts
1/2 teaspoon dried basil

Slice chicken breasts into bite-sized pieces. (I was able to get 7 pieces from a 4 ounce breast.) In a small bowl, whisk together the chili sauce and the garlic chili paste. Place the chicken breast pieces in a large ziploc bag. Pour the sauce over the chicken, seal the bag, and marinate in the refrigerator for at least 4 hours up to overnight.

Preheat oven to 500 degrees F. Coat a 9 x 13-inch baking dish with non-stick spray; set aside. Remove chicken from the fridge; set aside.

Place the panko in a wide, shallow bowl or plate. Place the peanuts into the bowl of a food processor, and grind until very fine. Mix ground peanuts and dried basil with the panko, tossing to combine. Roll each piece of chicken in the breadcrumb mixture, completely coating, then place in the prepared baking dish. Repeat with remaining chicken, making sure the pieces do not touch in the baking dish. Bake for 10-12 minutes, or until chicken is done.


Serves: 3 (7 nuggets per serving)


Originally I added 1 teaspoon of basil to the recipe, but I felt it's flavor was a little on the strong side, so I have adjusted the recipe above to reflect a lower amount. But feel free to add more if you love it! I also think next go around I'll add more sambal oelek as the spice didn't come through in quite the way I was hoping. Or maybe I'll toss some red pepper flakes in the panko.

And trust me that they'll be a next go around. Adam wasn't even completely done going through 14 nuggets before telling me I HAD to make these again. Soon. Sounds good to me, especially since they take all of 10 minutes total of prep time.


Nutrition Facts
Serving Size 191g
Amount per serving
Calories 467Calories from fat 126
% Daily Value
Total Fat 14.0g22%
Saturated Fat 3.2g16%
Cholesterol 101mg34%
Sodium 1019mg42%
Total Carbs 46.3g15%
Fiber 1.5g6%
Sugars 17.3g
Protein 37.6g
Vitamin A 2%Vitamin C 3%
Calcium 6%Iron 15%

Tuesday, February 7, 2012

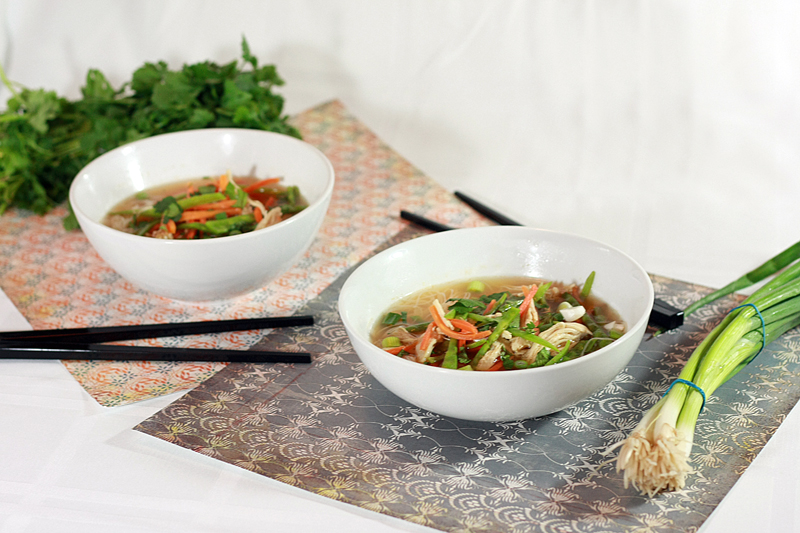
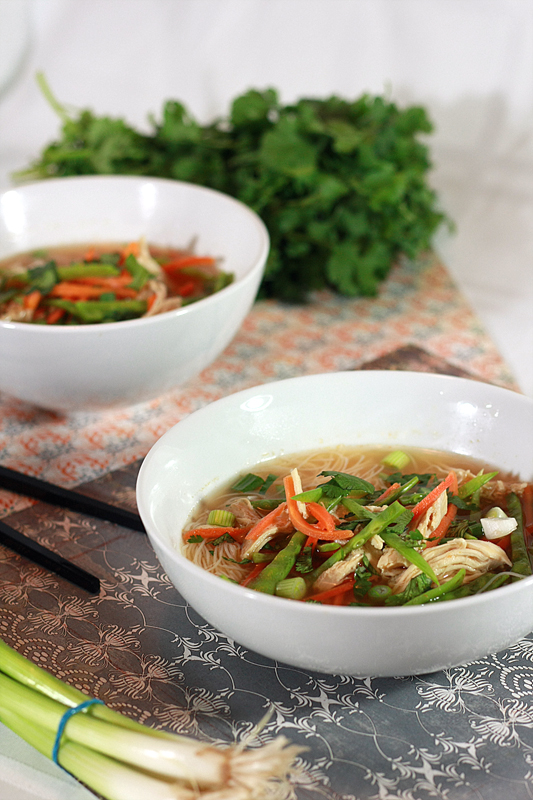
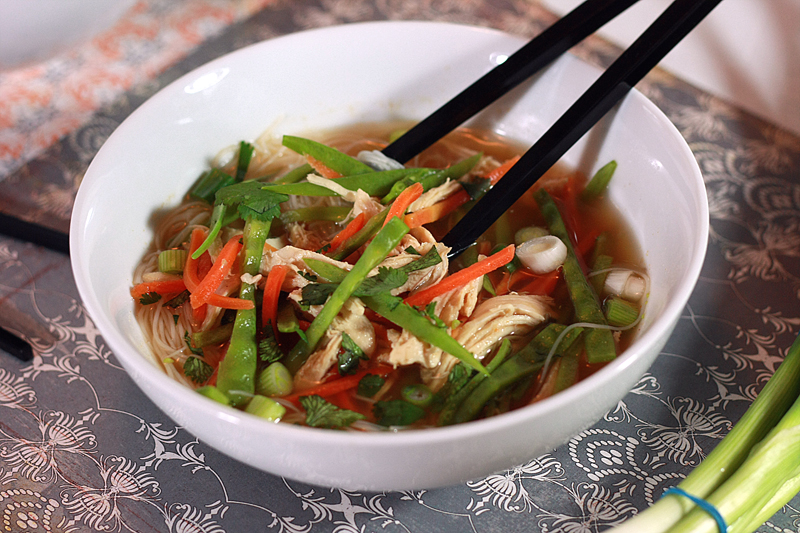
Spicy Asian Chicken Noodle Soup


Chicken Noodle Soup is the ultimate "feel better" soup. (Unless you're my husband and want vegetable soup in that scenario, but he's just weird.) I totally grew up on the Campbell's version of the soup, but you really can't beat it when it's homemade. (Um, of course, you can add three times as many noodles!)

Usually though, when I'm not sick, I tend to steer away from the comforts of the Chicken Noodle Soup. Not that I don't enjoy it, but, it has it's time and place -- when I'm sick. However, this version of Chicken Noodle Soup is one I definitely embrace sick OR healthy.

Sick version: up the amount of Sriracha and red curry paste and you will be guaranteed to clear out those sinuses. Even if you can't taste it.

Healthy version: keep "as is" and enjoy a nice spicy Asian flavored soup.

See, that's just a win-win for me.

Spicy Asian Chicken Noodle Soup
Adapted from: RavieNomNoms

3 cups fat-free, reduced-sodium chicken broth
1 1/2 cups water
8 ounces cooked shredded chicken
1/2 cup grated carrots
1/2 cup snow peas, thinly sliced
1 1/2 teaspoons Sriracha
2 teaspoons soy sauce
1 1/2 teaspoons Thai red curry paste
1 2-inch piece fresh ginger
3 ounces uncooked rice flour noodles
1 tablespoon lime juice
1/4 cup chopped fresh cilantro
1/4 cup green onions, sliced into 1/4-inch pieces

In a large saucepan over medium heat, add the first 9 ingredients (through ginger). Bring to a simmer for at least 5 minutes, then keep warm.

Meanwhile, bring a large pot of water to a boil over high heat. Add the rice noodles and cook according to package instructions; drain. Transfer 1/4 cup noodles into each soup bowl.

Remove ginger from broth mixture. Add lime juice and stir. Ladle about 1 1/2 cups soup into each bowl. Sprinkle with a tablespoon each of cilantro and green onions.


Serves: 4


Not only is this super tasty, but it's also a breeze to throw together. Simply heat the ingredients in a large pot and away you go. Kind of sounds like the canned Chicken Noodle Soup. But tastier.


Nutrition Facts
Serving Size 400g
Amount per serving
Calories 195Calories from fat 22
% Daily Value
Total Fat 2.4g4%
Saturated Fat 0.7g4%
Cholesterol 44mg15%
Sodium 648mg27%
Total Carbs 22.6g8%
Fiber 2.1g8%
Sugars 1.8g
Protein 19.5g
Vitamin A 53%Vitamin C 22%
Calcium 4%Iron 10%

Wednesday, January 25, 2012

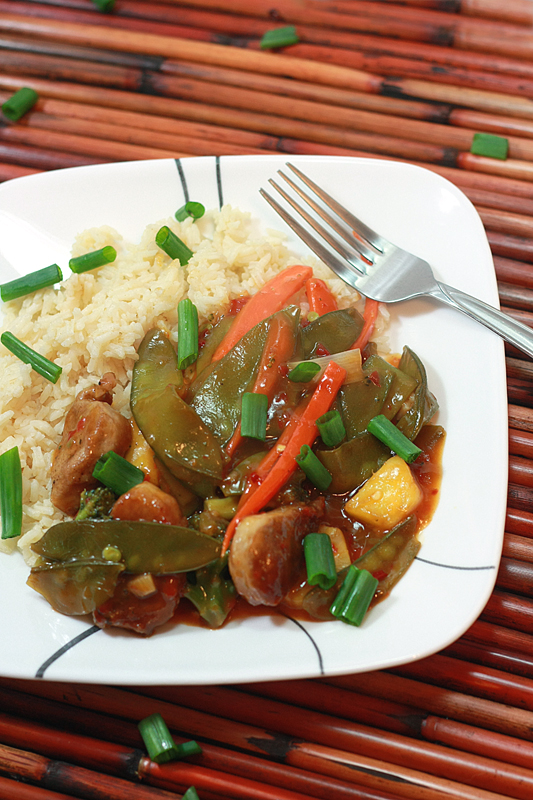
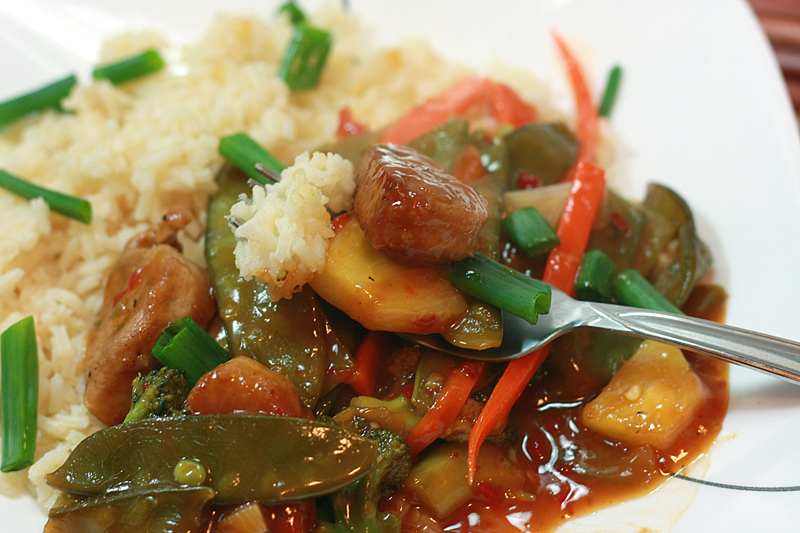
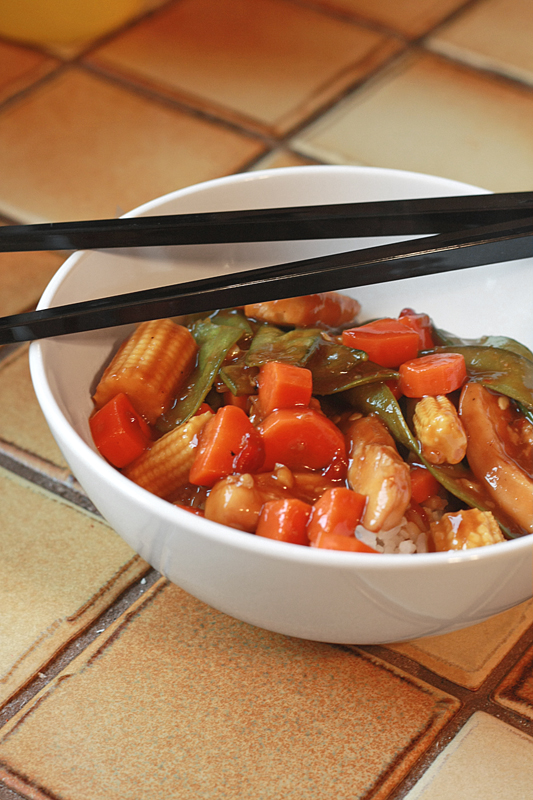
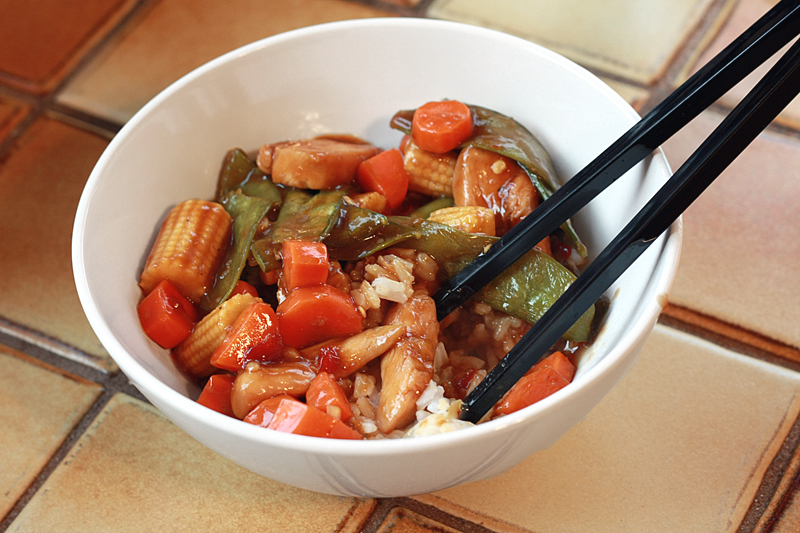
Sweet & Sour Pork Stir Fry with Sesame Ginger Rice


Let me tell you a story about me trying to burn the house down. It involves pork and a wok pan. And two smoke detectors that would not shut up.

Okay, so there may not have been any actual flames (lame, I know) but there was definitely smoke and very loud beeping noises and omgcanyounottelliamjustcookingdinner? all in one go. Oh, not to mention me being clueless about any smoke whatsoever and merrily going about stirring my little pieces of pork.

Oh dear.

But somehow the pork was cooked just fine and I am still indignant about the fact that there was any smoke. Trust me. I know smoke when I see it. Been there, done that. Whatever. Maybe the fact that there's smoke detectors every 3 feet in this house doesn't help either.

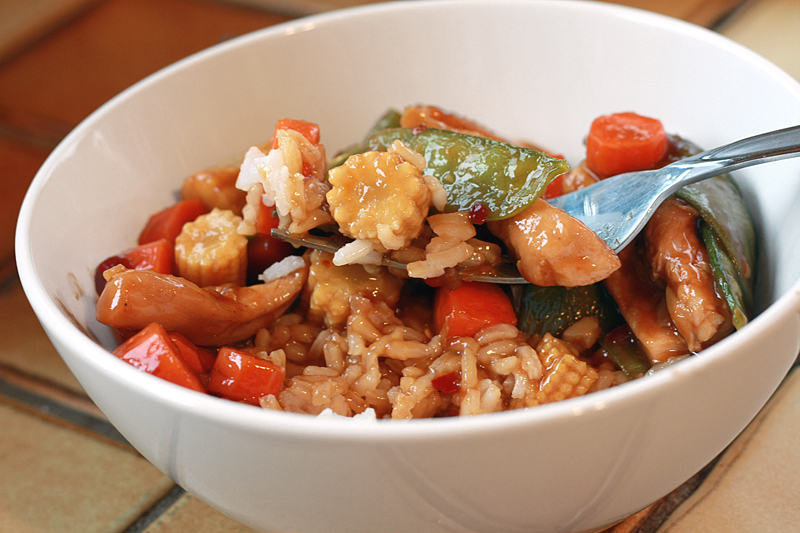
Irregardless of my cooking ability, this is still delicious. Definitely spicy with a nice touch of sweet from the pineapple and pineapple juice. Yum.

Sweet & Sour Pork Stir Fry with Sesame Ginger Rice
Adapted from: Cuisine at Home, December 2011

6 ounces pineapple juice
2 tablespoons chili garlic paste
3 tablespoons rice vinegar
3 tablespoons soy sauce
3 tablespoons brown sugar
2 tablespoons cornstarch
2 tablespoons cooking sherry
1 pound pork tenderloin, trimmed, cut into 2-inch pieces
1/2 teaspoon kosher salt
1/2 teaspoon ground black pepper, grated
3 tablespoons canola oil, divided
1 tablespoon garlic
1 teaspoon ground ginger
8 ounces frozen broccoli
1 cup match-stick cut carrots
6 ounces frozen snow peas
1 bunch green onions, cut into 1-inch pieces
1 cup fresh pineapple, cubed

3 cups fat-free, reduced-sodium chicken broth
1 1/2 cups long grain white rice
2 teaspoons ground ginger
1 teaspoon sesame oil

In a small bowl, whisk together the first 7 ingredients (through sherry). Set aside.

Sprinkle the salt and pepper onto the pork tenderloin. Heat a wok or large non-stick skillet over medium-high heat. Add 2 tablespoons canola oil. Cook the pork in two batches until browned, about 5 minutes per batch. Remove pork to a paper towel-lined plate and set aside. Wipe wok out with a clean paper towel.

With the heat still at medium-high, add the remaining canola oil. Add the garlic and ginger, stir frying for 30 seconds. Add the broccoli and cook for 1 minute. Add the carrot and cook for another 2-3 minutes. Add the snow peas and white parts of the green onion, cooking for 1-2 minutes. Toss in the pineapple and reserved sauce mixture. Simmer until sauce thickens, about 2 minutes, continuing to stir. Stir in cooked pork and continue to simmer until heated through, about 2 minutes. Garnish with remaining green portions of green onions.

Meanwhile, bring broth to a boil in a medium saucepan over medium-high heat. Add rice, ginger, and sesame oil, stirring well. Return mixture to a boil. Cover, and reduce heat to medium-low. Cook 15-20 minutes or until rice is tender.


Serves: 6


Apparently, not only do I like to set off smoke detectors, but I also can't read. Instead of adding chili garlic sauce, I added paste. Um, yes, definitely a difference. Let's just say our sinuses were very cleared out after we finished eating. (Don't worry, I've adjusted the amount above to be more, shall we say, tolerable.) Despite all my flubs, we still really enjoyed the dish.


Nutrition Facts
Serving Size 438g
Amount per serving
Calories 460Calories from fat 100
% Daily Value
Total Fat 11.1g17%
Saturated Fat 1.7g8%
Trans Fat 0.1g
Cholesterol 55mg18%
Sodium 980mg41%
Total Carbs 60.5g20%
Fiber 4.0g16%
Sugars 13.1g
Protein 27.0g
Vitamin A 76%Vitamin C 115%
Calcium 8%Iron 25%

Friday, January 20, 2012

Baked Mushroom Bao


I have a love/hate relationship with snow. There are times I love it -- sledding, tubing, even when I'm out running (I will totally take snow over cold rain), and it's a perfect excuse to curl up on the couch and watch reruns of totally mind-numbing shows. There's something about it that makes everything just a bit softer and a bit quieter and a bit more peaceful.

Until I try and drive somewhere. There's where we get into the hate part of the relationship. One speck of snow and immediately everything slows down. Frustrating. Of course it's always best to be prudent, but 30 mph on the highway in drive-able conditions? Hair pulling.

Let's not even go into the part where the snow always seems to find its way down into my socks when I'm walking to the car and then magically dumps 5 pounds of itself into the driver's seat when I open the door. Splendid. That's my favorite.

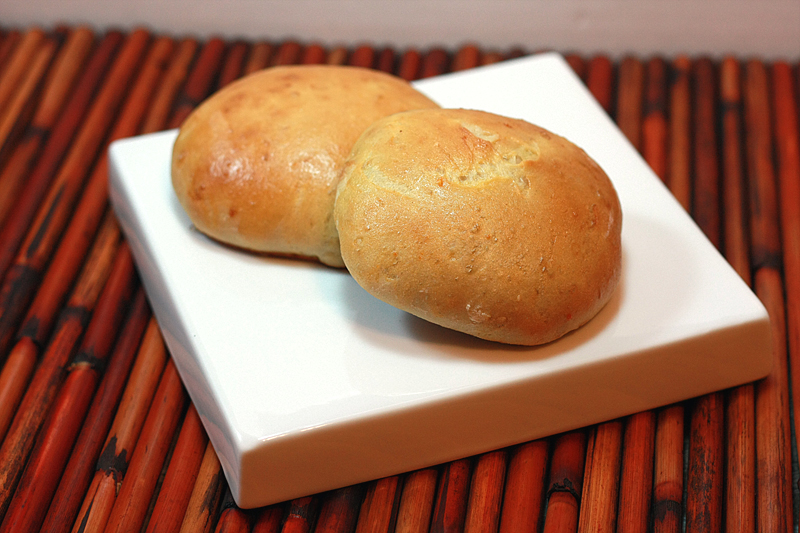
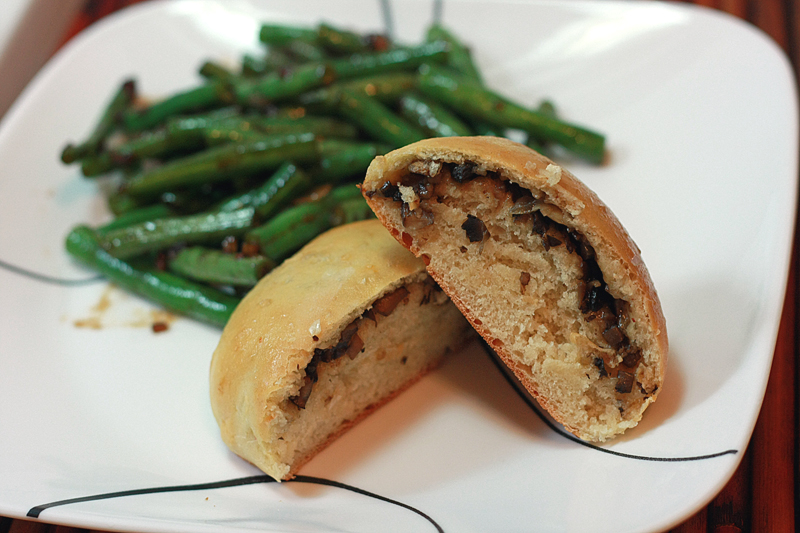
But these little bao buns don't have such a love/hate relationship with me. Just love. I used the bao bun recipe I've used in the past and simply swapped out the filling. The buns are slightly sweet and pair so well with the uber flavorful mushroom filling. Vegetarian? Almost (sorry, there's fish sauce), but trust me, you won't miss the meat in this one.

Baked Mushroom Bao
Adapted from: Katherine Martinelli

2 tablespoons sugar
1/2 cup very hot water
2 teaspoons vegetable oil
1/3 cup 1% milk
2 1/4 teaspoons instant yeast
2 cups all-purpose flour

1 egg yolk
1 teaspoon sugar
2 teaspoons water

1/2 tablespoon vegetable oil
1/4 cup shallot, finely diced
5 1/2 cups diced mushrooms (any mix will do)
1 tablespoon soy sauce
1 tablespoon fish sauce
1 tablespoon hoisin
1 teaspoon sesame oil
1/4 cup vegetable broth (can also use chicken broth)
1 teaspoon cornstarch

In a large bowl, stir together 2 tablespoons sugar and hot water. Let sit until sugar has completely melted (may need to put in the microwave for a few seconds). Add 2 teaspoons vegetable oil and milk. Allow mixture to cool to 110-115 degrees F. Add yeast and stir well. Cover with a towel and let sit for 10 minutes in a warm, draft free spot. Mixture should be foamy on top when ready.

Stir in flour with a wooden spoon until the flour is mostly incorporated and the mixture looks shaggy. Knead dough by hand until no longer sticky, about 5 minutes. Transfer to a lightly oiled bowl, turning once to coat. Cover with a towel and let rest in a warm, draft free area until doubled in size (25 minutes).

Preheat oven to 400 degrees F. Line a baking sheet with parchment paper and set aside.

Meanwhile, heat 1/2 tablespoon vegetable oil in a wok or large saute pan over medium-high heat. Add the shallots and cook until they start to soften, about 1-2 minutes. Add the mushrooms and cook until they have released their liquid and most of it has evaporated, about 5-7 minutes. Stir in the soy sauce, fish sauce, hoisin, and sesame oil. Cook for an additional 2-3 minutes.

In a small bowl, whisk together the broth and cornstarch until no lumps remain. Pour into the mushroom mixture, cooking until thickened, 1-2 minutes. Transfer mushroom mixture to a bowl to cool until ready to use.

Divide dough into 12 equal portions. Flatten each section into a 3-inch round, leaving the center thicker. Add a heaping tablespoon of filling to the center of each disk, then fold the ends over each other to form a ball. Seal the seams well. Place buns seam-side down on the baking sheet.

In a small bowl, whisk together the egg yolk, 1 teaspoon sugar, and 2 teaspoons water. Brush egg wash over each bun. Bake for 15-20 minutes, or until buns are golden brown.


Serves: 4 (serving size: 3 buns)


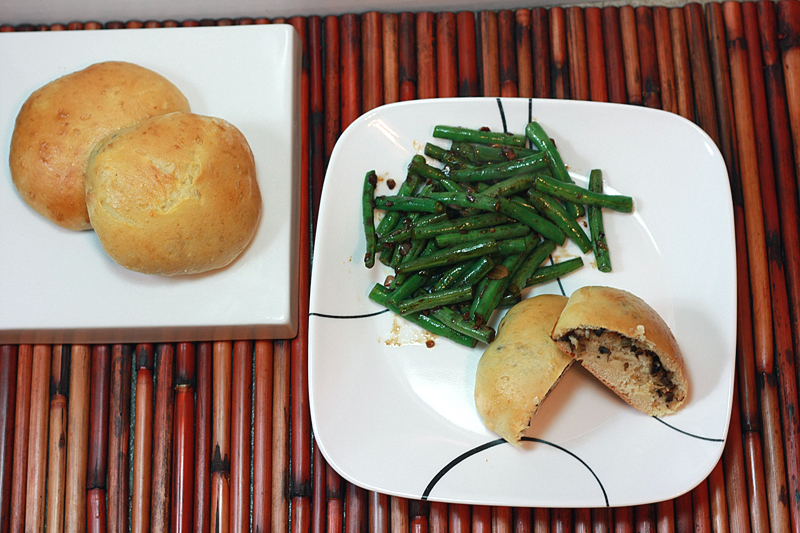
Unfortunately, I did a little miscalculation when I made these. The filling recipe claimed it made 12 buns, my bun recipe said it only made 6 buns. So I halved the filling. And it was only until I was already in the midst of things that I realized the dough amount in each original recipe was the same. Oops. So we just had really big, fluffy rolls. Next time I am definitely going for the whole filling recipe (which is reflected above). And yes, there will most definitely be a next time for these.

Side note: These pair great with some Sichuan Green Beans (which honestly might be the hubby's favorite side dish. Ever.).


Nutrition Facts
Serving Size 268g
Amount per serving
Calories 376Calories from fat 69
% Daily Value
Total Fat 7.7g12%
Saturated Fat 1.7g8%
Cholesterol 54mg18%
Sodium 706mg29%
Total Carbs 64.8g22%
Fiber 3.3g13%
Sugars 11.5g
Protein 12.8g
Vitamin A 4%Vitamin C 5%
Calcium 5%Iron 23%

Thursday, November 10, 2011

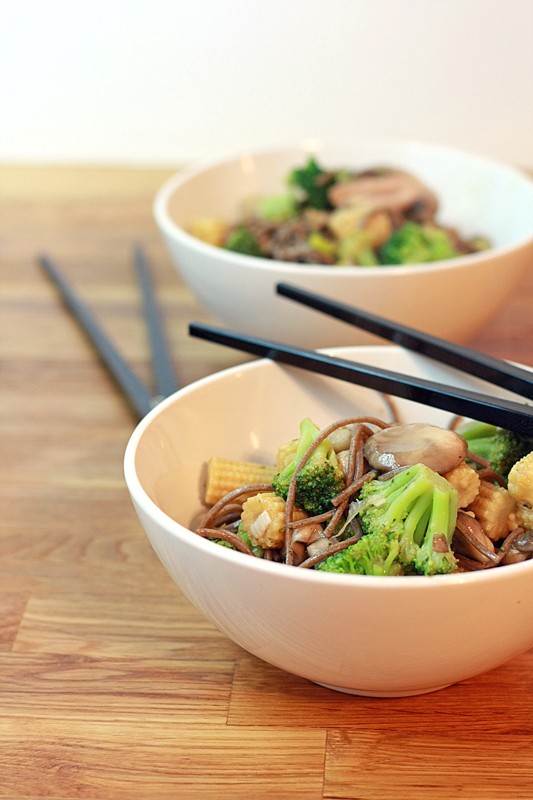
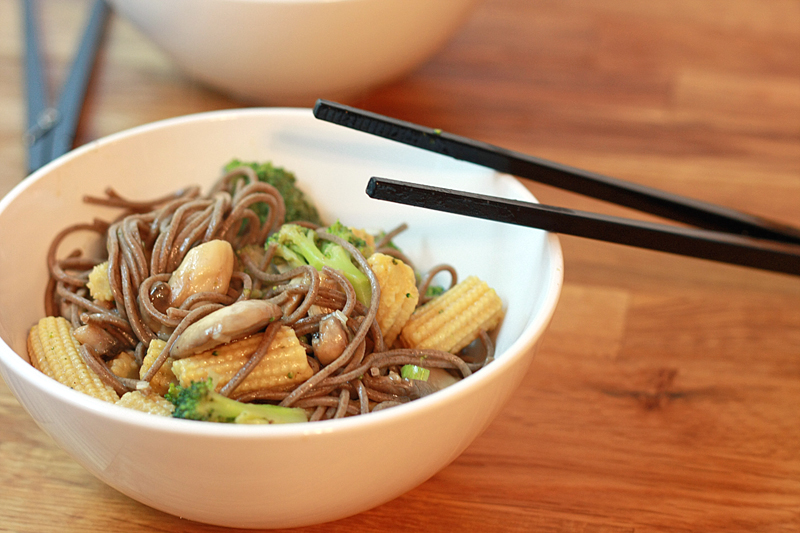
Ginger Hoisin Stir Fry

Fall is supposed to be about hearty, warm, rib-sticking meals -- laced with cinnamon, cloves, and nutmeg... right? On a chilly rainy day, absolutely.

As of late, there have been some absolutely gorgeous fall days. I'm pretty sure I saw the temps hit the low 70s earlier this week. Unbelievable, especially after it snowed the weekend before Halloween. But I love it. It just gives me more time to spend outside doing things (or maybe just running errands without being in a grouchy mood because I'm freezing).

If you can't tell, I'm not the biggest fan of winter. Thanksgiving? Christmas? Love. But I could totally do without gray slushy snow getting tracked into my house and finding its way into my shoes in the middle of January.

My husband especially hates cold weather. It means he gets icy toes stuck on him in the middle of the night. For some reason he seems to have a problem with this.

So before my fall and winter cravings hit full stride, I had to throw in a nice "lighter" dinner. Still filling and full of veggies, but not quite worthy of the stretchy pants. Thank goodness. I have plenty of that in my future.

Ginger Hoisin Stir Fry
Adapted from: Cooking Light, October 2011

1 1/2 teaspoons green onions, finely chopped
2 teaspoons rice wine vinegar
1 1/2 teaspoons soy sauce
1/3 teaspoon ground ginger
1/2 teaspoon honey
1 teaspoon hoisin sauce
8 ounces soba noodles
1 tablespoon canola oil
8 ounces frozen broccoli
6 ounces mushrooms, sliced
1 (15 ounce) can cut baby corn, drained

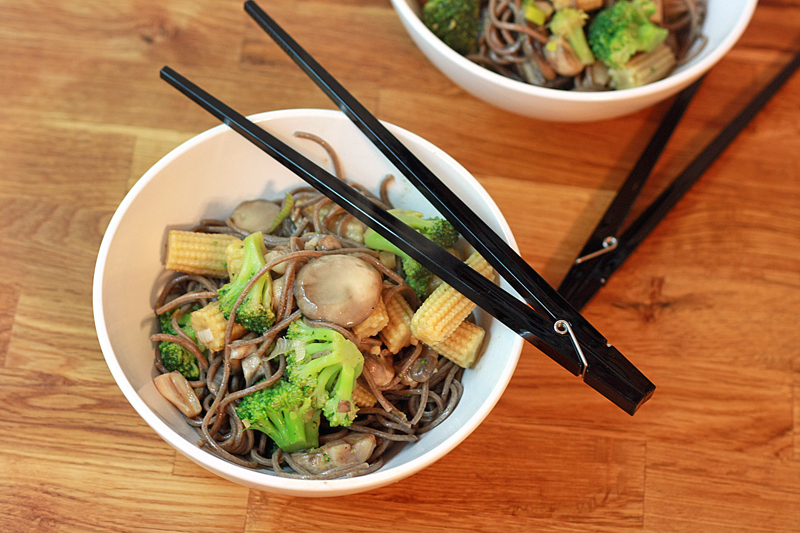
In a small bowl, mix together the first 6 ingredients (through hoisin). Set aside. Bring a medium pot filled with water to a boil. Cook the noodles according to package directions. Drain. Heat oil in a large skillet or wok over medium-high heat. Add broccoli and stir fry for 1 minute. Add mushrooms and baby corn, cook for an additional minute. Add cooked noodles, and stir fry for 1 minute. Pour the prepared sauce over noodles and cook for an additional minute.

Serves: 3


While good, not to mention fast, I think I could have gone for doubling the amount of sauce used. I didn't include it in the recipe as the sodium is fairly high, so I'll let you make that call. As with almost all Asian-inspired stir fries, you can easily switch out the veggies and add any kind of meat you wish. That's my kind of versatile dish.


Nutrition Facts
Serving Size 364g
Amount per serving
Calories 374Calories from fat 52
% Daily Value
Total Fat 5.8g9%
Saturated Fat 0.5g3%
Cholesterol 0mg0%
Sodium 1122mg47%
Total Carbs 70.0g23%
Fiber 4.9g20%
Sugars 4.9g
Protein 17.3g
Vitamin A 14%Vitamin C 117%
Calcium 7%Iron 21%

Monday, August 1, 2011

Hunan Chicken


I have to admit -- sometimes, Chinese take-out scares me.

When ordering Chinese, I typically tend to gravitate towards chicken or vegetarian dishes. On the rare occasion, I opt for beef. Clearly, I'm not going to be ordering seafood anytime soon.

I don't know why I keep going back to chicken. 9 times out of 10 it's fatty and gristly, and really just not all that great. Yeah, I'm that kid that gets skeeved out when biting into a piece of cartilage or huge chunk of fat. Gross. I just gave myself the heebie-jeebies thinking about it.

Aside from the obvious remedy to the situation (go find a different Chinese place!), there's really only one other way to get around this problem and still eat chicken. Make it myself.

I am not the world's greatest by any stretch when it comes to mixing and matching Asian ingredients. Actually, I'm pretty bad. I tend to leave out things like fish sauce or oyster sauce simply due to their nature of being made from seafood, even though they add subtle yet important nuances to dishes. So when I came across this dish over on Curry and Comfort I jumped on it.

Hunan Chicken


Adapted from: Curry and Comfort

5 tablespoons soy sauce, divided
2 tablespoons cornstarch, divided
1/4 teaspoon ground black pepper
12 ounces boneless, skinless chicken breast, sliced into thin strips
1 tablespoon garlic chili paste (such as sambal oelek)
1 tablespoon rice wine vinegar
1/4 cup cooking sherry
2 teaspoons sesame oil
1 tablespoon brown sugar
2 tablespoons Worcestershire sauce
1 tablespoon oyster sauce
4 tablespoons water
3 tablespoons vegetable oil
3 cloves garlic
2 teaspoons ground ginger
1 (15 ounce) can baby corn
2 carrots, chopped
4 ounces snow peas

In a small bowl, whisk together 1 tablespoon soy sauce, 1 tablespoon cornstarch, and black pepper until smooth. Place chicken strips in a glass bowl. Pour soy sauce slurry over chicken, tossing to coat. Marinate in the fridge for 30 minutes.

Meanwhile, prepare the hunan sauce. In a medium bowl, whisk together remaining soy sauce, garlic chili paste, and next 6 ingredients (through oyster sauce). Set aside.

In another small bowl, whisk together 1 tablespoon cornstarch and water to form a slurry. Set aside.

Once the chicken has finished marinating, heat oil in a wok (or large pan) over high heat. Once hot, add the chicken with marinade, and stir fry for 2-3 minutes, or until the outside of the chicken turn white. Add the garlic and ginger; cook for 1-2 more minutes. Pour in the hunan sauce, tossing to coat the chicken, and continue to cook for another 2 minutes. Stir in the baby corn, carrots, and snow peas. Cook for and additional 1-2 minutes, or until the vegetables are heated through. Remove from heat and serve over hot rice.


Serves: 6


Now, I can't guarantee you the authenticity of this dish, but I can guarantee that it's going to be pretty tasty. And minus some MSG and chewy, fatty chicken. Win.

This dish is also a great pantry meal -- all I needed from the store was a can of baby corn and some carrots. So feel free to switch up those veggies to fit what you have hiding out in your produce drawer (broccoli and mushrooms would also be great in this). You can also substitute an equal amount of hoisin sauce for the Worcestershire sauce, which is what the original recipe called for. I just happened to miss the unopened jar of it sitting in my pantry. Sigh, why am I not surprised?


Nutrition Facts*
Serving Size 225g
Amount per serving
Calories 287Calories from fat 102
% Daily Value
Total Fat 11.3g17%
Saturated Fat 2.3g11%
Cholesterol 48mg16%
Sodium 959mg40%
Total Carbs 24.0g8%
Fiber 3.3g13%
Sugars 6.8g
Protein 21.7g
Vitamin A 75%Vitamin C 26%
Calcium 3%Iron 11%
*Nutrition facts do not include rice

Friday, April 1, 2011

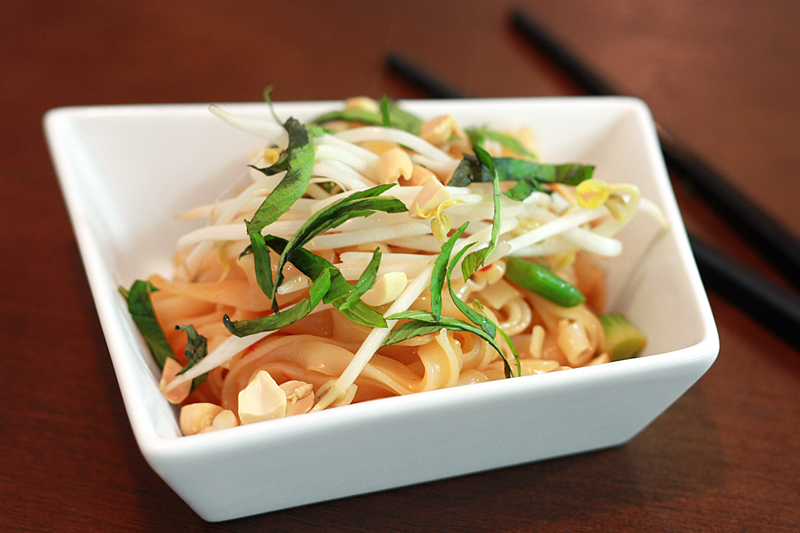
Pad Thai


I love most Asian food. Okay, minus things involving seafood and coconut, which, I know, makes up a large portion. But as for the rest, delicious. There's just something about the way that all the flavors are so well balanced -- the sour with the sweet, the bitter with the salty, and let's not forget about umami.

I was a little leery about the authenticity of a Pad Thai recipe coming out of a Cooking Light magazine, but figured I would give it a shot anyways. While I am positive that there are one or two key "authentic" ingredients missing from the line up, their replacements do a fine job of getting this version close.

I did have to stop by the Asian grocery store to pick up a few of the items on the list -- the flat rice noodles and the bean sprouts, and was lucky enough that the lady working there suggested I buy basil. I was about to say no as I had picked some up the other day until I realized that it was most likely Asian basil rather than regular basil. Score! I've been on the search for sweet basil for a while now, and I knew it would make this dish even better.

Pad Thai


Adapted from: Cooking Light, March 2011

8 ounces uncooked flat rice noodles
2 tablespoons brown sugar
2 tablespoons soy sauce
1 1/2 tablespoons fish sauce
1 1/2 tablespoons lime juice
1 tablespoon garlic chile paste (such as sambal oelek)
3 tablespoons canola oil
1 cup green onions, cut into 1-inch pieces
5 cloves garlic, minced
1 cup fresh bean sprouts
1/4 cup peanuts, unsalted & dry-roasted, chopped
3 tablespoons sweet Asian basil (regular basil will also work)

Bring a large pot of water to boil over high heat. Add noodles and cook according to package directions. Drain.

Meanwhile, in a small bowl, whisk together the sugar, soy sauce, fish sauce, lime juice, and garlic chile paste. Set aside.

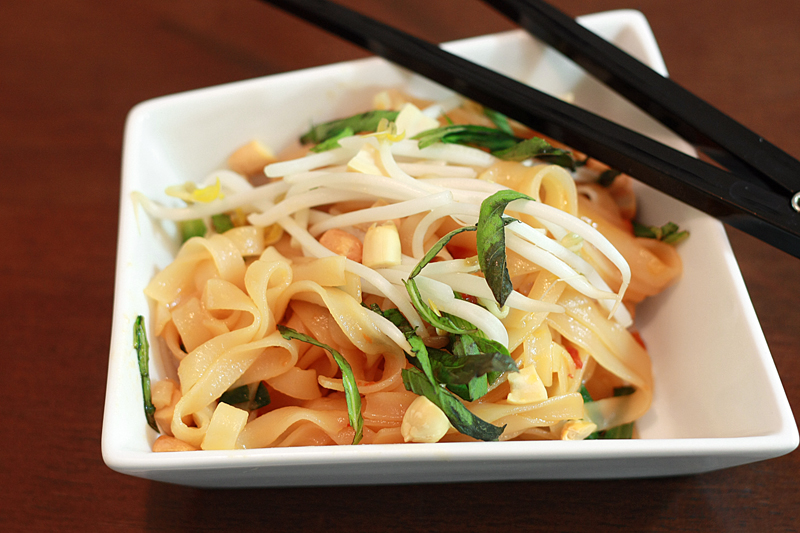
Add the oil to a large skillet (or wok), and warm over medium-high heat. Add onions and garlic, and stir-fry for 2 minutes. Add noodles, tossing to combine. Pour sauce over top and cook for 1 minute, stirring constantly. Serve topped with 1/4 cup bean sprouts, 1 tablespoon peanuts, and 2 teaspoons basil.


Serves: 4


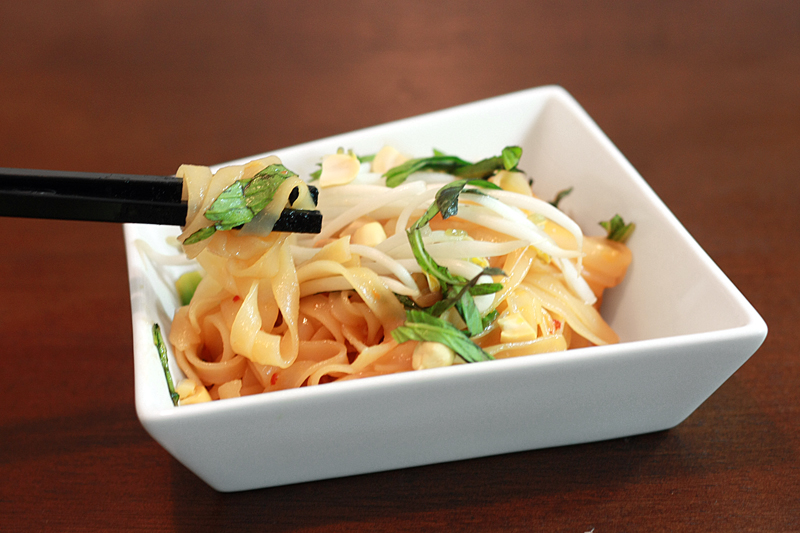
Turns out, Adam ended up liking this dish even better than the one served at a local Thai place. Apparently it's not quite as sweet as theirs. But I wasn't really listening to him, I was far too busy eating as much of this as I could. It's one of those dishes that you really just want to keep eating and eating, no matter how full you get. There's just something about the crisp from the bean sprouts with the crunch from the peanuts all mixing in with the chewy noodles and spicy sauce that's irresistible to me. I am very sad I was snookered out of the leftover for lunch today.

I had actually done the prep work before dinner (as we had a dinnertime soccer game, so didn't get home until much later), so the actual cooking of this meal was a breeze -- not to say that you couldn't easily do all the prep work in the time it takes the water to boil. With this recipe being so quick and easy, it's is definitely sticking around.


Nutrition Facts
Amount per serving
Calories 259Calories from fat 139
% Daily Value
Total Fat 15.4g24%
Saturated Fat 1.4g7%
Cholesterol 0mg0%
Sodium 1018mg42%
Total Carbs 26.5g9%
Dietary Fiber 2.2g9%
Sugars 5.9g
Protein 6.5g
Vitamin A 7%Vitamin C 45%
Calcium 6%Iron 9%

LinkWithin

Related Posts with Thumbnails
 
Pin It button on image hover