Showing posts with label Bread. Show all posts

Monday, October 29, 2012

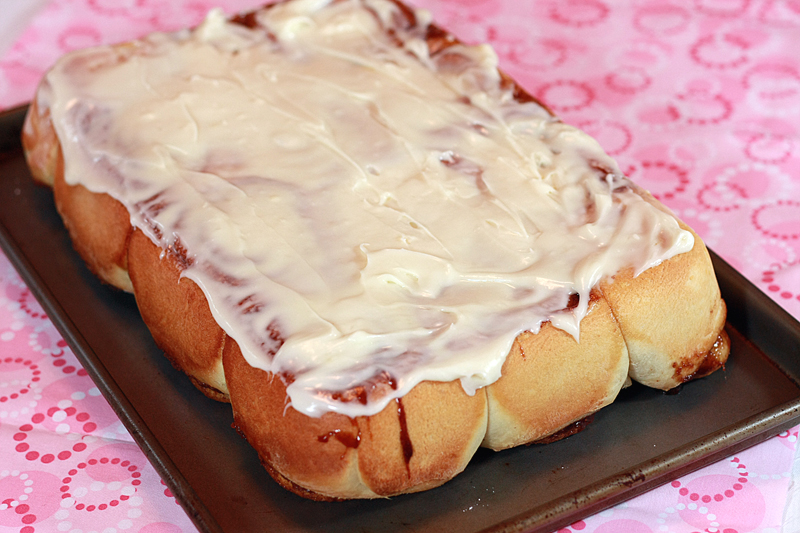
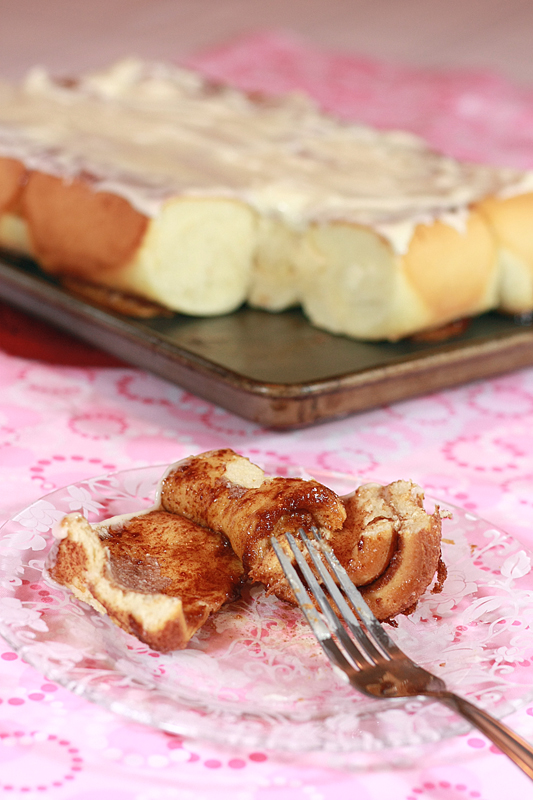
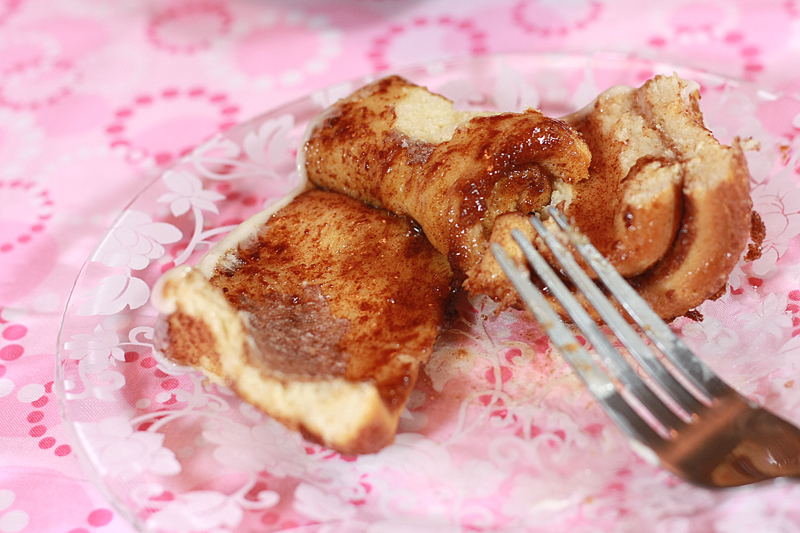
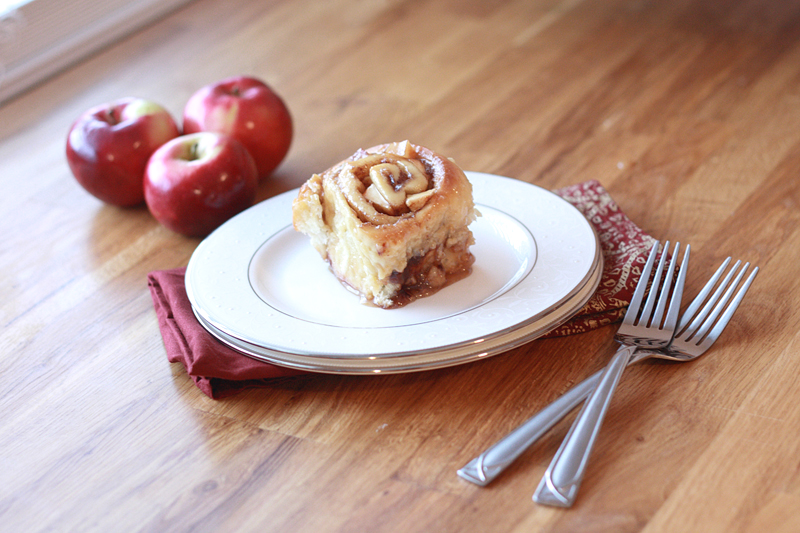
Caramel Apple Cinnamon Rolls


Over the past few years I have learned one very important lesson: if you're going to make sweets, make sure you have a place to take the majority of the batch. Otherwise, it will all end up in your belly. Which, while delicious, is probably not the wisest idea.

Occasionally, Adam and I argue on this point. This was one of those times.

Of the 12 cinnamon rolls, I gave away 5, and I totally suffered the husband stink-eye look when I gave any of them away. But, there's no way we each need 6 of these rolls. As much as we want to eat them.

I first saw the idea for this over on The Spiffy Cookie and couldn't get the thought out of my head. Of course throwing some diced apple into cinnamon rolls makes perfect sense, why oh why did I not think of this before? It took me less than a week to get into the kitchen and make my own.
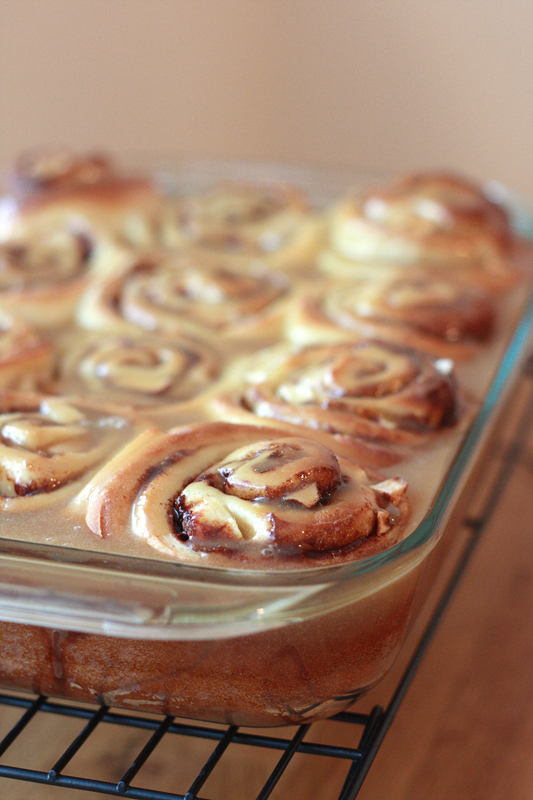

Caramel Apple Cinnamon Rolls
Adapted from: Allrecipes.com

1 cup warm 1% milk (105 - 115 degrees F)
2 1/4 teaspoons active dry yeast
1/2 cup granulated sugar
2 eggs, at room temperature
1/3 cup butter, melted
1 teaspoon kosher salt
4 1/2 cups bread flour

1 cup brown sugar, packed
2 tablespoons ground cinnamon
1/3 cup butter, softened
4 small apples, peeled and diced (I used McIntosh)

1/2 cup whipping cream
1/3 cup granulated sugar
1 cup brown sugar
1 tablespoon butter

In a large mixing bowl, stir together the milk, yeast, and 1 tablespoon granulated sugar. Let sit for 5-10 minutes, or until the top of the mixture is foamy. Mix in the eggs, melted butter, salt, and remaining 1/2 cup of granulated sugar. Slowly add in the flour, one cup at a time, until a soft dough forms. If using a stand mixer, switch out the paddle attachment for the dough hook, add any remaining flour, and knead on medium speed for 6-8 minutes. Otherwise, turn out the dough onto a lightly floured work surface, add any remaining flour, and knead for 8-10 minutes, or until dough is slightly tacky and elastic.

Coat a large bowl with cooking spray. Shape the dough into a ball, then transfer to the bowl and cover with plastic wrap. Place bowl in a warm, draft-free area and let dough rise until doubled, 1-2 hours.

While the dough is rising, combine 1 cup brown sugar and cinnamon in a small bowl; set aside. Once the dough has doubled in size, turn out onto a lightly floured work surface. Punch down, then let cover and rest for 10 minutes.

Roll dough out into a 16 x 21 inch rectangle. Spread 1/3 cup butter evenly across the dough leaving a 1/4-inch margin on the shorter sides. Sprinkle the brown sugar and cinnamon mixture evenly across the butter. Spread diced apples across the dough, making sure they are evenly spaced. Starting from a short side, roll dough up, pressing the final 1/4-inch margin of dough gently into the roll to seal. Cut dough with a serrated knife into 12 slices. Coat a 9 x 13 inch baking pan with cooking spray. Transfer the rolls to the pan. Cover pan with a towel and let the rolls rise until they have about doubled, 30 minutes.

Preheat oven to 400 degrees F. Bake rolls for 15 minutes, or until tops are golden brown. Let cool slightly.

Meanwhile, in a small saucepan over medium-low heat, combine whipping cream, 1/3 cup granulated sugar, 1 cup brown sugar, and 1 tablespoon butter. Cook until the butter is completely melted and sugars have dissolved.

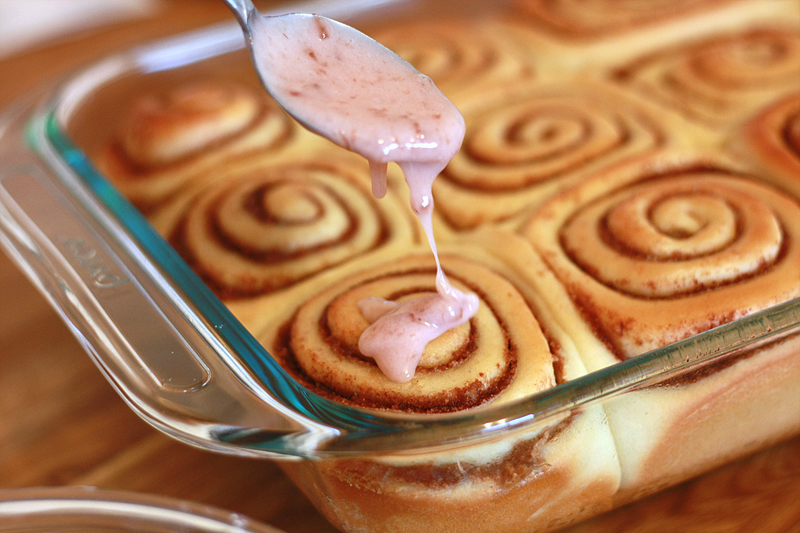
Drizzle tops of warm rolls with caramel sauce.


Serves: 12
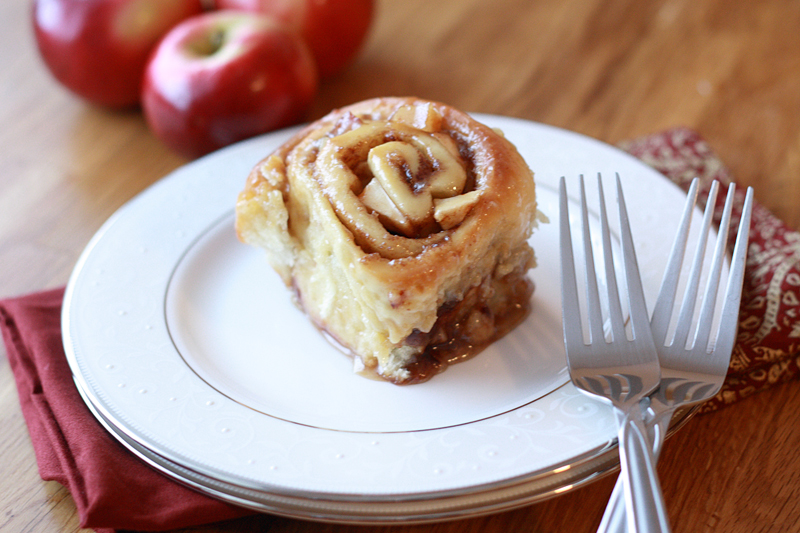

I ended up using 3 apples for my rolls, but I really think adding more would really bring out the apple flavor (this change is reflected in the ingredient list above). I also think I might play around with the caramel sauce next time as mine turned out pretty thin.

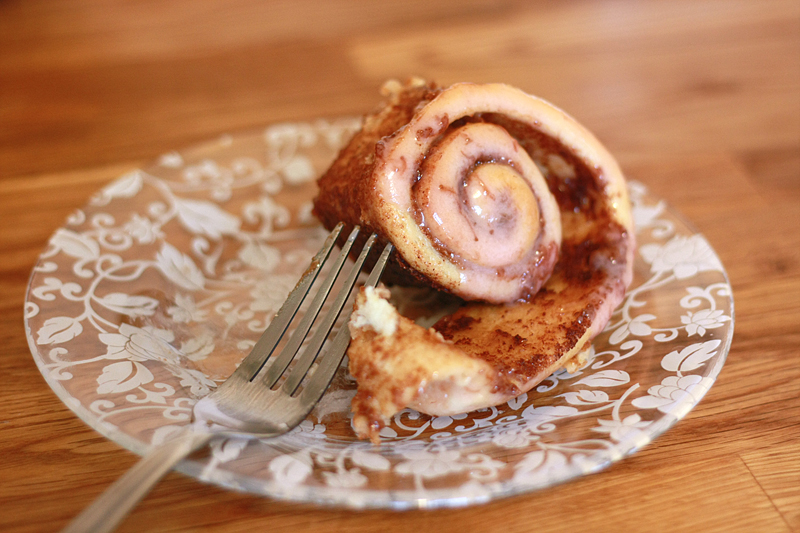
Even with these additional changes I might make, there was no denying that these were some very tasty rolls. Perfect for a chilly fall day.


Nutrition Facts
Serving Size 183g
Amount per serving
Calories 480Calories from fat 128
% Daily Value
Total Fat 14.3g22%
Saturated Fat 8.5g43%
Cholesterol 64mg21%
Sodium 303mg13%
Total Carbs 82.6g28%
Fiber 3.2g13%
Sugars 43.8g
Protein 7.2g
Vitamin A 10%Vitamin C 4%
Calcium 8%Iron 15%

Friday, March 30, 2012

Peanut Butter & Jelly Cinnamon Rolls


As of late I've been whining, and pouting, and stomping my feet that I've been in a cooking/baking funk. In a big way. So when Cindy from Once Upon a Loaf asked if I would be interested in participating in their Project PB&J, I hesitated.

Basically, Project PB&J is a sandwich and baked goods competition just in time for National Peanut Butter and Jelly Day on April 2nd. First, I think it's awesome that there is a PB&J day. And second, how on earth do people find out about these things?? I'm pretty sure I'm 99% out-of-the-loop on these details.

Long story short, I decided that forcing me out of my comfort zone by requiring an original recipe would be the swift kick in the pants I needed to get back in the kitchen. So, yes, I decided to go for the gusto and submit these babies for Project PB&J. While I'm debating whether or not it actually worked, I think I might just go back for some seconds on these rolls. Or maybe thirds.

Peanut Butter & Jelly Cinnamon Rolls
Adapted from: my Cinnabon Cinnamon Rolls

1 cup warm 1 % milk (105-115 degrees F)
2 1/4 teaspoons active dry yeast
1/2 cup granulated sugar
2 eggs, at room temperature
1/3 cup butter, melted
1 teaspoon kosher salt
4 1/2 cups bread flour

1 cup packed brown sugar
2 tablespoons ground cinnamon
1/3 cup peanut butter, slightly melted

1 cup powdered sugar
1/2 cup strawberry jam (or jelly, any flavor works)
3 tablespoons 1% milk


In a large mixing bowl, stir together the milk, yeast, and 1 tablespoon granulated sugar. Let sit for 5-10 minutes, or until the top of the mixture is foamy. Mix in the eggs, melted butter, salt, and remaining sugar. Slowly add in the flour, one cup at a time, until a soft dough forms. If using a stand mixer, switch out the paddle attachment for the dough hook, add any remaining flour, and knead on medium speed for 6-8 minutes. Otherwise, turn out the dough onto a lightly floured work surface, add any remaining flour, and knead for 8-10 minutes, or until dough is slightly tacky and elastic.

Coat a large bowl with cooking spray. Shape the dough into a ball, then transfer to the bowl and cover with plastic wrap. Place bowl in a warm, draft-free area and let dough rise until doubled, 1-2 hours.

While the dough is rising, combine the brown sugar and cinnamon in a small bowl; set aside. Once the dough has doubled in size, turn out onto a lightly floured work surface. Punch down, then let cover and rest for 10 minutes.

Roll dough out into a 16 x 21 inch rectangle. Spread 1/3 cup peanut butter evenly across the dough leaving a 1/4-inch margin on the shorter sides. Sprinkle the sugar and cinnamon mixture evenly across the butter. Starting from a short side, roll dough up, pressing the final 1/4-inch margin of dough gently into the roll to seal. Cut dough with a serrated knife into 12 slices. Coat a 9 x 13 inch baking pan with cooking spray. Transfer the rolls to the pan. Cover pan with a towel and let the rolls rise until they have about doubled, 30 minutes.
Preheat oven to 400 degrees F. Bake rolls for 15 minutes, or until tops are golden brown. Transfer pan to a baking rack to cool.

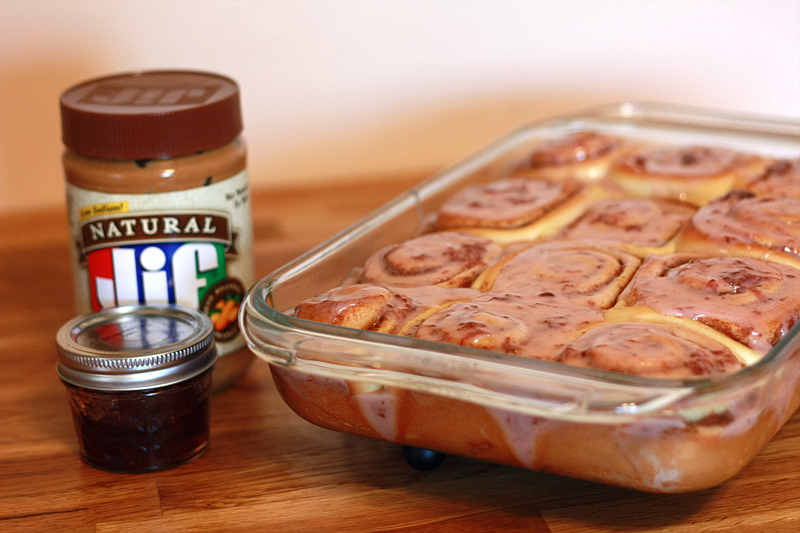
Meanwhile, beat milk and jam together until smooth. Slowly stir in the powdered sugar until fully incorporated. Drizzle glaze over warm rolls.


Serves: 12


Honestly, I was a bit on the worried side when thinking about how the cinnamon roll and PB&J flavors would mesh together. Ha, silly me. Cinnamon fits in with PB&J like it was meant to be there. No stopping to think, hey, what's going on here? upon first bite.

This recipe is a spin-off of my earlier Cinnabon clone cinnamon rolls, which were adapted from Allrecipes.com. I used homemade strawberry jam, but I actually think the traditional Smuckers or other maybe-not-so-"real" jams might bring a tad more flavor to the party.


Nutrition Facts
Serving Size 145g
Amount per serving
Calories 451Calories from fat 92
% Daily Value
Total Fat 10.2g16%
Saturated Fat 4.4g22%
Cholesterol 46mg15%
Sodium 289mg12%
Total Carbs 82.2g27%
Fiber 2.5g10%
Sugars 32.0g
Protein 8.8g
Vitamin A 5%Vitamin C 0%
Calcium 7%Iron 15%

Tuesday, March 6, 2012

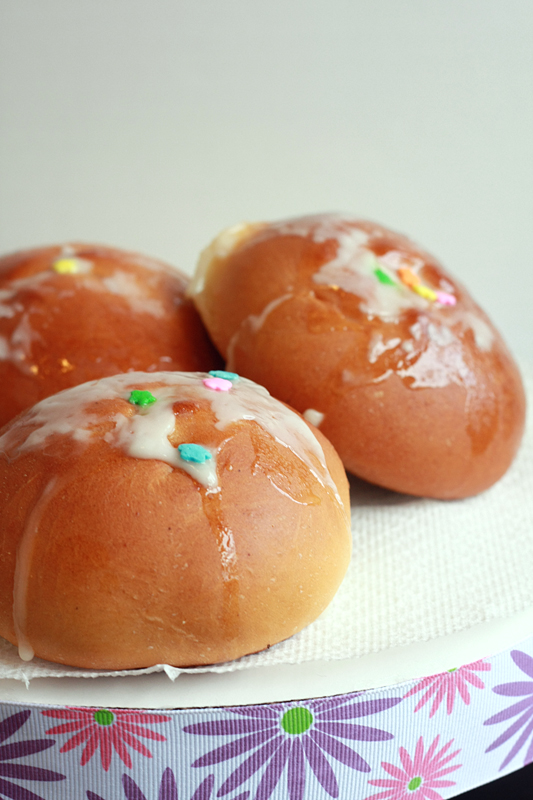
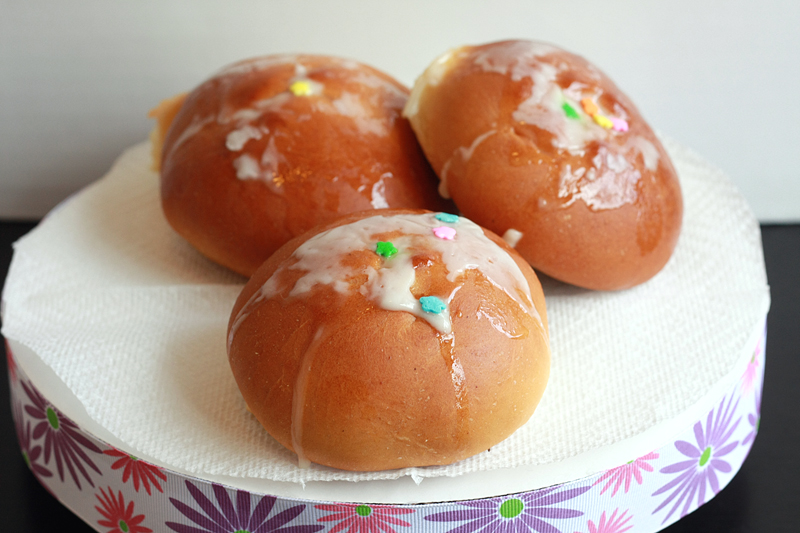
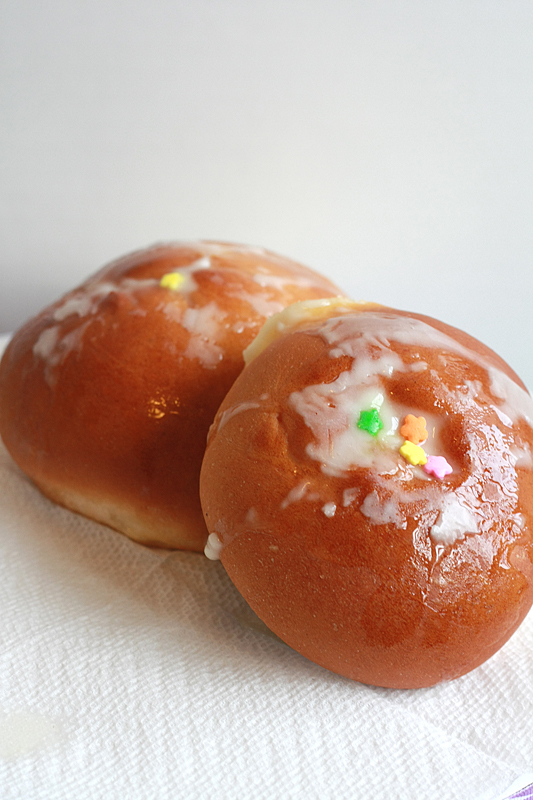
Individual King Cakes


Um, yeah, I DO know that Fat Tuesday was last week. I'm just slow. Okay? Don't hate.

And I might have gotten coerced into making these for hubby's work. Even though we don't celebrate Lent. Although Adam definitely doesn't mind it -- he loves him a good fish fry on Friday.

Since these were kind of a spur of the moment (and oh-by-the-way, I know it's after dinner, but can you make this for tomorrow?) type of thing, I of course didn't have the right topping decor handy. So I sent the hubby to the store and he came back with, well, not the right sprinkles. To be fair, it was all they had, and it was too late to go elsewhere, so these little cakes didn't turn out overdosed in Mardi Gras glory. (AKA smothered and covered in purple, green, & yellow.) It happens.


Individual King Cakes
Adapted from: Allrecipes.com & Food.com

1 cup 1% milk
1/4 cup butter
4 1/2 teaspoons active dry yeast
2/3 cup warm water (105-115 degrees F)
1/2 cup granulated sugar
2 eggs
1 1/2 teaspoons kosher salt
1/2 teaspoon ground nutmeg
5 1/2 cups all-purpose flour

2 (8 ounce) packages reduced-fat cream cheese, at room temperature
1 egg
3/4 cup granulated sugar
2 teaspoons vanilla extract

1 1/2 cups powdered sugar
1 teaspoon vanilla extract
2 tablespoons 1% milk

In a small saucepan, scald milk. Add 1/4 cup butter and stir. Set aside and let come to room temperature.

In the large work bowl of a mixer, combine the yeast, warm water, and 1 tablespoon sugar. Let stand for 10 minutes, or until the top is foamy. Stir in eggs. Beat in 1/2 cup sugar less 1 tablespoon, kosher salt, and nutmeg. Slowly add in flour, 1 cup at a time until a soft dough forms. Turn out onto a lightly floured work surface. Knead for 8-10 minutes, or until smooth and elastic, then form into a ball.

Coat a large bowl with non-stick spray, and place the ball of dough in the bowl, turning once to coat. Cover with plastic wrap and set bowl in a warm, draft-free spot until dough has doubled in volume, about 2 hours.

While dough is rising, beat the cream cheese until smooth. Add the egg, 3/4 cup sugar, and vanilla, mixing until creamy.

Once dough has risen, turn dough out onto a lightly floured work surface and punch down. Divide dough in half. Separate each half of dough into 8 balls. Roll each dough ball out, one at a time, into a 1/4-inch thick square. Cover remaining dough with a towel. Place 2 tablespoons of filling into the center of the square. Fold dough over filling and seal well, so no filling is exposed. Place on a baking sheet lined with parchment paper and cover with a towel. Repeat with remaining dough and filling. Let buns rise until doubled, about 45 minutes.

Preheat oven to 375 degrees F. Bake rolls for 30 minutes. Push a plastic food-safe baby doll into the bottom of one roll.

Meanwhile, whisk together the powdered sugar, 1 teaspoon vanilla extract, and 2 tablespoons milk. Drizzle over each roll and top with sprinkles (traditional Mardi Gras colors are green, purple, and yellow).


Serves: 16


Many commenters on the original recipe claimed that this version "tastes just like the real thing!" Which of course means make-me-now. The actual "cake" itself was perfect for a breakfast sweet roll, although I have to admit I wasn't a fan of the nutmeg in it. I know you New Orleaners out there are clutching your pearls at the thought, but... I'm going to play my "I'm not from there" card on this one, slowly back out of the room, and run away before you can chase me with pitchforks.

As for the filling. Eh, not a fan. Even though there was only one egg in it, I kept thinking how eggy it tasted. But, that is an easy fix. Or switch to another type of filling, such as brown sugar and pecans or something of that nature.


Nutrition Facts
Serving Size 357g
Amount per serving
Calories 585Calories from fat 304
% Daily Value
Total Fat 33.8g52%
Saturated Fat 20.3g102%
Cholesterol 103mg34%
Sodium 1063mg44%
Total Carbs 47.2g16%
Fiber 3.2g13%
Sugars 2.4g
Protein 26.1g
Vitamin A 36%Vitamin C 25%
Calcium 39%Iron 28%

Tuesday, February 28, 2012

Cinnabon Cinnamon Rolls


Growing up, we never lived very close to our extended family. Come Christmas-time or any other time to visit family, this entailed a 24 hour drive or some very expensive flights. The older we got, the more often my parents opted for the plane rides rather than the ridiculously long drive.

I loved it when we flew. Mostly because we always had a layover at the Minneapolis airport. And the Minneapolis airport = Cinnabon cinnamon rolls. It never failed. Unless we had a crazy short layover requiring the "airport sprint", my sister and I always made a stop at the Cinnabon in the central shopping area. Always.

Nowadays, the Cinnabon is long gone, replaced by some taco or burrito joint. Seriously? Bitter, party of one, right here.

That said, I haven't had a Cinnabon cinnamon roll in years. But for some reason, out of the blue, I was craving them. For weeks, actually. So I finally broke down and poked around on the internet to see what I could find. Knowing full well that there are a ton of copy-cat recipes out there.

It took probably less than 5 minutes to come across this recipe which had 5 stars with over 4600 reviews. Okay, I'm sold.


Cinnabon Cinnamon Rolls
Adapted from: Allrecipes.com

1 cup warm 1 % milk (105-115 degrees F)
2 1/4 teaspoons active dry yeast
1/2 cup granulated sugar
2 eggs, at room temperature
1/3 cup butter, melted
1 teaspoon kosher salt
4 1/2 cups bread flour

1 cup packed brown sugar
2 tablespoons ground cinnamon
1/3 cup butter, softened

3 ounces reduced-fat cream cheese, at room temperature
1/4 cup butter, at room temperature
1 1/2 cups powdered sugar
1/2 teaspoon vanilla extract

In a large mixing bowl, stir together the milk, yeast, and 1 tablespoon granulated sugar. Let sit for 5-10 minutes, or until the top of the mixture is foamy. Mix in the eggs, melted butter, salt, and remaining sugar. Slowly add in the flour, one cup at a time, until a soft dough forms. If using a stand mixer, switch out the paddle attachment for the dough hook, add any remaining flour, and knead on medium speed for 6-8 minutes. Otherwise, turn out the dough onto a lightly floured work surface, add any remaining flour, and knead for 8-10 minutes, or until dough is slightly tacky and elastic.

Coat a large bowl with cooking spray. Shape the dough into a ball, then transfer to the bowl and cover with plastic wrap. Place bowl in a warm, draft-free area and let dough rise until doubled, 1-2 hours.

While the dough is rising, combine the brown sugar and cinnamon in a small bowl; set aside. Once the dough has doubled in size, turn out onto a lightly floured work surface. Punch down, then let cover and rest for 10 minutes.

Roll dough out into a 16 x 21 inch rectangle. Spread 1/3 cup butter evenly across the dough leaving a 1/4-inch margin on the shorter sides. Sprinkle the sugar and cinnamon mixture evenly across the butter. Starting from a short side, roll dough up, pressing the final 1/4-inch margin of dough gently into the roll to seal. Cut dough with a serrated knife into 12 slices. Coat a 9 x 13 inch baking pan with cooking spray. Transfer the rolls to the pan. Cover pan with a towel and let the rolls rise until they have about doubled, 30 minutes.
Preheat oven to 400 degrees F. Bake rolls for 15 minutes, or until tops are golden brown. Cool for 5 minutes, then place a baking sheet face down over the pan. Holding the two pans together, flip over so the rolls are now on the baking sheet upside down.

Meanwhile, in the large work bowl of a mixer, beat the cream cheese and 1/4 cup butter until smooth. Add the vanilla. Slowly stir in the powdered sugar until fully incorporated. Spread frosting over warm rolls.


Serves: 12


Yes, I realize that flipping these bad boys over does not for a pretty picture make. However, flipping the rolls over almost right out of the oven allows all the molten brown sugar/cinnamon/butter gooey filling to flow back into the rolls, rather than running out of the bottom and sticking to the pan. And seriously, that's what we're here for.

I was literally almost sick with the amount and thickness of brown sugar that went in as the filling, but I honestly don't think in the end you can ever have too much. It's really the best part. Though if you're going to go true Cinnabon-style, you have to have the cream cheese frosting, and that's pretty darn good too.

Adam and I gave these two thumbs way up, and I think they are definitely close to the real thing. The problem is, unfortunately, that instead of curing my craving, it really only made me want more. Wait, is that really a problem?


Nutrition Facts - crust only
Serving Size 137g
Amount per serving
Calories 474Calories from fat 155
% Daily Value
Total Fat 17.2g26%
Saturated Fat 10.4g52%
Cholesterol 75mg25%
Sodium 346mg14%
Total Carbs 73.4g24%
Fiber 2.0g8%
Sugars 36.3g
Protein 7.6g
Vitamin A 12%Vitamin C 0%
Calcium 7%Iron 15%

Wednesday, February 22, 2012

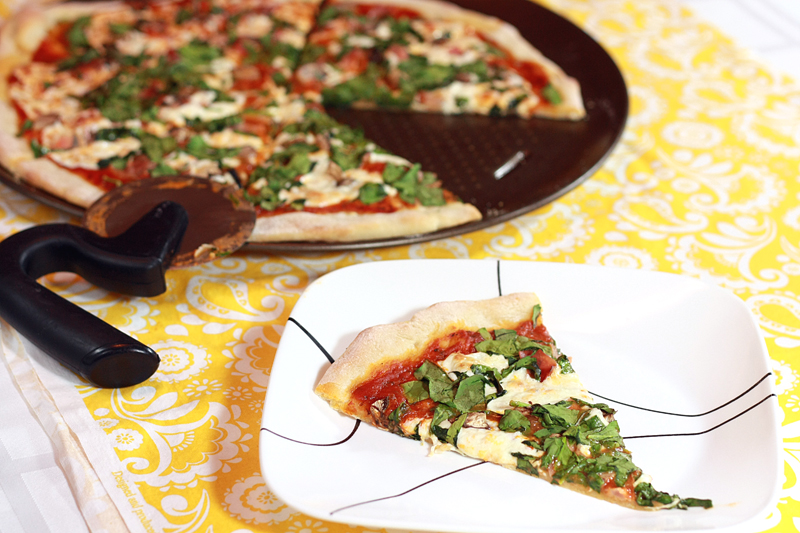
Homemade Pizza Dough


I may have mentioned in the past how spoiled I am when it comes to pizza. Occasionally friends of ours will have us over for homemade pizza. They always make their own crust and then go to town with creative toppings. (I'm pretty sure last time around we had a Big Mac pizza.)

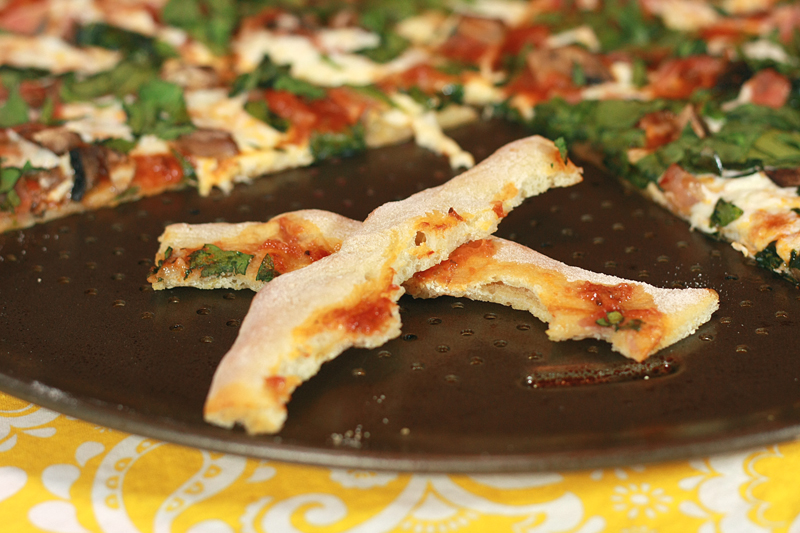
To me, one of the most important parts of a pizza is the crust. Yeah, yeah, I know it's just a vehicle for moving the toppings from the plate to your mouth, but a bad crust can really ruin what would otherwise be an awesome pizza. It has to be well balanced between crispy and chewy (not a huge fan of the crisp-all-the-way-through crust), and flavorful enough that the outer edge of the pizza is good enough to stand on its own -- something you want to eat, not just a handhold for the rest of the slice.

I might be biased, since I automatically go for any slices with the huge crust bubbles, but that just makes the crust all that much more important.

As for this crust, it totally fits the bill on all accounts. Which is exactly why I had to arm wrestle the family recipe away from our friends. Ooor maybe just gave them a quick phone call... but whatever. How I got it is neither here nor there. What matters is that I have it, and I'm sharing it with you. Because I like you. You're special. :) Now go make some pizza.

Homemade Pizza Dough
Adapted from: Corey Broton

2 1/4 teaspoons active dry yeast
1 cup water (105-115 degrees F)
1 cup white wine (105-115 degrees F)
1 tablespoon honey
1 tablespoon olive oil
1 teaspoon kosher salt
4 1/2 cups all-purpose flour
1/4 cup cornmeal

In a large bowl, add the yeast, water, and wine. Let sit for 5-10 minutes or until the top becomes foamy.

Whisk in 2 cups flour, salt, and olive oil until all the lumps are gone and the mixture is smooth. Stir in the cornmeal and 2 more cups of flour. Turn dough out onto a lightly floured work surface. Add remaining 1/2 cup flour and knead for 10 minutes. Add an additional 1/2 cup flour if dough is too sticky.
Coat another large bowl with cooking spray. Form dough into ball and place in bowl, turning once to coat with spray. Cover bowl with plastic wrap and place in a warm, draft-free area (such as an oven) until doubled, about 1 1/2 hours.

Preheat oven to 450 degrees F. Transfer dough to a lightly floured surface and punch down. Let rest for 10 minutes. Divide dough into four sections. Each section can be rolled out to a 14-inch pizza or frozen for later use.

When ready to use, roll dough out to between a 1/8-inch and 1/4-inch thickness. Transfer to a pizza pan* coated with cooking spray. Top with any sauce, cheese, and toppings. Bake for 10 minutes, then reduce heat to 400 and bake for another 10 minutes.


Serves: 32 (8 slices per pizza)

*In my opinion, a pizza stone works much better than a pan to cook the pizza. If you are lucky enough to have one, preheat the stone at 500 degrees F for at least 2 hours prior to baking the pizza. Transfer dough to a pizza peal dusted with cornmeal, top as desired, then transfer prepared pizza to the heated stone inside the oven. Bake for 7-8 minutes or until done.


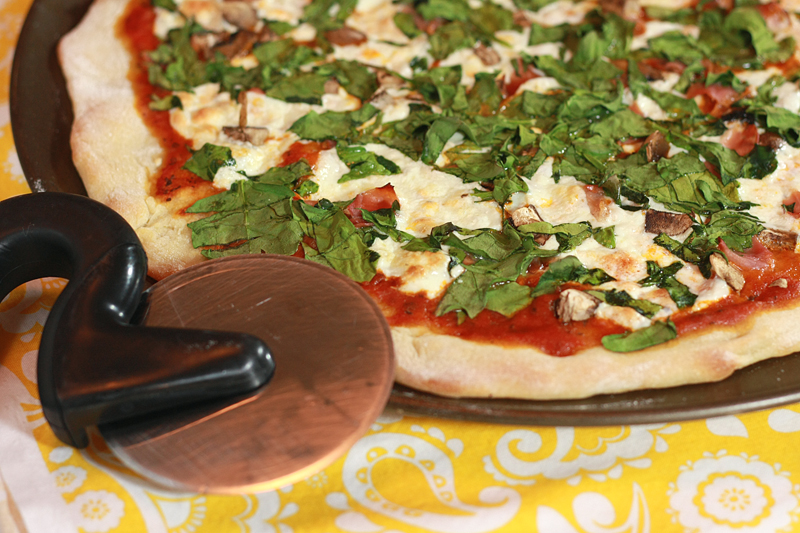
Warning: Pizza made with this dough can be very addicting. I recommend roughly 1 pizza for two people. No joke. This go around Adam was wanting to replicate a pizza he had at a restaurant just a few days before -- this included regular tomato pizza sauce topped with fresh mozzarella, mushrooms, thinly slice prosciutto, and spinach. Divine. As expected.

Oh, and we totally recommend using fresh mozzarella over the pre-shredded bagged variety. Do a simple taste test between the two and you'll never go back. True story.

Side note: if you don't have white wine, or run out, you can always substitute blush or red wine in its place. You may or may not end up with a purple pizza crust, however, it pretty much still tastes the same.


Nutrition Facts - crust only
Serving Size 35g
Amount per serving
Calories 80Calories from fat 6
% Daily Value
Total Fat 0.6g1%
Saturated Fat 0g0%
Cholesterol 0mg0%
Sodium 75mg3%
Total Carbs 15.0g5%
Fiber 0.6g2%
Sugars 0.7g
Protein 2.0g
Vitamin A 0%Vitamin C 0%
Calcium 0%Iron 5%

Wednesday, February 1, 2012

Cornbread Supreme


Now, if you're going to serve soup, you almost have to have some sort of bread or other starchy side to go with it. Okay, you don't have to, but it's kind of...um...disappointing without it.

Most of the cornbread I'm used to borders on the I'm-almost-too-dry-but-not-quite-there-yet side. I know you know what I'm talking about. The kind you have to drench with syrup and/or butter before sending it down the hatch.

Let me tell you, it doesn't have to be that way.

No more dry crumbly excuse for cornbread any more.

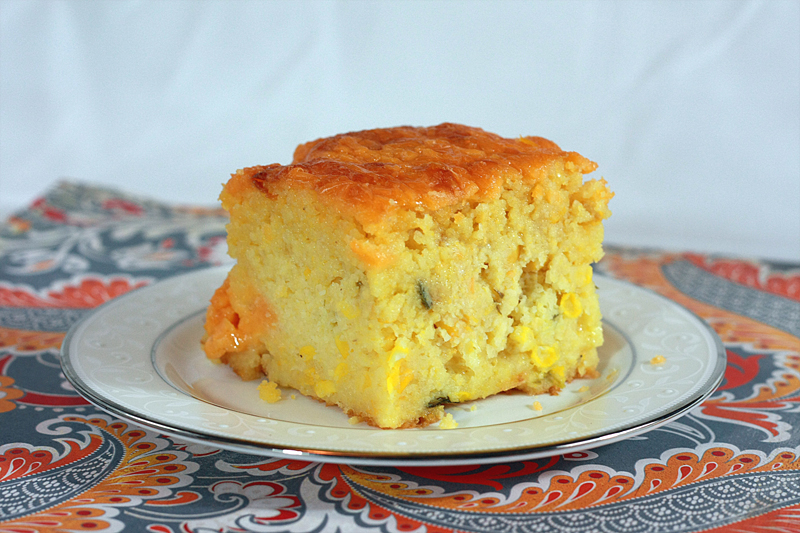
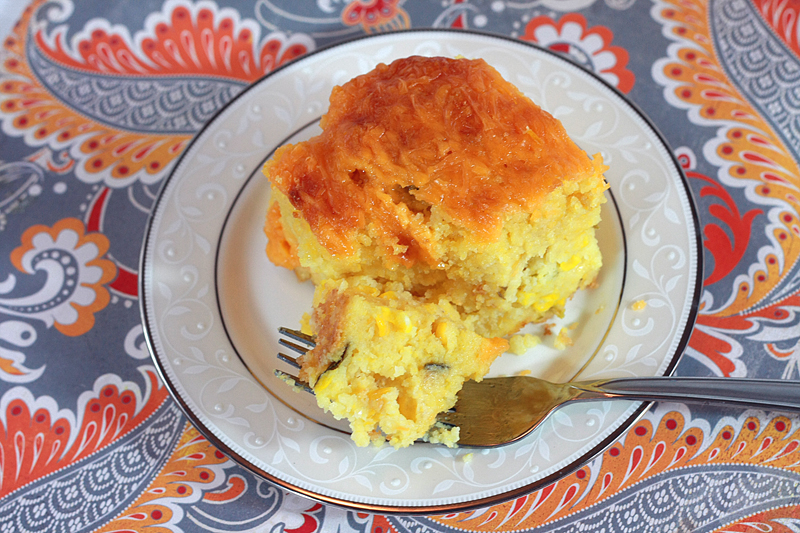
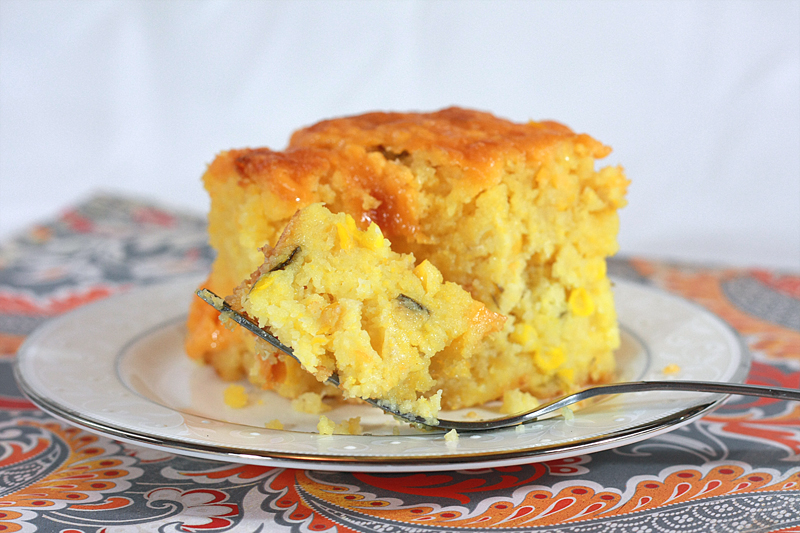
Enter sour cream. And jalapenos. And whole kernels of corn. This, my friends, makes for a moist, and can I even go so far as fluffy? cornbread.

Go ahead. Do your happy dance.


Cornbread Supreme
Adapted from: Cast Sugar

16 ounces frozen whole kernel corn
1 (16 ounce) can cream-style corn
3 ounces diced jalapenos
16 ounces reduced-fat sour cream
4 eggs, lightly beaten
1 cup butter, melted
2 (8.5 ounce) boxes Jiffy cornbread mix
2 cups shredded cheddar cheese

Preheat oven to 350 degrees F. Coat a 9 x 13-inch baking dish with cooking spray.

In a large bowl, combine all the ingredients except for cheese. Pour batter into prepared baking dish. Sprinkle cheese evenly across the top. Bake for 45-50 minutes, or until golden and cooked through. Let rest for at least 10-15 minutes before serving.


Serves: 16


I am so delighted to have finally found a cornbread that doesn't resemble a cake someone left out on the counter for a week. I mean, minus the mold and all. Adding the jalapenos are totally optional (diced green chiles also work), but I kind of like the extra little kick they give.

This will definitely be showing up again next time cornbread is called for.


Nutrition Facts
Serving Size 160g
Amount per serving
Calories 372Calories from fat 207
% Daily Value
Total Fat 23.0g35%
Saturated Fat 13.0g65%
Cholesterol 106mg65%
Sodium 663mg28%
Total Carbs 34.1g11%
Fiber 2.1g8%
Sugars 6.5g
Protein 9.9g
Vitamin A 17%Vitamin C 9%
Calcium 20%Iron 10%

Wednesday, June 1, 2011

Light Brioche Burger Buns


There are some days that dinner time rolls around and I groan. The kitchen is the last place I want to be, and making dinner is the last thing I want to be doing. Those are our delivery pizza/fast food take-out days.

Unfortunately those days have been getting more and more frequent. I blame the weather. Even though the rain and/or heat really has nothing to do with it. In mind it's summer. And summer = being lazy. At least in my book.

So I made some crock-pot pulled pork. Then felt guilty because it was SO easy, and I really wasn't doing anything the rest of the day. So I felt compelled to try my hand at making my own hamburger buns after having a very delicious recipe tucked away for a while. Well, that and we didn't have any hamburger buns at the house. Summer = lazy, remember? I really just didn't want to go to the store.

Would it have been easier to just buck it up and go to the store for some buns? Probably. But honestly, these really weren't that difficult to make, they just took a little time. And quality-wise? Oh-so-much better than those $0.99 buns I have a habit of picking up. Sorry, I'm a cheap-skate on certain things, can't be helped.


Light Brioche Burger Buns


Adapted from: Susi's Kochen Und Backen Adventures

3 tablespoons warm milk (105-115 degrees F)
1 cup warm water (105-115 degrees F)
2 teaspoons active dry yeast
2 1/2 tablespoons sugar
1 large egg
3 cups bread flour
1/3 cup all-purpose flour
1 1/2 teaspoons salt
2 1/2 tablespoons unsalted butter, at room temperature

1 egg, lightly beaten
1 tablespoon water
1 teaspoon sesame seeds

Combine milk, 1 cup water, yeast, and sugar in a glass measuring cup, stirring well. Let sit for about 5 minutes, or until the top is foamy. In a small bowl, lightly beat one egg.

In the large work bowl of a mixer, stir together both flours and salt. Cut in butter until crumbs form. Add the egg and yeast mixture to the flour. Mix together with the dough hook attachment on low. Once combined, increase the speed to medium until the dough is smooth and elastic, about 6-8 minutes (or 8-10 minutes if you are kneading by hand). The finished dough may be slightly sticky (do not add additional flour).

Transfer the dough to a clean work area and into a ball. Place the down in a greased bowl, flipping once to coat entirely. Cover bowl with plastic wrap and let rise in a warm, draft-free location until doubled in size, 1-2 hours.

Remove dough from the bowl and place on a clean work area. Punch the dough down, then let rest for about 5 minutes. Divide the dough equally into 10 sections and shape each into a ball. Line a baking sheet with parchment paper. Transfer the dough balls to the baking sheet, spacing them out 2-3 inches. Cover with plastic wrap coated with cooking spray. Let rise for an additional 1-2 hours until doubled in size.

Set a large shallow pan of water on oven floor. Preheat oven to 400 degrees F.

In a small bowl, beat together 1 egg with 1 tablespoon water. Brush the egg wash on top of each bun. Sprinkle the buns with sesame seeds. Bake, turning sheet halfway through baking, until tops are golden brown, about 15 minutes. Transfer to a rack to cool completely.


Makes: 10 buns


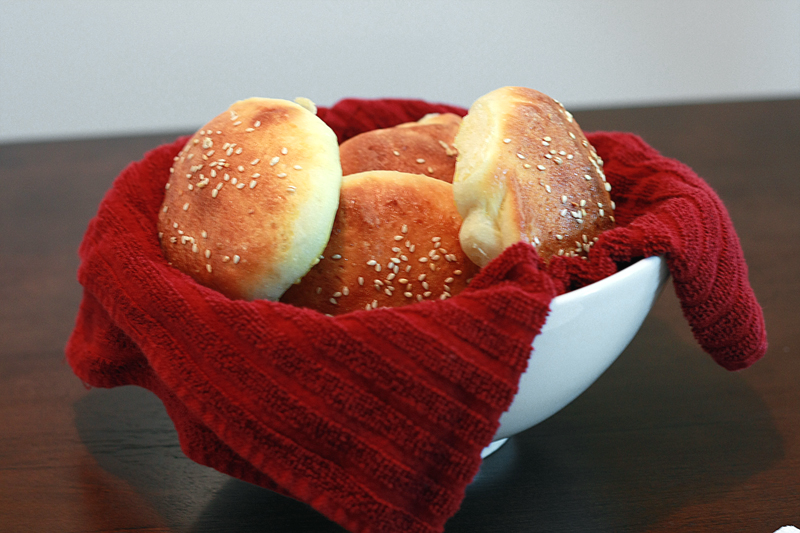
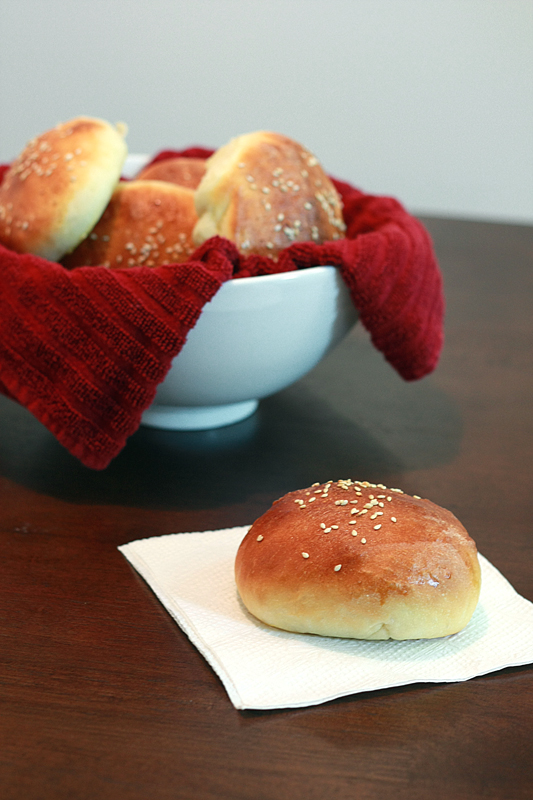
There are certain things that make a hamburger bun a "good quality" bun. You don't want the bun to be so overly soft that any liquid renders it a smooshy sticky mess within minutes of slapping on that burger patty, pulled pork, or sloppy joe mix. Yet you don't want the outside to be so crusty that biting into it squishes everything between the bun out the back. These buns are a nice happy mix. The buns have a nice soft center, yet are totally capable of handling saucy heavy fillings without falling apart or going squishy. As for my favorite part, there is just a very light hint of sweetness to the bun as well. I will definitely be making these again next time we have any recipe calling for a hamburger bun (well, time permitting). :)


Nutrition Facts
Amount per serving
Calories 209Calories from fat 41
% Daily Value
Total Fat 4.5g7%
Saturated Fat 2.3g11%
Cholesterol 48mg16%
Sodium 386mg16%
Total Carbs 35.6g12%
Fiber 1.3g5%
Sugars 3.6g
Protein 6.0g
Vitamin A 3%Vitamin C 0%
Calcium 2%Iron 13%

Tuesday, March 15, 2011

Mini Irish Soda Bread


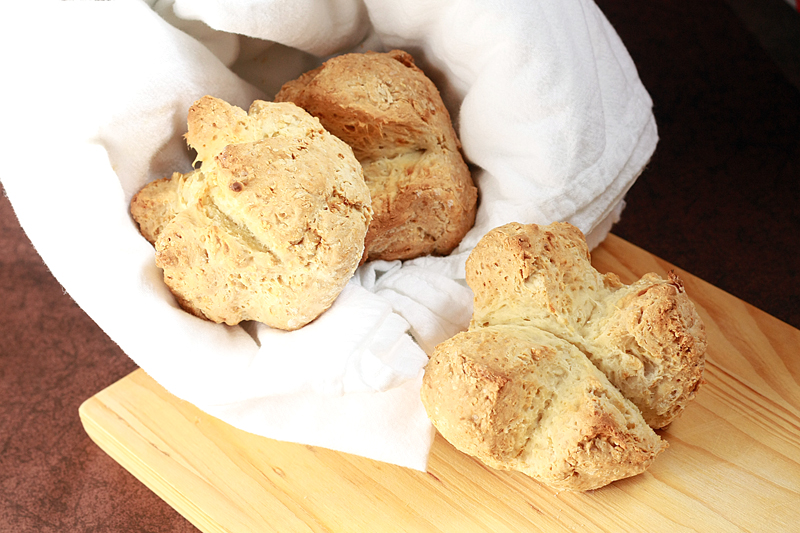
Irish Soda Bread -- a recipe with rules and about 50 million ways to break them. Traditionally, Irish soda bread is made with 4 ingredients: flour, baking soda, salt, and buttermilk. That's it. Anything else added and it is no longer a "traditional" Irish Soda Bread. Not only does this bread only involve four ingredients, but there is also no kneading or rise time involved. You can't get much easier than that.

Of course, over the years, a whole host of things have been added from eggs to whiskey to yogurt to raisins and the list goes on. So... feel free to add whatever you'd like. Since St. Patty's Day is just around the corner, I opted to go for the "almost traditional" route by including just a bit of sugar. I can't follow all the rules, now can I?

Mini Irish Soda Breads
Adapted from: CaffeIna

3 1/2 cups flour (all-purpose or cake flour)
1 teaspoon sugar
1 teaspoon salt
1 teaspoon baking soda
8+ ounces buttermilk

Preheat the oven to 450 degrees F. Lightly dust a baking sheet with flour, then set aside.

In a large mixing bowl, sift together the flour, sugar, salt, and baking soda. Make sure the ingredients are mixed well.

Form a well in the center of the flour mixture. Pour the buttermilk into the well and stir with a wooden spoon. The dough will be soft but lumpy. If all the flour mixture is not hydrated, add more buttermilk, 1 tablespoon at a time until all the ingredients are fully incorporated.

Knead the dough 15-30 seconds, then shape into a large disk. You can slice a cross in the dough and bake at this point, or you can divide the dough evenly into 6 balls. Flatten the tops of the balls, then cut a cross halfway deep into the top of each one. Transfer the balls to the baking sheet.

Bake for 10 minutes, then lower the temperature to 400 degrees F and bake for an additional 10 minutes. Transfer the breads to a cooling rack for several minutes before serving them.

Makes: 6 mini breads


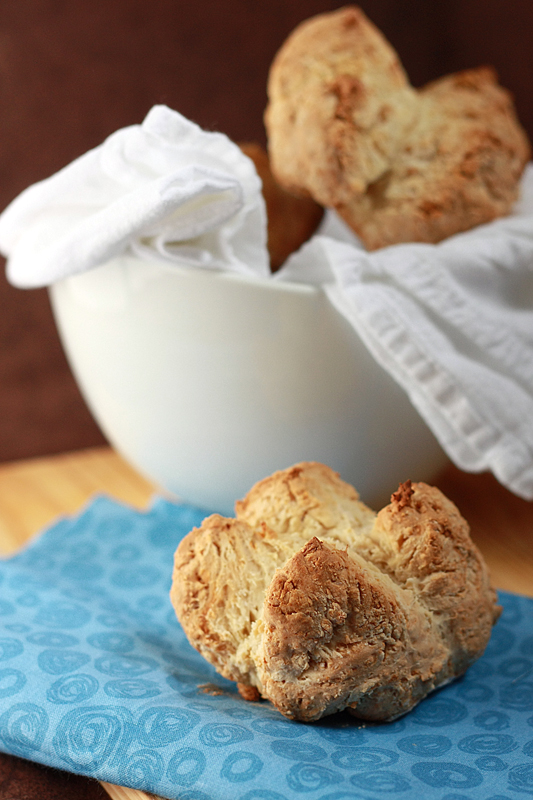
Right out of the oven (okay, after cooling for a few minutes), these little bread balls somewhat reminded me of those flaky Pillsbury biscuits. You know the ones, with the layers you can peel, only with a much crunchier outside and without the buttery factor. Not so bad for only 5 ingredients.

Then I tried to reheat these wrapped in foil in the oven right before dinner. Not so great. These had lost their crispy crunch outside and fluffy inside, and were instead just tough on the outside and super dense on the inside. Even the ones that didn't go in the oven were the same way. Sad face.

If you plan on serving these right out of the oven, I say go for it. They're tasty then. However, I wouldn't make this ahead of time or plan on keeping it around, it just doesn't hold up for later use.


Nutrition Facts
Amount per serving
Calories 283Calories from fat 9
% Daily Value
Total Fat 1.0g2%
Cholesterol 2mg1%
Sodium 639mg27%
Total Carbs 58.2g19%
Dietary Fiber 2.0g8%
Sugars 2.7g
Protein 8.8g
Vitamin A 0%Vitamin C 1%
Calcium 6%Iron 19%

Tuesday, March 8, 2011

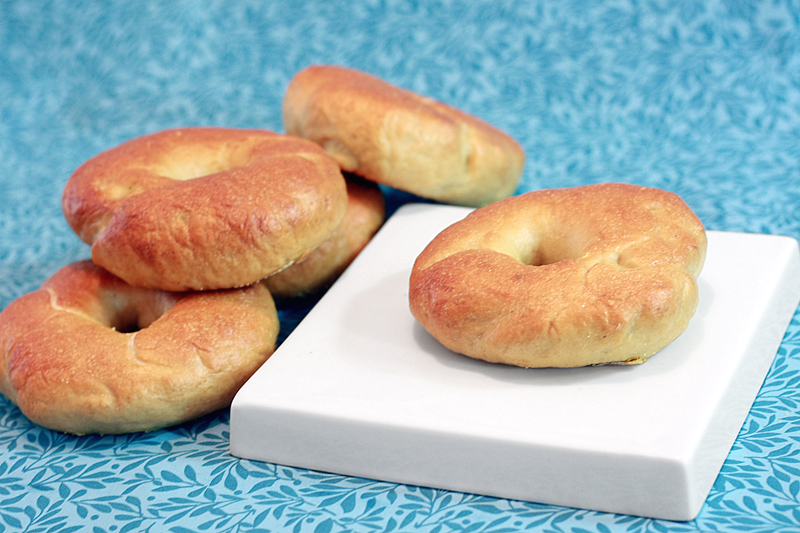
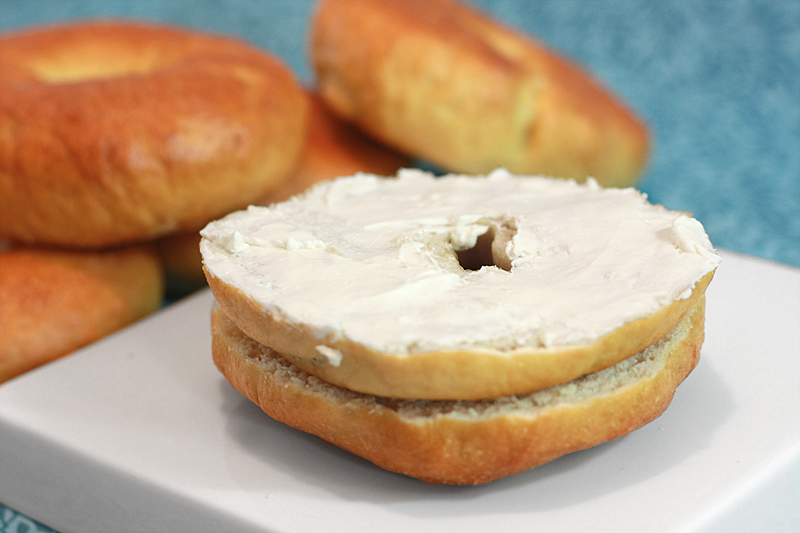
Bagels


When I was in school I absolutely refused to eat school lunches. I wasn't the kid that was embarrassed by my little brown paper sack and always longed to be like all the other kids eating their school-made food. Quite the opposite, in fact - I couldn't stand that greasy messy tasteless conglomeration they called "food" that showed up on my tray. But at that point, my parents decided I was old enough to prepare my own lunches, which turned out to be almost the exact same thing every.single.day. My mom still teases me about it. A sandwich, chips, drink, and a dessert.

Sure the type of sandwich varied day to day - turkey or ham and cheese, peanut butter (no jelly, thankyouverymuch), or one of my all time favorites, a plain bagel with plain cream cheese, but that's about as creative as I got. It's true, I loved my bagels. And I still do to this day.

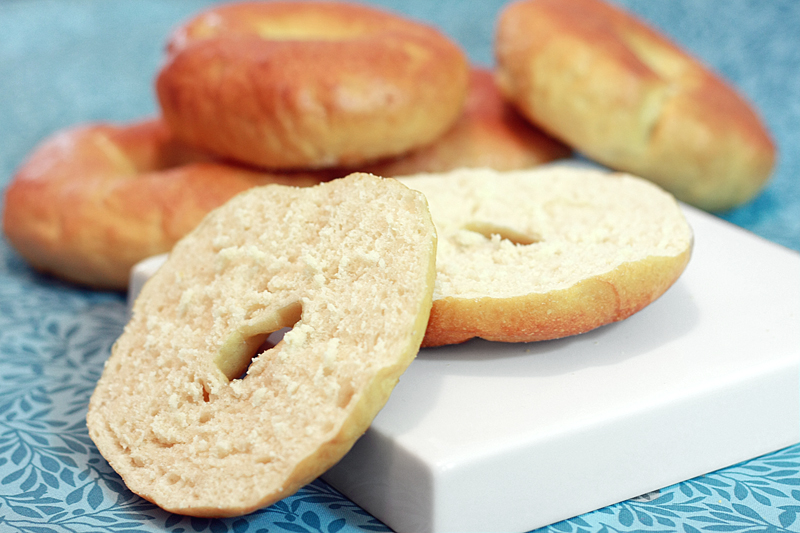
My parents would always buy bagels from the store, and I never really thought about eating any other kind. Those existed? Then I ate an actual bagel from an actual bagel shop. Wow. There is really no comparison. The real bagel is soft on the inside with a nice chewy outside -- those store-bought things simply can't compare.

After eating at such a bagel shop while visiting a friend a while back, I have had nothing but those deliciously fluffy yet chewy bagels on my mind. I just haven't been able to bring myself to buy store-bought or even Panera-bought ones since. It was time to tackle them myself if I wanted the real thing.

Peter Reinhart's Bagels
Adapted from: The Bread Baker's Apprentice

1 teaspoon instant yeast
4 cups bread flour
2 1/2 cups water, room temperature

1/2 teaspoon instant yeast
3 3/4 cups bread flour
2 3/4 teaspoons salt
1 tablespoon honey

1 tablespoon baking soda

Cornmeal or semolina flour for dusting

Note: This recipe is a two day process.

Day One:
In the work bowl of a mixer, stir together 1 teaspoon yeast and 4 cups flour. Add water, and stir until a smooth, sticky batter forms. Cover the bowl with plastic wrap and place in a draft free area at room temperature for approximately 2 hours, or until the sponge is foamy and bubbly, and almost double in size.

Add the remaining yeast to the sponge and stir. Slowly add 3 cups of flour, salt, and honey. With the dough hook, mix on low until the ingredients form a ball. Working in the remaining 3/4 cup flour, a little at a time, to stiffen the dough.

Transfer the dough to a work surface, and knead for at least 10 minutes (or for 6 minutes by machine) (be prepared to knead quite a bit longer). The dough should be firm, but elastic and smooth. There should be no raw flour – all ingredients should be hydrated. If the dough seems too dry and rips, add a few drops of water and continue kneading. If the dough seems tacky or sticky, add more flour to achieve the stiffness required (dough will be very stiff). The kneaded dough should feel satiny and pliable but not be tacky.

Divide the dough into 4 1/2 ounce pieces and shape into rolls. Cover with a damp towel and allow to rest for about 20 minutes.

Line two baking pans with parchment paper and spray lightly with cooking spray. Poke a hole in the center of each ball of dough and gently rotate your thumb around the inside of the hole to widen it. The holes should be approximately 2 1/2 inches in diameter, and the dough should be as evenly stretched as possible.

Place each of dough rings 2 inches apart on the pans. Spray the bagels very lightly with cooking spray and cover the pans loosely with plastic wrap. Let the dough rest at room temperature for about 20 minutes.

Use the “float test” to see if the bagels are ready to be refrigerated. Fill a small bowl with cool or room-temperature water. The bagels are ready to be refrigerated when they float within 10 seconds of being dropped into the water. Take one bagel and test it. If it floats, immediately return the tester bagel to the pan, pat it dry, cover the pan, and place it in the refrigerator overnight (it can stay in the refrigerator for up to 2 days). If the bagel does not float. Return it to the pan and continue to proof the dough at room temperature, checking back every 10 to 20 minutes or so until a tester floats. The time needed to accomplish the float will vary, depending on the ambient temperature and the stiffness of the dough.

Day Two:
Preheat the oven to 500 degrees F. Bring a large, wide pot of water to a boil. Add the baking soda.

Remove the bagels from the fridge. Gently drop the bagels into the water, boiling only as many as comfortably fit (they should float within 10 seconds). Flip each bagel after 1 - 2 minutes, depending on how chewy you prefer them (longer = chewier). Boil for the same amount of time on the other side.

Meanwhile, sprinkle the same parchment-lined pans with cornmeal or semolina flour. If you are adding any toppings to your bagels, do so as soon as they come out of the water.

When enough bagels to fill one pan have been boiled, place pan on middle rack in the oven. Bake for approximately 5 minutes, then rotate the pan 180 degrees, lower the temperature to 450 degrees, and bake for another 5 minutes. Bagels are done when they turn light golden brown, although you may bake them darker if you prefer. Remove the pan from the oven, and transfer the bagels to a cooling rack for at least 15 minutes before serving.

While the first pan of bagels is in the oven, finish boiling the second pan, and repeat the baking process, remembering to turn the oven heat back to 500 degrees F before baking.

Makes: 14 bagels


Every where I searched for a bagel recipe, it seemed this one kept popping up. I did make a few changes, as I wasn't able to find all the ingredients necessary. I switched out high-gluten flour for bread flour, and honey for malt powder. Usually not a huge deal. In this case, I think the honey for malt powder switch really changed the flavor of these bagels. There is just something about a bagel that has a very particular flavor -- and now I know for sure it comes from malt powder (or syrup). Next time I try these, this will definitely be a must-have ingredient to hunt down.

I also ended up hand-kneading the dough and adding a lot of extra water (yes, it really was that stiff I didn't trust it in my mixer). Let's just say you get quite the work out kneading this dough. I never did get my dough to pass the windowpane test, but the end result seemed as it should be.

Adam really really liked these (taking down two of these for breakfast alone). I did like them, except for that tiny little bit about the flavor part. The texture and chewiness were right on. However, I wouldn't let these sit around very long as they seemed to dry out a little bit by the following day (I ended up freezing the remaining bagels).


Nutrition Facts
Amount per serving
Calories 258Calories from fat 6
% Daily Value
Total Fat 0.7g1%
Cholesterol 0mg0%
Sodium 731mg30%
Total Carbs 54.2g18%
Dietary Fiber 2.0g8%
Sugars 1.4g
Protein 7.3g
Vitamin A 0%Vitamin C 0%
Calcium 1%Iron 18%

Monday, February 21, 2011

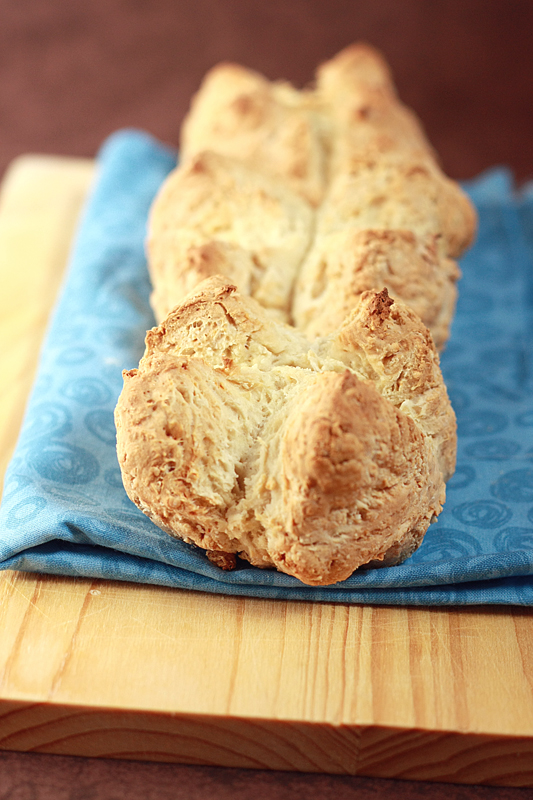
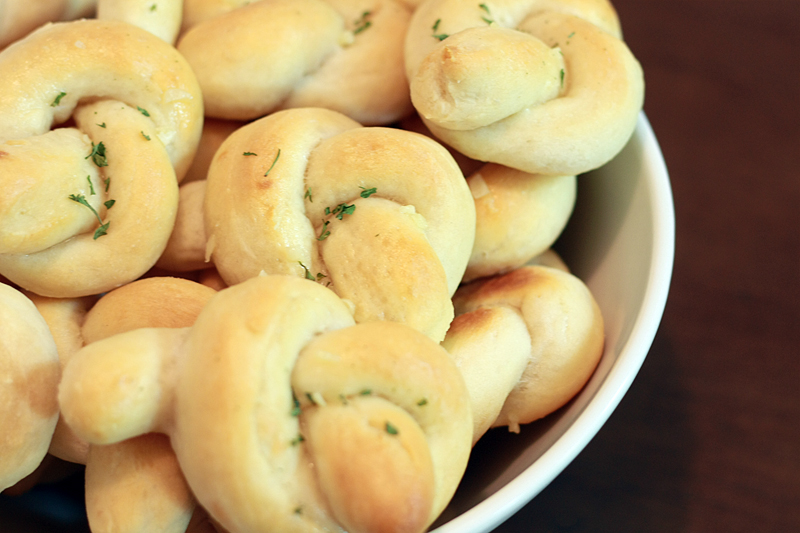
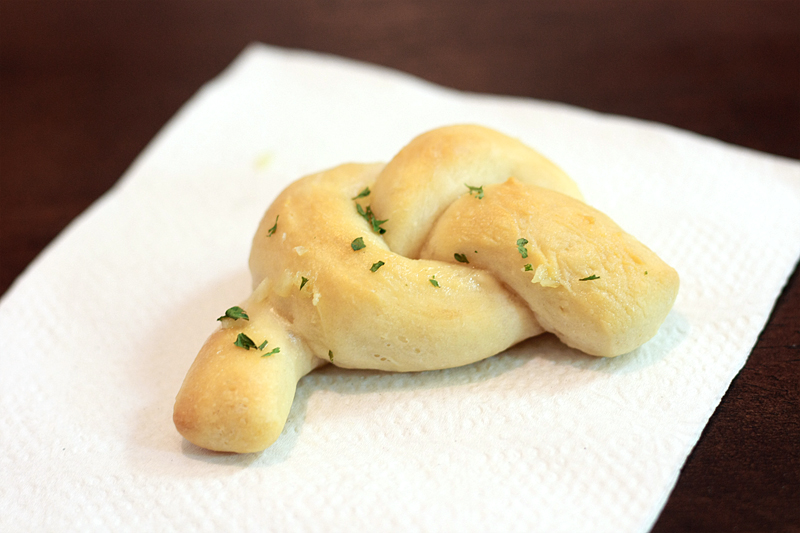
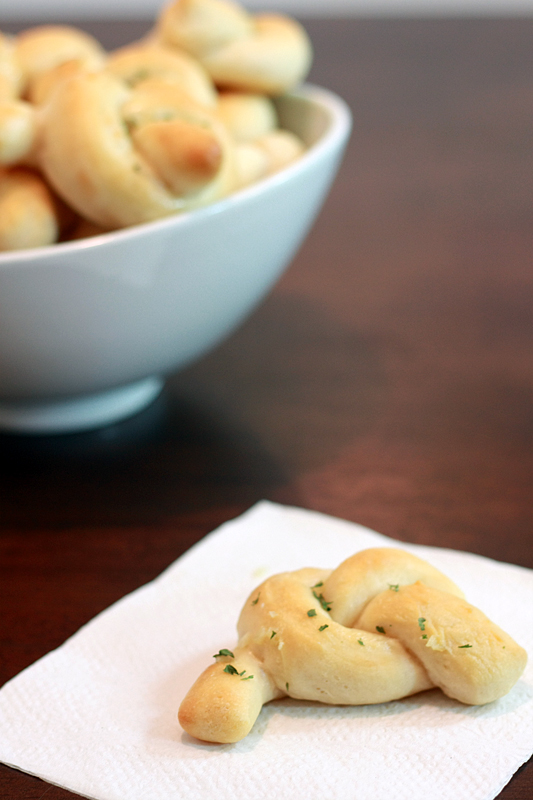
Garlic Knots


Last week, when I decided to make Chicken Gnocchi Soup for dinner, I felt like we needed something else to go with it. As the soup is full of veggies, I didn't think a vegetable side was in order (I mean, I can only handle so much green stuff), so where did that leave me? Well, bread of course. Since I was already doing an Olive Garden spin-off soup, why not go the whole 9 yards and throw in some garlicky breadsticks too? Well, maybe not quite like the ones at Olive Garden, as I'm not really a huge fan of those anymore.

Of course, at this point, I was already running a bit short on time for playing with yeast, so I didn't want to spend forever searching for a recipe. I remembered seeing some garlic knots over at Brown Eyed Baker not that long ago, and after a quick scan of the recipe I decided it was a go. Adam was going to love the fact that he finally had some bread to dip in his soup.

Garlic Knots
Adapted from: White On Rice Couple via Brown Eyed Baker

5 1/2 cups all-purpose flour
1 3/4 cups warm water (110-115 degrees F)
1/4 cup olive oil
1 1/2 tablespoons active dry yeast
1 tablespoon granulated sugar
1 teaspoon kosher salt

2 tablespoons olive oil
2 tablespoons butter
4 cloves of garlic, finely minced
2 teaspoons dried parsley

Place the flour in a large bowl and set aside.

In a small bowl, add the water, olive oil, yeast, sugar and salt. Stir to dissolve the yeast. Pour the water mixture over the flour and stir with a wooden spoon until the water is fully incorporated and all of the flour is moistened.

Transfer the dough out to a lightly floured surface and knead for a minute or two, until the dough is soft and slightly tacky. Add more flour if the dough is too sticky, and more water if it is too dry. Place the dough in a well-oiled bowl, turning once to coat the top of the dough. Cover with plastic wrap, and place in a draft-free area until doubled in size, about 1 1/2 to 2 hours.

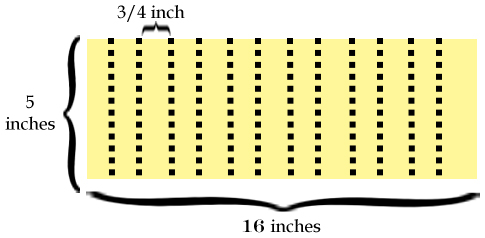
Line up to four baking sheets with parchment paper; set aside. (If you do not have 4 baking sheets, line as many as you have, then lay plastic wrap on the counter for the remaining rolls. You will have to transfer the formed dough knots to the lined, cooled baking sheets later.) Transfer the dough to a lightly floured surface, and divide into two. Take the first half and press down into a rough rectangle to release any trapped gasses. Flip the dough over and press down again. Using a rolling pin, roll the dough into a rectangle measuring 5 inches by 16 inches, and 1/2-inch thick. Using a pizza cutter or a sharp knife, slice the rectangle into 5-inch by 3/4-inch strips.


Lightly sprinkle the strips with flour. Gently roll each strip it back and forth (think play-doh snake) to create an even rope, 7-9 inches long. Tie it into a knot and place on a prepared baking sheet, about 1 1/2 inches apart. Repeat with the remaining dough, the again with the second half of the dough. Cover the baking sheets with a dry kitchen towel and place in a warm, draft-free area. Allow knots to rise for 30 minutes to 1 hour, or until doubled in size.

While the knots are rising, preheat the oven to 400 degrees F.

Once the knots have doubled in size, bake uncovered, one pan at a time, for 12 to 15 minutes, or until golden brown.

Meanwhile, prepare the garlic coating. In a small saucepan, warm the olive oil, butter and garlic over low heat. Add the parsley, cover and set aside.

Tranfer the knots from the oven to a cooling rack. While the knots are still warm, using a pastry brush, brush them with the garlic coating. Sprinkle with additional kosher salt to taste. Serve warm or at room temperature. Baked rolls can be individually wrapped and frozen in an airtight freezer bag. Rewarm in a 350 degree F oven for about 5 minutes.

Makes: 40 rolls


I was very excited to taste these rolls, as my kitchen was starting to smell wonderful. After smothering them with the garlic sauce, I oh-so-impatiently let them sit for another 5 minutes or so, to really soak up that garlic flavor. Finally... one bite in, two bites in... hmmm. Not quite what I expected. The outside crust was much firmer than I was hoping for, although the inside was still nice and chewy. Then I noticed that the garlic sauce hadn't soaked through at all (most likely due to the harder crust) and the inside was really lacking flavor. Bummer. These worked well when it came to dipping and soaking up soup (once bitten into), but on their own they were a bit lackluster in my book. I'm still trying to figure out if I missed something in these as the recipe came with glowing reviews.


Nutrition Facts
Amount per serving
Calories 89Calories from fat 25
% Daily Value
Total Fat 2.8g4%
Saturated Fat 0.7g3%
Cholesterol 2mg1%
Sodium 63mg3%
Total Carbs 13.7g5%
Dietary Fiber 0.6g2%
Protein 2.0g
Vitamin A 0%Vitamin C 0%
Calcium 0%Iron 5%

LinkWithin

Related Posts with Thumbnails
 
Pin It button on image hover