Showing posts with label Pork. Show all posts

Thursday, November 29, 2012

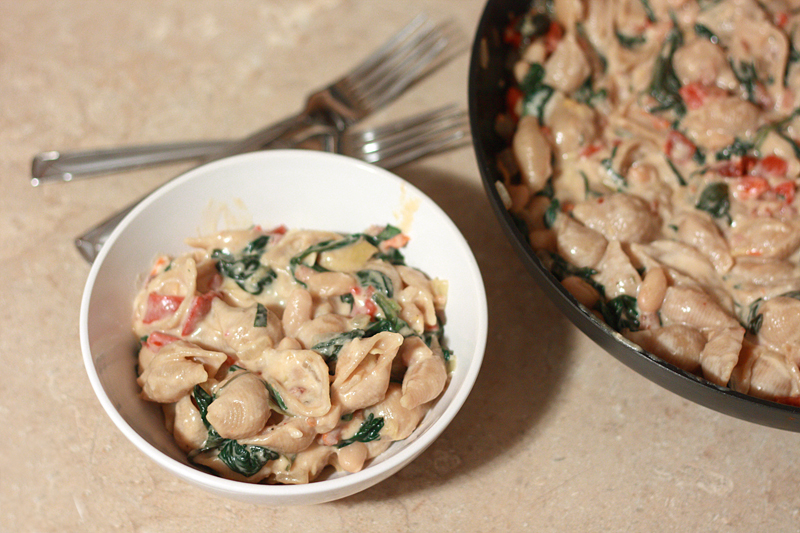
Tuscan White Bean Pasta


Oh my goodness. Is it just me or has the past week or two just flown by? Maybe it just me, as we had visitors and a baby shower the weekend before Thanksgiving, followed by leaving the day after our guests for my parent's house for the.day.of.food.and.all.things.fattening.

Needless to say, it's been a whirlwind around here, and even though I've put away most of the things we've received from both our showers, our living room is still strewn with baby things. Oh, who am I kidding? It's everywhere, not just the living room.

Sometimes though, you just need to stop. Back up. And take a breath. Back away from all the holiday hub-bub and just have a day here and there of "the usual". No leftover cranberry sauce infused this, or leftover turkey sandwich that. Just a nice normal dinner that's actually somewhat good for you. I mean, there's even green stuff in it. Which totally makes up for all that pumpkin pie, or cookies to come.
Tuscan White Bean Pasta
Adapted from: How Sweet Eats

2 cups whole wheat pasta
1/4 cup pancetta, chopped
1 cup onion, diced
3 cloves garlic, minced
6 ounces fresh baby spinach
1 (12 ounce) jar roasted red pappers, drained and diced
1/2 cup sun-dried tomatoes, diced
1/3 cup artichoke hearts, chopped
1 (15 ounce) can cannellini beans
10 fresh basil leaves, julienned
1 tablespoon butter
1 tablespoon all-purpose flour
1 (15 ounce) can low-fat evaporated milk
1/2 cup 1% milk
3 tablespoons grated Parmesan cheese

Bring a saucepan of water to a boil over high heat. Cook pasta according to package instructions.

In a large skillet over medium-high heat, cook the pancetta until crispy and most of the fat has rendered. Transfer to a paper towel-lined plate and let drain.

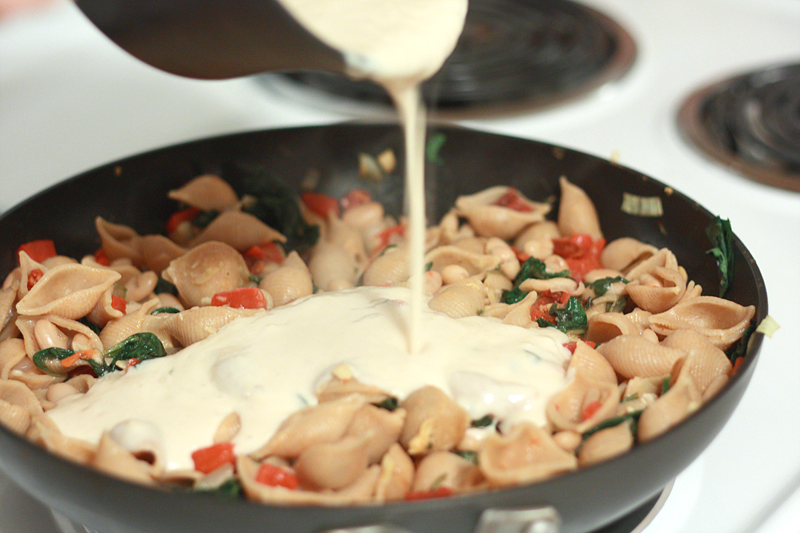
Reduce heat to medium-low. Add the onions and cook 3-5 minutes, or until softened. Add the garlic and spinach, stirring until spinach wilts. Toss in roasted red peppers, sun-dried tomatoes, artichokes, and beans. At this point the pasta should be finished cooking and drained; add to the mixture. Reduce heat to low, stirring occasionally.

In a small saucepan, melt the butter over low heat. Once melted and pan is hot, whisk in flour until no lumps remain, and mixture is golden and fragrant. Pour in evaporated milk and regular milk. While whisking continuously, bring the mixture to a boil over medium-high heat, then reduce heat to a simmer. Stir frequently for 5-7 minutes, or until the mixture has thickened to desired consistency. Reduce heat to low and stir in Parmesan cheese and basil. Season with salt and pepper if desired.


Serves: 6
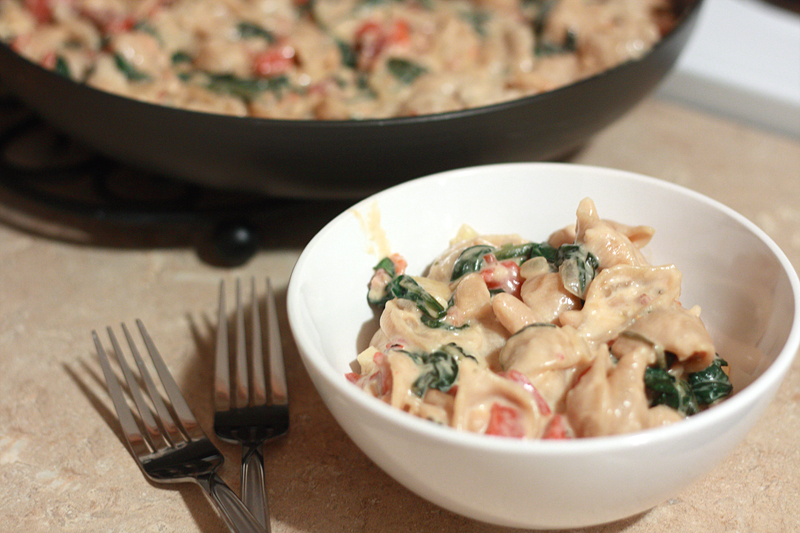

I actually made this a while back, and seemed to remember liking it... but when you're making multiple new meals a week, things tend to blend into one another. So I gave this another shot, and I am so glad I did. It's creamy and satisfying, perfect for the winter, but not overwhelmingly so that all you feel like doing is sitting on the couch in your favorite pair of stretchy pants. Though that's not always a bad thing. I love how colorful this dish is -- reminds me with every bite that there's something healthy going on, and healthy tastes absolutely fantastic.


Nutrition Facts
Serving Size 523g
Amount per serving
Calories 624Calories from fat 88
% Daily Value
Total Fat 9.8g15%
Saturated Fat 3.2g16%
Cholesterol 31mg10%
Sodium 990mg41%
Total Carbs 95.1g32%
Fiber 22.7g91%
Sugars 12.8g
Protein 35.2g
Vitamin A 84%Vitamin C 33%
Calcium 43%Iron 48%

Thursday, March 1, 2012

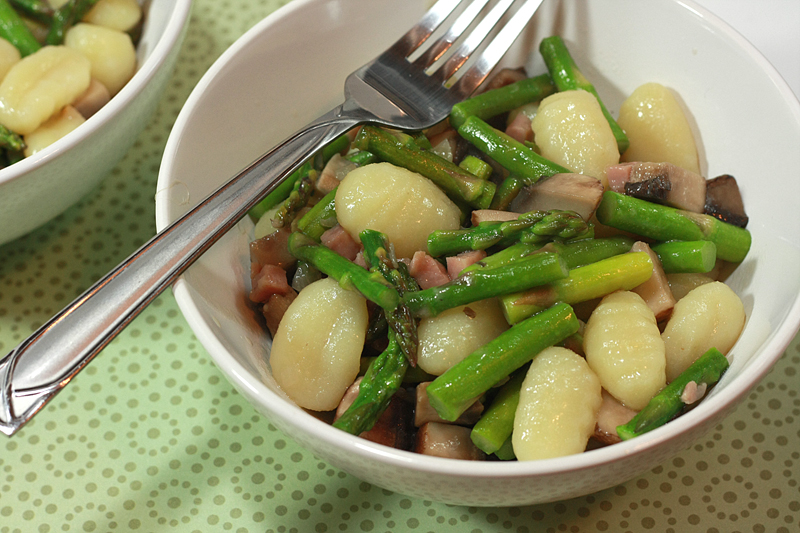
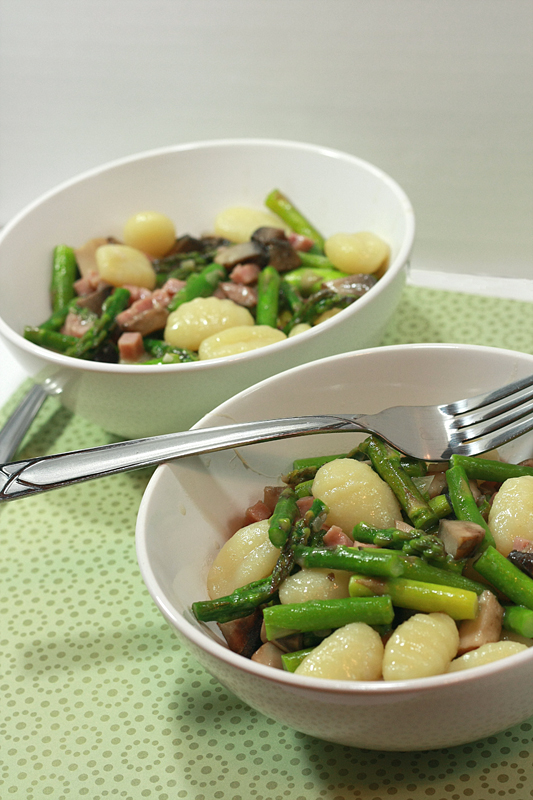
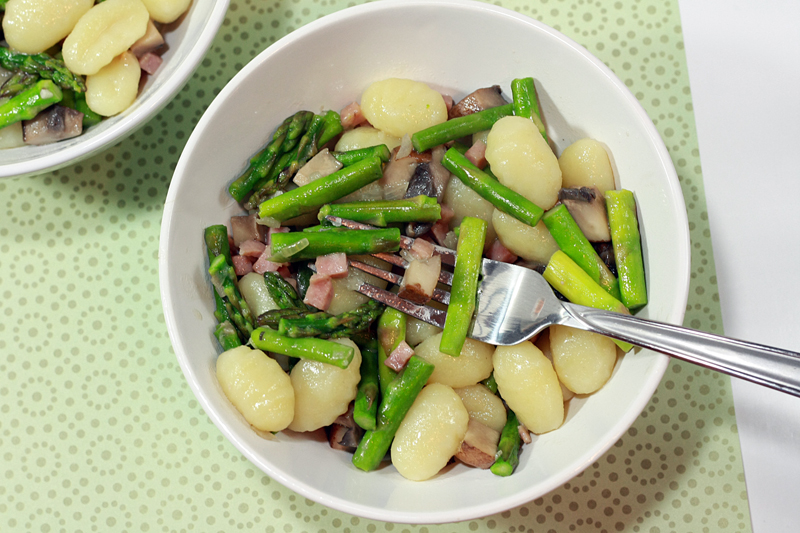
Gnocchi with Ham, Shallots, & Asparagus


As of late I've been in another one of my cooking slumps. I've been bookmarking, and pinning, and printing recipes, but when it actually comes time to make them... well, I'd rather just sit on the couch and browse some more rather than get in the kitchen. Sigh. But we have to eat, and fast food had gotten a little abused as of late (which means nothing sounds good from those places). This needs to stop.

I've found one of the best ways to get back out of a cooking slump is by making easy-peasy yet delicious meals. Preferably ones that don't take forever (unless it's in a crockpot, and then I might just be okay with it).

This recipe fits the bill. It's a very spring-like dish, being full of veggies, yet on the other hand it's a little bit of Paula Deen influenced. 1/2 a stick of butter anyone? Err, shall we say, the "old school" Paula Deen? Not going there on that argument.

Anyhoo. Time to make this dish < time to run out and grab fast food. Not to mention it's delish. Gotta love tastiness in simplicity. Though that butter doesn't hurt.


Gnocchi with Ham, Shallots, and Asparagus
Adapted from: From Cupcakes to Caviar

1 pound potato gnocchi
1/2 cup butter
1 clove garlic, minced
1 shallot, diced
1 pound asparagus, ends trimmed and cut into 1-inch pieces
6 ounces portobello mushrooms, washed and sliced
3 ounces diced ham
1/3 cup Romano cheese, grated
1/3 cup Parmesan cheese, grated

Bring a large pot of water to a boil over high heat. Cook gnocchi according to package instructions. Drain, reserving 1/4 cup of water. Set aside.

Meanwhile, melt the butter in a large non-stick skillet over medium heat. Add the garlic, and cook until fragrant, 30-60 seconds. Add the shallot and cook for another 3 minutes, or until tender. Add the asparagus, mushrooms, and ham, cooking until asparagus is crisp tender, about 5 minutes.

Reduce heat to medium-low. Add the cheeses and reserved cooking water to the pan. Stir until cheeses have melted, about 3 minutes. Add the gnocchi, tossing to coat with sauce.


Serves: 4


Adam was very perplexed by the "sauce" at first. Mostly because he really liked it but couldn't figure out what it was. For just reserved cooking water and cheese, it definitely gave the meal that extra boost. Though I have a feeling the butter had a bit to do with it... However, that dang butter = a TON of saturated fat. Next time around I think I'll play around with cooking the veggies in olive oil, then finishing off the dish with a pat or two or butter (rather than half a stick). Hmmm, maybe this needs to go on next week's "to-make" list...


Nutrition Facts
Serving Size 357g
Amount per serving
Calories 585Calories from fat 304
% Daily Value
Total Fat 33.8g52%
Saturated Fat 20.3g102%
Cholesterol 103mg34%
Sodium 1063mg44%
Total Carbs 47.2g16%
Fiber 3.2g13%
Sugars 2.4g
Protein 26.1g
Vitamin A 36%Vitamin C 25%
Calcium 39%Iron 28%

Wednesday, February 8, 2012

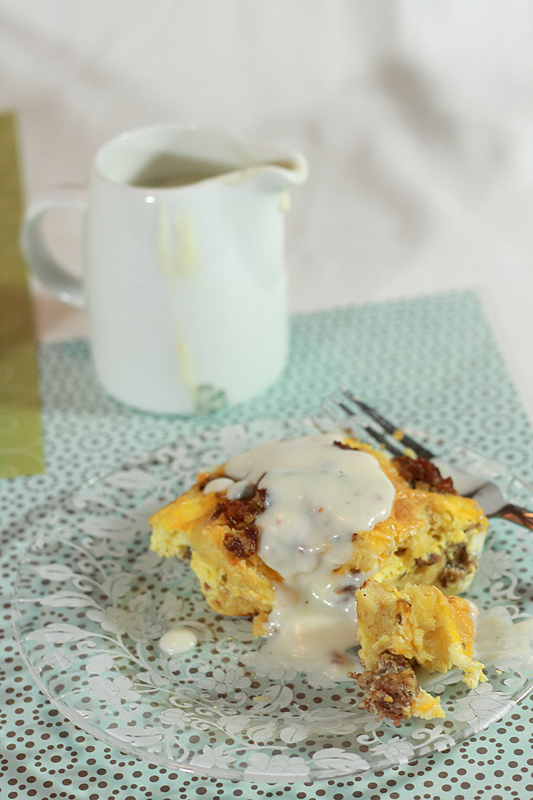
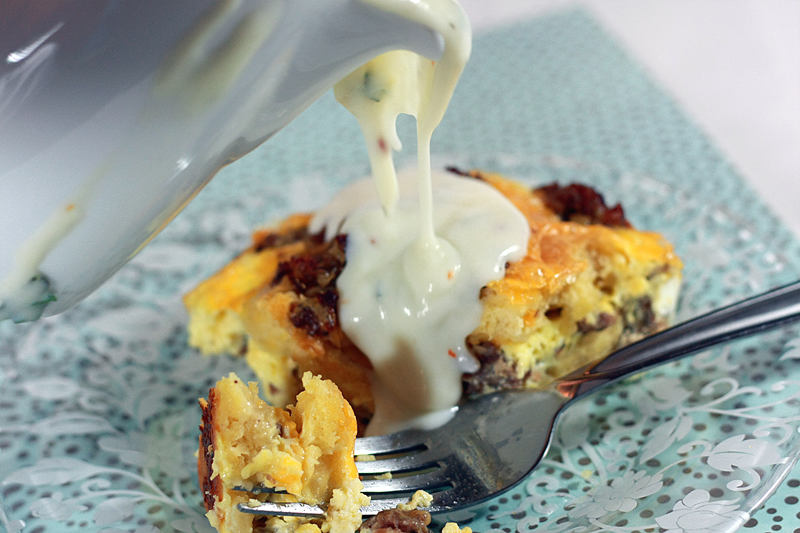
Sausage, Egg, & Biscuit Casserole


Let me let you in on a little secret. Breakfast just isn't for breakfast any more. Shocking, I know.

If fact, breakfast for dinner (or brinner) is pretty much the only way I eat "breakfast-y" type foods anymore. Well, aside from vacations, but that's another story.

Let's be honest here. I like my sleep. I like to eat when I get up. I don't like to wait hours for my food to be done. But every once in a blue moon I do like the nice warm comfort of breakfast food. And there's no written law stating that eggs and sausage smothered in gravy must be eaten for breakfast. [A fact someone should pass on to fast food restaurants that end breakfast service at 10.]

Nope, here we do those kinds of things for dinner. And relish them. In all their calorie-laden comfort glory. Which, let's face it, is really how these types of meals roll.


Sausage, Egg, and Biscuit Casserole
Adapted from: Cuisine at Home, December 2011

1 pound bulk pork breakfast sausage
7 eggs
1 1/4 cups 1% milk
3/4 cup heavy cream
1/2 teaspoon kosher salt
1 teaspoon ground black pepper
8 refrigerated buttermilk biscuits, sliced in half hamburger-style
1 1/2 cups shredded Cheddar cheese, divided

3 tablespoons butter
3 tablespoons all-purpose flour
2 cups 1 % milk
1 tablespoon fresh sage, minced
1/2 teaspoon crushed red pepper flakes
1/2 teaspoon ground black pepper

Preheat oven to 375 degrees F. Coat a 9 x 13-inch baking dish with non-stick spray; set aside.

In a large skillet over medium heat, brown the sausage, breaking up with a spoon. Transfer cooked sausage to a paper towel-lined plate and set aside until ready to use. Leave drippings in pan.

In a medium bowl, whisk together the eggs and next 4 ingredients (through 1 teaspoon ground pepper).

Layer the bottom half of the biscuits in the prepared baking dish. Top with half of the sausage. Sprinkle with half of the cheese. Add another layer of biscuit dough with the remaining biscuit tops. Top with remaining sausage. Drizzle the egg mixture evenly over the sausage and biscuits.

Bake for 30 minutes. Sprinkle remaining cheese over top and bake for another 10-15 minutes, or until the center no longer jiggles (165 degrees) and a toothpick inserted into a biscuit comes out clean. Let stand for 10 minutes.

While casserole is baking, melt the butter in the skillet with the sausage drippings over medium heat. Whisk in flour until smooth, continuing to stir for 2 minutes. Pour in milk and whisk until smooth. Continue cooking gravy until mixture becomes thickened, 5-8 minutes. Stir in sage, red pepper flakes, and 1/2 teaspoon ground black pepper. Serve poured over casserole.


Serves: 8


If you are dead set on making this for breakfast, make the casserole the night before, cover and refrigerate, then pop it in the oven when you get up. It will still take the full 55-60 minutes to bake, but you shaved off around a half hour of frying and whisking. If you also make the gravy ahead of time, place plastic wrap directly onto the surface of the gravy before storing in the fridge to prevent that lovely skin from forming on the top. Simply reheat when ready to use.


Nutrition Facts
Serving Size 259g
Amount per serving
Calories 534Calories from fat 351
% Daily Value
Total Fat 39.0g60%
Saturated Fat 18.0g90%
Cholesterol 257mg86%
Sodium 1023mg43%
Total Carbs 20.8g7%
Fiber 0.7g3%
Sugars 7.2g
Protein 23.8g
Vitamin A 19%Vitamin C 1%
Calcium 34%Iron 13%

Tuesday, January 31, 2012

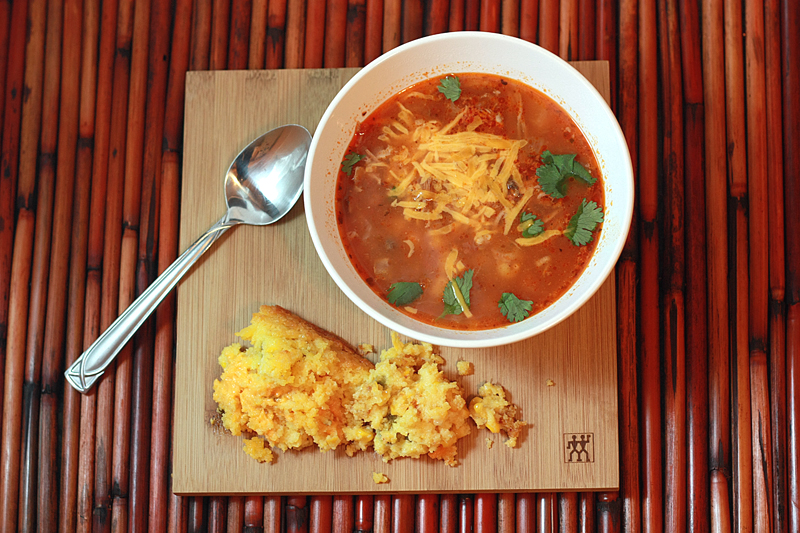
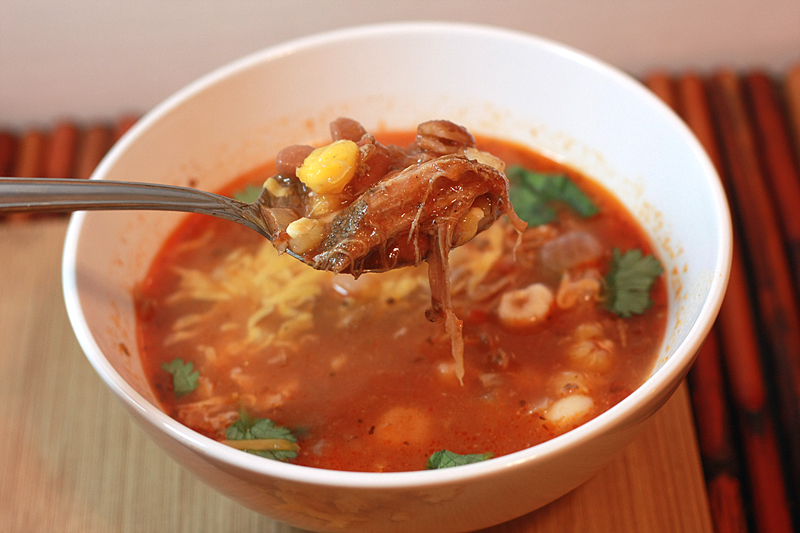
Slow Cooker Posole


Winter isn't only a time for snow and chilly weather. It also ushers in the classic cold and flu season. Joy. As much as I try and avoid it, at some point the cold always catches up to me. In some form or another.

Which is why I spent most of yesterday morning surrounded by a sea of kleenex followed by an evening of not being able to breathe due to a stuffy nose. And it looks like I'm in for a repeat today.

At least it's just confined to my nose, right?

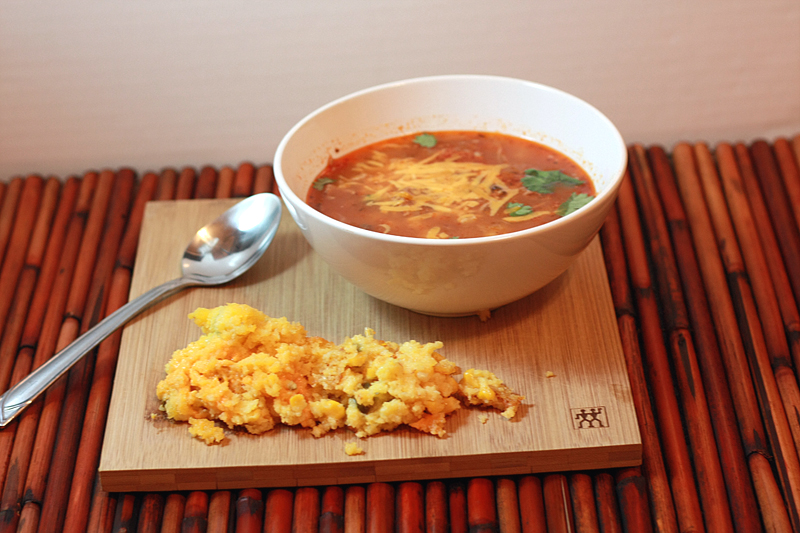
Too bad this soup is long gone. I could definitely go for a bowl right about now. All steamy and full of warm cozy flavors. Someone make me another batch, stat!

And let's just ignore the cornbread that has completely fallen apart because I was far too impatient/hungry to let it rest a bit. Tasted way better than it looks, promise. But we'll get to that another day. ;)

Slow Cooker Posole
Adapted from: Bon Appetit, January 2012

1 tablespoon ground cumin
1 teaspoon garlic powder
1 teaspoon smoked paprika
1/2 teaspoon kosher salt
1/4 teaspoon ground black pepper
2 pounds boneless pork shoulder
1 cup onion, diced
1/2 cup water

1/4 cup vegetable oil
1 cup onion, diced
3 cloves garlic, minced
3 ounces fresh baby spinach, chopped
6 cups fat-free reduced-sodium chicken broth
28 ounces pinto beans, undrained
28 ounces white hominy, drained
28 ounces diced tomatoes, undrained, pureed
1 tablespoon oregano
2 teaspoons ground cumin
1/2 teaspoon kosher salt
1/4 teaspoon ground black pepper
4 ounces grated cheddar cheese
1/4 cup chopped cilantro

In a small bowl, mix together the first 5 ingredients (through pepper). Rub mixture over pork. Cover a slow cooker with a slow cooker liner. Place pork in the slow cooker with 1 cup onion and water. Cook on low for 6-8 hours or until easily shredded with forks. Remove pork from slow cooker and shred.

In a large dutch oven over medium heat, warm the oil. Add onion and cook under tender, about 5 minutes. Add garlic, stirring often, and cook for another 2 minutes. Add broth, beans, hominy, tomato puree, oregano, and cumin. Bring to a boil, then reduce heat to low. Cover and simmer, stirring occasionally, for 30 minutes. Add pork and simmer for another 30 minutes. Season with salt and pepper.

Divide posole between bowls, topping each with shredded cheese and cilantro.


Serves: 10


Why yes, I do realize that it does take about an hour to finish this dish outside the slow cooker. However, I have no intentions of letting pork simmer on the stove for 5-6 hours. I just don't feel comfortable leaving it if I have to step out for a minute. Or an hour. Thank goodness for crockpots.

And really though, after the slow cooker it's pretty much just a dump and heat process. That's my kind of dinner. Especially when it brings variety to the table. Not to mention fiber. Tricky tricky.


Nutrition Facts
Serving Size 529g
Amount per serving
Calories 595Calories from fat 131
% Daily Value
Total Fat 14.6g22%
Saturated Fat 4.9g24%
Cholesterol 78mg26%
Sodium 908mg38%
Total Carbs 68.4g23%
Fiber 16.1g64%
Sugars 6.9g
Protein 46.7g
Vitamin A 19%Vitamin C 30%
Calcium 22%Iron 38%

Wednesday, January 25, 2012

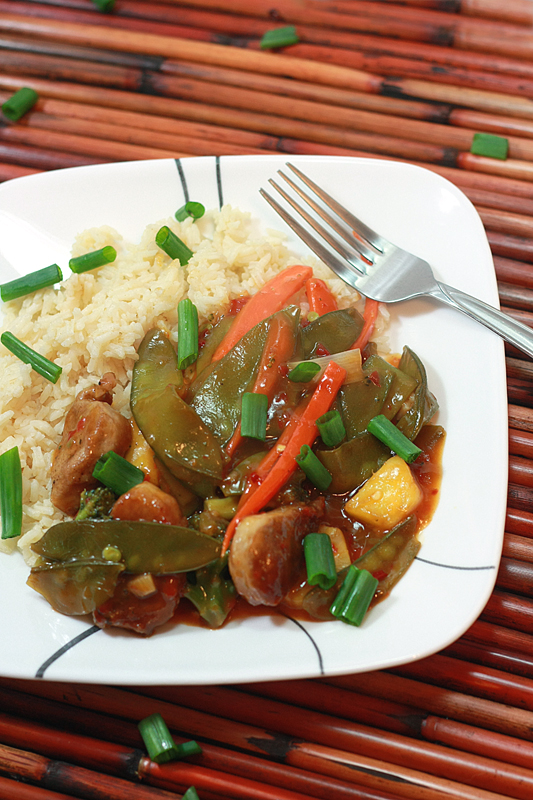
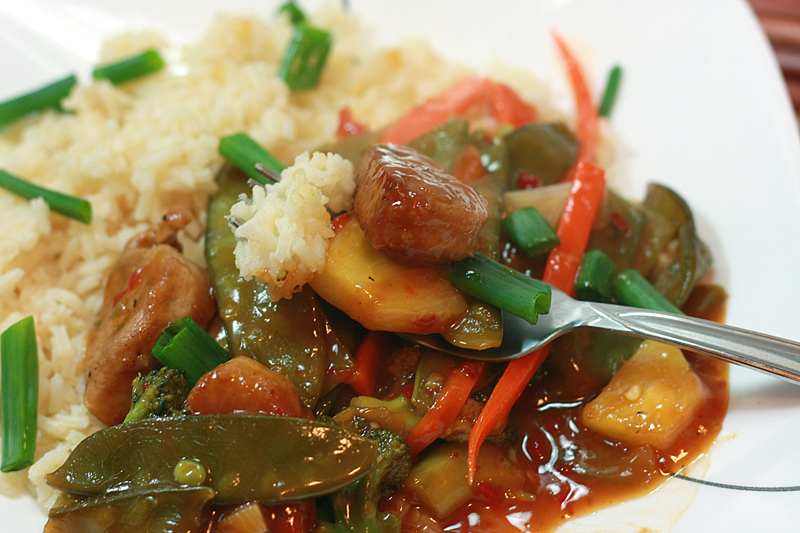
Sweet & Sour Pork Stir Fry with Sesame Ginger Rice


Let me tell you a story about me trying to burn the house down. It involves pork and a wok pan. And two smoke detectors that would not shut up.

Okay, so there may not have been any actual flames (lame, I know) but there was definitely smoke and very loud beeping noises and omgcanyounottelliamjustcookingdinner? all in one go. Oh, not to mention me being clueless about any smoke whatsoever and merrily going about stirring my little pieces of pork.

Oh dear.

But somehow the pork was cooked just fine and I am still indignant about the fact that there was any smoke. Trust me. I know smoke when I see it. Been there, done that. Whatever. Maybe the fact that there's smoke detectors every 3 feet in this house doesn't help either.

Irregardless of my cooking ability, this is still delicious. Definitely spicy with a nice touch of sweet from the pineapple and pineapple juice. Yum.

Sweet & Sour Pork Stir Fry with Sesame Ginger Rice
Adapted from: Cuisine at Home, December 2011

6 ounces pineapple juice
2 tablespoons chili garlic paste
3 tablespoons rice vinegar
3 tablespoons soy sauce
3 tablespoons brown sugar
2 tablespoons cornstarch
2 tablespoons cooking sherry
1 pound pork tenderloin, trimmed, cut into 2-inch pieces
1/2 teaspoon kosher salt
1/2 teaspoon ground black pepper, grated
3 tablespoons canola oil, divided
1 tablespoon garlic
1 teaspoon ground ginger
8 ounces frozen broccoli
1 cup match-stick cut carrots
6 ounces frozen snow peas
1 bunch green onions, cut into 1-inch pieces
1 cup fresh pineapple, cubed

3 cups fat-free, reduced-sodium chicken broth
1 1/2 cups long grain white rice
2 teaspoons ground ginger
1 teaspoon sesame oil

In a small bowl, whisk together the first 7 ingredients (through sherry). Set aside.

Sprinkle the salt and pepper onto the pork tenderloin. Heat a wok or large non-stick skillet over medium-high heat. Add 2 tablespoons canola oil. Cook the pork in two batches until browned, about 5 minutes per batch. Remove pork to a paper towel-lined plate and set aside. Wipe wok out with a clean paper towel.

With the heat still at medium-high, add the remaining canola oil. Add the garlic and ginger, stir frying for 30 seconds. Add the broccoli and cook for 1 minute. Add the carrot and cook for another 2-3 minutes. Add the snow peas and white parts of the green onion, cooking for 1-2 minutes. Toss in the pineapple and reserved sauce mixture. Simmer until sauce thickens, about 2 minutes, continuing to stir. Stir in cooked pork and continue to simmer until heated through, about 2 minutes. Garnish with remaining green portions of green onions.

Meanwhile, bring broth to a boil in a medium saucepan over medium-high heat. Add rice, ginger, and sesame oil, stirring well. Return mixture to a boil. Cover, and reduce heat to medium-low. Cook 15-20 minutes or until rice is tender.


Serves: 6


Apparently, not only do I like to set off smoke detectors, but I also can't read. Instead of adding chili garlic sauce, I added paste. Um, yes, definitely a difference. Let's just say our sinuses were very cleared out after we finished eating. (Don't worry, I've adjusted the amount above to be more, shall we say, tolerable.) Despite all my flubs, we still really enjoyed the dish.


Nutrition Facts
Serving Size 438g
Amount per serving
Calories 460Calories from fat 100
% Daily Value
Total Fat 11.1g17%
Saturated Fat 1.7g8%
Trans Fat 0.1g
Cholesterol 55mg18%
Sodium 980mg41%
Total Carbs 60.5g20%
Fiber 4.0g16%
Sugars 13.1g
Protein 27.0g
Vitamin A 76%Vitamin C 115%
Calcium 8%Iron 25%

Tuesday, January 17, 2012

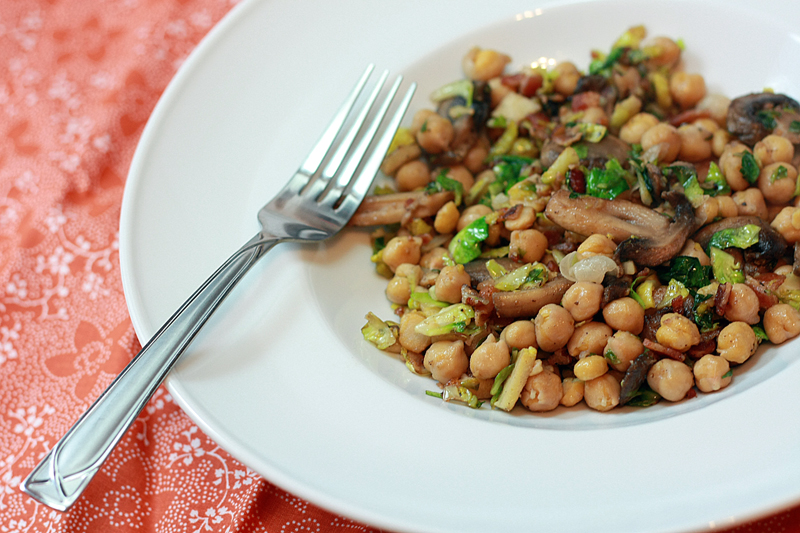
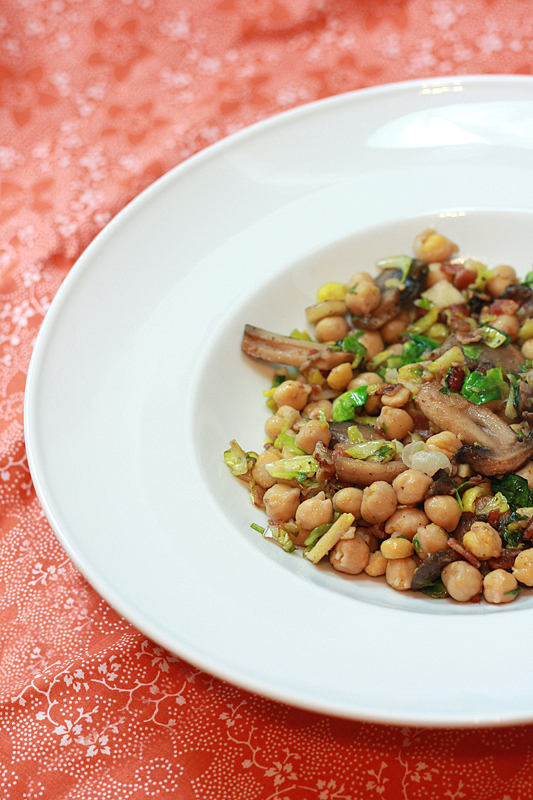
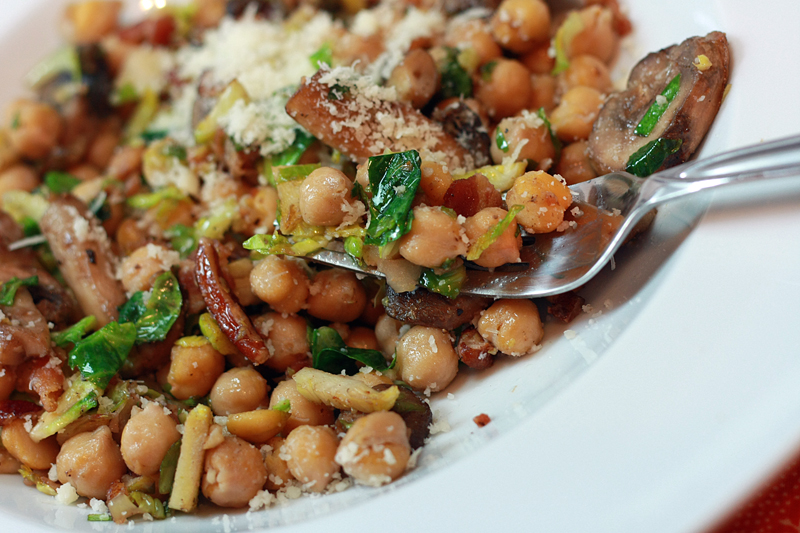
Warm Chickpea Salad


I warned you I was going for some more veggies in my diet. You know, those things I don't like to eat?

But, when they're smothered and covered in bacon drippings... they're tolerable. Even the green ones.

Honestly, I was a little scared when I was making this. Not because I thought I wouldn't like it, but I was a bit worried I may be scrounging around for something else for the hubby. That I would get that look. The "what the heck is this and why am I supposed to be eating it?" look.

Yet the look never came. I didn't have to go back into the kitchen to try and poke around for some leftovers or who knows what else. I think it was the bacon. It's excellent at hiding things. Or at least convincing you that there is most definitely meat present, and a lot of it. Even when it's not true.

Not that you have to worry about not being full from this meal. The chickpeas take care of that. Maybe, just maybe, I can get the hang of this whole eating veggies thing down. With a little help from my friend bacon.

Warm Chickpea Salad
Adapted from: How Sweet It Is

3 slices bacon
1 cup sliced mushrooms
7 Brussels sprouts, thinly sliced
1 (15 ounce) can chickpeas, drained and rinsed
2 tablespoons chopped pecans
1/4 teaspoon ground black pepper
1/8 teaspoon ground nutmeg
2 tablespoons grated Parmesan cheese

Place bacon in a large skillet over medium heat. Cook until bacon is browned but not completely crisp. Transfer to a paper towel-lined plate. Remove all drippings from the pan except for 2 tablespoons.

Add mushrooms to the pan and cook for 5 minutes, or until they start to release their juices, stirring occasionally. Add the Brussels sprouts and cook an additional 5 minutes. Stir in the chickpeas, bacon, pecans, pepper, and nutmeg. Cook for another 5-6 minutes, or until mixture is heated through.

Divide the mixture evenly between three plates. Sprinkle each with 1/3 of the Parmesan.


Serves: 3


Despite the fact that this can be a high calorie meal, it's actually fairly healthy for you. (I'm pretty sure you'll be set on some fiber for a while.) Although you could always opt for having this as a side rather than as the entree. Which, I think is definitely doable -- coming from someone who is horrible at timing foods together and rarely makes sides. I guess that says something, right? (And the fact that the hubby actually commented on how much he liked it says something too, I should add.)


Nutrition Facts
Serving Size 232g
Amount per serving
Calories 697Calories from fat 217
% Daily Value
Total Fat 23.6g39%
Saturated Fat 6.7g34%
Cholesterol 18mg6%
Sodium 256mg12%
Total Carbs 91.7g31%
Fiber 27.1g108%
Sugars 16.8g
Protein 33.6g
Vitamin A 9%Vitamin C 73%
Calcium 21%Iron 55%

Tuesday, November 8, 2011

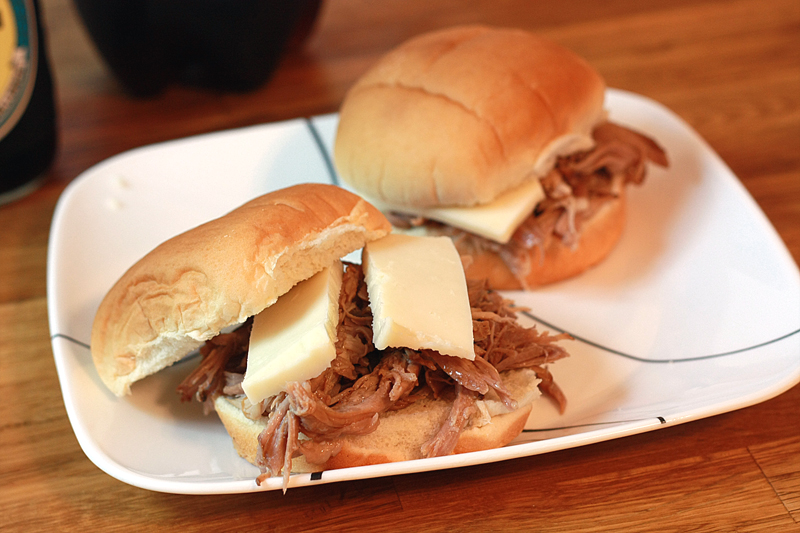
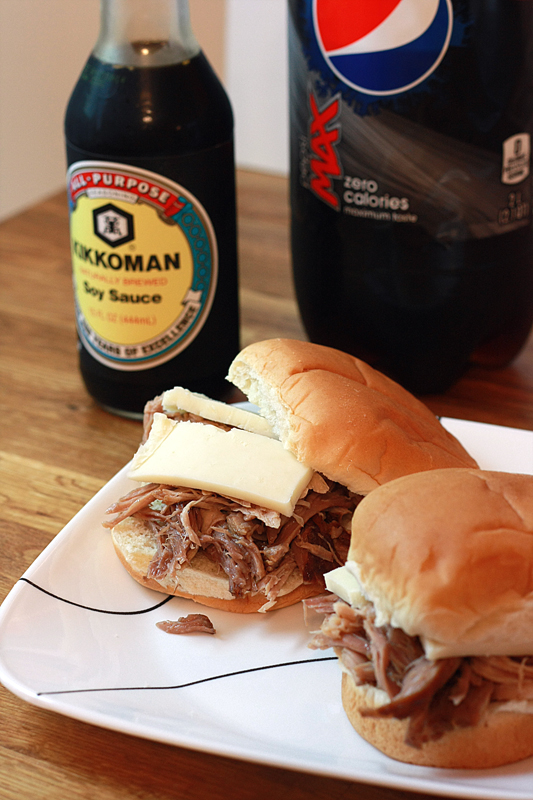
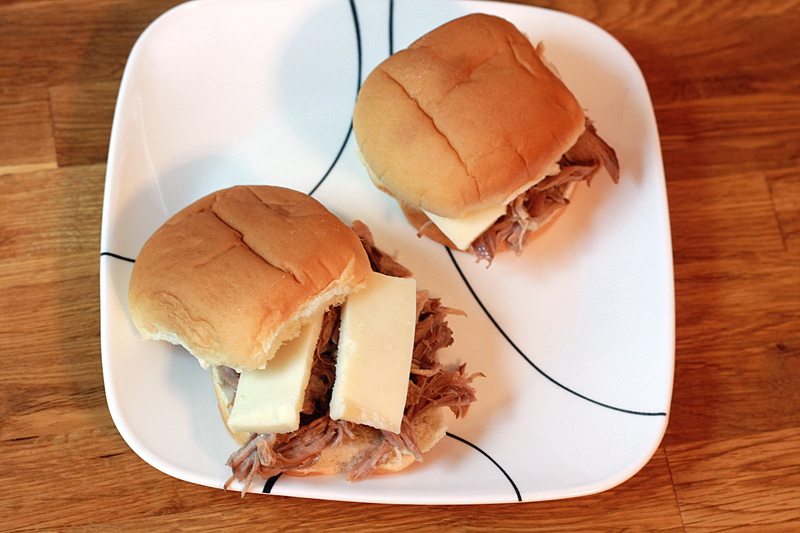
Slow Cooker Soy and Cola Pork Sandwiches


Oh.my.goodness. Yet another slow cooker recipe?

It happens. Kind of like life.

Which is why these slow cooker recipes are so important. Some days you just can't make a wonderful nice meal, slaving away in the kitchen for an hour or two, no matter how much you want to. (Anyone claiming otherwise... I strongly beg to differ.)

And if you're wondering, yes, I am getting a bit "pulled pork"-ed out. It's still pulled pork, no matter how you dress it up. But Adam was the one that picked out this recipe and stared me down with some puppy dog eyes, so it's not like I had a choice in the matter. The only choice I had was to convert this from a stove-top to a crockpot recipe. Which I did gladly. Much less work for me. And it helps to avoid hungry-cranky husband syndrome. Definitely a must.


Slow Cooker Soy and Cola Pork Sandwiches


Adapted from: Cooking Light, October 2011

3 pounds bone-in pork shoulder (Boston Butt)
1 tablespoon sesame oil
1/2 teaspoon kosher salt
1 teaspoon ground ginger
4 cloves garlic, minced
2 cups cola
1/2 cup hoisin sauce
1/4 cup rice vinegar
1/4 cup soy sauce
1/4 cup rice vinegar
8 ounces Monterrey Jack cheese, cut into 1 ounce slices
8 hamburger buns

Cover a slow cooker with a liner. Place the pork shoulder in the slow cooker. In a medium bowl, whisk together remaining ingredients. Pour mixture over pork. Cook on low for 4-6 hours, or until pork shreds easily. Remove the bone and transfer pork to a cutting board. Using two forks, shred the pork. Place pulled pork on each hamburger bun and top with a slice of cheese.

Serves: 8


This is a nice combination of the infamous Coke Pulled Pork and Asian flair. Neither one are overly pronounced or outweigh the other. I didn't boil down the liquid mixture as called for in the original recipe, but that is always an option, and would probably give some extra punch to those flavors. While I wasn't overly impressed, the hubby sure enjoyed these and quickly devoured a few of them in one sitting, followed by polishing the rest off for the lunch the next day.


Nutrition Facts
Serving Size 345g
Amount per serving
Calories 638Calories from fat 309
% Daily Value
Total Fat 34.3g53%
Saturated Fat 14.4g72%
Cholesterol 136mg45%
Sodium 1361mg57%
Total Carbs 35.5g12%
Fiber 1.5g6%
Sugars 12.8g
Protein 41.5g
Vitamin A 6%Vitamin C 1%
Calcium 30%Iron 22%

Tuesday, November 1, 2011

Slow Cooker Lasagna


I was so excited last night. For the first time since we'd moved to Pittsburgh, we had the chance of having trick or treaters. So I filled up the candy bowl, and waited. Made some lasagna, and waited. Ate some lasagna, and waited.

Wouldn't you know it -- we didn't get a single trick or treater last night. Bummer.

Except for the fact that now I get to keep all the candy. Which is just marvelous in my book. Except for my teeth. Which may just rot out in 2.3 days at the rate I'm going.

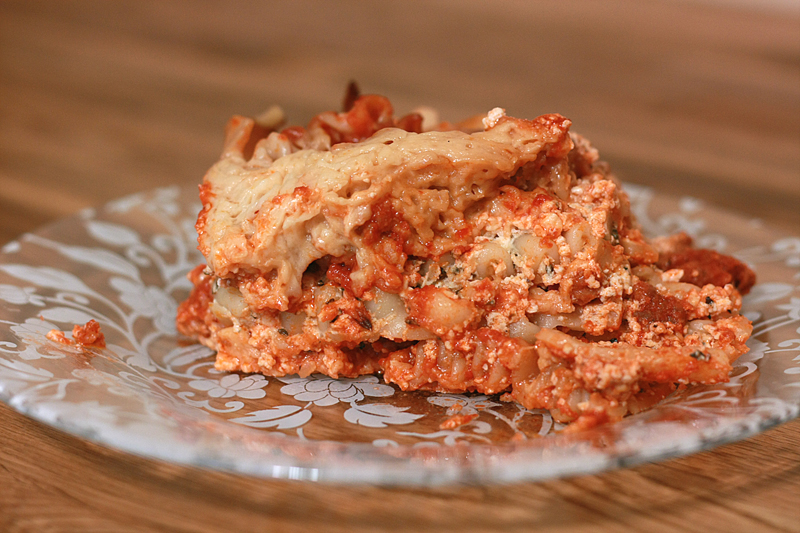
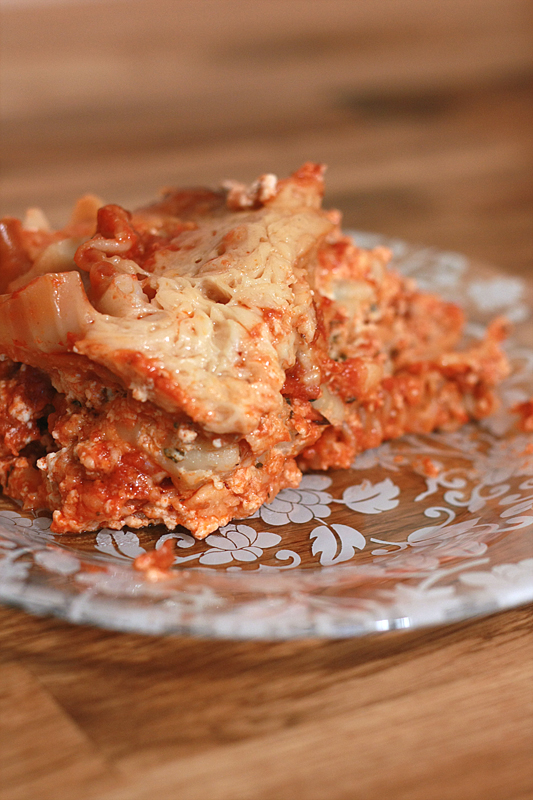
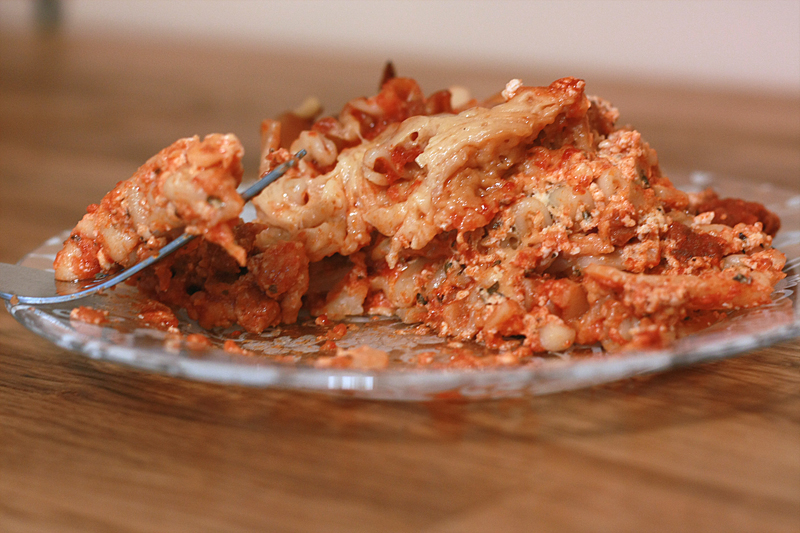
While this isn't the lasagna I made last night, it is another one of my slow cooker meals that worked out perfectly during soccer season. And I've decided that lasagna might just be one of the more infuriating things to try and get a good picture of. Usually it just ends up in a cheesy, meaty, gooey pile of deliciousness. Which, tastes excellent, but photographs... not so great. Especially when you're starving and all you want to do is eat -- but no, you have to take 257 million pictures first. Give or take a few.

Slow Cooker Lasagna


Inspired by: The Meat and Potato Foodie

6 no-boil lasagna noodles
2 teaspoons olive oil, divided
1/2 cup onion, diced
1/2 teaspoon kosher salt
1/4 teaspoon ground black pepper
1 pound hot Italian sausage, casings removed
1/4 teaspoon garlic powder
1/4 teaspoon crushed red pepper flakes
1 (8 ounce) can tomato sauce
1 (6 ounce) can tomato paste
1/4 cup fat-free reduced-sodium chicken broth
1 (8 ounce) package reduced-fat cream cheese, at room temperature
1 cup 2% cottage cheese
1/4 cup low fat sour cream
2 eggs, lightly beaten
1 teaspoon kosher salt
1/8 teaspoon ground nutmeg
1 teaspoon dried parsley
1 teaspoon dried basil
1 teaspoon Italian seasoning
2 cups shredded part-skim mozzarella cheese
1/2 cup Parmesan cheese, grated

Preheat oven to 350 degrees F.

In a large nonstick skillet, heat the remaining oil over medium heat. Add in the onion, and cook until they start to become fragrant and soft, about 5 minutes. Add in the Italian sausage, breaking up into smaller bits with a wooden spoon. Sprinkle with garlic powder and red pepper flakes and cook until brown (about 8-10 minutes) stirring often. Turn off heat and stir in tomato sauce, paste, and broth until the mixture is fully incorporated.

Meanwhile, in a large bowl whisk together the cream cheese, cottage cheese, and sour cream. Stir in the eggs until well mixed, then add in the salt, nutmeg, parsley, basil, and Italian seasoning.

Cover a slow cooker with a liner. Spread part of meat mixture on the bottom of the slow cooker so it is lightly covered. Layer with 3 lasagna noodles (you may need to break a few). Spoon half of the cheese mixture over the noodles, spreading evenly across the noodles. Top with 1/2 the mozzarella. Repeat with the remaining meat mixture, lasagna noodles and cheese mixture. Cover slow cooker with lid and cook on low for 4-6 hours. 30 minutes prior to serving, top with remaining mozzarella and the shredded Parmesan. Let melt, then serve.


Serves: 12


I was a little leery at first using noodles in the crockpot. Wouldn't they just end up in mushy nastiness? Surprisingly, no. Although I was closer to the 4 hour end rather than the 6, so I can't guarantee anything at that point. This does take a little bit of work to put together prior to cooking, so it's great if you have a lot of free time earlier in the day, need to go do stuff later, yet want to eat as soon as you walk in the door (unlike traditionally cooked lasagna where you would still need to bake it at least 30 minutes once you arrived home). For the way my schedule broke down, this method worked perfectly.


Nutrition Facts
Serving Size 186g
Amount per serving
Calories 400Calories from fat 210
% Daily Value
Total Fat 23.3g36%
Saturated Fat 10.3g52%
Trans Fat 0.1g
Cholesterol 104mg35%
Sodium 1032mg43%
Total Carbs 22.7g8%
Fiber 1.0g4%
Sugars 3.1g
Protein 24.0g
Vitamin A 14%Vitamin C 9%
Calcium 23%Iron 8%

Thursday, October 27, 2011

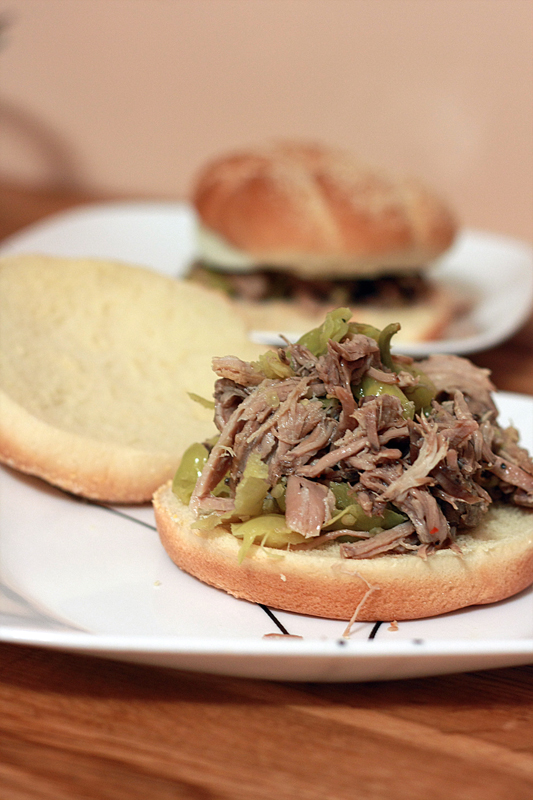
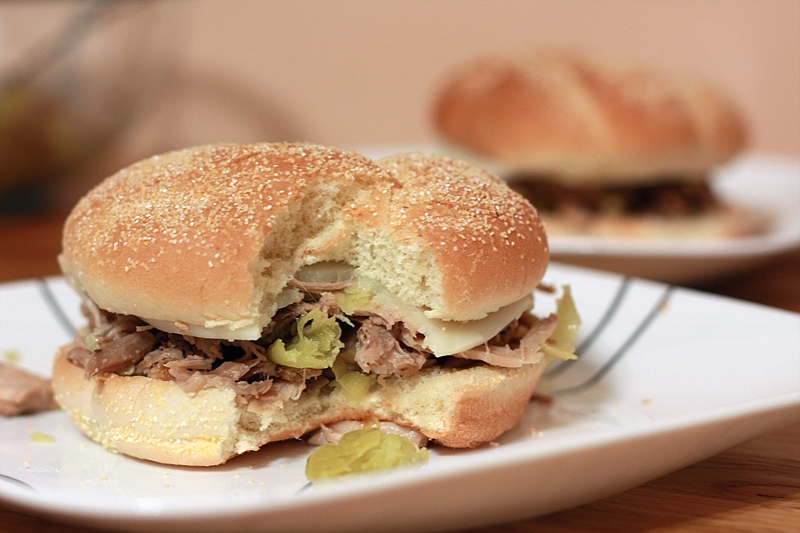
Italian Pepperoncini Pork Sandwiches


I've warned you. I'm on a slow cooker streak here. Mostly because I'm lazy we've had soccer practice, which has left little time for meal prep and cooking when we get home. And when we get home, we are usually hungry.

No, starving.

That is why it is of the utmost importance to have something that is practically ready to go (or maybe 5 minutes of work) once we do get home. Hungry hubby = cranky hubby. And nobody likes one of those.

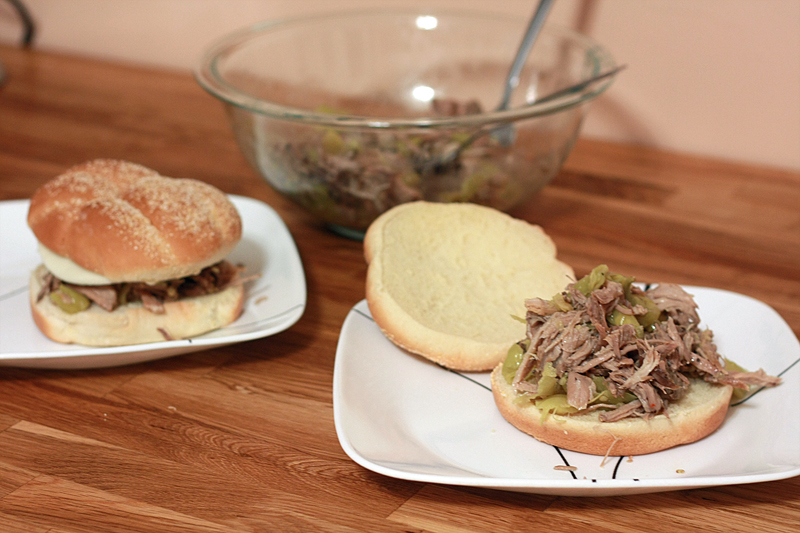
Pulled pork can definitely bring on a big yawn-seen-that-a-million-times factor, but the fact that pepperoncinis were added caught my eye. Spicy pulled pork? Now that's something I hadn't thought of before, well without the addition of spicy barbecue sauce that is. Count me in.


Italian Pepperoncini Pork Sandwiches


Adapted from: The Meat and Potatoes Foodies

1 1/2 pounds pork shoulder
2 (1 ounce) packages dry Italian dressing mix, such as Good Seasons
1 (16 ounce) jar pepperoncini peppers, whole or sliced
6 slices Provolone cheese
6 hamburger buns

Line a slow cooker with a liner. Place the pork in the slow cooker; sprinkle with dry dressing mix. Pour the jar of peppers with juice into the slow cooker. Cook on low for 6-8 hours, or until the pork shreds easily.

Remove pork from slow cooker and shred with two forks, discarding any extra fat and bone. Place shredded pork in a large bowl. If whole pepperoncini are used, remove the stems and slice. Mix pepperoncinis into the pork.

Serve on hamburger buns topped with a slice of Provolone cheese.


Serves: 6


While I had high hopes that these would be nice and spicy, the pepperoncinis let me down a bit. This is definitely more spicy than regular ol' pulled pork, but if you're going for spicy, this was more on the mild side. Adam said he got a bit of heat, but I didn't really notice any. Next time I think I'll switch up which peppers I'm using.


Nutrition Facts
Serving Size 269g
Amount per serving
Calories 584Calories from fat 305
% Daily Value
Total Fat 33.9g52%
Saturated Fat 14.2g71%
Cholesterol 121mg40%
Sodium 1831mg76%
Total Carbs 30.2g10%
Fiber 2.0g8%
Sugars 2.9g
Protein 38.0g
Vitamin A 5%Vitamin C 1%
Calcium 30%Iron 17%

LinkWithin

Related Posts with Thumbnails
 
Pin It button on image hover