Showing posts with label Dessert. Show all posts

Tuesday, January 22, 2013

Dark Chocolate Mint Cupcakes


Oh man, it's been awhile since I've done a Recipe Re-Do. As in *cough* almost a year ago. Almost to the day. Obviously I didn't do so hot this past year with keeping up with my re-dos. Therefore I'm still pulling from February 2008. That's right. 2008.

Which on the bright side, means this little ol' blog has been hanging around for 5 years. Barely, this past year, but here we are, still carrying on. I'll take it.

5 years ago, I was in the middle of planning Adam and I's wedding while living in DC. Today, we've been in Pittsburgh for almost 5 years and are expecting our first child any day now. It's crazy how things change.

But that's not what we're here for, is it? Nope. We're here for the cupcakes. And you're lucky, because they're totally worth it. Back in 2008, I used a boxed cake mix and canned frosting. Smashed up a bunch of Girl Scout cookies, threw them in the batter and frosting and called it a day.

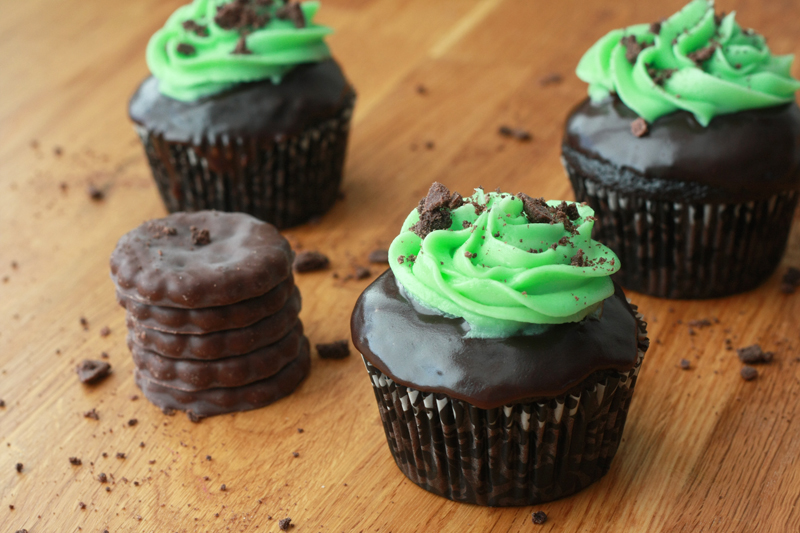
While that certainly isn't a bad way to make cupcakes, I decided it was time to give them a little update. A face lift if you will. I kept true to the flavors from those Dark Chocolate Thin Mint Cupcakes, but I altered how I infused the "mint" flavor into them. Instead of smashing up Girl Scout cookies (which, who wastes Girl Scout cookies like that?), I used dark chocolate mint candy melts to make a ganache instead. After dipping the cupcakes in the ganache, I topped them with a simple vanilla buttercream dusted with a few crushed up Keebler Grasshoppers. Thin Mints? No, but they do come pretty darn close. Much like the original cupcakes, the mint flavor isn't overpowering, but it's definitely there.

Now, who's going to take these away from me?
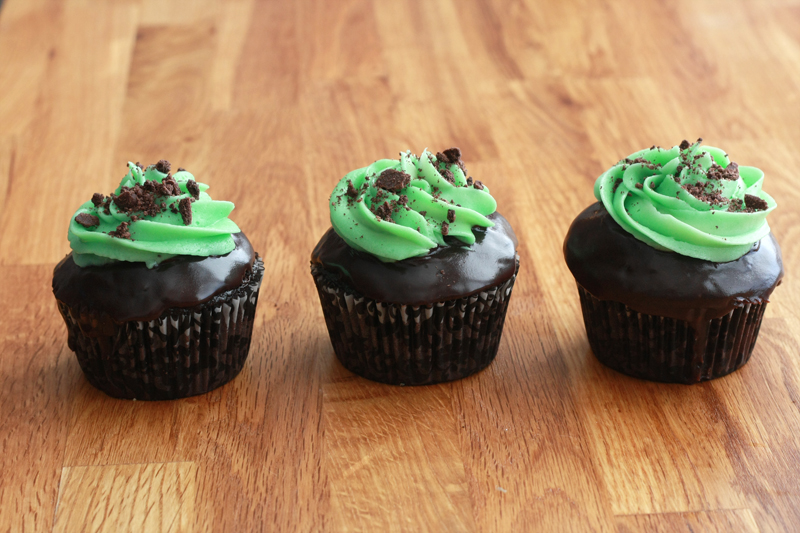

Dark Chocolate Mint Cupcakes
Original Recipe

2 cups boiling water
1 cup Hershey's Special Dark cocoa (or other dutch-processed cocoa)
2 3/4 cup cake flour
2 teaspoons baking soda
1/2 teaspoon baking powder
1/2 teaspoon salt
1 cup butter, softened
2 1/4 cups granulated sugar
4 eggs
1 1/2 teaspoons vanilla extract

1/2 cup heavy cream
4 ounces Wilton's Dark Chocolate Mint candy melts
2 tablespoons butter

1 cup butter, at room temperature
1 pound powdered sugar
1 teaspoon vanilla extract
5-6 drops green food coloring (optional)
5-6 Keebler Grasshopper cookies or Girl Scout Thin Mints, crushed

Preheat oven to 350 degrees F. Line two muffin tins with baking cups.

In a medium bowl, pour boiling water over cocoa; whisk until smooth. Let mixture cool.

In another medium bowl, sift together flour, baking soda, baking powder, and salt.

In the work bowl of a mixer, cream together butter and sugar until light and fluffy. Beat eggs in, one at a time, making sure each is fully incorporated before adding the next. Stir in vanilla. Add the flour mixture alternately with the cocoa mixture until all ingredients are fully incorporated. (Note: batter will be very thin and runny.)

Fill baking cups about 2/3 full, and bake at 350 for 18-22 minutes, or until a toothpick inserted in the center comes out clean. Allow to cool for 5-10 minutes in pan before removing to wire racks. Allow to cool completely.

To make the ganache, in a small bowl, heat the chocolate and butter in the microwave, 20-30 seconds at a time. Stir between each heating until melted. Slowly stir in the cream.

In a large mixing bowl, cream the butter. Add in the vanilla. Slowly add in 1 pound of powdered sugar and mix until smooth and creamy. Beat in food coloring if desired.

Once the cupcakes and ganache have cooled, turn the cupcake upside down and dip the top in the ganache. Slowly rotate so that the entire top of cupcake is covered, making sure ganache does not get on the cupcake liner. Shake cupcake slightly to remove any excess ganache. Flip right-side up, and allow the ganache to set. Pipe or spread on frosting. Sprinkle crushed mint cookies over frosting.


Makes: 30 cupcakes
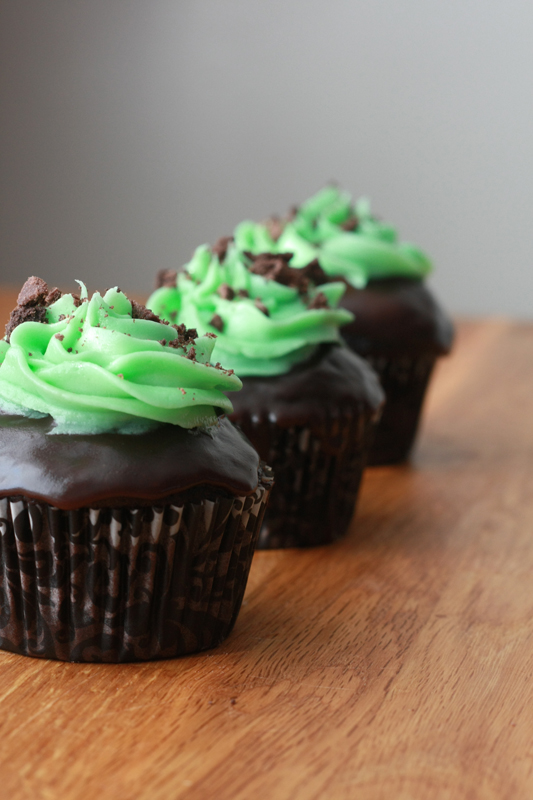

Dark chocolate cupcakes dipped in dark chocolate mint ganache topped with buttercream? Yes please. Although it is an additional step, I love the extra flavor and moisture the layer of ganache brings.

Alright, I will admit, I pretty much ripped off my own Chocolate Dipped Chocolate Raspberry Cupcakes making these. For some reason, I'm alright with it. :) Especially now that I don't have to wait until Girl Scout cookie season to make these.


Nutrition Facts
Serving Size 89g
Amount per serving
Calories 323Calories from fat 146
% Daily Value
Total Fat 16.2g25%
Saturated Fat 10.2g51%
Cholesterol 59mg20%
Sodium 268mg11%
Total Carbs 44.0g15%
Dietary Fiber 1.5g6%
Sugars 32.8g
Protein 2.7g
Vitamin A 9%Vitamin C 0%
Calcium 1%Iron 5%

Tuesday, January 15, 2013

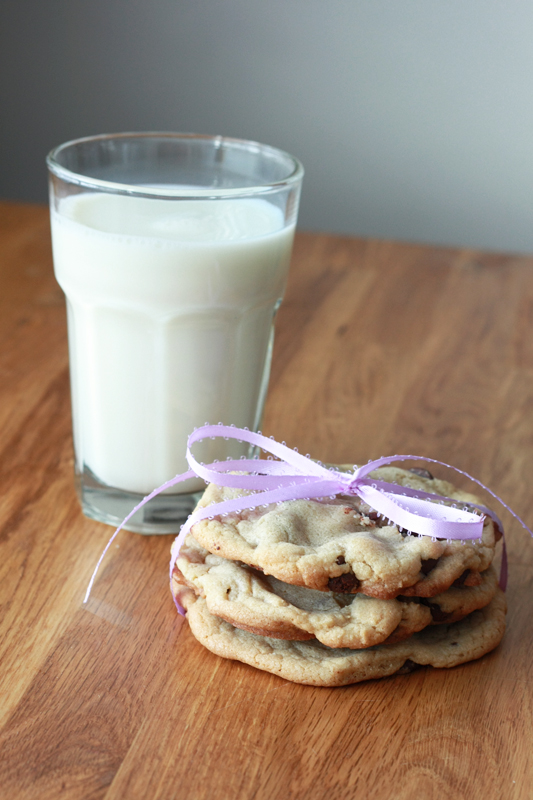
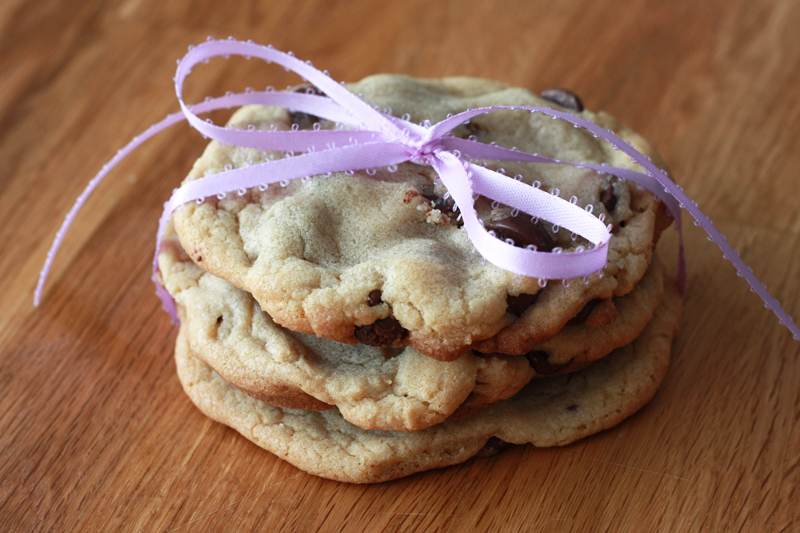
Brown Butter Chocolate Chip Cookies


Um. What? An actual food recipe? On a [mostly] food blog? Don't hate, I've been slightly... distracted. Yes, it has really taken me half a month into the new year to post something food related on here.

Though that's not to say my kitchen has been completely quiet. I've simply been rehashing old favorites, simply not taking pictures, or prepping freezer food for the month or so ahead. (Which reminds me, I have a couple fantastic holiday recipes to bring to you at some point.)

However, at a Christmas party Adam and I attended last month, I got a taste at an awesome chocolate chip cookie (which I hadn't had in for.ever.). After begging for the recipe (ok, it was handed over freely...) my first attempt didn't really go so hot. Over-baked and crunchy, blah. That's what I get for following directions. But, after remembering what my friend told me he changed, I cut a significant portion off the baking time and threw in my own twist by browning the butter. No real reason. Just because.

But I have to admit, Ladies and Gents, these cookies (with those alterations) are definitely a keeper. Well, not as in, they'll keep for a while, because frankly, after at least 3 cookies today, I wouldn't know.


Brown Butter Chocolate Chip Cookies
Adapted from: Gourmet, October 2003

3 cups all purpose flour
1 1/2 teaspoons baking soda
1 1/2 teaspoons kosher salt
1 cup (2 sticks) + 1 tablespoon unsalted butter
1 1/2 cups light brown sugar
1 cup granulated sugar
3 eggs
1 1/2 teaspoons vanilla extract
12 ounces dark chocolate chips

Preheat oven to 375 degrees F. Line two baking sheets with parchment paper or a baking mat; set aside.

Add the butter to a medium saucepan over medium heat. Cook butter until foam resides, it turns a nice caramel brown color, and takes on a more nutty smell; about 10 minutes. Remove from heat and let cool slightly. Pour browned butter into a bowl or glass measuring cup, separating from the browned solids in the pan. Let cool another 5 minutes.

In a medium bowl, whisk together flour, baking soda, and salt. Set aside.

In the large work bowl of a mixer, cream together butter and both sugars until light and fluffy; about 2-3 minutes. In a small bowl, lightly beat 1 egg with a fork. Add the remaining 2 eggs to the sugar and butter mixture, along with 1 3/4 tablespoons of the lightly beaten egg. Beat until mixture is creamy, about 1 minute. Add vanilla. Reduce mixture speed to low and slowly add in the flour mixture until everything is blended. Fold in the chocolate chips.

Using a 1/4 measuring cup (or equivalent-sized cookie scoop), place cookie dough on prepared baking sheets keeping in mind that cookies will spread. Press down dough mound to about a 3-inch round with the palm of your hand. Bake 1 sheet at a time for 8-9 minutes. Let cool completely on the baking sheet before transferring to a wire cooling rack.


Makes: 24 cookies


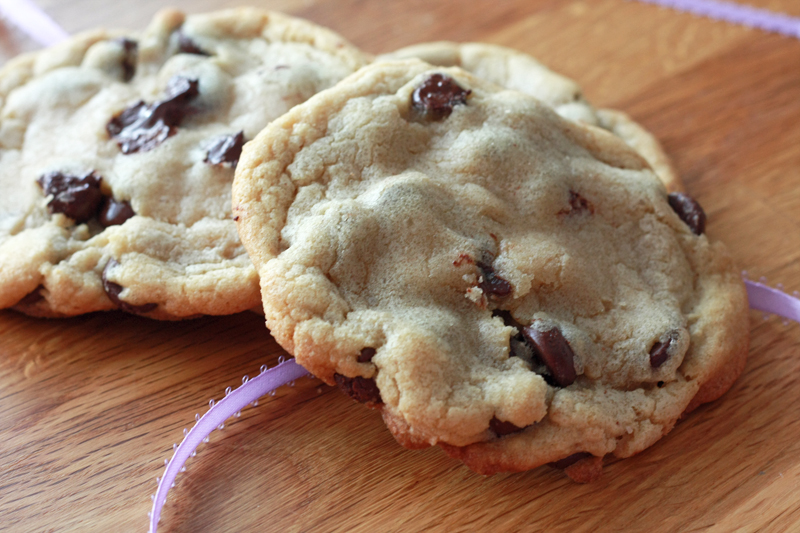
If you're in the middle of making these, and have reached the baking stage -- I know what you're thinking. Yes, I know these guys don't look quite done. And, they're probably not 100% done in the center (which is why they need to remain on the baking sheet until cool). But I like my cookies soft and chewy, rather than hard and crunchy, so this is how I roll. Slightly under-baked. This gives the cookies a nice soft center without rock hard edges. Which is exactly what I ended up with at the recommended 13-15 minutes; although I must say it was mostly hard crunchy edges. This is one of those times you just gotta roll with it.


Nutrition Facts
Serving Size 64g
Amount per serving
Calories 270Calories from fat 114
% Daily Value
Total Fat 12.6g19%
Saturated Fat 7.7g39%
Cholesterol 42mg14%
Sodium 295mg12%
Total Carbs 38.7g13%
Sugars 24.8g
Protein 3.4g
Vitamin A 6%Vitamin C 0%
Calcium 2%Iron 7%

Thursday, December 13, 2012

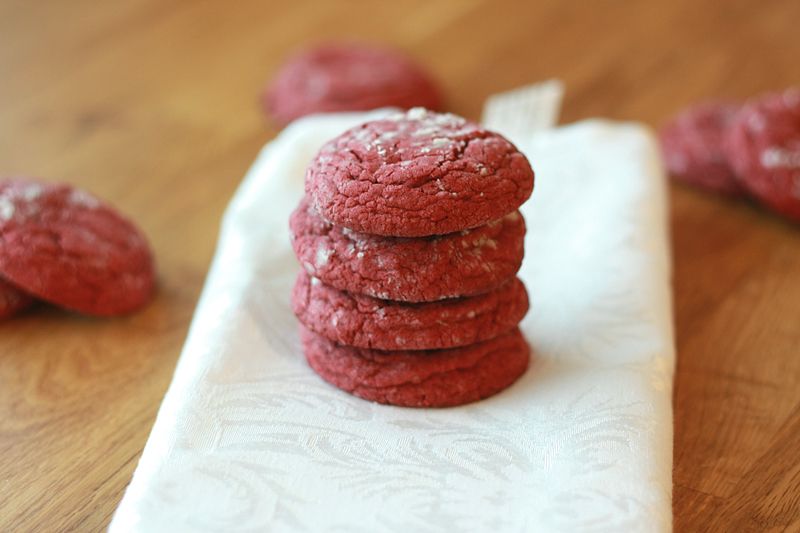
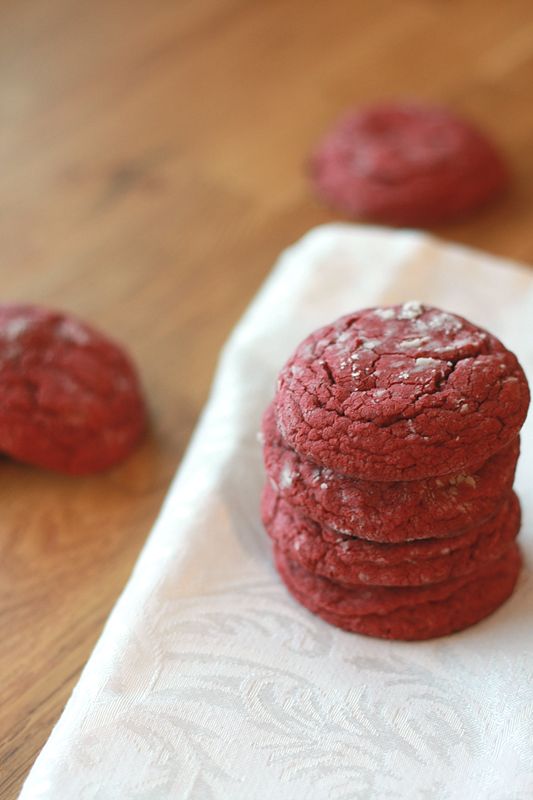
Red Velvet Crinkle Cookies


This past week and a half has just been a fabulous time for me in the kitchen. Not just one, but two failed recipes. And I'm getting to the point where I really only have energy to make one thing at a time. Which means we're kind of screwed when dinner comes around.

I keep telling myself that I'm going to go back and fix at least one of those failed attempts (the other, I have no idea how to fix that mess). But alas, I have Christmas gift shopped my way into a state of exhaustion almost every day this week by 3 pm. And I am sorely running out of time to play in the kitchen instead of getting down to business and start my prepping for when Adam's family comes to visit next week.

So, what is a person to do when they're exhausted from shopping all morning and have a Christmas party to attend later that night (for which a dessert is requested)? Go simple. Sweet, simple, and festive. Then call it a night.

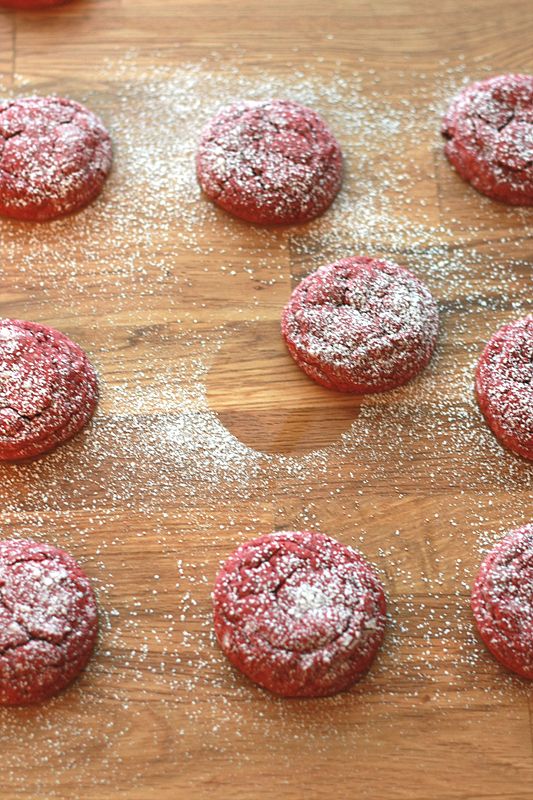
Red Velvet Crinkle Cookies
Adapted from: Two Peas and Their Pod

1 (18.75 ounce) box red velvet cake mix
2 tablespoons all-purpose flour
2 eggs
1/2 cup vegetable oil
1 teaspoon vanilla extract
1/4 cup powdered sugar

Preheat oven to 350 degrees F. Line two baking sheets with parchment paper or a baking mat; set aside.

In the large work bowl of a mixer, beat together all of the ingredients except for the powdered sugar until no more lumps remain and all ingredients are well incorporated.

Place the powdered sugar in a small, wide bowl. Roll 1 tablespoon of cookie dough into a ball, then roll through the powdered sugar until completely coated. Place ball on a prepared baking sheet, then repeat until sheet is full. Bake for 10 minutes, or until edges are set and the cookies begin to crack.

Allow cookies to rest on baking sheet for 2 minutes, then remove to a wire rack to fishing cooling. If the majority of powdered sugar has melted into the cookie, feel free to top with additional powdered sugar.


Makes: 33 cookies


While these definitely fit the bill of simple, festive, and sweet, I almost felt like there was something missing. It wasn't that these were bad by any means, oh no. Maybe it's because I'm so used to having cream cheese as red velvet's companion that I'm kind of missing it here? I'm not sure. I would still make these again, but I might play around with them a bit to see if I can make them go from "good", to "wow".


Nutrition Facts
Serving Size 24g
Amount per serving
Calories 106Calories from fat 47
% Daily Value
Total Fat 5.2g8%
Saturated Fat 1.3g6%
Cholesterol 10mg3%
Sodium 97mg4%
Total Carbs 13.6g5%
Sugars 8.0g
Protein 1.1g
Vitamin A 0%Vitamin C 0%
Calcium 3%Iron 4%

Wednesday, October 24, 2012

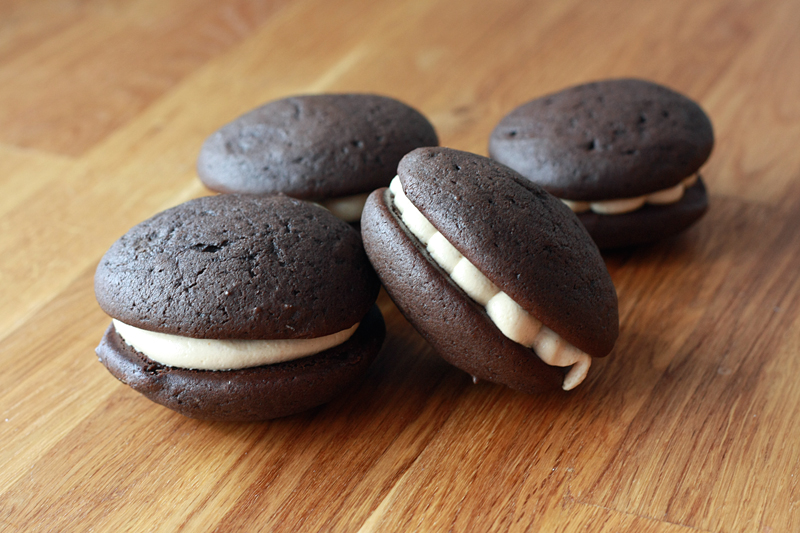
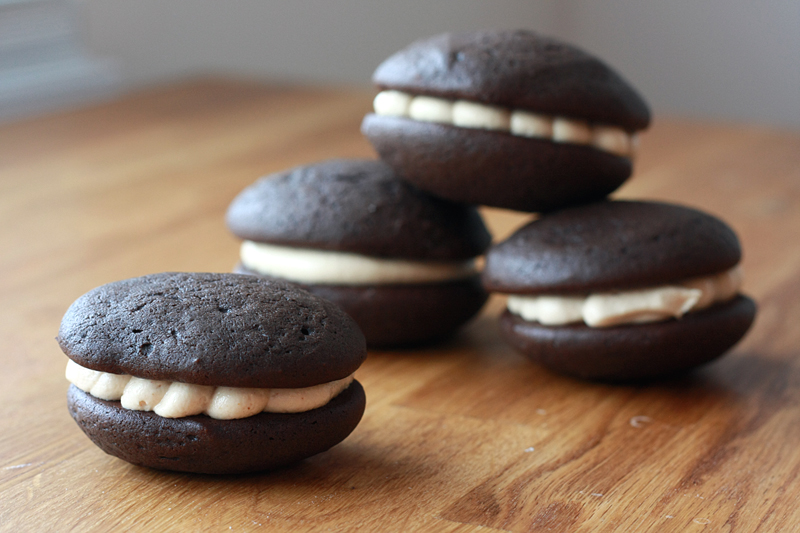
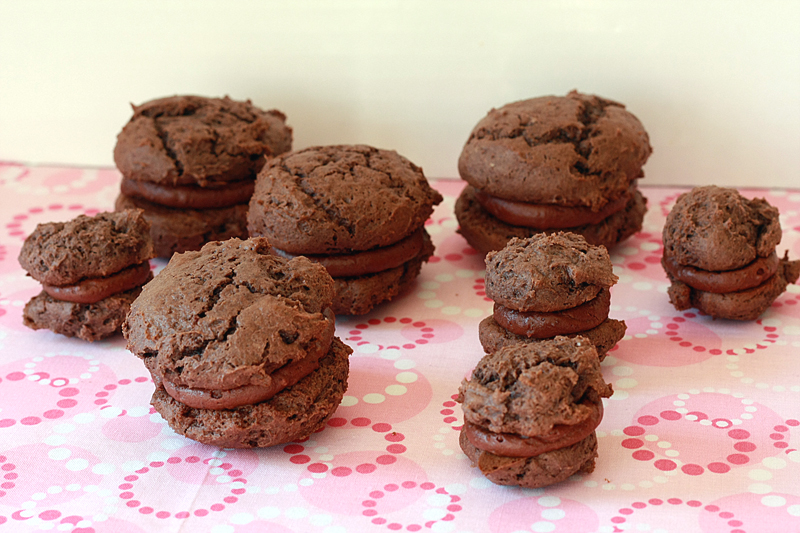
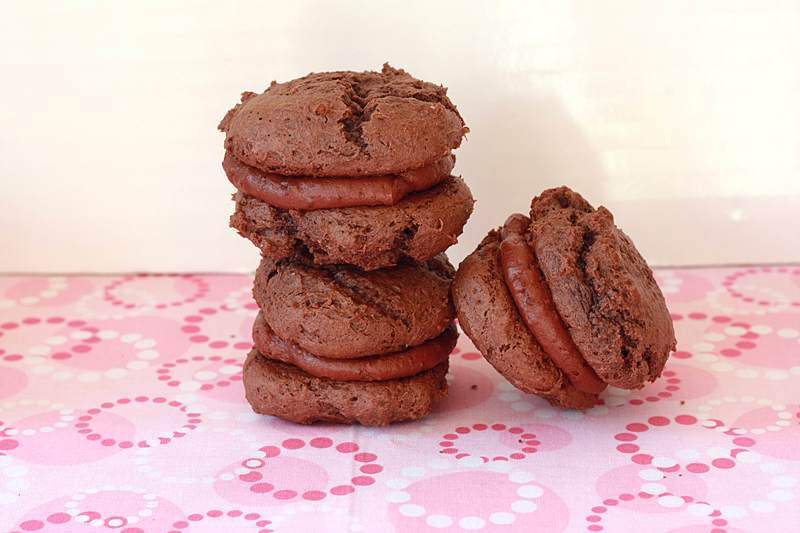
Chocolate Peanut Butter Whoopie Pies


A little over a month ago, we found out the bad news that one set of our good "couple" friends was moving. To Texas. Forever far away. Sad day.

When you're not from the area originally, it's kind of nice to have other friends in the same boat as you that you can lament to about the horrible drivers, ridiculous roads, and Pittsburgh-ese accent. It's also nice when these friends will come over to help you finish getting ready for a beer tasting party or help you throw a baby shower or play soccer with you on Thursday nights.

We found out about their decision with not a ton of time before the husband left to begin training at his new job, so his going away party was unfortunately squeezed into the middle of a week when we knew everybody could make it. (I swear free weekends are like gold around here!) However, with the departure date for his wife looming at the end of this month, some of our other friends decided to throw one last small get together. I, of course, waited until the last minute to decide on what to bring, but I knew it had to be dessert.

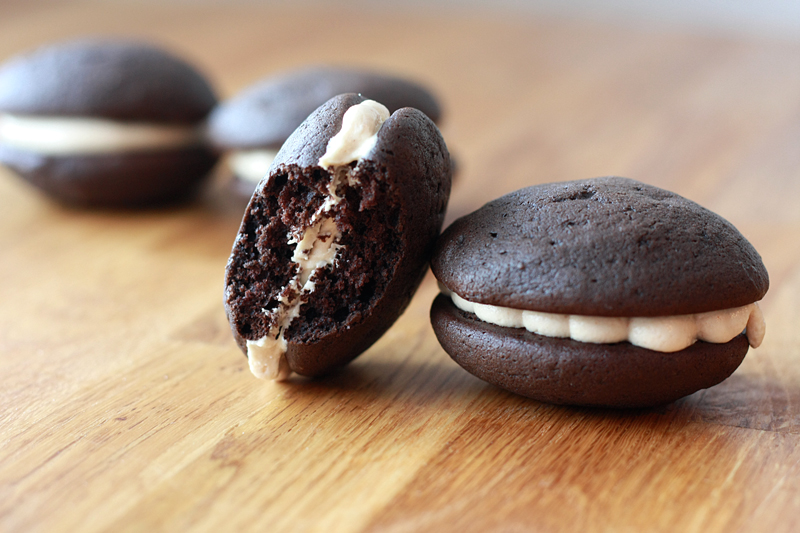
After some scrolling through my recipes and pins on Pinterest, I opted to go with these Chocolate Peanut Butter Whoopie Pies. a) They're portable and easy to grab as you walk by, b) I knew she was a fan of the chocolate peanut butter combo as she's made a killer chocolate peanut butter pie before, and c) I've been craving baby girl loves her some chocolate and peanut butter together. What can I say? It was an easy decision.


Chocolate Peanut Butter Whoopie Pies
Adapted from: Eats Well with Others

2 cups all-purpose flour
1/2 cup Hershey's Special Dark cocoa powder
1 1/4 teaspoons baking soda
1 teaspoon salt
1/2 cup unsalted butter, at room temperature
1/2 cup granulated sugar
1/2 cup brown sugar, packed
1 large egg
2 teaspoons vanilla extract, packed
1 cup buttermilk

1/2 cup unsalted butter, at room temperature
7 ounces marshmallow fluff
1/2 cup smooth peanut butter
1/2 teaspoon salt
1 cup powdered sugar
1 teaspoon vanilla extract

Preheat oven to 350 degrees F. Line two baking sheets with parchment paper (or silpats), set aside.

In a medium bowl, combine the first four ingredients (through salt).

In the large bowl of a mixer, cream together the butter, granulated sugar, and brown sugar until light and fluffy, 3 - 5 minutes. After scraping down the sides of the bowl, add the egg and beat on low for one minute. Stir in vanilla.

Add half of the flour mixture to the mixing bowl and stir at a low speed. Once ingredients have mostly combined, slowly pour in the buttermilk. As soon as the buttermilk is fully incorporated into the batter, add the remaining flour mixture. Stir until all ingredients are well blended.

Scoop a heaping tablespoon of batter onto the prepared baking sheets. Leave at least 1 inch of space between cookies. Bake for 12-14 minutes, or until centers of cookies are cooked, but still soft. Repeat with remaining batter. Allow cookies to cool for 10 minutes on the pan before transferring to a wire cooling rack to cool completely.

Meanwhile, in a large bowl, beat together 1/2 cup butter, marshmallow fluff, peanut butter, and salt. Once there are no more lumps, slowly add in the powdered sugar and vanilla. Increase mixer speed to medium and beat for 3 minutes, or until fluffy.

Once the cookies are completely cool, pipe the filling onto the upturned bottom of one of the cookies. Top with a second cookies. Repeat with remaining cookies and filling.


Makes: 18-22 whoopie pies


The problem with great dinners thrown by friends is that there is never enough room to eat everything you want. As was the case this time. But, after sitting around the awesome fire pit for a while, there seemed to be juuuust enough room for dessert. Several disappearing and one toasted whoopie pie later, and it was determined that these were a hit. You know they're good when people who have a ton of leftovers actually want to keep a few for later.


Nutrition Facts (1 batch = 18 whoopie pies)
Serving Size 81g
Amount per serving
Calories 301Calories from fat 134
% Daily Value
Total Fat 14.8g23%
Saturated Fat 7.6g38%
Cholesterol 38mg13%
Sodium 395mg16%
Total Carbs 39.1g13%
Fiber 1.2g5%
Sugars 23.1g
Protein 4.1g
Vitamin A 7%Vitamin C 0%
Calcium 3%Iron 6%

Wednesday, April 25, 2012

Thin Mint Cookies


Oh. My. Has it been a while. Let's just say my life has exploded over the past few weeks. Between starting the subject recruitment and data collection for my thesis and then finding out that our landlord sold the house we're in (meaning, hey you have a month or so to find a new place!) things have been busy busy.

And busy busy means lots of macaroni and cheese and fast food for dinner. Blech. But we're not here to talk about dinner today. Today, we focus on cookies. Because cookies make everything better. (Maybe not perfect, but definitely better.)

Girl Scout cookie season is over. And I missed it. Much like I have the past few years. I totally need a reminder for these things. Maybe it's a good thing I don't know about when these sales occur though. I can go through an entire sleeve of Thin Mints in one sitting without even batting an eye. True story.

While debating what to serve for dessert for a baby shower I was hosting with a friend, we decided to go Girl Scout themed since the mom-to-be loves her some Samoas. But we couldn't just be happy with Samoas-flavored fudge -- we wanted variety, and because we have a problem with making too much food. But really, who doesn't love Thin Mints? If you don't, well, that's just information you need to keep to yourself.

Thin Mint Cookies
Adapted from: my Katrina's Kitchen

1 cup butter, at room temperature
1 cup powdered sugar
1 teaspoon vanilla extract
1/2 cup unsweetened cocoa powder
1/2 cup dutch-processed cocoa powder
3/4 teaspoon salt
1 1/2 cups all-purpose flour

14 ounces mint-flavored dark chocolate candy melts

The the large bowl of a mixer, cream the butter until light and fluffy. Slowly add in the powdered sugar, mixing on low until just combined. Increase the mixer speed and continue to cream until well blended. Stir in the vanilla, salt, and both cocoa powders. Add the flour, 1/2 cup at a time until fully incorporated. Mixture may be on the crumbly side.

Turn dough out onto a clean work surface, kneading together until smooth. Separate dough into 2 portions, flattening each into a disk. Wrap in plastic wrap and chill for 10 minutes.

Preheat oven to 350 degrees F. Line two baking pans with parchment paper and set aside.

Remove one of the chilled dough disks from the fridge. Lightly dust counter with flour and roll dough out to about 1/8-inch thickness. Cut out cookies and transfer to a prepared baking sheet. Repeat with remaining dough until baking pan is full. Bake for 10 minutes. Allow cookies to cool on pan for 5-10 minutes, then transfer to a wire rack to cool completely.

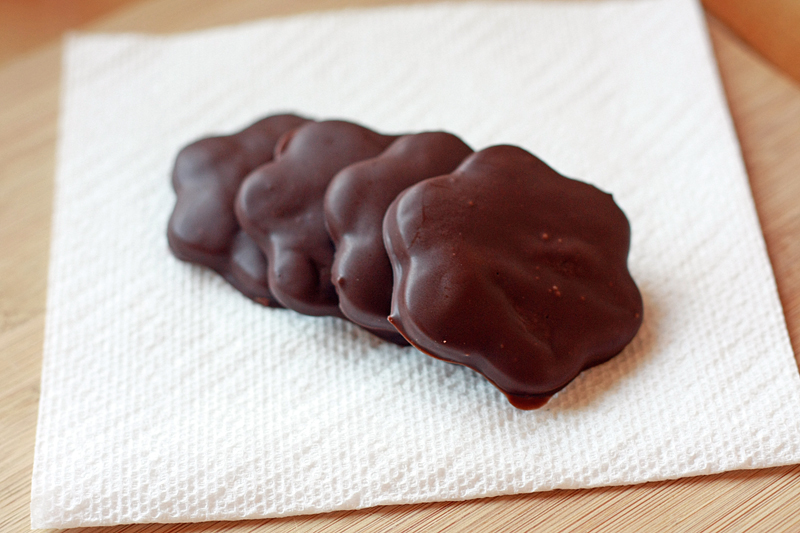
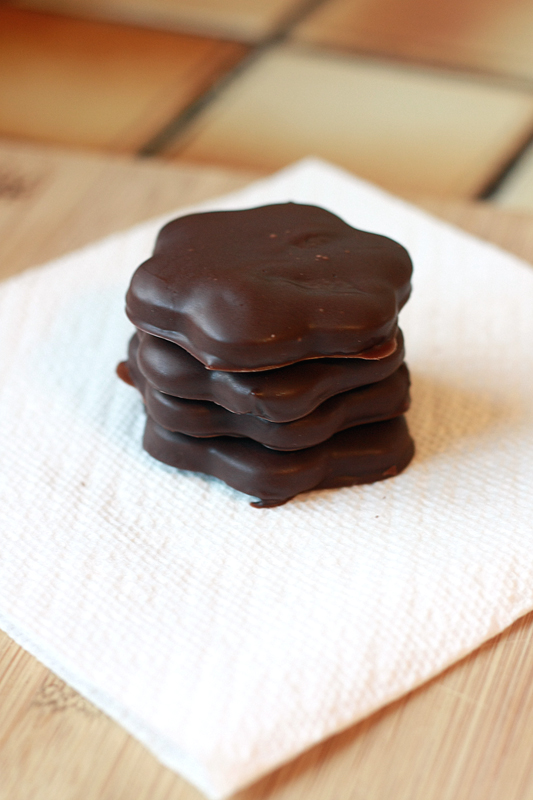
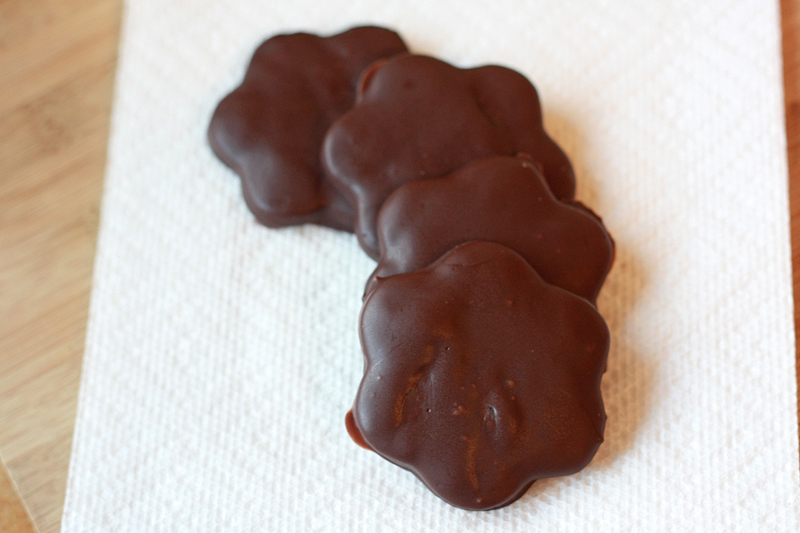
While cookies are baking, prepare chocolate coating. Heat the chocolate melts in a small bowl according to package instructions. Stir every 20-30 seconds until chocolate becomes smooth. Dip each cooled cookie in the chocolate face down, then flip right-side up and remove from bowl, shaking any excess chocolate off (a fork works great here). Place on a wax paper covered baking sheet to set. Once the sheet is full place in fridge for about a 1/2 hour to finish setting the chocolate.


Makes: about 3 dozen cookies (serving size: 1 cookie)


Even though these took a little while to make, and even though I have a severe dislike for dipping things, I might have to concede that it was totally worth it. The cookies had just the right amount of firmness and the chocolate coating provided just the right amount of mint flavor. I dare say these might actually be better than the original. Except for the fact that the originals only involve me opening the package to eat them... but I digress.


Nutrition Facts
Serving Size 29g
Amount per serving
Calories 135Calories from fat 80
% Daily Value
Total Fat 8.9g14%
Saturated Fat 6.3g31%
Cholesterol 14mg5%
Sodium 90mg4%
Total Carbs 15.1g5%
Fiber 1.4g6%
Sugars 8.8g
Protein 1.6g
Vitamin A 3%Vitamin C 0%
Calcium 1%Iron 6%

Tuesday, February 14, 2012

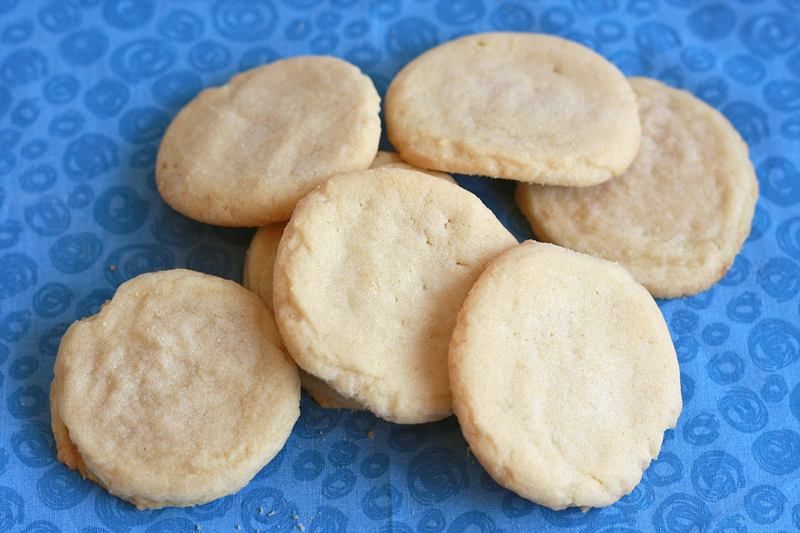
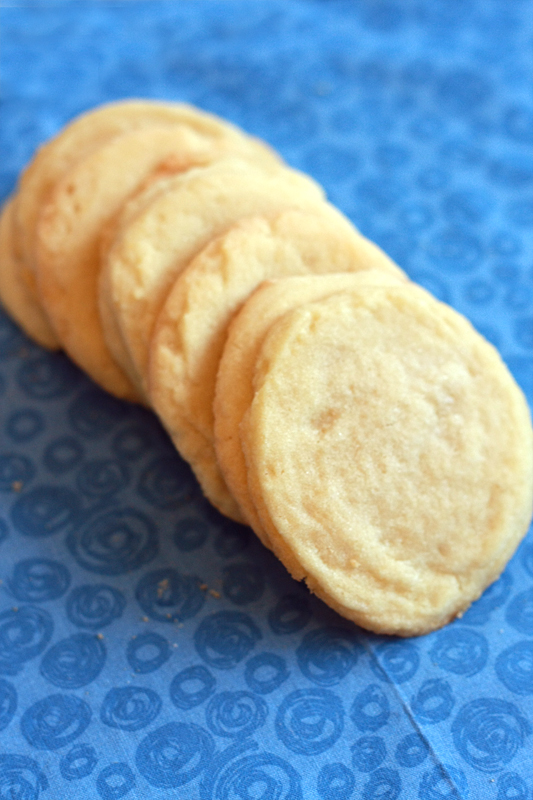
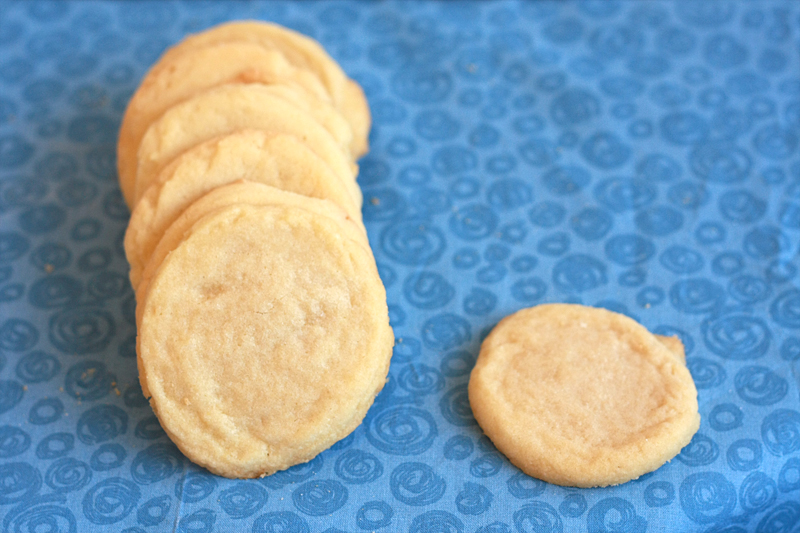
Simple Sugar Cookies


Sugar cookies and I go way back. Like back when eating the raw dough at an unbelievably young age didn't faze people. (And I still totally stand by my dough eating habit.) I used to love going to the mall purely for the fact that I could get a soft and chewy sugar cookie the size of my head. Welcome to my heaven.

As much as I do love me some chocolate chip cookies, or chocolate cookies, and even rolled and iced sugar cookies, there's just something special about the simplicity of a plain ol' sugar cookie. And I have yet to find "the one".

I've had this recipe bookmarked on my Google Reader for eons, and I finally said enough was enough. It was time to give these guys a try.

Simple Sugar Cookies
Adapted from: Annie's Eats

2 cups all-purpose flour
1/2 teaspoon baking soda
1/4 teaspoon salt
1/2 cup butter, at room temperature
1/2 cup vegetable oil
1/2 cup granulated sugar + 2 tablespoons extra
1/2 cup powdered sugar
1 egg
2 teaspoons vanilla extract
1 teaspoon almond extract

Preheat oven to 350 degrees F. Line baking sheets with parchment paper; set aside.

In a medium bowl, whisk together the flour, baking soda, and salt.

In the large work bowl of a mixer, beat the butter until smooth, about 1 minute. Add the vegetable oil and beat on medium-high until well incorporated. Stir in the granulated and powdered sugars until fully combined, about 1 minute. Mix in the egg. Add the vanilla and almond extracts, stirring until fully blended. Add the dry ingredients, half at a time, and slowly beat into the wet ingredients. Once mixed, add in the remaining dry ingredients. Refrigerate dough for 1 hour or freeze for 15 minutes.

Drop scoops of dough (I used a size 50 scoop) onto the prepared baking sheets. Using wet hands or the back of a wet spoon, gently press down on the dough to flatten the cookies. Sprinkle with extra granulated sugar. Bake for 8-10 minutes, or just until the edges very very slightly begin to turn golden. Let rest on baking sheets for 10 minutes, then transfer to a wire rack to cool completely.


Makes: 33 cookies


While delicious, soft, and chewy, especially right out of the oven, I'm not quite sure these win "the one" title. After a few hours I noticed these turned slightly greasy and dried out really fast. Or at least some of them did, others didn't. My mind is boggled. Either way, still a little disappointing. I'm not trying to knock a good cookie, but when the bar is set so high... you have to be uber critical.


Nutrition Facts
Serving Size 22g
Amount per serving
Calories 106Calories from fat 57
% Daily Value
Total Fat 6.3g10%
Saturated Fat 2.5g12%
Cholesterol 13mg4%
Sodium 60mg3%
Total Carbs 11.4g4%
Sugars 5.6g
Protein 1.0g
Vitamin A 2%Vitamin C 0%
Calcium 0%Iron 2%

Friday, February 3, 2012

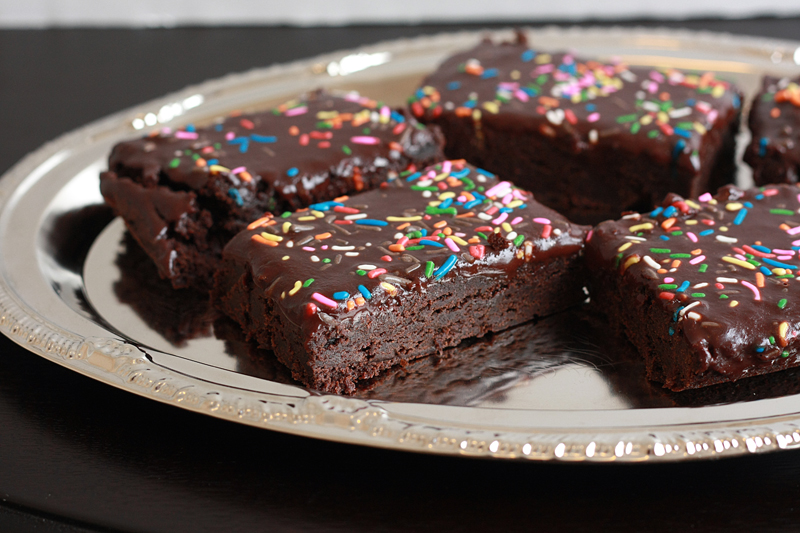
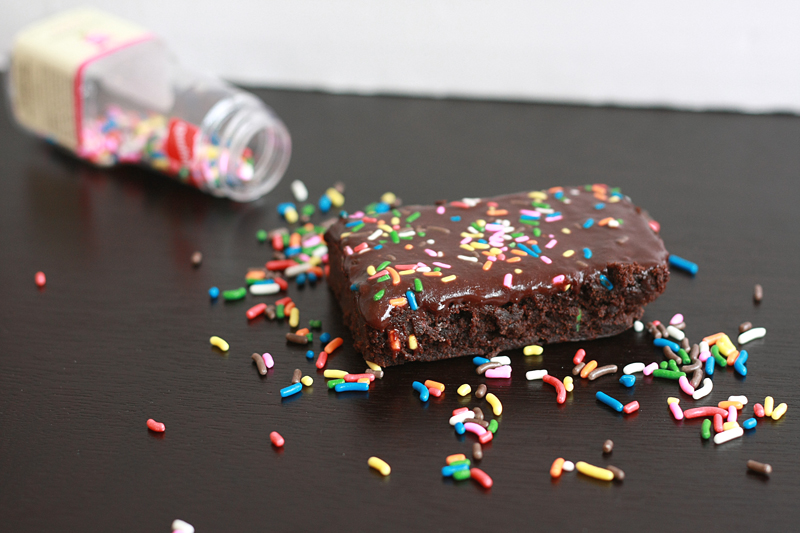
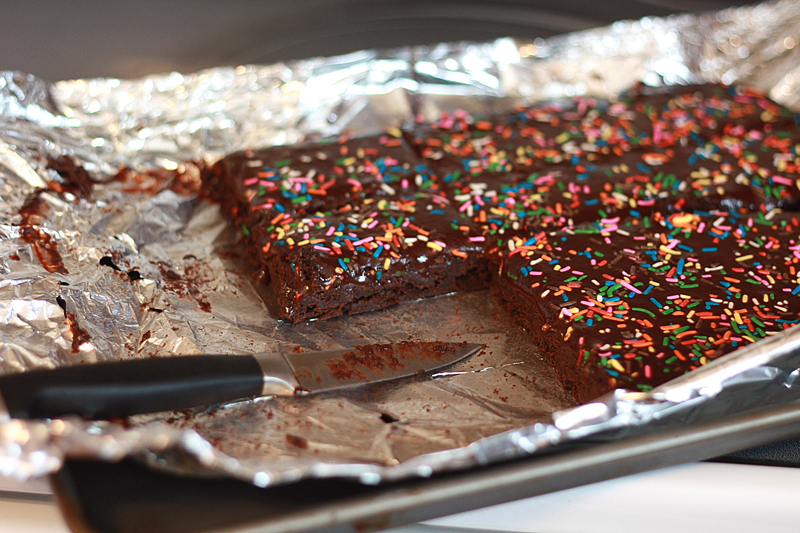
Glazed Brownies


Brownies. Quite possibly Adam's most favorite dessert. EVER.

I kid you not, he walked into the kitchen after work and his eyes got as big as saucers. All I hear is "BRRROWNIES!!" [insert childish voice here]. Followed by the pitter-patter of feet walking down the hallway and seeing him holding a half-eaten brownie in one hand with a gigantic smile on his face. I'm pretty sure I made his week. :)

If you have a feeling you've seen these brownies somewhere before, you probably have. Maaaaybe in a vending machine? Or right out of a Little Debbie box? (Or even from The Spiffy Cookie?) Well forget about all those extra preservatives and un-pronounceable ingredients found in the Little Debbie version. Just poke around in your pantry and you'll probably have the majority of ingredients.

Which you absolutely should do. Make these, that is. They're dense and fudgy and the ganache just puts them over the top. Definitely outshines those prepackaged things.

Glazed Brownies
Adapted from: The Spiffy Cookie

1 cup granulated sugar
2/3 cup brown sugar, packed
3/4 cup butter, melted
2 tablespoons water
2 eggs
2 teaspoons vanilla extract
1 1/3 cup all-purpose flour
3/4 cup unsweetened cocoa powder
1/2 teaspoon baking powder
1/4 teaspoon salt
1/2 cup heavy cream
7 ounces semisweet chocolate chips
1 ounce sprinkles

Preheat oven to 350 degrees F. Line a 9 x 13-inch baking pan with aluminum foil. Coat foil with cooking spray; set aside.

In the large work bowl of a mixer, beat together the sugars, butter, and water. Add in the eggs and vanilla. Stir until eggs are fully incorporated.

In a medium bowl, whisk together the flour, cocoa, baking powder, and salt. With the mixer on low, slowly add 1/2 of the dry ingredients to the wet. Once ingredients are almost combined, add the remaining half of dry ingredients. Stir until fully combined.

Pour batter into prepared baking pan, spreading out with a spatula. Bake for 18 minutes, or until a toothpick inserted in the center comes out clean. Transfer pan to a wire rack to cool.

Meanwhile, pour the chocolate chips into a medium bowl. Heat the cream in a small saucepan over medium until it just simmers (do not boil). Remove from heat and pour over the chocolate. Let sit for 1-2 minutes, then gently start to fold the now-melted chocolate into the cream. Set aside until mostly cooled, and brownies are completely cooled.

Once brownies are cool, pour the ganache over the top, spreading evenly across the surface. Top with sprinkles. Place brownies in the fridge until ganache has set, 30 minutes to an hour.


Serves: 16


Needless to say, these brownies didn't last all that long. (Yes, for once I didn't have him take these in to work to share since I knew how much he loves brownies.) I won't even tell you how fast these disappeared... between 2 people. Ouch. My pants were not happy. But my tummy sure was!


Nutrition Facts
Serving Size 70g
Amount per serving
Calories 287Calories from fat 134
% Daily Value
Total Fat 14.9g23%
Saturated Fat 9.0g45%
Cholesterol 51mg17%
Sodium 108mg5%
Total Carbs 38.0g13%
Fiber 2.3g9%
Sugars 26.9g
Protein 2.7g
Vitamin A 7%Vitamin C 0%
Calcium 3%Iron 7%

Friday, January 27, 2012

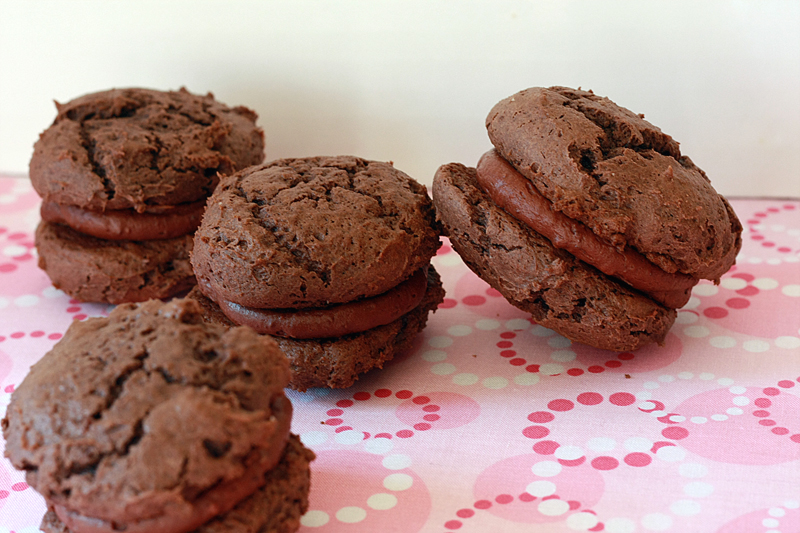
Chocolate Peppermint Whoopie Pies


4 years.

You can do a lot in 4 years.

Get married.

Move.

Go back to school.

Move again.

Buy a car.

Keep up with a blog.

You would think at least the last thing would easily fall by the wayside in 4 years. Yet for some reason, it never did. So here we are, 4 years after the start of this blog. It's amazing how things change.

Like the photography, the cooking ability... although some things never do change. Like me trying to burn the place down.

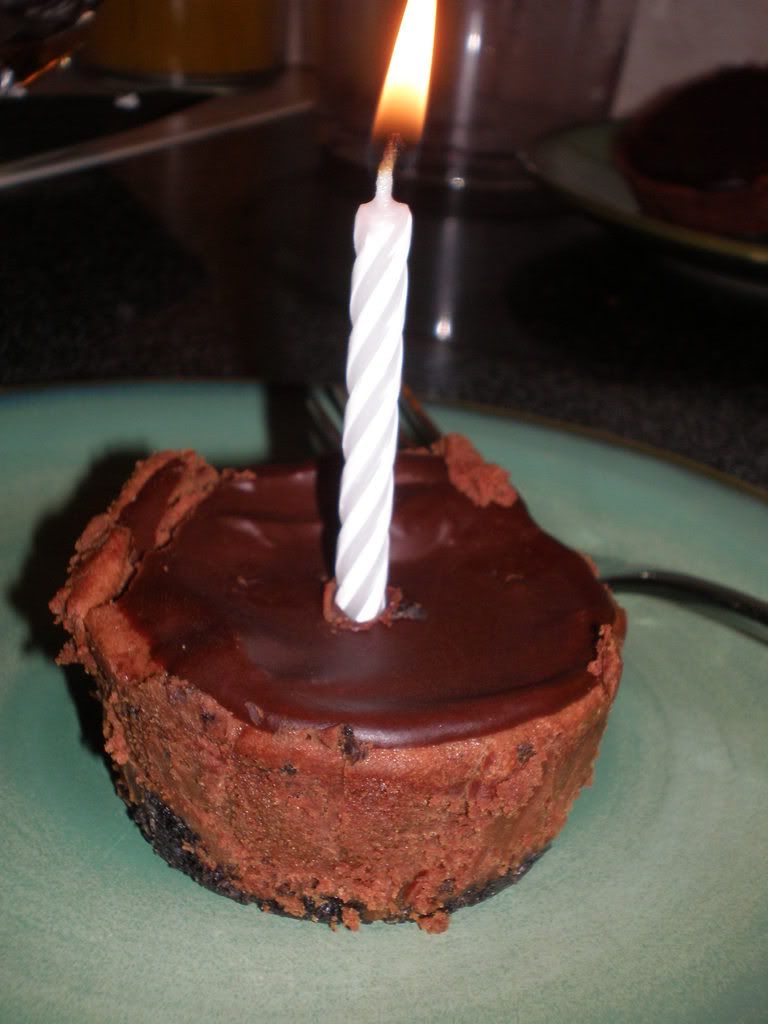
I thought it only fitting, on the eve of my 4 year blog birthday, to have another recipe re-do. Taking a trip down memory lane to the first I ever made a cheesecake. Or in this case, cheesecakes. These Mini Mint Chocolate Cheeesecakes were rich, and dense, and definitely in-your-face minty. Which, isn't exactly my favorite flavor.


I went back and forth and back and forth trying to figure how I wanted to re-do this recipe. Make another cheesecake? But I didn't feel like cheesecake. Chances are 90% of it would end up in the trash. No, it needed to be something else.

Something portable. Why, cookies of course!


Chocolate Peppermint Whoopie Pies


Adapted from: cdkitchen & Gingerbread Bagles

1/4 cup butter
8 ounces reduced-fat cream cheese
1 egg
1/4 teaspoon vanilla extract
1 (17.5 ounce) box chocolate cake mix

3 cups powdered sugar
1/2 cup butter, melted
2/3 cup unsweetened cocoa powder
1 teaspoon peppermint extract
1/2 teaspoon vanilla extract
1/3 cup half & half

In the large work bowl of a stand mixer, cream together the butter and cream cheese. Stir in the egg and vanilla until fully incorporated. Slowly add in the cake mix, 1/3 at a time. Cover and chill for 30 minutes.

Preheat oven to 375 degrees F. Line baking sheets with parchment paper. Using a scoop (or a tablespoon) drop dough onto prepared baking sheets. Bake for 8-10 minutes or until done. Let cookies rest on pan for 1 minute, then transfer to a wire rack to cool.

In a large bowl, mix together the butter and cocoa for about 4 minute until smooth. Stir in peppermint and vanilla extracts. Slowly stir in half of the powdered sugar, followed by half of the half and half. Repeat with remaining powdered sugar and half and half until combined, then increase speed to medium-high for 3 minutes, or until mixture is smooth.

Transfer frosting to a piping bag (a ziploc bag with the corner snipped off works well too). Spread frosting on the upturned side of half of the cookies, top with the remaining cookies.


Makes: 24 whoopie pies


Alright, I can't lie, I kind of screwed up on these. I was going for waaaay more of a cheesecake-y vibe than I got from these. Silly me, I thought simply adding the cream cheese into the cookies would come through enough, but it really doesn't at all. I should have gone with my gut on the frosting and went with a simple cream cheese buttercream with peppermint. Sigh.

And you would think after all these years I would've learned...

However, if you didn't know I was going for the whole cheesecake-reincarnation-in-a-cookie thing, you would have thought it was light and fluffy chocolate cookies sandwiching peppermint buttercream. Not a bad combo, and definitely not a bad whoopie pie.


Nutrition Facts
Serving Size 60g
Amount per serving
Calories 235Calories from fat 109
% Daily Value
Total Fat 12.1g19%
Saturated Fat 6.2g31%
Cholesterol 31mg10%
Sodium 254mg11%
Total Carbs 31.8g11%
Dietary Fiber 1.3g5%
Sugars 23.0g
Protein 3.0g
Vitamin A 6%Vitamin C 0%
Calcium 5%Iron 7%

Wednesday, December 21, 2011

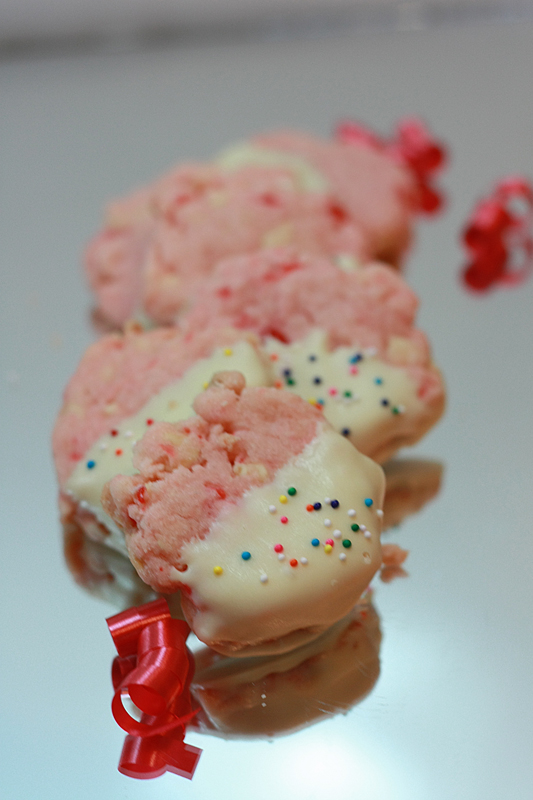
White Chocolate Cherry Shortbread Cookies


Mwuahaha. (That is my evil laugh by the way.)

I bet you thought I was done with cookies. So did I.

Then I saw these. And I wasn't done.

Something about the white chocolate and cherry mixture called to me. It disregarded the fact that I don't like dipping things, and said "make me". Kind of creepy, actually.

Thank goodness I was able to look past that. And my dislike of dipping desserts. (Which stems from the fact that usually the chocolate ends up everywhere -- in my case, it is most definitely "operator error".)

Case in point -- there is already chocolate on my shirt this morning and all I did was EAT it. Dang it. Somebody put a bib in my stocking. And yes, I totally had chocolate as part of my breakfast. Early lunch?

Annnnyways. We were talking about these cookies I believe. That need to go on your to-make Christmas cookie list. Which is already 3.47 miles long. Don't worry. There's still time. You can do it. I have faith.

White Chocolate Cherry Shortbread Cookies
Adapted from: Baking Serendipity

1/2 cup maraschino cherries, drained
2 1/2 cups all-purpose flour, packed
1/2 cup sugar
1 cup cold butter, cut into cubes
1/2 teaspoon almond extract
12 ounces white chocolate baking chips, divided
2 teaspoons vegetable shortening
Sprinkles (optional)

Preheat oven to 325 degrees F. Line two baking sheets with parchment paper; set aside.

Place cherries on a paper towel to completely drain.

In the large work bowl of a mixer, stir together the flour and sugar. Cut the butter into the dry ingredients using a pastry blender (two knives work as well).

Finish drying cherries and finely chop. Chop 4 ounces of white chocolate until fine. Using a spatula, fold the almond extract, cherries, and white chocolate into the dough until a smooth ball forms.

Scoop out a 1" ball of dough and place on the prepared baking sheet. Flatten the ball with the base of a drinking glass until about 1/4-inch thick. Repeat until sheet is full, spacing cookies 1-2 inches apart.

Bake for 10-12 minutes. Let cookies cool for 1-2 minutes on baking sheet, then transfer to a wire rack to cool completely.

Once the cookies have cooled, combine the remaining white chocolate with the shortening in a small bowl. Stir until smooth. Dip half of each cookie in the melted chocolate, then shake of any excess. Place cookie on wax paper. Coat with sprinkles if desired; let the chocolate harden.


Makes: 3 1/2 dozen cookies


Due to my recent flurry of baking activity, I failed to notice how low I was actually getting on my almond extract before making these. Turns out, I only had about 1/4 teaspoon left. Although I supplemented with vanilla, definitely think the right amount (or even a bit more) of almond extract will really make these sing. Shoo, even without the full amount they were still pretty darn tasty. My only complaint is I wish the cherry flavor was just a smidge more prominent. Then they'd be perfect.


Nutrition Facts
Serving Size 27g
Amount per serving
Calories 120Calories from fat 63
% Daily Value
Total Fat 7.0g11%
Saturated Fat 4.5g23%
Cholesterol 12mg4%
Sodium 40mg2%
Total Carbs 14.0g5%
Sugars 8.2g
Protein 1.4g
Vitamin A 3%Vitamin C 0%
Calcium 1%Iron 2%

Tuesday, December 13, 2011

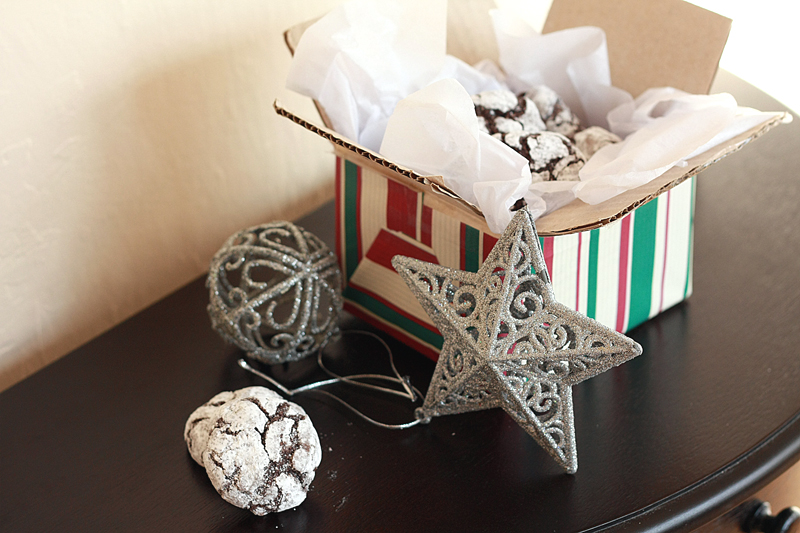
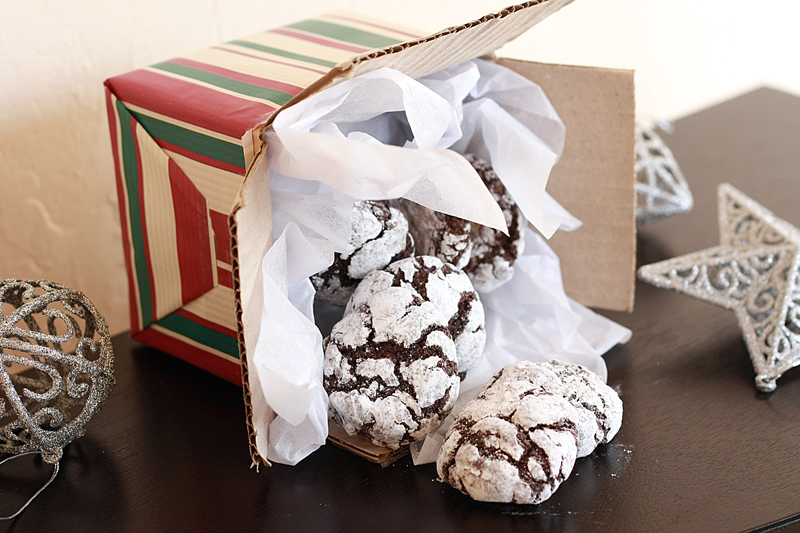
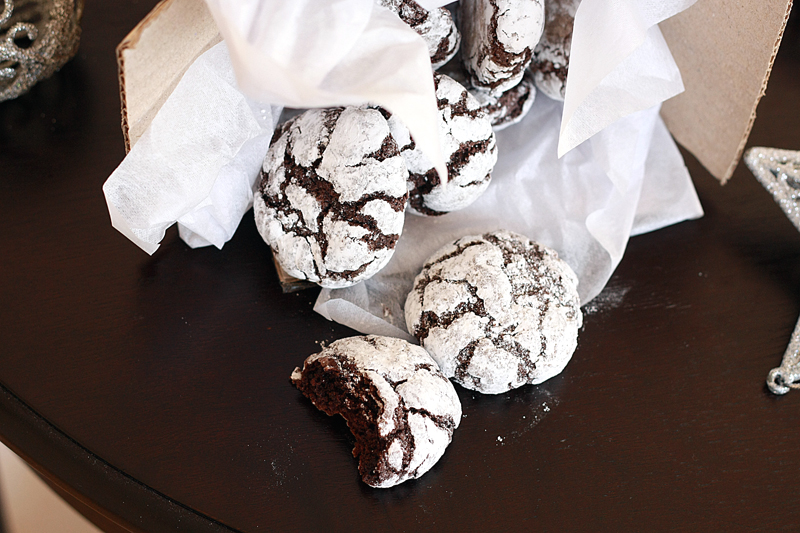
Chocolate Crinkles


At one point last week, at least half of my freezer was completely filled with cookies. No, but really. Even after I cleaned things out. Since then, I've mailed a few of them off, but there still remains well over 6 dozen cookies in there (probably closer to 7 or 8).

We are going to have one tasty Christmas, that's for sure.

See, I just don't believe in Christmas without a cookie plate. It's a necessity -- just part of how this holiday works. You walk by the cookie plate and grab a cookie. Christmas cookies don't come with any calories. Fact.

Okay, or so I wish.

I am not sure how I've made I through 27 Christmases and these have yet to grace the cookie plate. Kind of a crime when you think about it. Or taste them. Time to change that business. After making 2 batches of these, they are well on their way to becoming a holiday staple.

Chocolate Crinkles
Adapted from: Allrecipes.com

1/2 cup unsweetened cocoa powder
1/2 cup Dutch-processed cocoa powder (such a Hershey's Special Dark)
2 cups granulated sugar
1/2 cup vegetable oil
4 eggs
2 teaspoons vanilla extract
2 cups all-purpose flour
2 teaspoons baking powder
1/2 teaspoon salt
1/2 cup powdered sugar

In the large work bowl of a mixer, beat together the cocoas, granulated sugar, and vegetable oil until the cocoa powder is well hydrated. Beat in eggs, one at a time, fully mixing in before adding the next. Add vanilla.

In a medium bowl, stir together the flour, baking powder, and salt. Slowly add in thirds to the wet ingredients. Once the flour mixture is fully incorporated into the batter, cover dough with plastic wrap and place in the fridge for a minimum of 4 hours.

Preheat oven to 350 degrees F. Line baking sheets with parchment paper. Scoop dough into a tablespoon or a #50 size cookie scoop. Drop dough into the powdered sugar, roll until coated with sugar, then roll into 1-inch balls. Transfer dough ball to prepared baking sheets.

Bake for 10-12 minutes, or until the dark, cracked part of the cookie looks baked. Let rest on baking sheet for 1-2 minutes, then transfer to wire cooling racks.


Makes: 5 dozen


I'll admit, I was a little leery when I saw these went for oil instead of butter -- until I remembered that's how brownie and cake mixes roll, soooo I should just go with it. And you know what? It works.

These are rich and fudgey -- pretty much just a brownie in cookie form covered in powdered sugar. Totally a cookie Adam can get behind. And me. Although I usually don't discriminate, I'll back most any cookie.


Nutrition Facts
Serving Size 18g
Amount per serving
Calories 69Calories from fat 21
% Daily Value
Total Fat 2.3g4%
Saturated Fat 0.6g3%
Cholesterol 12mg4%
Sodium 24mg1%
Total Carbs 11.8g4%
Fiber 0.6g2%
Sugars 7.7g
Protein 1.1g
Vitamin A 0%Vitamin C 0%
Calcium 1%Iron 3%

LinkWithin

Related Posts with Thumbnails
 
Pin It button on image hover