Showing posts with label Appetizer. Show all posts

Tuesday, January 29, 2013

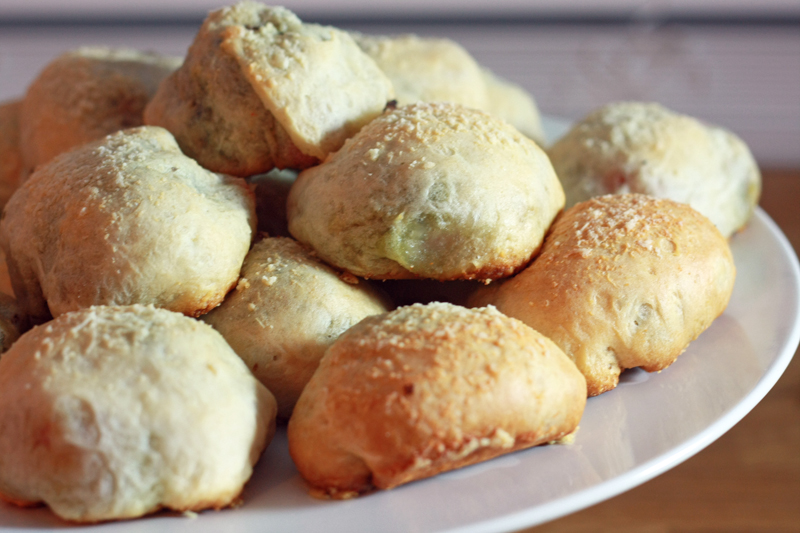
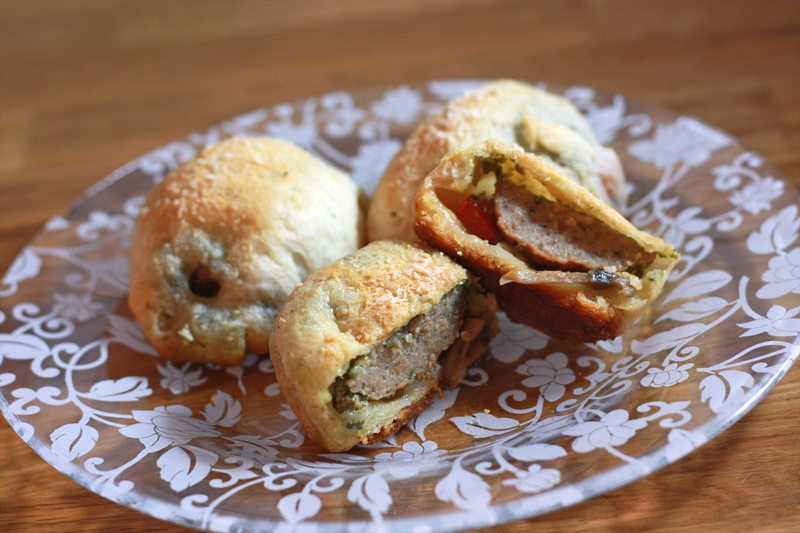
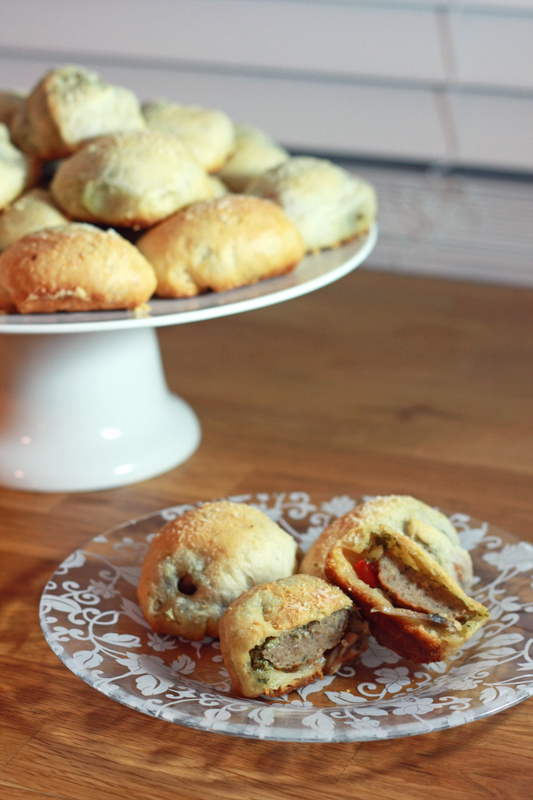
Pesto Meatball Buns


I have a small confession to make. I've been a bit of a Pinterest stalker as of late. Scrolling through the food and craft sections, pinning things here and there. I need to stop.

But then there are things out there like this -- it may not be quite the same as the original pin, but it really gets my creative juices flowing.

The original recipe was more of a straight meatballs with mozzarella and marinara dipping sauce, which is good, but not what I typically go for. However, the concept intrigued me. I've been in a pesto mood as of late, so I decided that was the direction I was going to head with these. I swapped out the mozzarella for Parmesan, then added in pesto, and in true "if you give a mouse a cookie" fashion, I threw in some roasted red peppers and sauteed mushrooms. Just because.


Pesto Meatball Buns
Adapted from: Menu Musings of a Modern American Mom

8 Pillsbury Grands biscuits
8 frozen meatballs, thawed and halved
1 tablespoon olive oil
4 ounces button mushrooms, chopped
5 1/2 tablespoons pesto
3 1/2 tablespoons grated Parmesan cheese, divided
6 ounces roasted red peppers, diced
2 tablespoons butter, melted
1/4 teaspoon garlic powder

Preheat oven to 350 degrees F. Line a large baking sheet with a silicone baking mat or parchment paper. Set aside.

In a small saucepan over medium-high heat, warm the oil. Add the mushrooms and cook, 5-6 minutes, or until the mushrooms have released their juices and it has mostly evaporated.

Cut your biscuits in half and lay out on a clean work surface. Top each half with 1 teaspoon pesto, 1/4 teaspoon Parmesan cheese, half a meatball, roasted red peppers, and mushrooms. Fold edges of biscuit dough over the filling ingredients and pinch together. Place filled buns onto prepared baking sheet (it's okay if they touch).

In a small bowl, combine melted butter and garlic powder. Brush butter mixture over tops of buns. Sprinkle with remaining Parmesan cheese. Bake for 17-21 minutes, or until buns are golden.


Makes: 16 buns (appetizer serving size: 2 buns)


We went to town on these for dinner the other night, but I actually think they'd work better as an appetizer or a side dish than an entree. Such is the life of my husband nowadays, I swear the poor thing never gets a normal meal. :)

I will say, while we both found these to be delicious, they were a little bit of work and took longer to throw together than expected. It probably didn't help that I tried making 24 of these by cutting the biscuits into thirds, not halves. Just. Don't do that. The dough becomes too thin and you start getting holes in the buns. I've adjusted the recipe above to reflect a better quantity for the amount of ingredients.


Nutrition Facts
Serving Size 140g
Amount per serving
Calories 375Calories from fat 226
% Daily Value
Total Fat 25.1g39%
Saturated Fat 8.7g43%
Cholesterol 24mg8%
Sodium 974mg41%
Total Carbs 28.9g10%
Dietary Fiber 1.9g8%
Sugars 7.2g
Protein 10.6g
Vitamin A 16%Vitamin C 61%
Calcium 11%Iron 15%

Tuesday, February 21, 2012

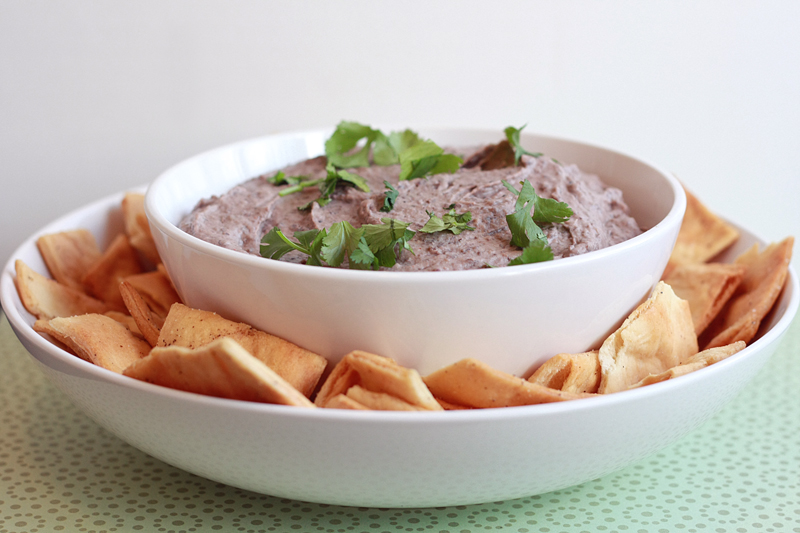
Roasted Garlic Black Bean Dip


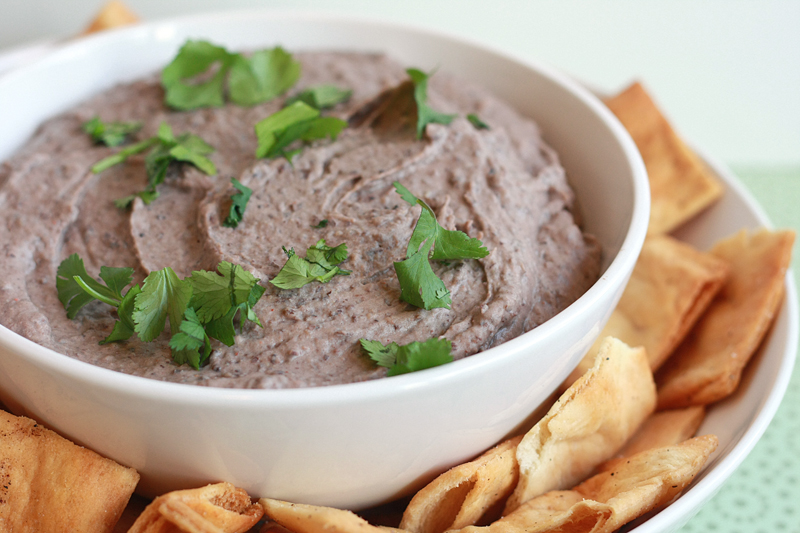
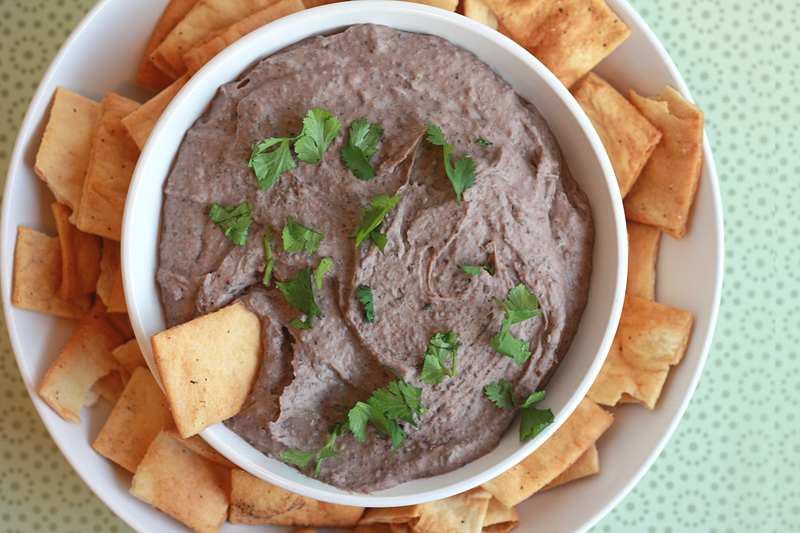
As I mentioned last week, Jalapeno Cheddar Hummus wasn't the only thing on my mind when it came to making something for the Superbowl. I have seen countless recipes floating around for a black bean dip, which intrigued me, but for some reason I decided to go off on my own for this one.

I knew going in that I wanted to somehow incorporate roasted garlic into the dip because I love it so. Originally, I was only going to use one head of garlic, but I made up a second just.in.case. Definitely the right move. It may seem like a ton of garlic, but since it's roasted, it becomes much more subtle and doesn't come through in an "in your face" sort of way. Which is a good thing when we're talking 2 heads of garlic.

I simply topped the dip off with a few seasonings (cumin and cayenne) and away we went. Very easy to throw together, and the only time consuming thing was roasting the garlic. The rest utilized the "dump and blend" method. Perfect for those times you really don't feel like making anything but don't want to go the store-bought route.

Roasted Garlic Black Bean Dip
Original Recipe

2 heads garlic
2 tablespoons olive oil

2 (15 ounce) cans black beans
1/4 cup extra-virgin olive oil
2 tablespoons tahini (sesame seed paste)
1/2 teaspoon cayenne pepper
1 teaspoon ground cumin
1 teaspoon kosher salt
1 tablespoon lemon juice
1 1/2 teaspoons dried chives

Preheat oven to 375 degrees. Tear two squares of aluminum foil and lay flat on a work surface. Cut the top 1/4 off each head of garlic. Place one head of garlic in the center of each foil square. Drizzle each with 1 tablespoon olive oil. Wrap foil around garlic and roast in the oven for 1 hour. Remove and let cool at least 15 minutes, or until able to handle.

Squeeze the cloves out of the heads of garlic into the bowl of a food processor. Add the black beans. Pulse until ingredients are pureed. With the processor still running, pour in the olive oil until the mixture becomes smooth and creamy. Add tahini and remaining 4 ingredients. Process again until the mixture is smooth, adding water if it becomes too thick.

Serve with pita chips or veggies.


Serves: 20 (2 tablespoons per serving)


Next time around, I think incorporating fresh chives (and more of them) or green onions would be a must. Most of the flavors in this dish a very mild and mellow, and I think adding one of those options would really brighten things up. Overall though, not too bad for doing my own thing. :)


Nutrition Facts
Serving Size 55g
Amount per serving
Calories 199Calories from fat 50
% Daily Value
Total Fat 5.5g8%
Saturated Fat 0.8g4%
Cholesterol 0mg0%
Sodium 121mg5%
Total Carbs 29.0g10%
Fiber 6.7g27%
Sugars 1.0g
Protein 9.8g
Vitamin A 1%Vitamin C 4%
Calcium 7%Iron 14%

Friday, February 17, 2012

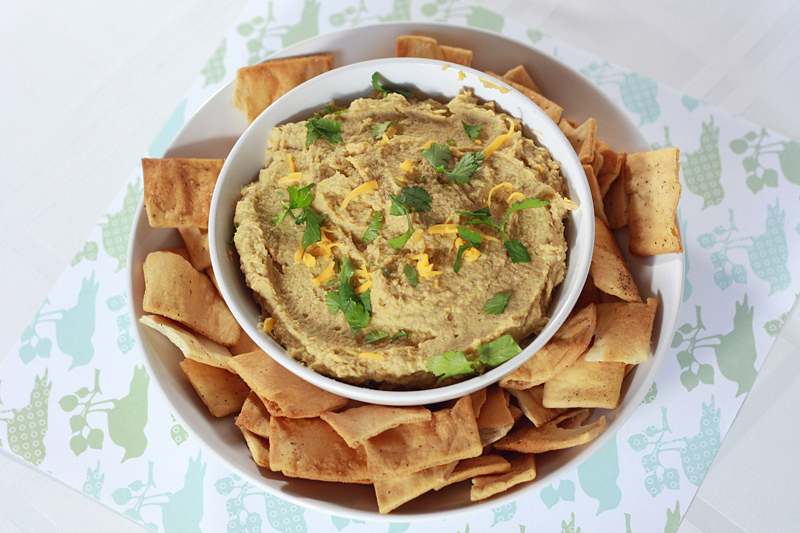
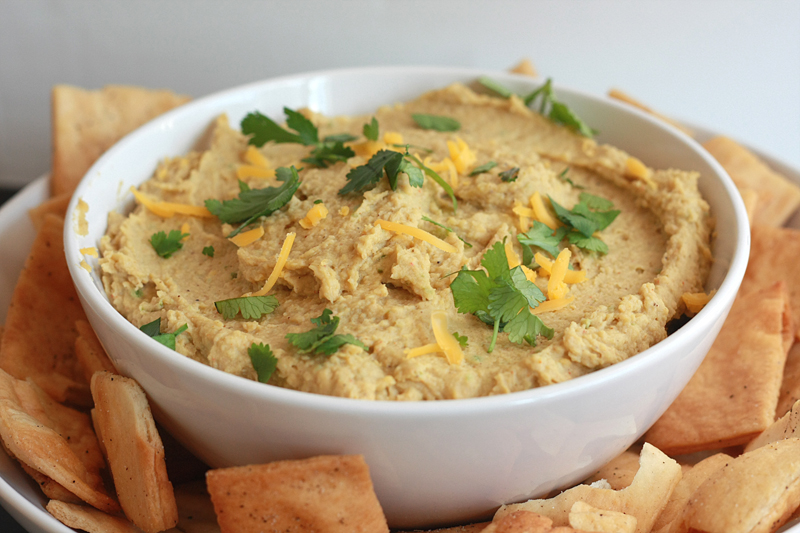
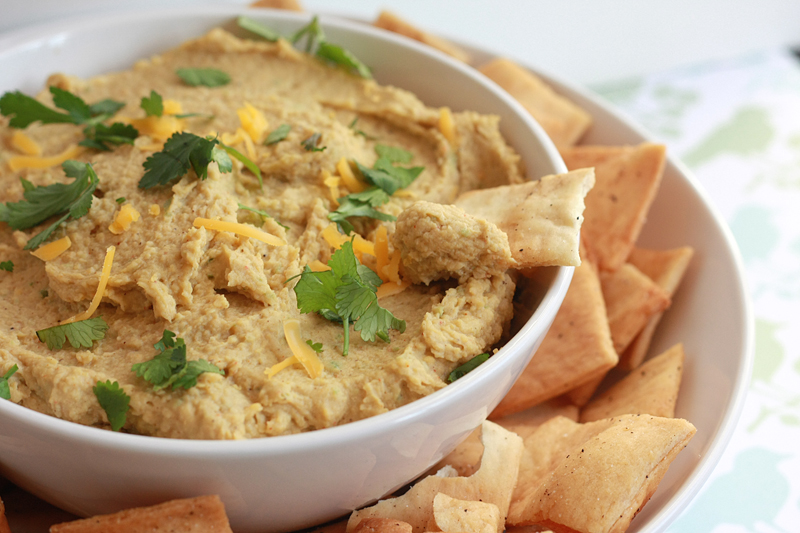
Jalapeno Cheddar Hummus


Hummus is one of those things that is rarely allowed in our house. Not because we don't like hummus. On contraire, once we get going, or ahem, once one of us gets going, it's far too easy to eat almost the entire container before realizing it. We won't say whom that might be.

So when the opportunity presented itself to bring a food dish to share with friends (*cough*superbowl*cough), my mind immediately jumped to some sort of savory dip. I didn't have a ton of notice was too lazy to come up with something wildly crazy, so opted for something simple with ingredients I knew I could pick up at the small-ish grocery store down the street.

I originally had a different idea for a dip going into it, but I decided last minute to pick up the things for this hummus as well just.in.case. the other one didn't turn out like I'd planned.

So glad I did. Not because the other dip didn't turn out (I'll be sharing that next week), but because this was definitely tasty. I love the addition of cheddar and jalapeno to hummus, and so did the other guests!

Jalapeno Cheddar Hummus
Adapted from: The Spiffy Cookie

2 (14.5 ounce) cans chickpeas, drained and rinsed
1 jalapeno, chopped, seeds and membranes removed
1/4 cup extra-virgin olive oil
2 tablespoons warm water
2 tablespoons tahini (sesame seed paste)
1 teaspoon kosher salt
1 teaspoon ground cumin
1/2 teaspoon cayenne pepper
1 teaspoon garlic powder
1 cup freshly shredded cheddar cheese

In the bowl of a food processor, combine the chickpeas and jalapeno. Pulse until ingredients are pureed. With the processor still running, pour in the olive oil and water until the mixture becomes smooth and creamy. Add tahini and remaining 5 ingredients. Process again until the mixture is smooth, adding more water if it becomes too thick.

Serve with pita chips or veggies.


Serves: 20 (2 tablespoons per serving)


As written, this hummus turns out a bit thicker that your normal store-bought hummus, but I kind of enjoyed it that way. You can always add more water if you like it more on the thinner side. As much as I did enjoy what the cheddar and jalapenos brought to the table, I almost wish it would have been more. I felt like the chickpeas really kind of muted the cheddar more than I was expecting, and I could have gone for keeping a few of the seeds with the jalapeno, as this was not spicy - at all. Still, even with the hummus the way it was, I could have definitely chowed down on at least half a bowl. ;)


Nutrition Facts
Serving Size 54g
Amount per serving
Calories 206Calories from fat 71
% Daily Value
Total Fat 7.9g12%
Saturated Fat 1.9g10%
Cholesterol 6mg2%
Sodium 163mg7%
Total Carbs 25.5g9%
Fiber 7.3g29%
Sugars 4.5g
Protein 9.7g
Vitamin A 2%Vitamin C 3%
Calcium 9%Iron 16%

Friday, October 21, 2011

Cider-Roasted Pork Loin for Steph's Virtual Bridal Shower

A couple months ago, my friend Steph from Steph's Bite by Bite announced that her and her fiance had to move up their wedding date by 9 months. I don't know about you, but my wedding planning took a full 9 months or so to get all of it in. I couldn't imagine having to squish it all down to two months! Yet due to circumstances out of their control, they moved the date from June 30, 2012, to October 29, 2011. What a champ! I would want to just throw my hands up and cry. Yet Steph hasn't, and you should really go and check out some of the really awesome (and cute!) wedding ideas she has, as well as all of her mouth-watering sweets and great looking dishes.

With the nuptials coming up right around the corner, Kita from Pass the Sushi came up with the great idea to surprise Steph with a "virtual" bridal shower of food bloggers, featuring great "date night" dishes for those times when they want to kick it up a night a home. Of course I was in.

Steph: Hope your wedding day goes off flawlessly and is everything you wanted! Congrats to you both!

For my "Big Night In" meal, I opted for the appetizer, entree and a side, and dessert route. Whew! Definitely some work, but totally worth it!

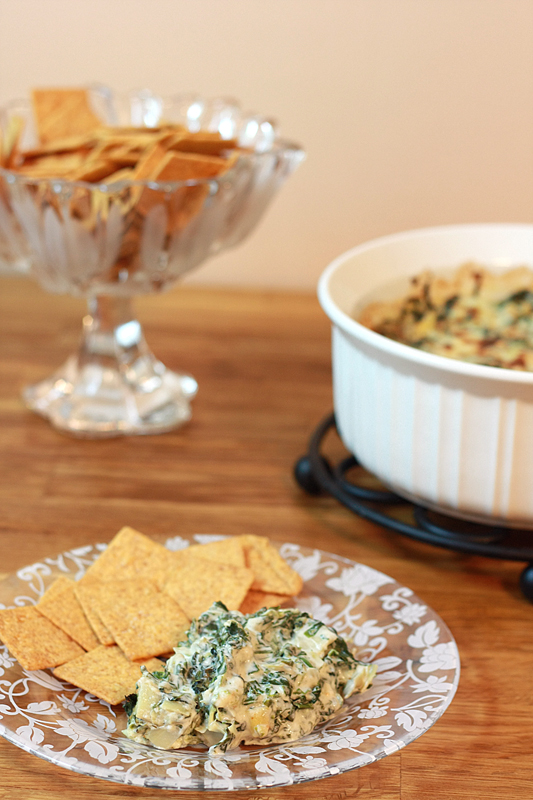
First, we start with one of my favorite appetizers of all time -- Spin Dip (better known as Spinach & Artichoke Dip). I may or may not be known to walk into a restaurant and order this solely and an entree. I can neither confirm or deny. However, I am one of those people who do not like mayo, so it took a bit of hunting to find a recipe that looked promising. I think this version proves that mayo is definitely not necessary for this dip, it's fantastic the way it is.

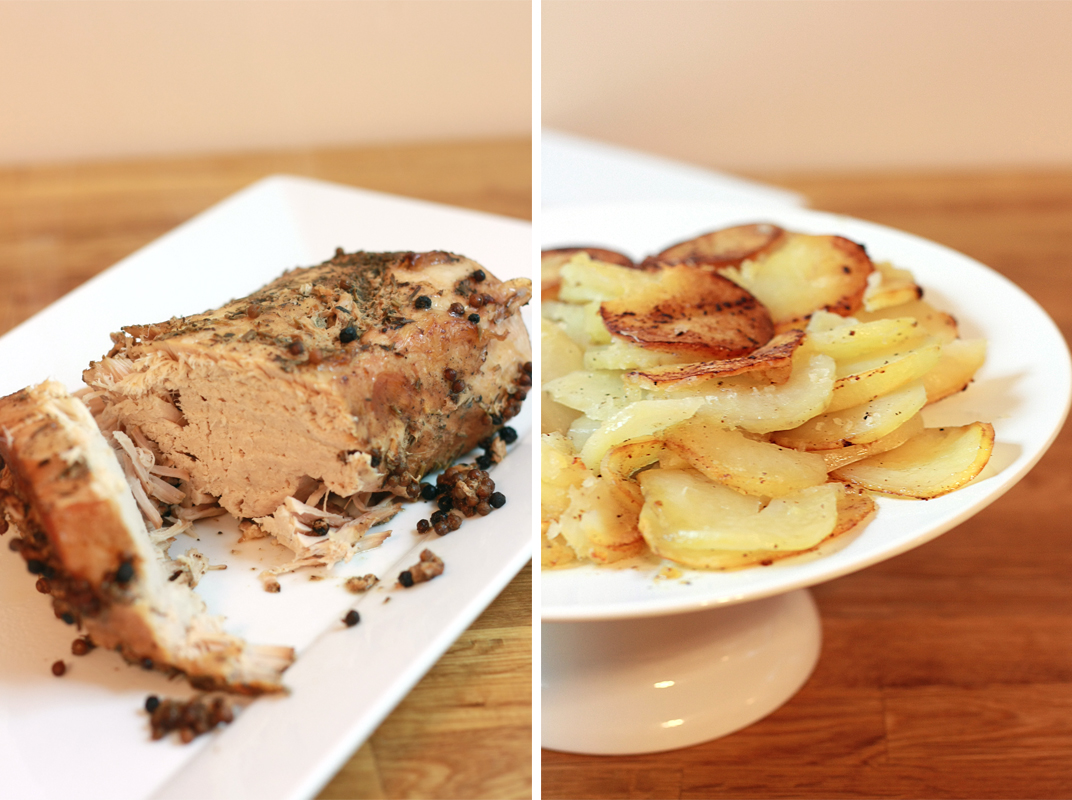
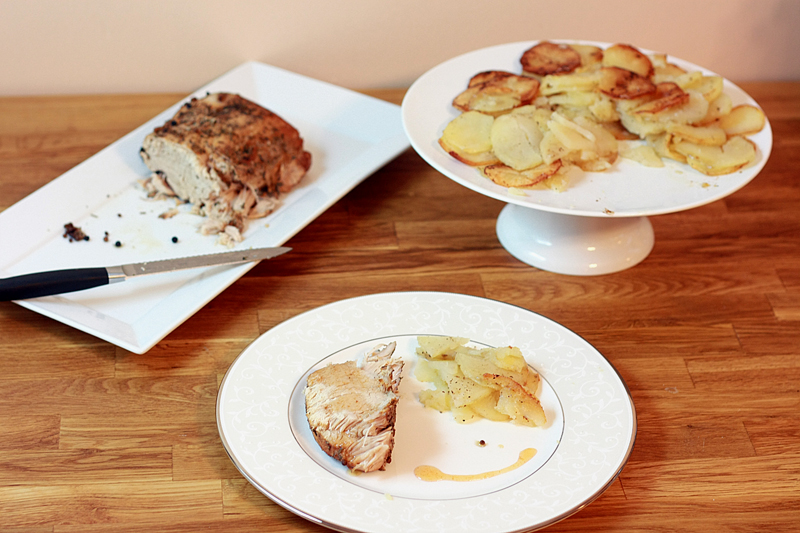
Next, we move to a Cider-Roasted Pork Loin with Pommes Anna. The pork has a nice kick from the peppercorns with a sweetness from the cider reduction -- great for a nice fall or winter evening. Just make sure you brine that sucker for a long, long time to prevent it getting dry while cooking. As for those Pommes Anna, which is supposed to look like a lovely little potato cake with rings of potato slices (not just a heap of potatoes). Well, we'll just say the taste was fantastic. I might have some work to do in the looks department on that dish.

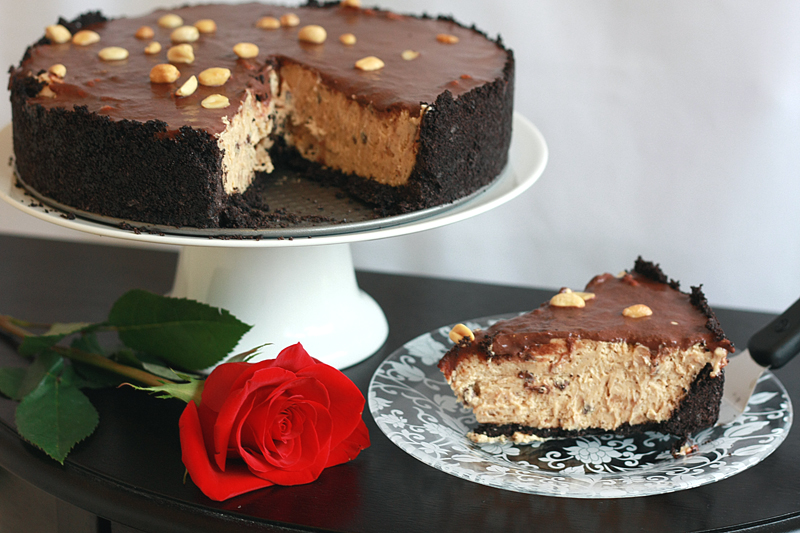
To finish things off, I opted for a fantastically rich Peanut Butter Torte (which can easily be made the day ahead). This delicacy will come next week my friends. Mwahaha. So mean, I know.


Spin Dip


Adapted from: Blog is the New Black

1 1/2 cups whipping cream
1 tablespoon flour
1/4 teaspoon garlic pepper seasoning (such as McCormick's, or make your own)
2 tablespoons Parmesan cheese, grated
2 tablespoons Romano cheese, grated
1 (16 ounce) package frozen spinach, thawed and drained well
1 cup Asiago cheese, grated
1 (14 ounce) can artichoke hearts, drained and chopped

Preheat oven to 350 degrees F. Coat a 1 1/2 quart baking dish with cooking spray; set aside.

In a medium bowl, whisk together cream, flour, garlic pepper, 1 tablespoon Parmesan, and 1 tablespoon Romano. Warm mixture in the microwave in 30 second intervals, stirring between each, until the mixture is hot and slightly thickened. Add spinach, Asiago cheese, and artichokes until well blended. Pour mixture into prepared baking dish and spread evenly across pan. Sprinkle remaining Parmesan and Romano over the top. Bake, uncovered, 15-18 minutes, or until hot and bubbly. Remove from oven and turn heat to broil. Once oven is heated, place under the broiler 3-5 minutes, or until cheese is lightly browned.


Serves: 8 as an appetizer


Cider-Roasted Pork Loin


Adapted from: Cooking Light, October 2004

3 cups water
3 cups apple cider
1/4 cup kosher salt
1 tablespoon black peppercorns
1 tablespoon coriander seeds
1 bay leaf
2 pounds boneless pork loin, trimmed
2 cups apple cider
1 teaspoon dried rosemary1 teaspoon dried oregano
1/8 teaspoon ground black pepper

In a large saucepan, bring the first 6 ingredients (through bay leaf) to a boil. Stir until salt dissolves. Remove from heat and cool to room temperature. Pour brine into a large ziploc bag with pork. Seal bag and place in refrigerator for at least 12 hours (preferably overnight). Turn bag occasionally.

Preheat oven to 350 degrees F.

In a small saucepan over medium-high heat, bring 2 cups of cider to a boil. Continue to cook until cider thickens and is reduced to about 1/4 of a cup. Set aside.

Meanwhile, remove pork from bag and discard brine. In a small bowl, combine rosemary, oregano, and 1/8 teaspoon ground black pepper. Rub herb mixture over pork. Place pork on the rack of a broiler pan coated with cooking spray. Bake for 1 hour, or until internal temperature reaches 155 degrees F. During the final 20 minutes of cooking, baste the pork at least twice with the cider reduction. Remove pork from oven and baste pork with cider reduction a third time. Let rest for 10 minutes before serving. Serve with any remaining cider reduction.


Serves: 8


Pommes Anna


Adapted from: Food Network

2 1/2 pounds russet potatoes peeled, placed in a bowl of water
6 tablespoons unsalted butter, melted
1 1/2 teaspoons kosher salt
3/4 teaspoon ground black pepper
1/8 teaspoon ground nutmeg
1 tablespoon grated Parmesan cheese

Preheat oven to 350 degrees F.

In a small bowl, melt the butter in the microwave in 20 second increments. Once melted, set aside.

Slice potatoes into thin rounds with a mandolin or a very sharp knife. Pat slices dry. Heat a medium non-stick pan over medium heat. Arrange 1 layer of overlapping potato slices over the bottom of the pan in concentric circles. Drizzle with 1/3 of melted butter. Sprinkle with 1/2 teaspoon salt, 1/4 teaspoon pepper, and a pinch of nutmeg. Repeat twice more, for a total of three layers. Cook potato cake on low 25-30 minutes, or until the bottom potatoes are golden and crisp around the outside. Shake pan several times while cooking to prevent potato cake from sticking.

Using the lid of the pan to hold potatoes in place, pour off the excess butter into a small bowl; reserve. Place the same lid (the same size as the skillet) over the potatoes. Holding the lid in place, flip the pan over (the potatoes should now be on the lid and not in the pan). Pour the reserved butter back into the pan. Slide the potatoes back into the pan, uncooked side down. Place skillet in the oven for 25-30 minutes. Shake the pan several times while baking to keep the potatoes from sticking. Potatoes are done when the bottom is browned and crisp.

Pour off any remaining butter left in the pan. Slide potatoes onto a serving dish and sprinkle with cheese.


Serves: 6 (as a side)


Check back next week for this!

Congrats again Steph!

Check out all the other Date Night Dinners for Steph's Virtual Bridal shower!


Nutrition Facts - Spin Dip
Serving Size 149g
Amount per serving
Calories 176Calories from fat 113
% Daily Value
Total Fat 12.6g19%
Saturated Fat 7.8g39%
Cholesterol 42mg14%
Sodium 333mg14%
Total Carbs 8.9g3%
Fiber 4.0g16%
Sugars 0.8g
Protein 9.0g
Vitamin A 114%Vitamin C 36%
Calcium 25%Iron 13%

Nutrition Facts - Cider-Roasted Pork Loin*
Amount per serving
Calories 200Calories from fat 60
% Daily Value
Total Fat 6.6g10%
Saturated Fat 2.2g11%
Cholesterol 67mg22%
Sodium 419mg17%
Total Carbs 9.2g3%
Fiber 0.3g1%
Protein 24.4g

Nutrition Facts - Pommes Anna
Serving Size 206g
Amount per serving
Calories 237Calories from fat 108
% Daily Value
Total Fat 12.0g18%
Saturated Fat 7.5g37%
Cholesterol 31mg10%
Sodium 687mg29%
Total Carbs 29.9g10%
Fiber 4.6g18%
Sugars 2.2g
Protein 3.6g
Vitamin A 7%Vitamin C 62%
Calcium 3%Iron 6%

*Nutrition Facts from Cooking Light

Thursday, August 11, 2011

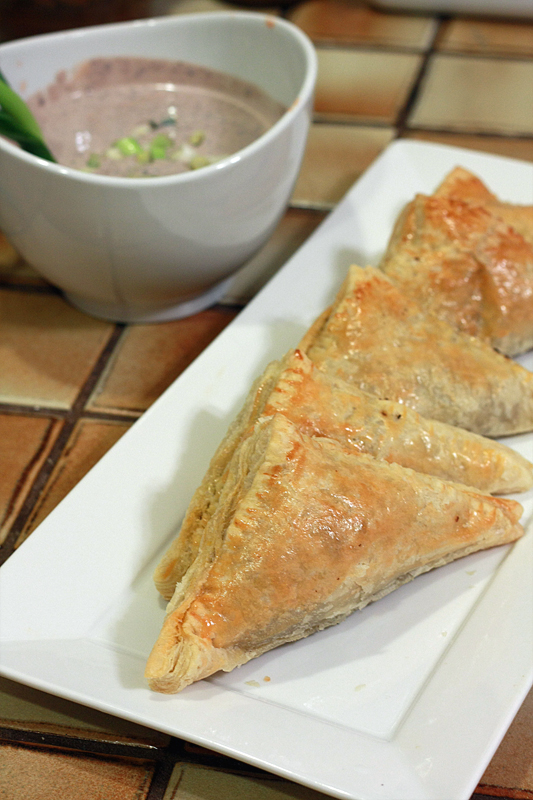
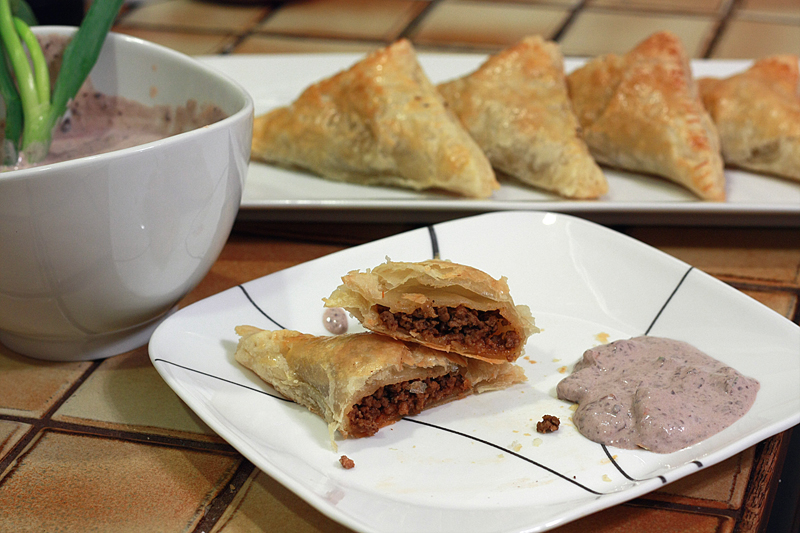
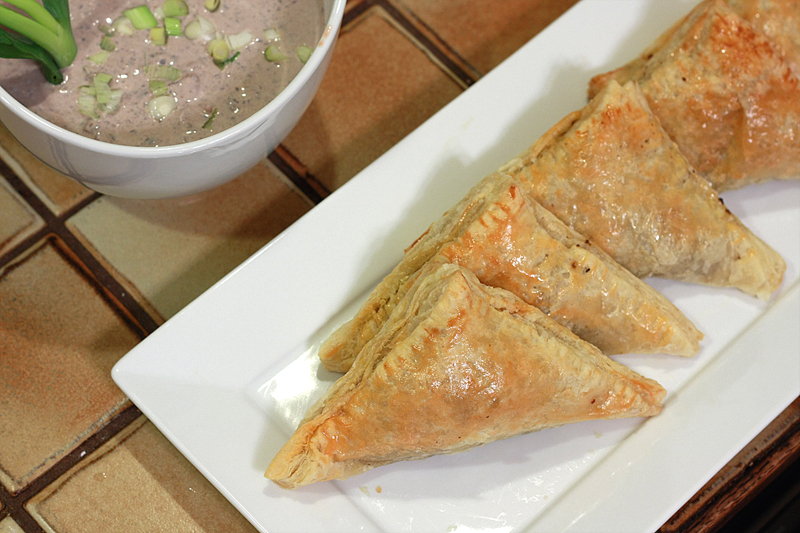
Beef Empanadas with Black Bean Dipping Sauce


Shhhh. I'm going to let you in on a little secret. And it's a good one.

Everybody assumes just looking at empanadas that they involve quite a bit of work. A little bit of time? Yes. A lot of work? No. Oh, and about that little bit of time? Most of it involves waiting for the puff pastry to thaw and the empanadas to bake. So you can be off doing whatever else strikes your fancy, and not running around the kitchen.

Another assumption about empanadas? They're hard to make. Once again, not true. If you are capable of cooking ground beef, cracking eggs, and cutting in a relatively straight line, you're hired. That's about as difficult as it gets. Brown ground beef, mix in spices, take off heat. Cut square into 4 smaller squares (I think we learned this one in kindergarten). Brush egg yolks around edges (yet another awesome kindergarten-acquired skill, painting!). Two scoops of beef mixture, fold into a triangle, and voilà. Trust me, it can be done.

That's the thing about assuming, it makes an as... well, you know how the rest goes.

Want to practice? Empanadas, not assuming.

This is a great starter recipe. A simple blend of spices provides a little bit of heat while the dipping sauce brings a creamy coolness. A yin and yang. Not to mention a little "wow" factor to those friends not in the know.


Beef Empanadas with Black Bean Dipping Sauce


Adapted from: Bon Appetit, June 2011

1 pound ground beef
3 cloves garlic, minced
1 tablespoon tomato paste
2 teaspoons ground cumin
1/2 teaspoon cayenne pepper
2/3 cup fresh cilantro, chopped
1/4 teaspoon ground black pepper
1 1/2 (17.3 ounce) packages (3 sheets) frozen puff pastry, thawed
3 large egg yolks
1 (15.5 ounce) can black beans, drained and rinsed
1 cup sour cream
1/2 (15.5 ounce) can diced tomatoes
2 green onions, chopped, divided

Warm a medium skillet over medium-high heat. Add beef and garlic; cook for about 3 minutes, or just until beef is done, stirring often. Break meat into smaller pieces using a wooden spoon while cooking. Stir in tomato paste, cumin, cayenne pepper, and black pepper. Reduce heat to medium, and cook for an additional 3 minutes. Remove from heat and stir in cilantro. Allow mixture to cool.

Preheat oven to 375 degrees F. Line two baking sheets with parchment paper; set aside.

Lay out the puff pasty on a clean work area. Cut each sheet into four equal 4 1/2" x 4 1/2" squares (12 square total). In a small bowl, lightly beat egg yolks with a fork. Using a pastry brush, brush egg yolks around the edges of each square. Spoon equal amounts of filling into the center of each square. Fold edges over (forming a triangle) and press down to seal. Using the tines of a fork, crimp the edges together. Transfer empanadas to the prepared baking sheets. Brush the tops of each empanada with the egg yolks. Bake for 20 minutes, or until tops are golden brown and puffed.

Meanwhile, add beans and sour cream to a food processor. Blend until smooth. Transfer to a medium bowl and stir in the tomatoes and half the green onions. Top with remaining green onions.


Makes: 12


These empanadas, by all means, should be simple and straight-forward to make. And they are, if you have all the ingredients. What a lovely little surprise when I pulled the beef out of the fridge and discovered it was a nice brown color instead of bright red with a "sell by" date for 5 days earlier. Gross. And into the trash. Since the puff pastry was already thawing, I set out for what would be grocery run #1.

After I came home and read the recipe further, I realized I also didn't have the tomato paste. Grr. I made the hubby do grocery run #2 on his way home. And then... I realized my cilantro had gone bad. After Adam had already been at the store. So, we just didn't have cilantro.

Lesson learned. Make sure your ingredients are fresh, and the recipe was actually on your weekly menu (ergo, all the ingredients already purchased) before starting a meal.

Then you can enjoy hassle-free easy-peasy empanada making. Which I highly recommend.


Nutrition Facts
Serving Size 184g
Amount per serving
Calories 593Calories from fat 284
% Daily Value
Total Fat 31.5g48%
Saturated Fat 9.9g49%
Cholesterol 95mg32%
Sodium 195mg8%
Total Carbs 52.5g17%
Fiber 6.7g27%
Sugars 1.5g
Protein 25.4g
Vitamin A 7%Vitamin C 3%
Calcium 9%Iron 29%

Monday, October 4, 2010

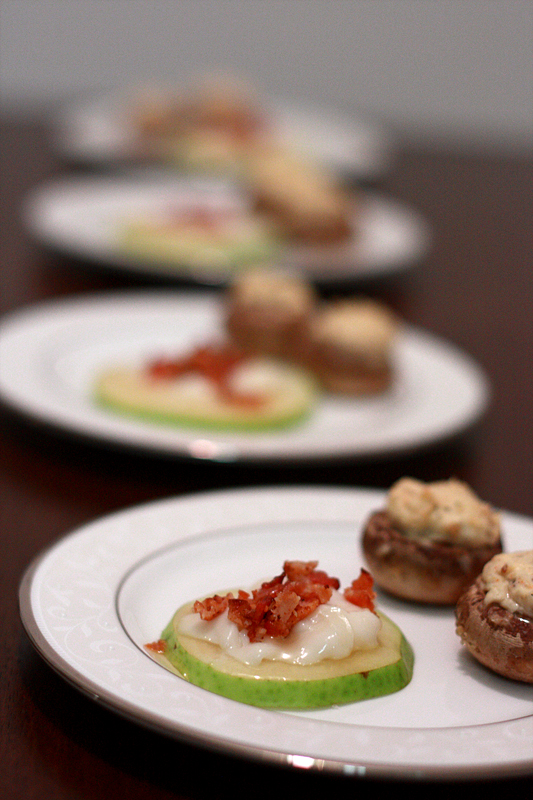
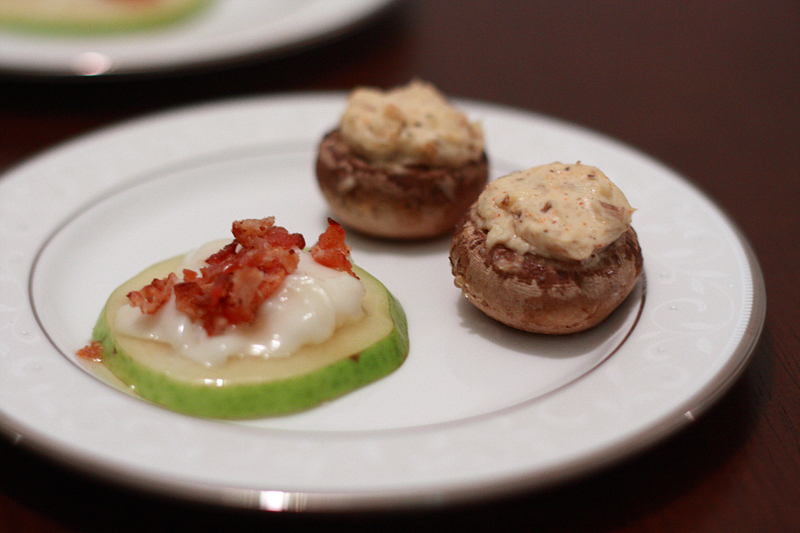
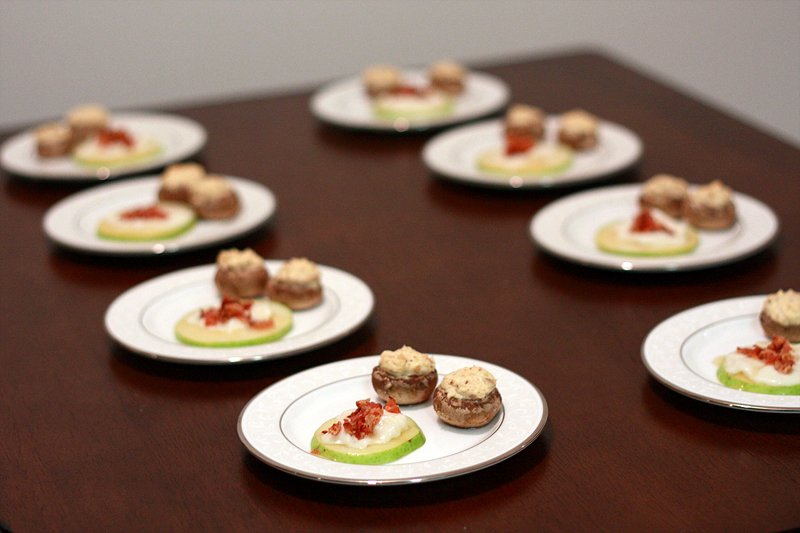
Cheese-Stuffed Mushrooms and Pears with Goat Cheese and Bacon

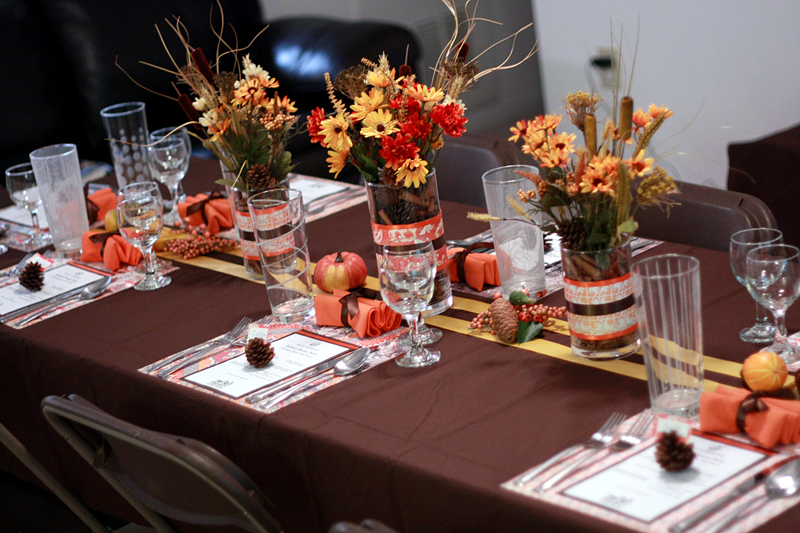
**This is the first of seven recipe installments from my Seven-Course Fall Feast.**


I burned the pancetta. Let's just get that out in the open right away. My guests were 5 seconds from walking in the door and I burned the pancetta. It wasn't the "oh the edges are a bit crispy, just break it off and use the rest...". No. It was full on blackened pancetta. Not exactly the way you want to kick off a huge dinner party that you've never attempted before.

After a few seconds of, ohnowhatdoIdoNOW? I remembered we had crumbled bacon tucked away in the fridge as a garnish for the salad. Saved by my love of bacon and the need to incorporate it into the meal.

Despite a slightly rocky start to the evening, my attempt at pulling off a seven-course dinner for the first time went off pretty smooth. Even though I burned part of the very first course of the night, my guests never knew about it and were raving after these first two dishes. Especially the stuffed mushrooms. They were cheesy, tangy, with a little bit of a kick from some cayenne pepper. And the Pancetta Crisps with Goat Cheese and Pear (turned Pears with Goat Cheese and Bacon) were so nicely balance with sweetness coming from the pear and honey with tang from the cheese and saltiness from the bacon. Yum.

Cheese-Stuffed Mushrooms
Adapted From: Allrecipes.com

24 fresh mushrooms (about 1 1/2" in diameter)
1 tablespoon vegetable oil
1 tablespoon minced garlic
1 (8 ounce) package reduced-fat cream cheese, at room temperature
1/4 cup grated Parmesan cheese
1/4 teaspoon ground black pepper
1/4 teaspoon onion powder
1/4 teaspoon ground cayenne pepper

Preheat oven to 350 degrees F. Spray a glass baking pan (9 x 13) with cooking spray.

Clean mushrooms with a damp paper towel. Carefully break off stems -- simply hold the mushroom by the cap and push in one direction on the stem near the base. It should pop right out. Remove the tough ends of 12 stems and chop extremely fine.

Heat oil in a large skillet over medium heat. Add garlic and chopped mushroom stems to the skillet. Fry until all the moisture is gone, being careful not to burn the garlic. Remove from heat and let cool.

In a medium-sized bowl, combine cream cheese, Parmesan, black pepper, onion powder, and cayenne pepper. Mix until smooth. Once the garlic and mushroom mixture is no longer hot, add to the cream cheese mixture and stir until fully incorporated (mixture will be thick). Using a spoon, fill each mushroom cap with a generous amount of cream cheese mixture. Arrange the mushroom caps, cream cheese side up, in the baking pan.

Bake for 20 minutes at 350 degrees, or until the mushrooms are hot and liquid starts to form under the caps.

Makes: 24 stuffed mushrooms (serving size: 2 mushrooms)


Pears with Goat Cheese and Bacon
Adapted from: Southern Living, November 2007

1 Bartlett pear
2 ounces soft goat cheese (not crumbled)
3 teaspoons honey
3 strips bacon, cooked and finely chopped

Core pear with an apple corer. Cut pear crosswise into 12 thin rings. Arrange on a serving platter. Spread about 1 teaspoon of goat cheese on each pear slice, making sure to cover the hole from the core. Sprinkle with 1/4 teaspoon bacon and drizzle with 1/4 teaspoon honey.

Makes: 12 pear slices (serving size: 2 slices)


These two dishes, even when made at the same time, were fairly easy to throw together with fantastic results. If serving at a party, the mushrooms with filling can easily be made in advance and stored in the glass baking dish in the refrigerator. The pears, on the other hand, must be cut and assembled close to the time of serving (to prevent browning). However, the bacon can be made in advance and stored in the fridge.

For the Mushrooms:

One of the favorites of the night

For the Pears:

Nutrition Facts - Cheese-Stuffed Mushrooms
Amount per serving
Calories 94Calories from fat 76
% Daily Value
Total Fat 8.4g13%
Saturated Fat 4.8g24%
Cholesterol 23mg8%
Sodium 90mg4%
Total Carbs 2.1g1%
Sugars 0.7g
Protein 3.4g
Vitamin A 6%Vitamin C 2%
Calcium 4%Iron 3%

Nutrition Facts - Pears with Goat Cheese and Bacon
Amount per serving
Calories 125Calories from fat 66
% Daily Value
Total Fat 7.4g11%
Saturated Fat 3.6g18%
Trans Fat 0.0g
Cholesterol 20mg7%
Sodium 253mg11%
Total Carbs 8.6g3%
Dietary Fiber 1.1g4%
Sugars 6.5g
Protein 6.5g
Vitamin A 4%Vitamin C 2%
Calcium 9%Iron 2%

Tuesday, September 21, 2010

Stuffed Pretzels


I am so super excited to share this recipe with you. Like, bouncing off the walls excited. Because these stuffed pretzels were really just that good.

A couple weekends ago Adam and I headed down to Blue Dust, a bar right outside the Waterfront (yes, on the other side of the tracks in Homestead) with a few of our friends. Supposedly, the beer selection was fantastic (which it was). Meet up at 7? Yeah, I suppose I could handle some bar food for dinner. Burgers, pub fries... not really what I was in the mood for, but it was fine.

I was so wrong. It only took a quick glance even at their appetizers to realize this wasn't plain ol' bar food. Red bean dip with tortilla chips, hummus and pita, tortilla chips with homemade salsa, artichoke dip with crostini... and then you kept looking down the menu. Crab rolls? Lamb chops? Surf and turf sandwich (1/2 a sandwich of pulled BBQ brisket and 1/2 a sandwich with crab meat)? Clearly this chef was not about your typical bar food.

Adam went with the surf n turf sandwich while I had some delectable Mexican pulled pork tacos. Yum. But that wasn't the best part. The friends that had invited us personally knew the chef -- they had been coming to the bar for a long time and were pretty much considered regulars. Our friend told the chef we were coming... and to make her stuffed pretzels (a hidden gem not found on their menu).

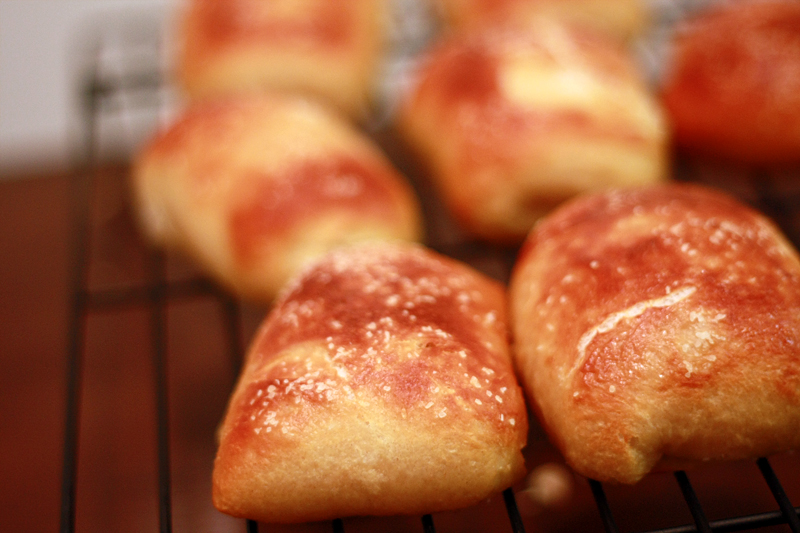
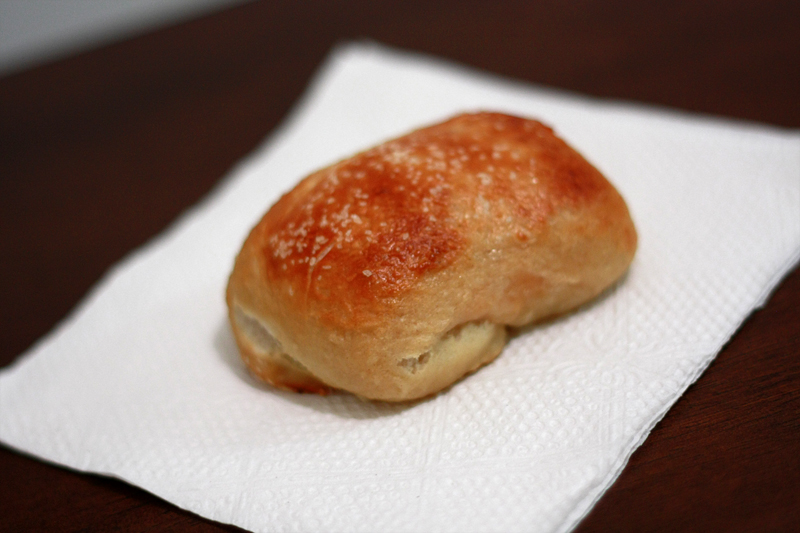
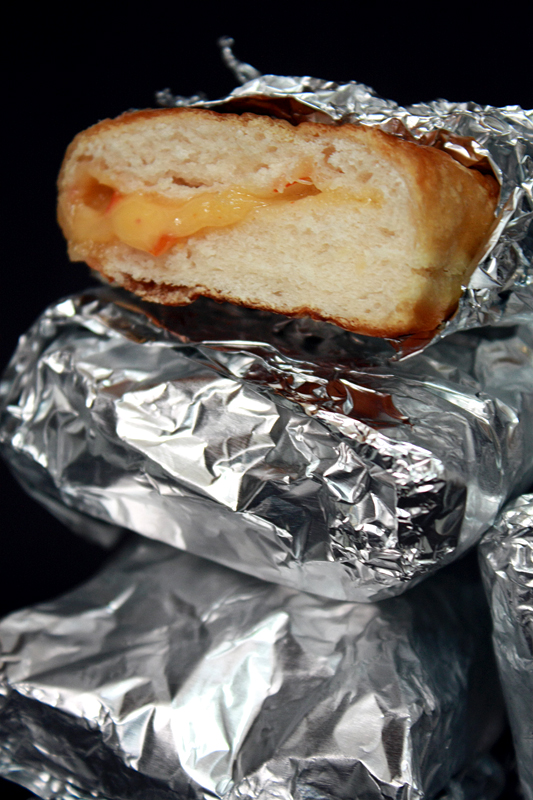
I'm pretty sure we ordered all the pretzels they had, and were not the least bit disappointed (except maybe we didn't get any more). Soft pretzel dough was wrapped around gooey cheese that was really beyond addictive. I'm pretty sure I could have just had that for dinner and been happy. (Too bad I had to share.)

So what's a kid to do (besides keep going back for more)? Make my own of course!

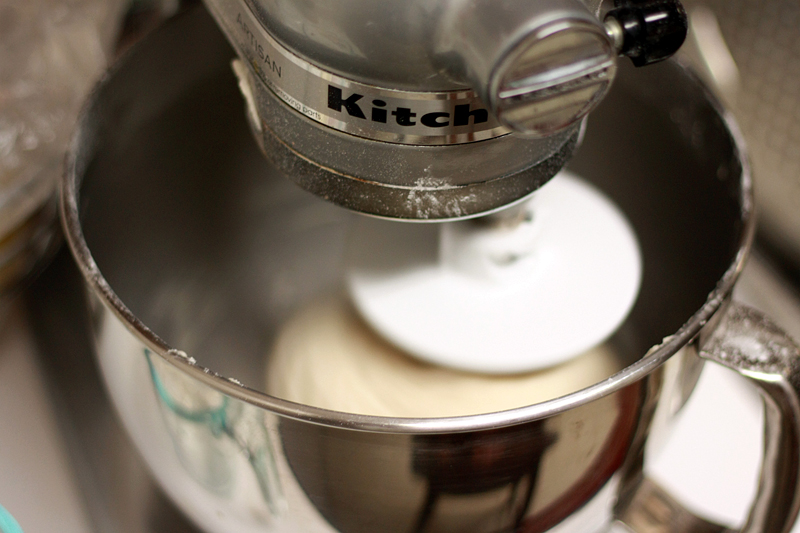
First you have to start with a good soft pretzel dough. This recipes starts with everybody in the bowl and then mix, mix, knead! (Yes I love my dough hook so I don't have to do this by hand.)


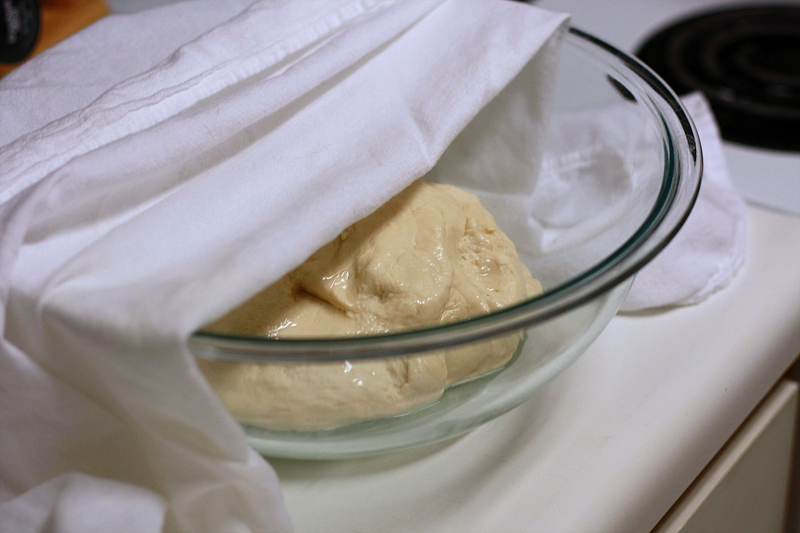
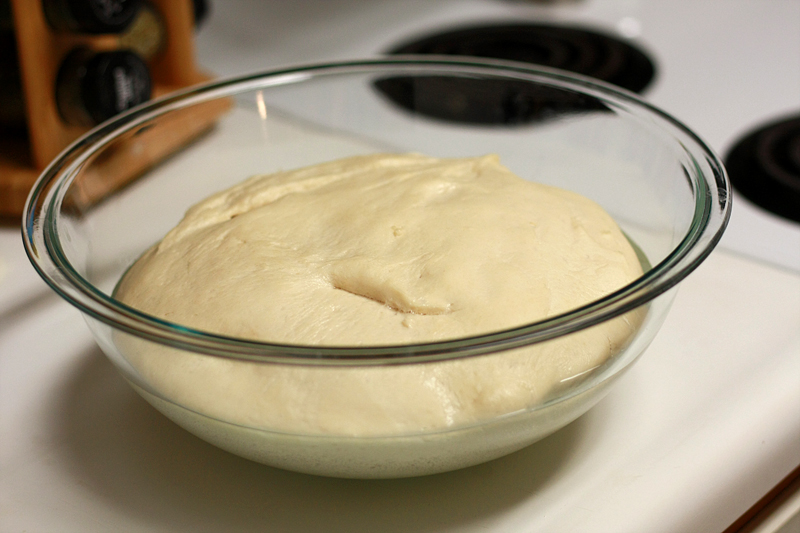
Place the dough in a lightly oiled bowl, free of drafts, in a warm area, and let rise 50-55 minutes or until doubled in bulk. Yay for a short rise time!


Ooo look how it is all nice and puffy! Turn the dough out onto a counter lined with parchment paper. Divide the dough into 16 equal portions.


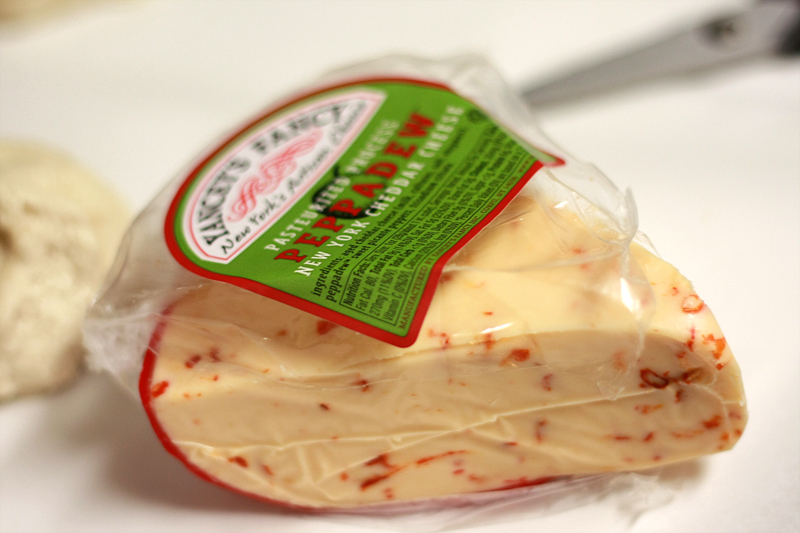
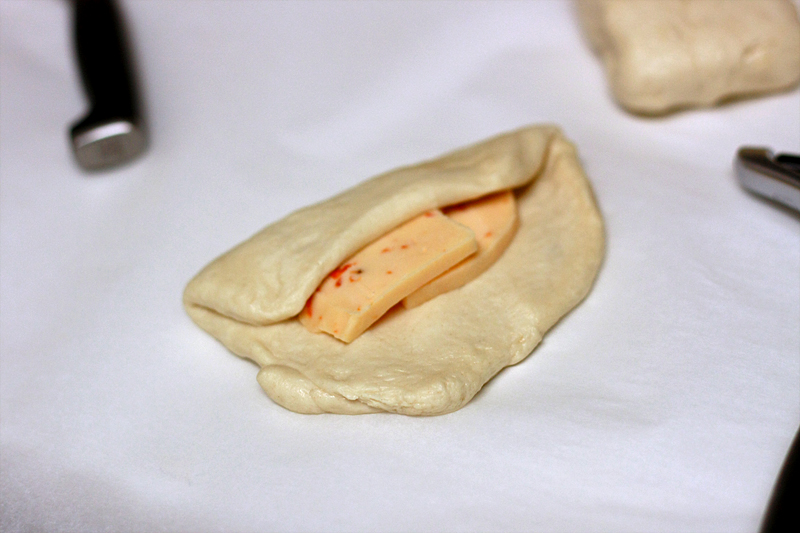
Choose your cheese wisely. I went with two different kinds -- cheddar with peddadew, and a chipotle cheese. You want a cheese that's a little softer so it will melt nicely.


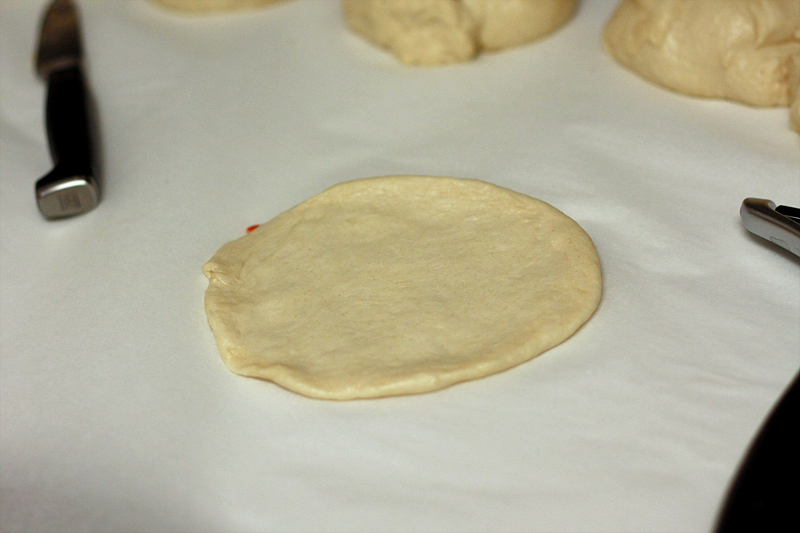
Pat a section of dough into a 4 - 5 inch round. Kind of like a mini pizza crust. Make sure the dough thickness remains consistent throughout.


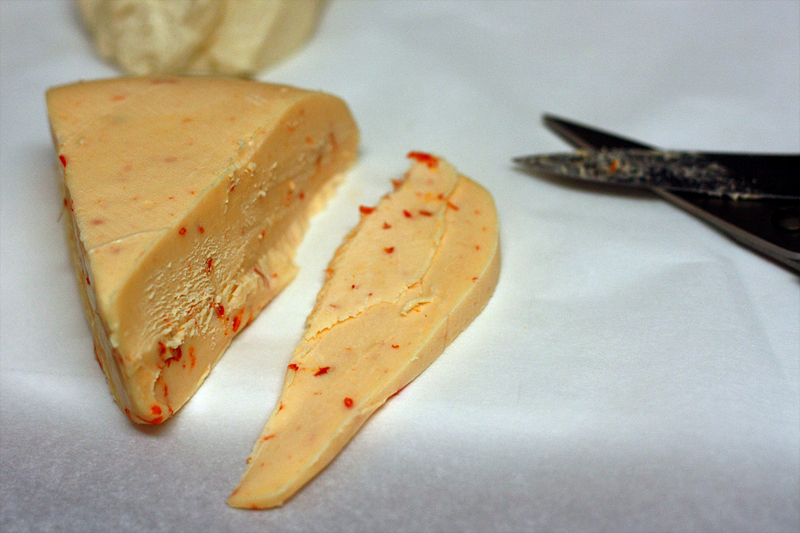
Slice your cheese into 0.5 - 1 ounce portions. I found that a cheese slicer worked much easier than a knife.


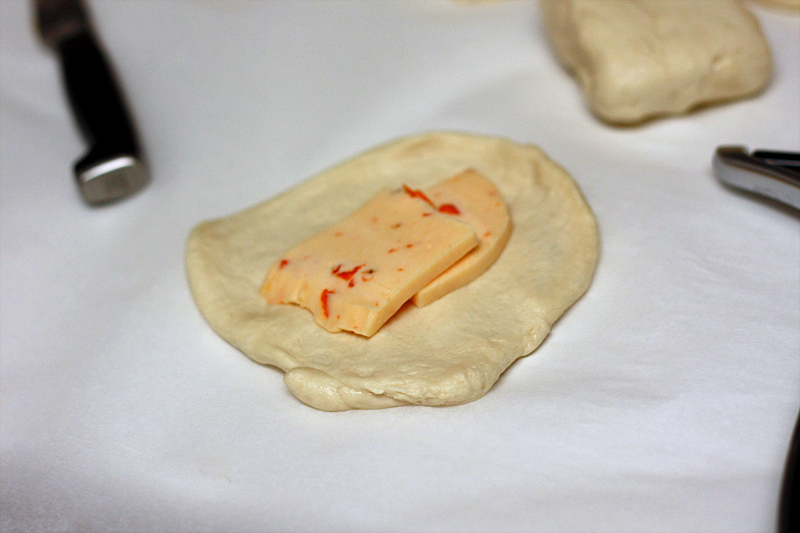
Layer the cheese on the dough round leaving at least 1/2-inch or more on each side.


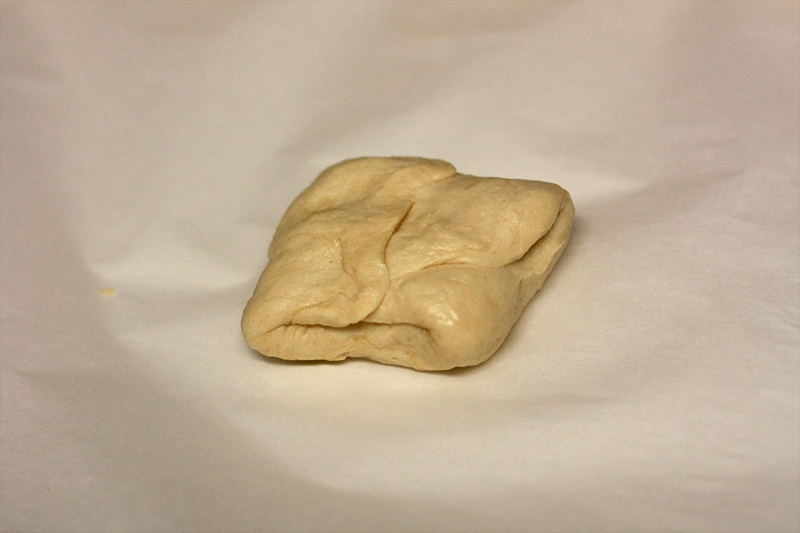
Fold it up and seal the sides as you go.


Seal, seal, seal! We don't want any of that cheese escaping!


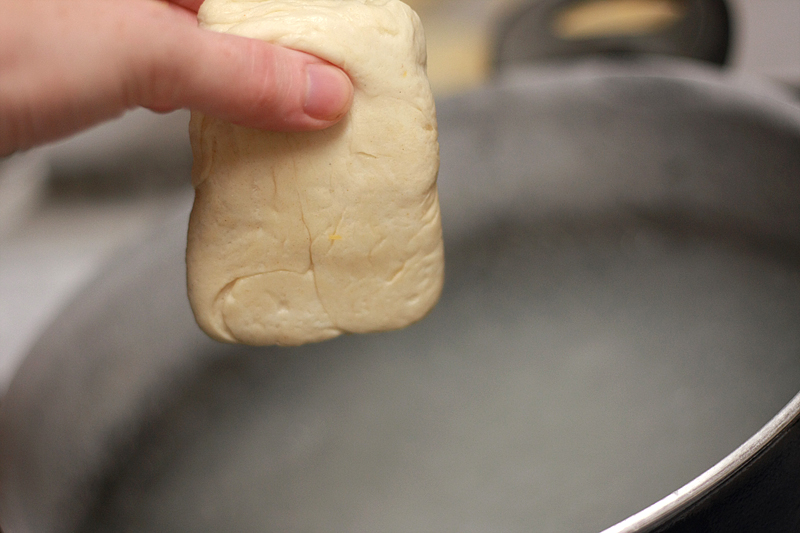
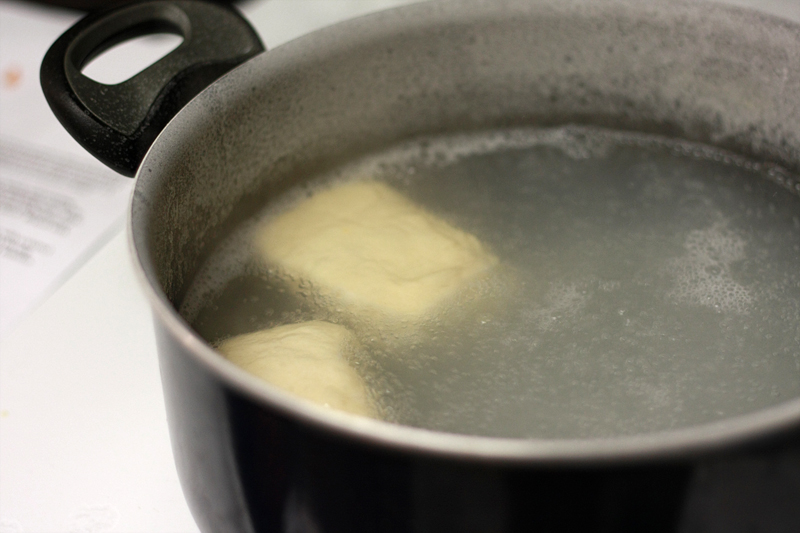
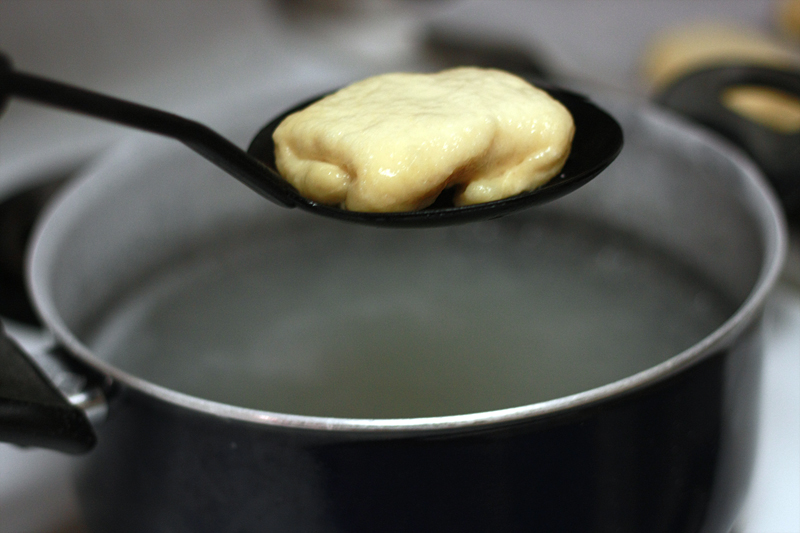
Bring a pot of water and 2/3 cup baking soda to a boil. Drop in your stuffed pretzels, two at a time. Allow to boil for 30 seconds.


Boil, boil, boil. The baking soda helps to give the pretzels their characteristic crust and chewy insides. Don't worry if there's white residue on the upper part of your pot, or stove, or microwave (if it's above the stove). It all comes off with quick wipe of a damp rag.


Remove the pretzels from the water with a strainer, skimmer, slotted spoon, or any other utensil that you can drain away the water with.


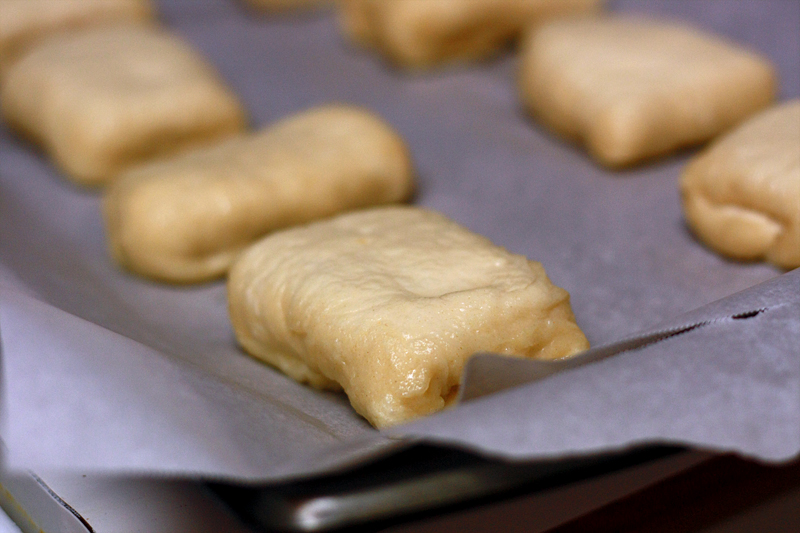
Line 'em up on a parchment-lined baking sheet.


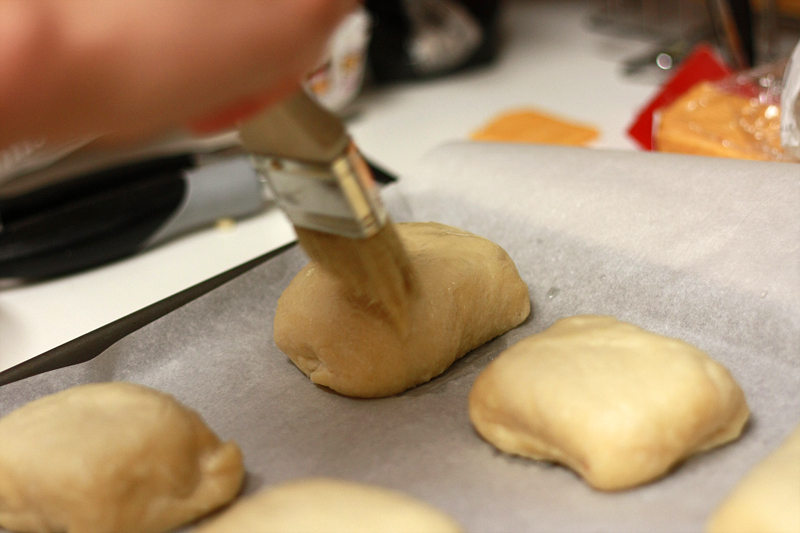
Brush the tops with egg wash.


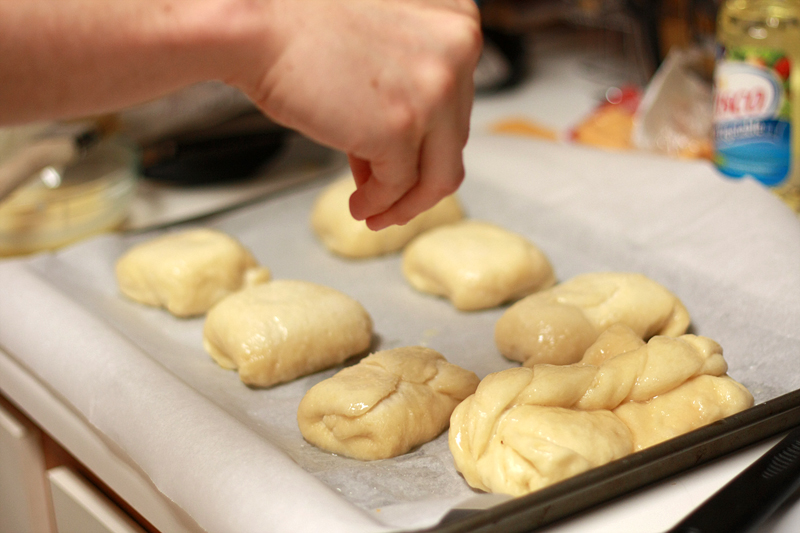
And then give each a healthy dash of pretzel or kosher salt. These are pretzels after all.


Place them in a 450 degree F oven and bake for 10-12 minutes, or until a deep golden brown. Remove to a wire rack and allow to cool for 5 - 10 minutes.


Wait for it... wait for it... you don't want to burn your mouth with the cheese. Sit on your hands if you must. I pretty much had to.


And enjoy! Doesn't that gooey mess just look wonderful??

Chipotle cheese is on the left, cheddar with peddadew is on the right.


Stuffed Pretzels
Adapted from: Alton Brown
Via: Annie's Eats


1 1/2 cups warm water (110-115° F)
1 tablespoon sugar
2 teaspoons kosher salt
2 1/4 teaspoons instant yeast
4 1/2 cups all-purpose flour
4 tablespoons unsalted butter, melted

Vegetable oil, for greasing the bowl

1 - 1 1/4 pound cheese (a variety that is firm at room temperature, but melts fairly easily, such as cheddar)

10 cups water
2/3 cup baking soda
1 egg yolk beaten with 1 tablespoon water
Pretzel (or kosher) salt

For dough:
Combine the water, sugar, salt and yeast in the bowl of a stand mixer fitted with the paddle attachment. Mix on low speed to dissolve the yeast. Add in the flour and melted butter and mix just until the dough comes together. Switch to the dough hook and knead on medium speed until the dough is smooth and clears the sides of the bowl, about 5 minutes. Transfer the dough to a bowl lightly greased with vegetable oil, turning once to coat. Cover with plastic wrap and let rise in a warm place, about 50-55 minutes or until doubled in bulk.

To assemble:
Preheat the oven to 450 degrees F. In a large pot, bring the water and baking soda to a boil. Line two baking sheets with parchment paper.

Turn dough out onto a counter lined with parchment paper. Divide dough into 16 equal portions. Divide cheese into 16 equal portions.

Pat a section of dough out into a 4 - 5 inch round, keeping the thickness consistent throughout. Add a portion of cheese (1 - 1 1/4 ounce) to the center of the round, keeping it at least 1/2 inch from the edges of the dough. Fold the dough so it surrounds the cheese, making sure to seal all the seams well.

Place the pretzels into the boiling water, 1 or 2 at a time, for 30 seconds. Remove from the water with a slotted skimmer and return to the baking sheet. Once all the pretzels have been boiled, brush the tops with the egg wash and sprinkle lightly with salt. Bake in the preheated oven until dark golden brown, about 10-12 minutes. Transfer to a cooling rack for at least 5 minutes before serving.

Makes: 16


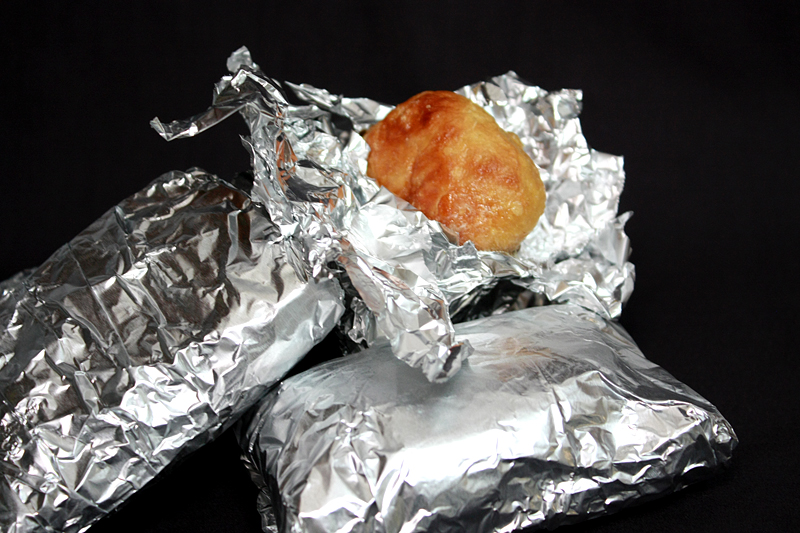
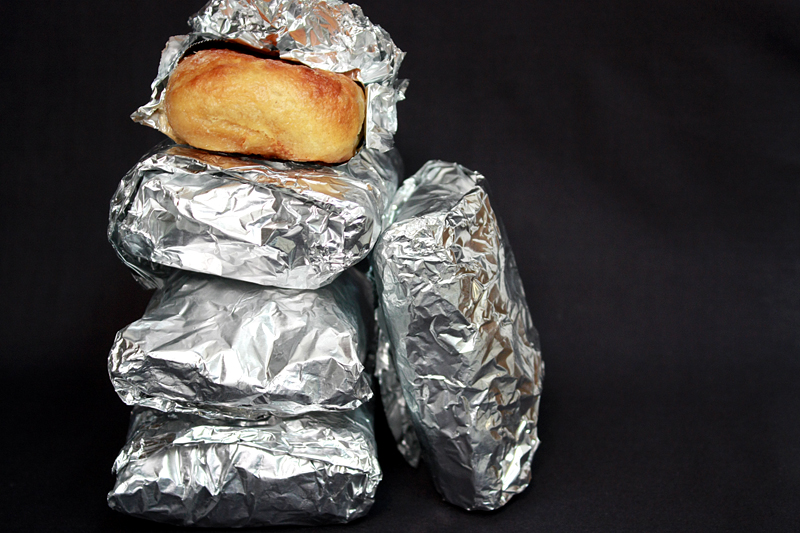
These are absolutely great to serve as appetizers at a party... but not exactly a quick and easy thing to throw together as guests are walking in the door. Instead of making it a mad dash to get these done, several days ahead bake these all the way through, wrap each individually in wax paper, followed by aluminum foil, place up to six in a gallon-sized ziploc bag, and freeze them. To reheat, remove foil and zap in the microwave on defrost for a few seconds. Remove wax paper and re-wrap with foil. Bake in the oven at 350 degrees F for 10 - 15 minutes (although I'm sure if you cranked it to 450 you could easily shorten that baking time). Other methods could involve freezing after the boiling step or even the dough wrapping step. If freezing after boiling, simply bake for 1 - 2 minutes longer; if freezing after the dough wrapping step, add about 15 extra seconds to the boiling time.

Mmmmm now I'm craving these all over again.


Nutrition Facts - made with 1 lb. of cheese
Amount per serving
Calories 276Calories from fat 116
% Daily Value
Total Fat 12.9g20%
Saturated Fat 8.0g40%
Cholesterol 50mg17%
Sodium 1071mg45%
Total Carbs 28.2g9%
Dietary Fiber 1.1g4%
Sugars 1.0g
Protein 11.1g
Vitamin A 8%Vitamin C 0%
Calcium 21%Iron 11%

LinkWithin

Related Posts with Thumbnails
 
Pin It button on image hover