Showing posts with label Side Dishes. Show all posts

Friday, March 22, 2013

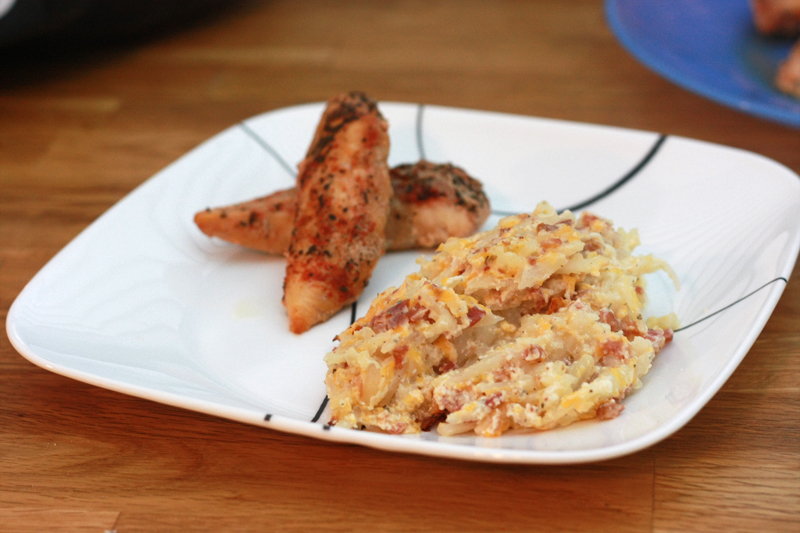
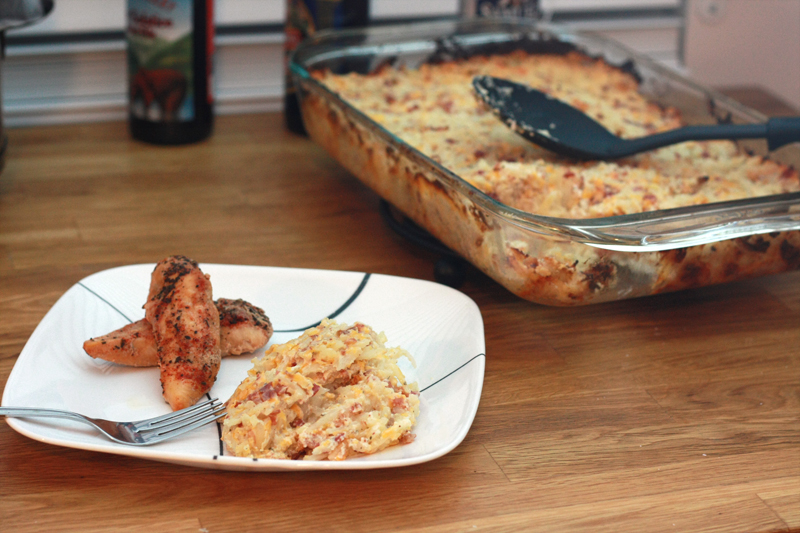
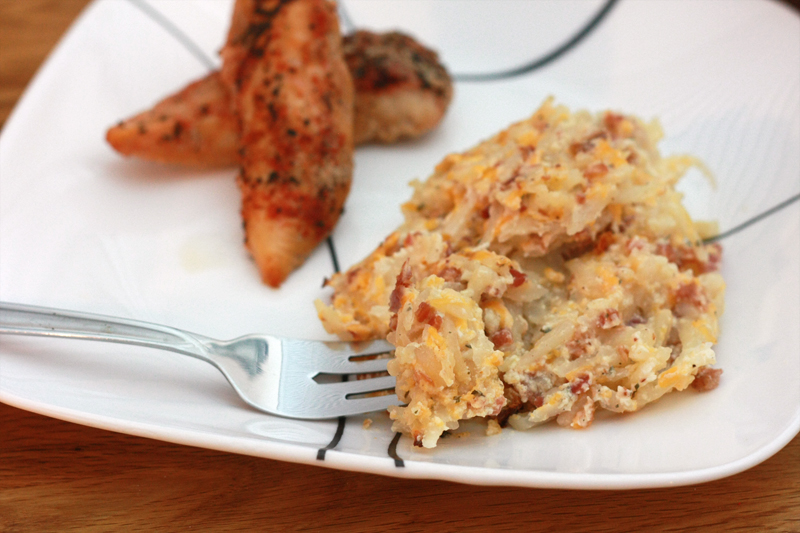
Crack Potatoes


Oh my goodness. Baby Spatula is sleeping and I actually have both hands free. And there is nothing superbly pressing that I must-do-this-minute-before-she-wakes-up. It's a miracle.

It might be more of a miracle for you than for me though. Because it actually allows me to share these fabulous cheesy potatoes with you. And you'll thank me for it. Profusely. I know I have them marked as a side dish and all, but honestly, we may or may not have eaten them after day 1 as just a meal. Our arteries love us.

Back home, there is a family friend who makes the absolute best "cheesy po's" ever. Ever, I tell you. (Um, hi Mom, your's are still pretty good too!) But of course it's "a little bit of this", "a lot of that"... no real recipe. So even though I don't know what all goes in them or how much, I do know that these come very close. However, they're not exactly the same as there is a nice healthy addition of ranch flavoring in these. Which is a great spin off of traditional cheesy po's. And yes. They are like crack. Just in case you were wondering.


Crack Potatoes
Adapted from: Plain Chicken

32 ounces reduced-fat sour cream
8 ounces cheddar cheese, shredded
6 ounces real bacon bits (or the equivalent of chopped bacon)
2 (0.4 ounce) packages Ranch powder (I used Hidden Valley Salad Dressing and Seasoning Mix)
30 ounces frozen shredded potatoes (i.e. hashbrowns)

Preheat oven to 400 degrees F. Coat a 9 x 13 pan with baking spray.

In a very large bowl, combine the sour cream through the powdered salad dressing. Stir in the frozen potatoes until completely coated with mixture. Bake for 45-60 minutes.


Makes: 8 servings


Of course, I totally enjoyed these completely guilt-free about a week or so before Baby Spatula's arrival, but now... yeah. I think there might be guilt if I made these now. Maybe. Unless all the sour cream and cheese smother it to death. I think it would be worth it to find out, don't you?


I mean honestly, do you really want to look at the nutrition facts? Just close your eyes and keep scrolling.

Nutrition Facts
Serving Size 272g
Amount per serving
Calories 603Calories from fat 384
% Daily Value
Total Fat 42.7g66%
Saturated Fat 22.3g111%
Cholesterol 95mg32%
Sodium 1201mg50%
Total Carbs 33.1g11%
Dietary Fiber 2.5g10%
Sugars 7.2g
Protein 22.3g
Vitamin A 20%Vitamin C 8%
Calcium 34%Iron 26%

Wednesday, February 1, 2012

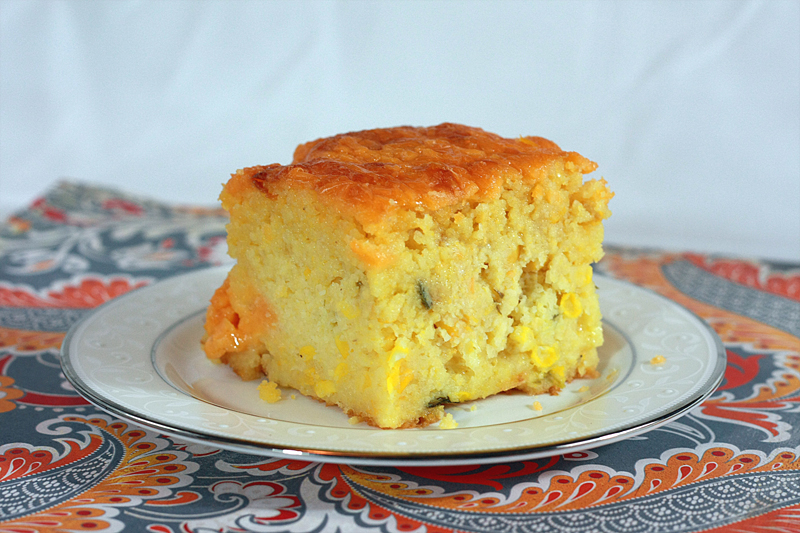
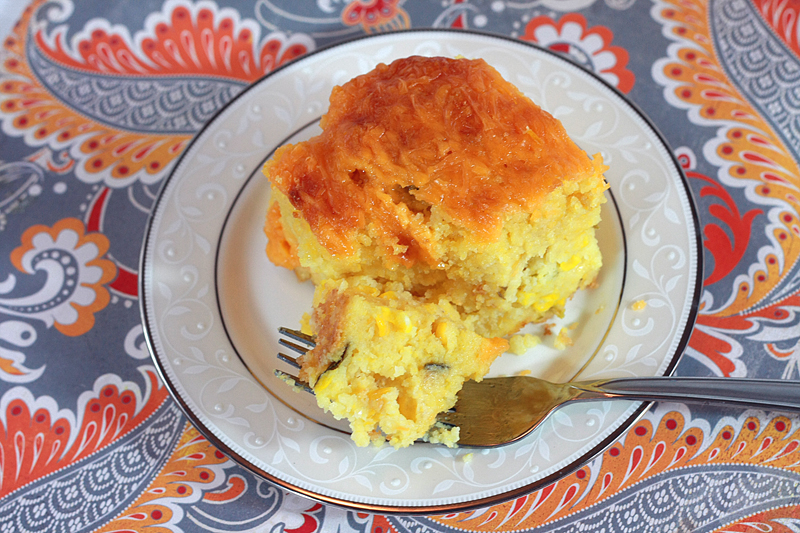
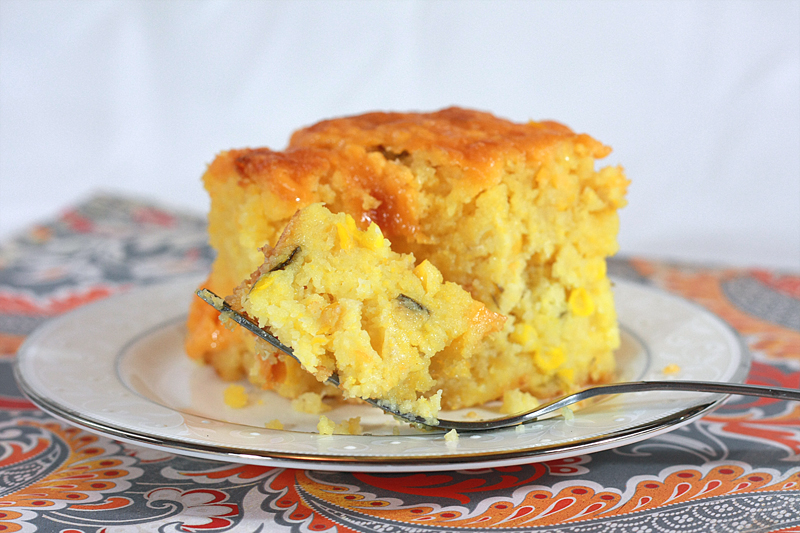
Cornbread Supreme


Now, if you're going to serve soup, you almost have to have some sort of bread or other starchy side to go with it. Okay, you don't have to, but it's kind of...um...disappointing without it.

Most of the cornbread I'm used to borders on the I'm-almost-too-dry-but-not-quite-there-yet side. I know you know what I'm talking about. The kind you have to drench with syrup and/or butter before sending it down the hatch.

Let me tell you, it doesn't have to be that way.

No more dry crumbly excuse for cornbread any more.

Enter sour cream. And jalapenos. And whole kernels of corn. This, my friends, makes for a moist, and can I even go so far as fluffy? cornbread.

Go ahead. Do your happy dance.


Cornbread Supreme
Adapted from: Cast Sugar

16 ounces frozen whole kernel corn
1 (16 ounce) can cream-style corn
3 ounces diced jalapenos
16 ounces reduced-fat sour cream
4 eggs, lightly beaten
1 cup butter, melted
2 (8.5 ounce) boxes Jiffy cornbread mix
2 cups shredded cheddar cheese

Preheat oven to 350 degrees F. Coat a 9 x 13-inch baking dish with cooking spray.

In a large bowl, combine all the ingredients except for cheese. Pour batter into prepared baking dish. Sprinkle cheese evenly across the top. Bake for 45-50 minutes, or until golden and cooked through. Let rest for at least 10-15 minutes before serving.


Serves: 16


I am so delighted to have finally found a cornbread that doesn't resemble a cake someone left out on the counter for a week. I mean, minus the mold and all. Adding the jalapenos are totally optional (diced green chiles also work), but I kind of like the extra little kick they give.

This will definitely be showing up again next time cornbread is called for.


Nutrition Facts
Serving Size 160g
Amount per serving
Calories 372Calories from fat 207
% Daily Value
Total Fat 23.0g35%
Saturated Fat 13.0g65%
Cholesterol 106mg65%
Sodium 663mg28%
Total Carbs 34.1g11%
Fiber 2.1g8%
Sugars 6.5g
Protein 9.9g
Vitamin A 17%Vitamin C 9%
Calcium 20%Iron 10%

Friday, October 21, 2011

Cider-Roasted Pork Loin for Steph's Virtual Bridal Shower

A couple months ago, my friend Steph from Steph's Bite by Bite announced that her and her fiance had to move up their wedding date by 9 months. I don't know about you, but my wedding planning took a full 9 months or so to get all of it in. I couldn't imagine having to squish it all down to two months! Yet due to circumstances out of their control, they moved the date from June 30, 2012, to October 29, 2011. What a champ! I would want to just throw my hands up and cry. Yet Steph hasn't, and you should really go and check out some of the really awesome (and cute!) wedding ideas she has, as well as all of her mouth-watering sweets and great looking dishes.

With the nuptials coming up right around the corner, Kita from Pass the Sushi came up with the great idea to surprise Steph with a "virtual" bridal shower of food bloggers, featuring great "date night" dishes for those times when they want to kick it up a night a home. Of course I was in.

Steph: Hope your wedding day goes off flawlessly and is everything you wanted! Congrats to you both!

For my "Big Night In" meal, I opted for the appetizer, entree and a side, and dessert route. Whew! Definitely some work, but totally worth it!

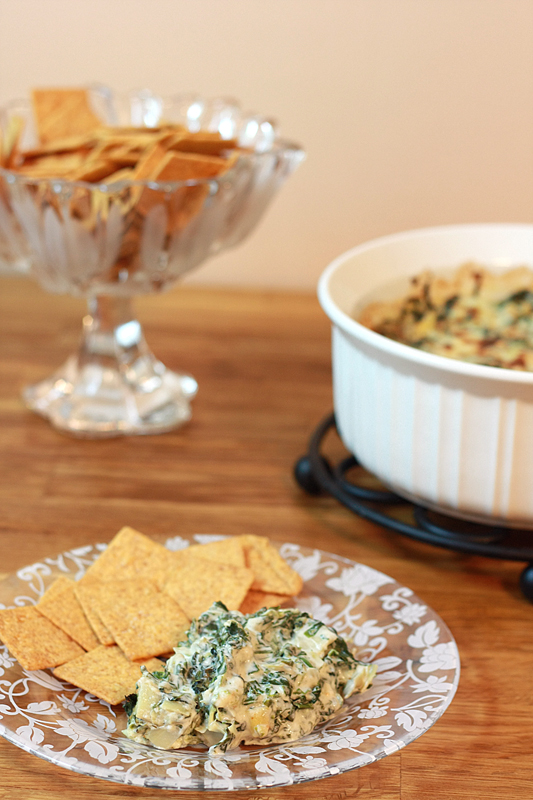
First, we start with one of my favorite appetizers of all time -- Spin Dip (better known as Spinach & Artichoke Dip). I may or may not be known to walk into a restaurant and order this solely and an entree. I can neither confirm or deny. However, I am one of those people who do not like mayo, so it took a bit of hunting to find a recipe that looked promising. I think this version proves that mayo is definitely not necessary for this dip, it's fantastic the way it is.

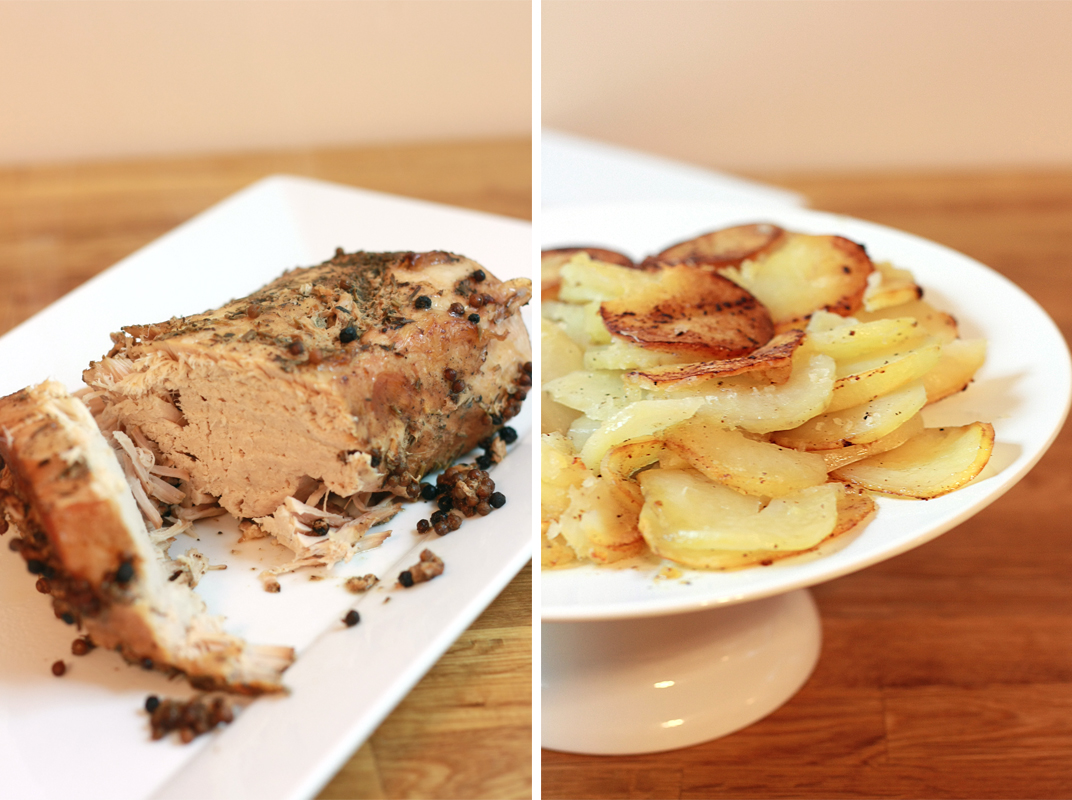
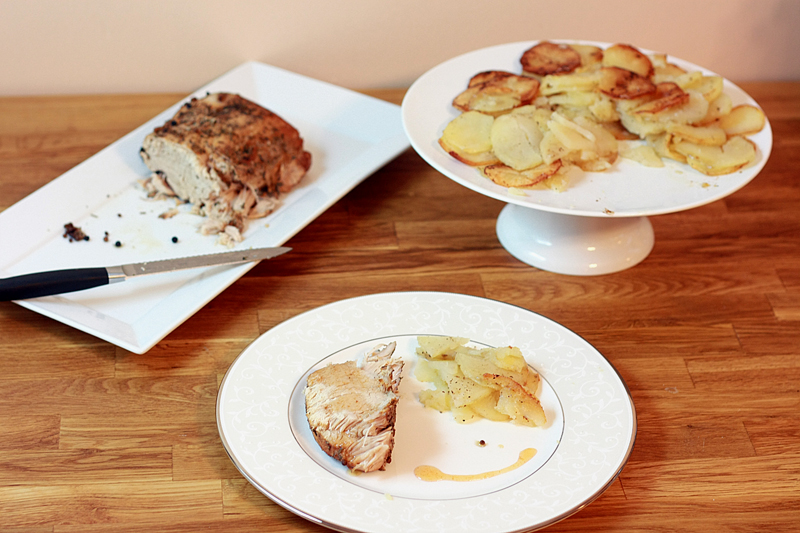
Next, we move to a Cider-Roasted Pork Loin with Pommes Anna. The pork has a nice kick from the peppercorns with a sweetness from the cider reduction -- great for a nice fall or winter evening. Just make sure you brine that sucker for a long, long time to prevent it getting dry while cooking. As for those Pommes Anna, which is supposed to look like a lovely little potato cake with rings of potato slices (not just a heap of potatoes). Well, we'll just say the taste was fantastic. I might have some work to do in the looks department on that dish.

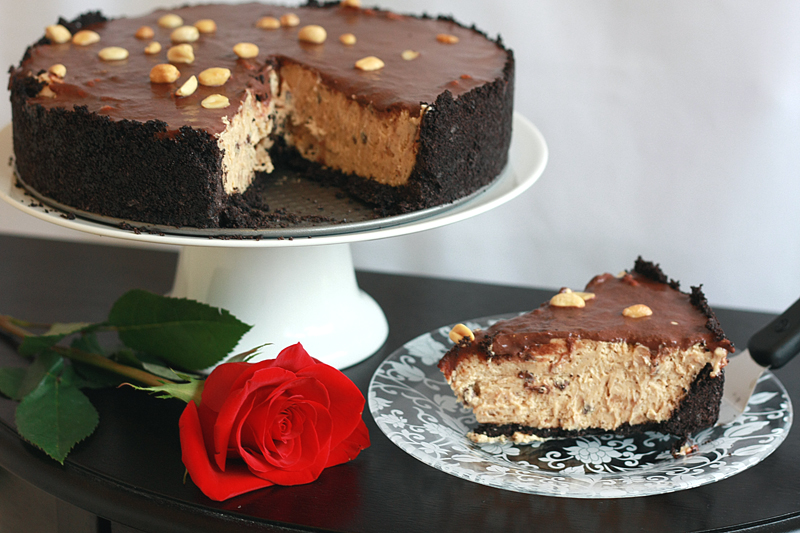
To finish things off, I opted for a fantastically rich Peanut Butter Torte (which can easily be made the day ahead). This delicacy will come next week my friends. Mwahaha. So mean, I know.


Spin Dip


Adapted from: Blog is the New Black

1 1/2 cups whipping cream
1 tablespoon flour
1/4 teaspoon garlic pepper seasoning (such as McCormick's, or make your own)
2 tablespoons Parmesan cheese, grated
2 tablespoons Romano cheese, grated
1 (16 ounce) package frozen spinach, thawed and drained well
1 cup Asiago cheese, grated
1 (14 ounce) can artichoke hearts, drained and chopped

Preheat oven to 350 degrees F. Coat a 1 1/2 quart baking dish with cooking spray; set aside.

In a medium bowl, whisk together cream, flour, garlic pepper, 1 tablespoon Parmesan, and 1 tablespoon Romano. Warm mixture in the microwave in 30 second intervals, stirring between each, until the mixture is hot and slightly thickened. Add spinach, Asiago cheese, and artichokes until well blended. Pour mixture into prepared baking dish and spread evenly across pan. Sprinkle remaining Parmesan and Romano over the top. Bake, uncovered, 15-18 minutes, or until hot and bubbly. Remove from oven and turn heat to broil. Once oven is heated, place under the broiler 3-5 minutes, or until cheese is lightly browned.


Serves: 8 as an appetizer


Cider-Roasted Pork Loin


Adapted from: Cooking Light, October 2004

3 cups water
3 cups apple cider
1/4 cup kosher salt
1 tablespoon black peppercorns
1 tablespoon coriander seeds
1 bay leaf
2 pounds boneless pork loin, trimmed
2 cups apple cider
1 teaspoon dried rosemary1 teaspoon dried oregano
1/8 teaspoon ground black pepper

In a large saucepan, bring the first 6 ingredients (through bay leaf) to a boil. Stir until salt dissolves. Remove from heat and cool to room temperature. Pour brine into a large ziploc bag with pork. Seal bag and place in refrigerator for at least 12 hours (preferably overnight). Turn bag occasionally.

Preheat oven to 350 degrees F.

In a small saucepan over medium-high heat, bring 2 cups of cider to a boil. Continue to cook until cider thickens and is reduced to about 1/4 of a cup. Set aside.

Meanwhile, remove pork from bag and discard brine. In a small bowl, combine rosemary, oregano, and 1/8 teaspoon ground black pepper. Rub herb mixture over pork. Place pork on the rack of a broiler pan coated with cooking spray. Bake for 1 hour, or until internal temperature reaches 155 degrees F. During the final 20 minutes of cooking, baste the pork at least twice with the cider reduction. Remove pork from oven and baste pork with cider reduction a third time. Let rest for 10 minutes before serving. Serve with any remaining cider reduction.


Serves: 8


Pommes Anna


Adapted from: Food Network

2 1/2 pounds russet potatoes peeled, placed in a bowl of water
6 tablespoons unsalted butter, melted
1 1/2 teaspoons kosher salt
3/4 teaspoon ground black pepper
1/8 teaspoon ground nutmeg
1 tablespoon grated Parmesan cheese

Preheat oven to 350 degrees F.

In a small bowl, melt the butter in the microwave in 20 second increments. Once melted, set aside.

Slice potatoes into thin rounds with a mandolin or a very sharp knife. Pat slices dry. Heat a medium non-stick pan over medium heat. Arrange 1 layer of overlapping potato slices over the bottom of the pan in concentric circles. Drizzle with 1/3 of melted butter. Sprinkle with 1/2 teaspoon salt, 1/4 teaspoon pepper, and a pinch of nutmeg. Repeat twice more, for a total of three layers. Cook potato cake on low 25-30 minutes, or until the bottom potatoes are golden and crisp around the outside. Shake pan several times while cooking to prevent potato cake from sticking.

Using the lid of the pan to hold potatoes in place, pour off the excess butter into a small bowl; reserve. Place the same lid (the same size as the skillet) over the potatoes. Holding the lid in place, flip the pan over (the potatoes should now be on the lid and not in the pan). Pour the reserved butter back into the pan. Slide the potatoes back into the pan, uncooked side down. Place skillet in the oven for 25-30 minutes. Shake the pan several times while baking to keep the potatoes from sticking. Potatoes are done when the bottom is browned and crisp.

Pour off any remaining butter left in the pan. Slide potatoes onto a serving dish and sprinkle with cheese.


Serves: 6 (as a side)


Check back next week for this!

Congrats again Steph!

Check out all the other Date Night Dinners for Steph's Virtual Bridal shower!


Nutrition Facts - Spin Dip
Serving Size 149g
Amount per serving
Calories 176Calories from fat 113
% Daily Value
Total Fat 12.6g19%
Saturated Fat 7.8g39%
Cholesterol 42mg14%
Sodium 333mg14%
Total Carbs 8.9g3%
Fiber 4.0g16%
Sugars 0.8g
Protein 9.0g
Vitamin A 114%Vitamin C 36%
Calcium 25%Iron 13%

Nutrition Facts - Cider-Roasted Pork Loin*
Amount per serving
Calories 200Calories from fat 60
% Daily Value
Total Fat 6.6g10%
Saturated Fat 2.2g11%
Cholesterol 67mg22%
Sodium 419mg17%
Total Carbs 9.2g3%
Fiber 0.3g1%
Protein 24.4g

Nutrition Facts - Pommes Anna
Serving Size 206g
Amount per serving
Calories 237Calories from fat 108
% Daily Value
Total Fat 12.0g18%
Saturated Fat 7.5g37%
Cholesterol 31mg10%
Sodium 687mg29%
Total Carbs 29.9g10%
Fiber 4.6g18%
Sugars 2.2g
Protein 3.6g
Vitamin A 7%Vitamin C 62%
Calcium 3%Iron 6%

*Nutrition Facts from Cooking Light

Tuesday, August 16, 2011

Spicy Dill Pickles


Excuse me, Mr. Vlasic. It's time for you to move over. Or just go back to hanging out on your shelf. I think it's time we broke it off. For the summer anyways.

I'm not even going to give you the "It's not you, it's me" line. Because it's most definitely you. And I've found something so much better.

Something more customizable.

Something more crunchy.

Something with a little spice.

Something that's not the same old, same old.

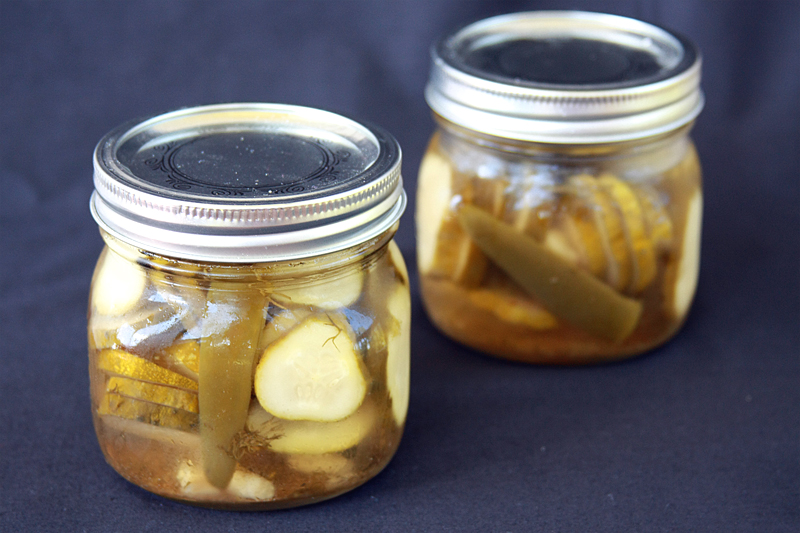
That's right, I cheated on you and made my own pickles. Sorry to say, but I have no regrets. Maybe except for one -- I regret not saving more of your jars to use for whole pickles. Such a tragedy.


Spicy Dill Pickles


Adapted from: Flamingo Musings via All Day I Dream About Food

2 pounds pickling cucumbers (about 6)
1 jalapeno
3 cloves garlic
2 tablespoons fresh dill, chopped
1 1/2 teaspoons whole black peppercorns
1 1/2 teaspoons ground coriander
1 1/2 cups distilled white vinegar
3/4 cup apple cider vinegar
3/4 cup water
1/4 cup kosher salt

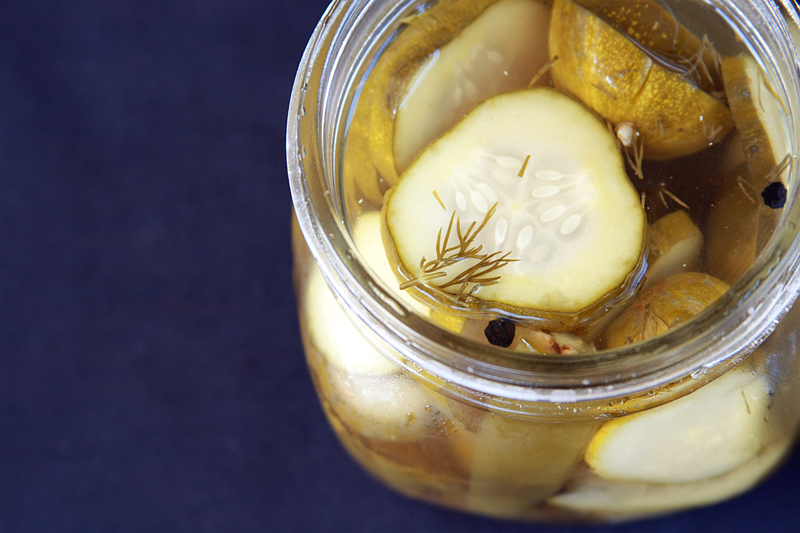
Wash and dry cucumbers, then slice 1/4-inch thick into style desired (i.e. rounds, sandwich slices, or you can leave them whole). Divide slices between three pint jars (about 2 cucumbers per jar). Add 1/3 of the jalapeno, 1 clove garlic, 2 teaspoons dill, 1/2 teaspoon peppercorns, and 1/2 teaspoon coriander to each jar.

Bring both vinegars, water, and salt to a boil in a medium saucepan over high heat. Stir until most of the salt is dissolved. Divide brine equally between jars, filling each as full as possible. Screw on lids and let jars sit on the countertop at room temperature for 3 days. After 3 days pickles can bet eaten; store jars in refrigerator.


Makes: 3 pints (serving size: 1 whole pickle)


Before spotting this recipe over at All Day I Dream About Food, making my own pickles never crossed my mind. Sure, I've been exposed to the canning process before -- my grandma had an entire room in her basement filled with canning equipment, but I've really never had a desire to follow in those footsteps. I mean, there's a lot of work that goes into the canning process: buying the equipment, sterilizing it, making sure it's sealed properly, etc. Not my cup of tea.

But, but, but. This is no ordinary canning technique. This is a quick and easy refrigerator method. Sure your jars need to be clean before use, but you don't have to sterilize them. Simply plop in your ingredients, cover with the boiling brine, seal, wait a few days, then refrigerate. Now this type of method my patience can handle.

And the results? Make that short little wait totally worth it.


Note: Due to the brining process, I am unable to calculate nutrition facts for this item. However, I can tell you that these are below 50 calories and have 0 fat per pickle.

Tuesday, August 2, 2011

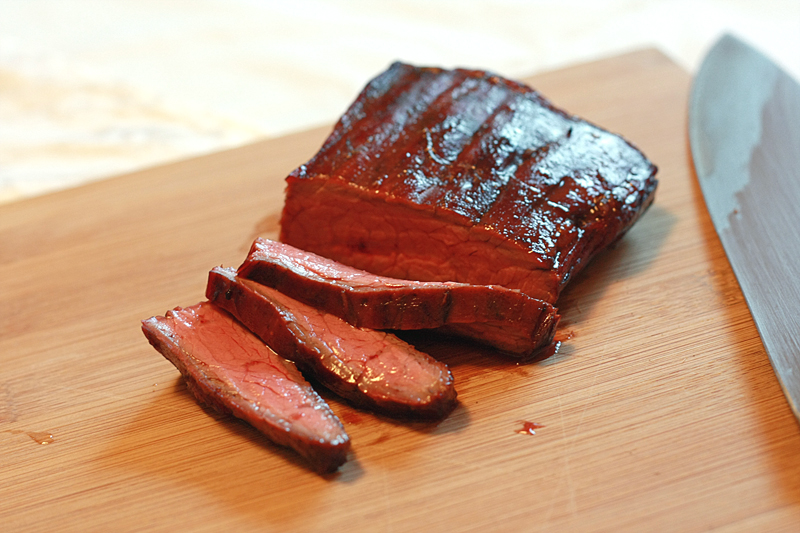
Grilled Balsamic Flank Steak


Flank steak. Adam and I's arch nemesis in the kitchen.

You can count the number of times we have attempted making any kind of steak at home on one hand. Easily. It's 4.

And of those, how many times did we either overcook or massively under-cook (and spend forever trying to get it cooked to the right temperature) the steak? 4.

That might explain why we prefer to get steak elsewhere.

I must have been off in la-la land when picking this recipe out for dinner last week. Why on earth would I pick a steak recipe with our stellar track record, not to mention I'm not a huge steak person? Sometimes, things are meant to be.

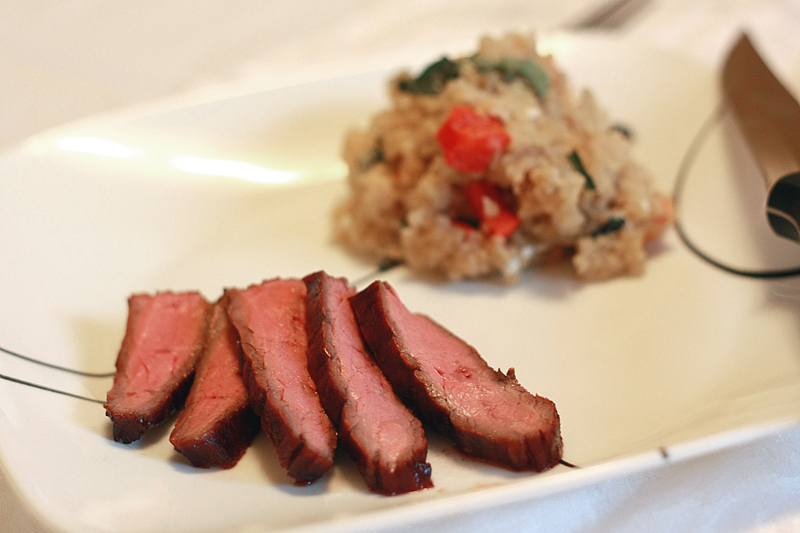
It took a bit of patience, and lots of testing with the meat thermometer, but we finally got the steak in the golden 130-135 degree range. After pulling it off and letting it rest a few minutes came the final test. We cut into the steak with breaths held -- was it overdone? Was it still completely rare? Instead, we were presented with a perfectly pink and juicy center with a nice outside crust full of balsamic flavor. Steak - 4, Us - 1.

Grilled Balsamic Flank Steak


Adapted from: Cooking Light, May 2010

1/3 cup blasamic vinegar
1 1/2 tablespoons Worcestershire sauce
3 teaspoons brown sugar
2 small cloves garlic, minced
1 1/2 pounds flank steak, cut into 4 pieces
3/4 teaspoon kosher salt, divided
1/2 teaspoon ground black pepper

In a gallon-sized ziploc bag, combine balsamic vinegar, Worcestershire sauce, brown sugar, and garlic. Add steak and seal bag. Flip bag several times to coat steak. Let steak marinate at room temperature for at least 30 minutes, turning once. Meanwhile, pre-heat grill (to medium-high if using a gas grill).

Remove steak from ziploc and place on a plate. Sprinkle both sides of steak with salt and pepper. Set aside. Pour remaining marinade into a small saucepan over medium-high heat. Bring to a boil and cook for 5 minutes. Remove from heat.

Transfer steak from plate onto the grill once hot. Cook steak for 5 minutes on each side, basting with reduced marinade every few minutes, or until steak reaches an internal temperature between 130 and 135 degrees F. Remove steak from grill and allow to rest for 10 minutes prior to serving. Cut steak diagonally across the grain into thin slices.


Serves: 5


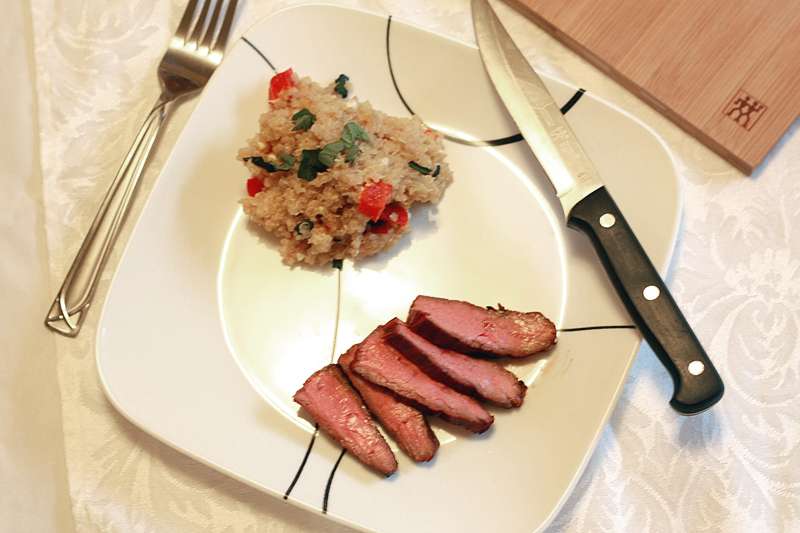
I wanted a little something else to go with the steak that wasn't my typical go-to bagged salad. I decided to make quinoa again, this time off the cuff with things from our fridge. Since the hubby actually had to debate going back for seconds versus a bowl of ice cream, I figured it must be pretty dang good. And if it's good, why then, I must share it with you! :)

Quinoa with Basil, Feta, and Roasted Red Peppers

In a medium saucepan, bring 2 cups fat-free reduced-sodium chicken broth and 1 cup rinsed and drained quinoa to a boil over medium-high heat. Cover, reduce heat to medium-low, and cook for 20 minutes. Remove from heat and stir in 1/4 cup crumbled feta, 2 tablespoons chopped basil, and 1/4 cup chopped roasted red peppers. Drizzle with 1 teaspoon balsamic vinegar and stir well to mix.

Serves: 10 as a side


Nutrition Facts - Balsamic Flank Steak
Serving Size 161g
Amount per serving
Calories 279Calories from fat 102
% Daily Value
Total Fat 11.3g17%
Saturated Fat 4.7g24%
Cholesterol 75mg25%
Sodium 485mg20%
Total Carbs 3.0g1%
Sugars 2.7g
Protein 37.9g
Vitamin A 0%Vitamin C 0%
Calcium 2%Iron 15%

Nutrition Facts - Quinoa
Serving Size 71g
Amount per serving
Calories 71Calories from fat 16
% Daily Value
Total Fat 1.8g3%
Saturated Fat 0.7g3%
Cholesterol 3mg1%
Sodium 168mg7%
Total Carbs 10.9g4%
Fiber 1.2g5%
Protein 2.9g
Vitamin A 4%Vitamin C 13%
Calcium 3%Iron 4%

Monday, July 25, 2011

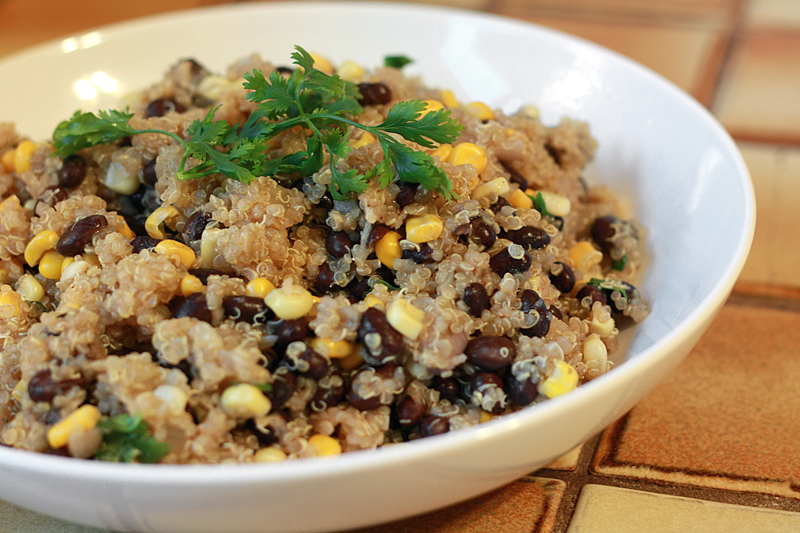
Quinoa & Black Beans


There are days when Adam and I are super compatible when it comes to food.

Coconut? Keep that out of our kitchen.
Raw tomatoes on the salad? Adam will gladly eat mine.
Water chestnuts in a dish? They magically find their way from Adam's plate to mine.

Then there are times we don't jive together so well. And it's almost always centered around seafood. He loves it. I can't stand it. Not a fan of the rubbery texture or smell. Therefore, seafood is rarely cooked in our home. (When it is, it's usually separate from the rest of the food and done by Adam.)

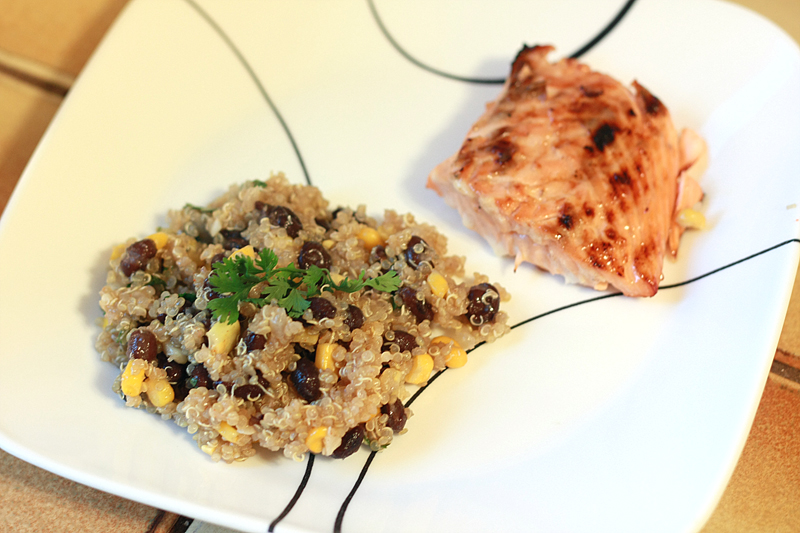
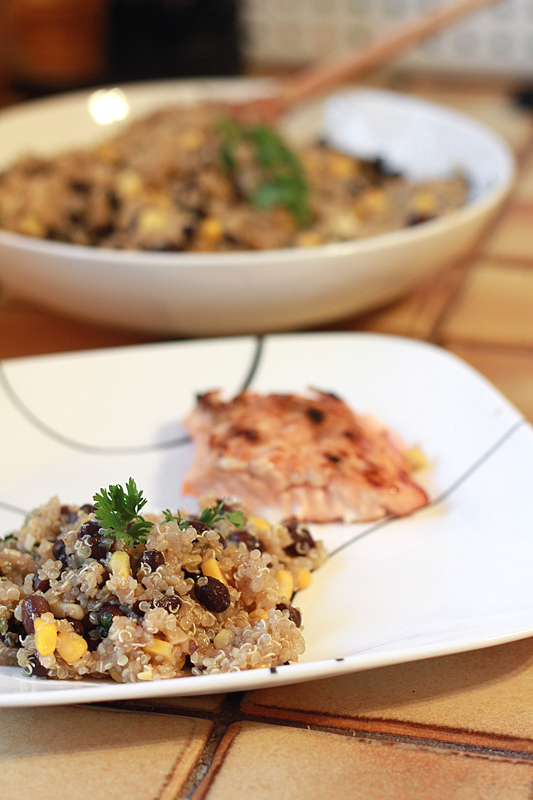
Enter the grill. Adam's new best friend. Now he can enjoy salmon while I have chicken, and I don't have to smell it for another 3 days. He is in love.

But you can't just have a slab of meat for dinner. Okay, well you can, but I prefer not to. I get overwhelmed and tired of the constant one flavor. And then you have to deal with the meat sweats later. Awkward.

While wandering around Trader Joe's for the first time in forever, I spotted a box of quinoa sitting on the shelf. Impulse buy. Weird, it didn't involve chocolate. Something funny's going on. Or maybe it's just my brain telling me I need a little bit healthier food after eating out constantly for the past month. Whatever the reason, that box ended up in the cart.

Turns out impulse buys can make for a great side dish. Unless they do involve chocolate, then no-so-much.

Quinoa and Black Beans


Adapted from: Allrecipes.com

1 teaspoon vegetable oil
1 cup onion, diced
3 cloves garlic, minced
3/4 cup uncooked quinoa
1 1/2 cups fat-free, less-sodium chicken broth (can also use vegetable broth)
1 teaspoon ground cumin
1/4 teaspoon cayenne pepper
1/2 teaspoon kosher salt
1/4 teaspoon ground black pepper
1 cup frozen corn kernels
1 (15 ounce) can black beans, rinsed and drained
1/2 cup fresh cilantro, chopped

In a medium saucepan, warm the oil over medium heat. Add the onion and garlic, and cook until lightly browned, about 7 minutes.

Stir in quinoa, then pour in broth. Add cumin, cayenne pepper, salt, and pepper, stirring well. Bring the mixture to a boil, then cover, and reduce heat to medium-low. Simmer for 20 minutes.

Add frozen corn to saucepan and simmer for an additional 5 minutes, or until corn in heated through. Stir in black beans and cilantro, and cook for another 1-2 minutes.


Serves: 10 (as a side)


Usually I have a hard time getting behind all these new healthy grains and seeds and whatnot that seem to keep popping up. Sometimes the texture's off, or the taste is weird, or I just don't see the point. But I'm glad I decided to take the plunge on this one. And it's a good one to start with -- it cooks up much like rice, is packed with fiber, and is one of the few plant sources containing complete proteins.

Despite being leery in the beginning about the texture, both Adam and I really enjoyed this dish. It's fairly simple to throw together, and doesn't seem quite as temperamental as rice can be. Maybe I'll keep it around a while longer and see what else I can stir up with it.

What's your favorite quinoa dish?


Nutrition Facts
Amount per serving
Calories 216Calories from fat 18
% Daily Value
Total Fat 2.0g3%
Saturated Fat 0.0g0%
Cholesterol 0mg0%
Sodium 322mg13%
Total Carbs 39.1g13%
Fiber 8.0g32%
Sugars 2.1g
Protein 12.0g
Vitamin A 2%Vitamin C 3%
Calcium 7%Iron 16%

Tuesday, April 26, 2011

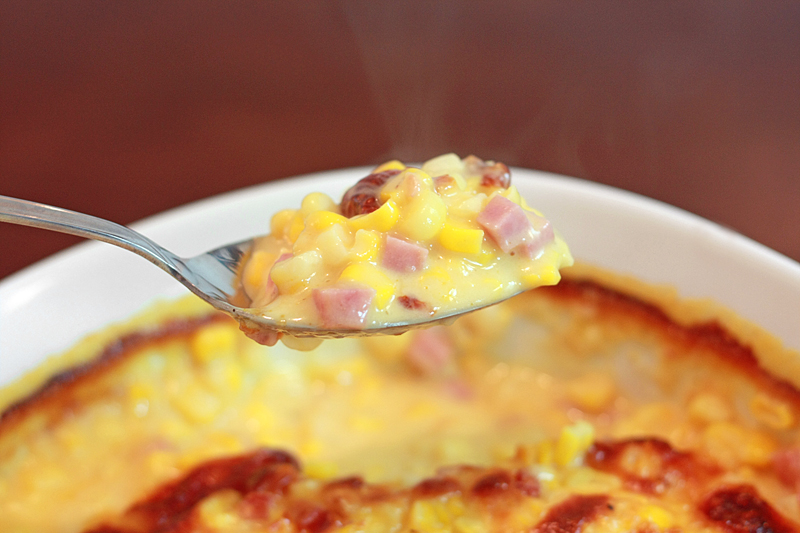
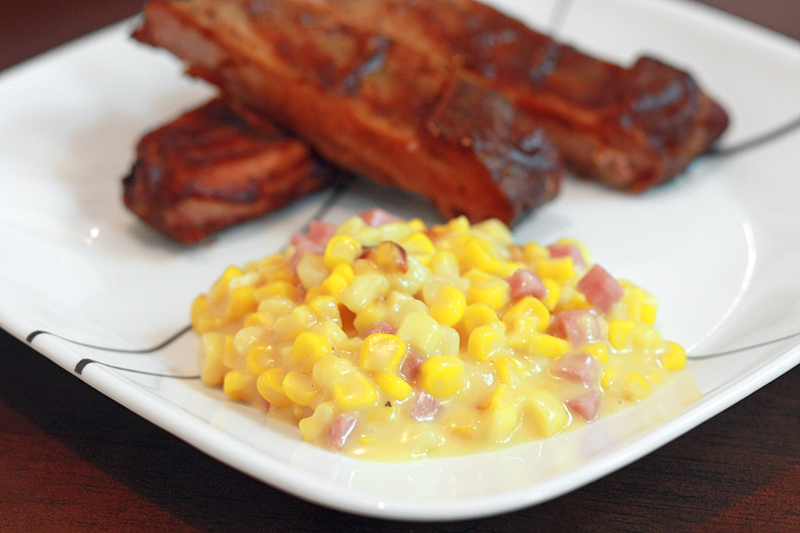
Cheesy Corn Bake


As I mentioned yesterday, I have been on a quest to clear out my freezer to be able to have room for my ice cream maker. Best of intentions, yes, my pants are fully aware.

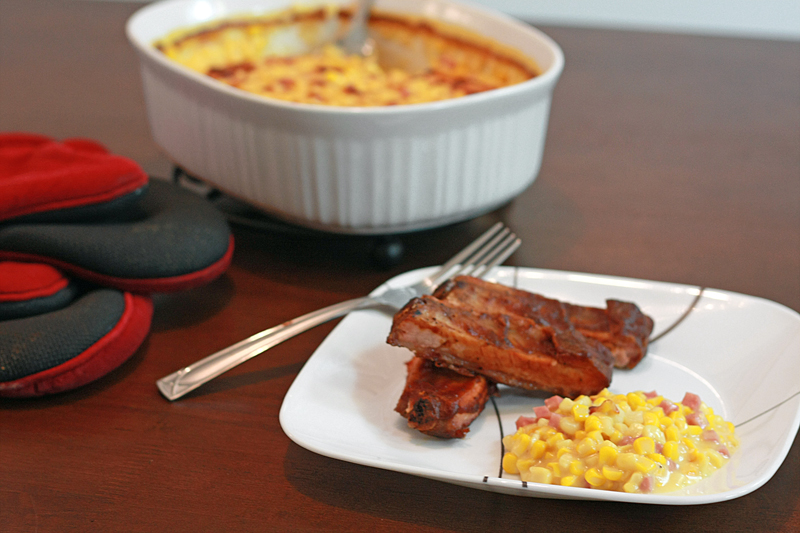
Due to this massive clean-out, I found myself with lots of protein-only entrées. My usual go-to in this situation is a bag of lettuce and some salad dressing. Nothing too fancy, obviously. However, since all I had to do with the ribs I re-discovered was pretty much stick them in the oven to reheat, I figured I could put a little more work into my side dish.

Adam is from Kansas City, and fiercely loyal to their barbecue style. One of his favorite places to go when we visit his parents is Jack Stack. It's almost always a full slab of ribs and some sort of combination of sides -- one always being their cheesy corn bake. Now their cheesy corn bake is fantastic, so trying to replicate it at home was kind of a dicey move. I usually try and stay away from doing restaurant replicas at home since, oh, that's why we go to the restaurant in the first place (and on the off chance that my re-creation is better, well, that just ruins the whole restaurant experience for me). However, I will make exceptions when it comes to restaurants we just don't have access to, like Jack Stack. For me, this was more about giving Adam a taste of home, rather than just trying to duplicate a favorite dish.


Cheesy Corn Bake


Adapted from: Food.com

2 tablespoons butter
3 tablespoons all-purpose flour
1/4 teaspoon garlic powder
3/4 cup milk
1 1/2 cups sharp American cheese, shredded
3 ounces reduced-fat cream cheese, cubed
30 ounces frozen whole kernel corn, thawed
3 ounces diced ham

Preheat oven to 350 degrees F. Coat a 2 quart baking dish with cooking spray.

In a large saucepan, melt butter over medium heat. Whisk in flour and garlic powder. Add milk and cook until thick and bubbly, stirring frequently. Add cheeses and reduce heat to medium-low. Stir until cheeses melt. Add corn and ham to pan and stir until coated with cheese mixture.

Pour corn mixture into baking dish. Bake for 45 minutes. Allow to cool for 10 minutes before serving.


Serves: 12 (as a side)


And surprise, surprise, Adam actually ended up liking this better than the original. I have to admit, I was a little more partial to this recipe as well, mostly because I feel the corn is a bit crisper, rather than leaning towards the mushy side.

I was a little skeptical when I saw the recipe called for sharp American cheese. American? Not really the cheese I would have gone with. Then I tasted it, and it was worlds away from those Kraft prepackaged singles. Note: I found sharp American at the deli counter, and I do think it's important you use sharp, not regular American.

I can definitely be sure that this side dish will be showing up again at some point or other.


Nutrition Facts
Amount per serving
Calories 176Calories from fat 87
% Daily Value
Total Fat 9.7g15%
Saturated Fat 5.4g27%
Cholesterol 29mg10%
Sodium 323mg13%
Total Carbs 17.3g6%
Dietary Fiber 2.1g8%
Sugars 4.1g
Protein 7.3g
Vitamin A 8%Vitamin C 9%
Calcium 11%Iron 4%

Monday, April 25, 2011

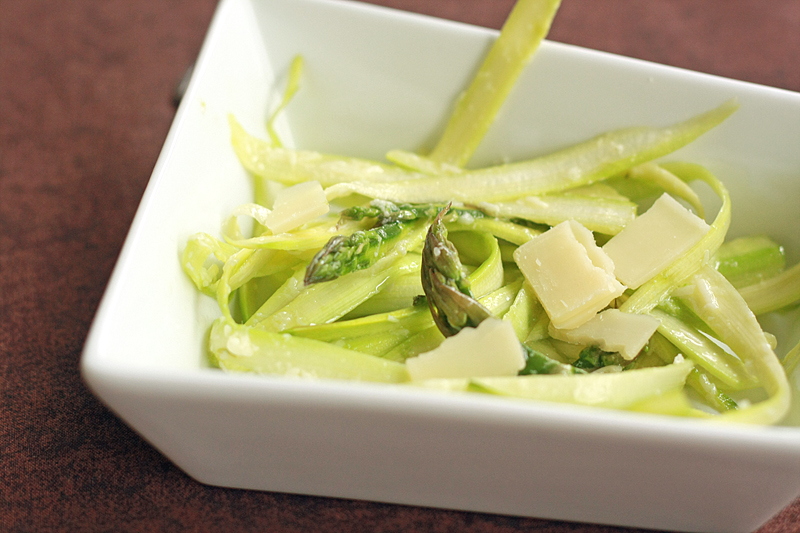
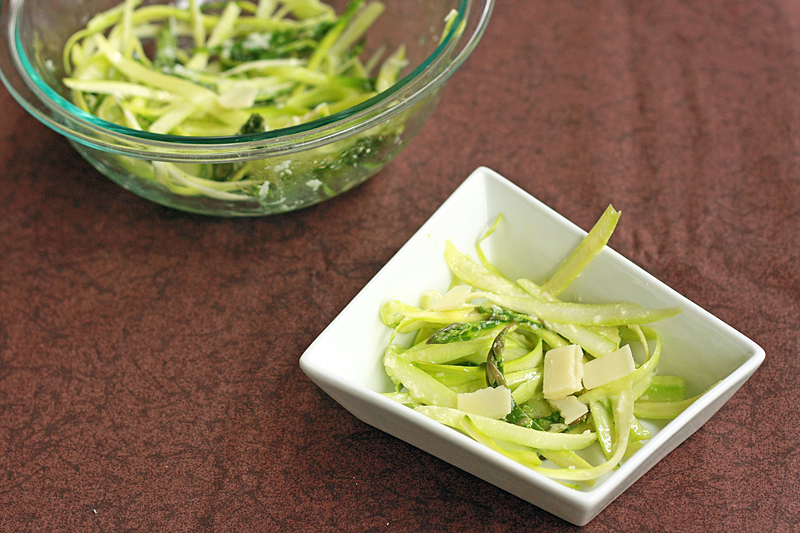
Shaved Asparagus with Parmesan Vinaigrette


I'm finally back! I have to admit, it was a tough week without my computer, even though I was borrowing the hubby's. There's just something about having my own stuff with all my files and programs. Although heading down to my parents for the weekend made it about a 100 times better since I had chunky baby cheeks to pinch and a three-year-old's birthday party to help throw. And of course I had to forget my camera, so I have no pictures. Sad day.

Once my power cord died and I realized there would be no editing and uploading of pictures, I decided to completely take the week off from blogging. There were other things piling up for me to do, so I decided to take advantage of my power-cord-failure-imposed time off and get a few of those done, or at least make some progress on them. However, before I essentially skedaddled out of the kitchen for a week, I did happen to try my hand at a quick and easy veggie side dish.

One of my goals as of late is to get my freezer cleaned out. Not really for any budget or old food reasons -- nope, I simply want to be able to fit my ice cream maker in there. It's starting to get warmer and warmer out (oh so gradually, but it is) which is only making Adam and I crave some ice cream. After throwing out several nasty looking freezer-burned foods, I came across a couple easy entrées and decided that I could actually maybe try my hand at a side dish since the main dish was almost no work at all.

Shaved Asparagus with Parmesan Vinaigrette


Bon Appetit, May 2011

1 pound large asparagus spears, trimmed and peeled
1/4 cup finely grated Parmesan, plus more for shaving
1 1/2 tablespoons lemon juice
1/4 cup extra-virgin olive oil
1/2 teaspoon kosher salt
1/4 teaspoon ground black pepper

Using a vegetable peeler, shave asparagus spears into long thin shavings. Place shavings and asparagus tips in a medium bowl.

In a small bowl, whisk together the grated Parmesan, lemon juice, and olive oil until well blended. Whisk in salt and pepper. Drizzle vinaigrette over asparagus, tossing to coat. Serve with shaved Parmesan.


Serves: 4


This side dish fit the bill for quick and easy, exactly what I was going for last week. The vinaigrette takes about 2 minutes to put together, and there is zero cooking, baking, or heating of any kind involved. Win. The asparagus spears are a little unwieldy at first when you start peeling them, but once you have a rhythm figured out, it goes by pretty fast.

I was a little hesitant at first with this recipe -- eating raw asparagus? That just sounded odd, something I'd never done before. But surprisingly, it works. The trick is to use the vegetable peeler rather than a knife so you have super thin shavings. Despite being drizzled in a vinaigrette, the asparagus remains bright, fresh, and crispy. Definitely something out of the ordinary rotation of steamed or roasted veggies, and perfect for spring.


Nutrition Facts
Amount per serving
Calories 171Calories from fat 139
% Daily Value
Total Fat 15.4g24%
Saturated Fat 3.0g15%
Cholesterol 6mg2%
Sodium 389mg16%
Total Carbs 5.2g2%
Dietary Fiber 2.4g10%
Sugars 2.3g
Protein 4.9g
Vitamin A 18%Vitamin C 15%
Calcium 10%Iron 15%

Monday, February 21, 2011

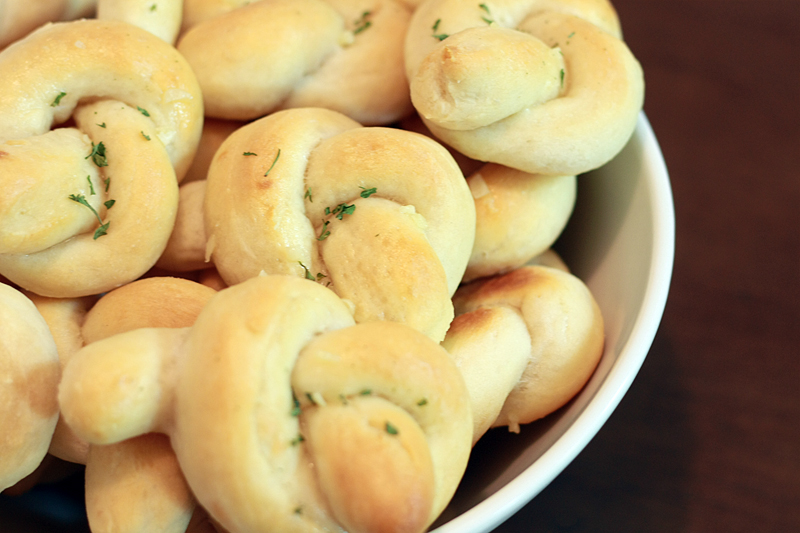
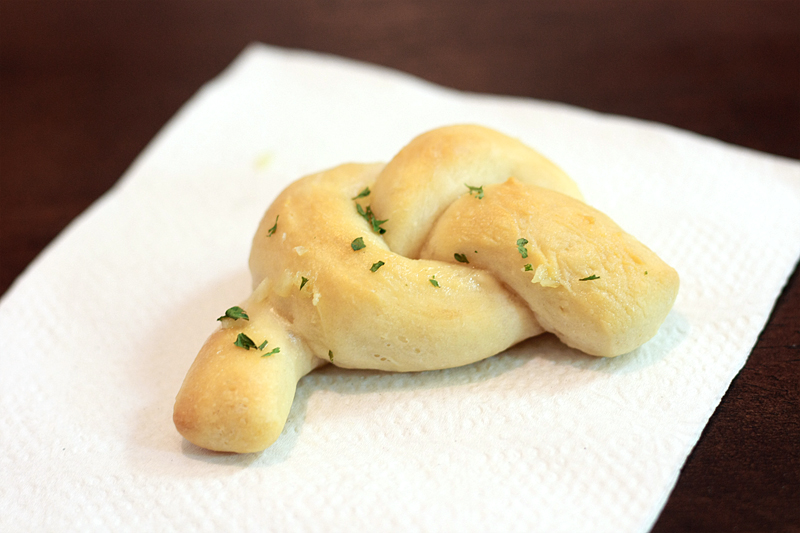
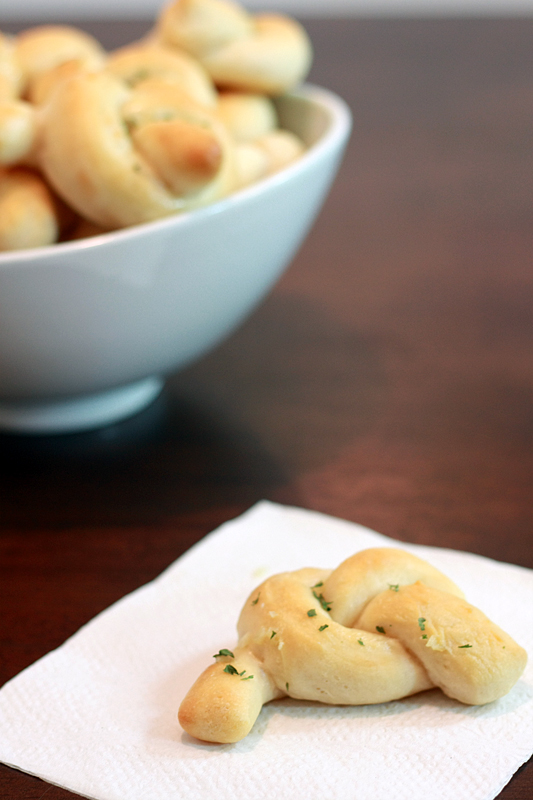
Garlic Knots


Last week, when I decided to make Chicken Gnocchi Soup for dinner, I felt like we needed something else to go with it. As the soup is full of veggies, I didn't think a vegetable side was in order (I mean, I can only handle so much green stuff), so where did that leave me? Well, bread of course. Since I was already doing an Olive Garden spin-off soup, why not go the whole 9 yards and throw in some garlicky breadsticks too? Well, maybe not quite like the ones at Olive Garden, as I'm not really a huge fan of those anymore.

Of course, at this point, I was already running a bit short on time for playing with yeast, so I didn't want to spend forever searching for a recipe. I remembered seeing some garlic knots over at Brown Eyed Baker not that long ago, and after a quick scan of the recipe I decided it was a go. Adam was going to love the fact that he finally had some bread to dip in his soup.

Garlic Knots
Adapted from: White On Rice Couple via Brown Eyed Baker

5 1/2 cups all-purpose flour
1 3/4 cups warm water (110-115 degrees F)
1/4 cup olive oil
1 1/2 tablespoons active dry yeast
1 tablespoon granulated sugar
1 teaspoon kosher salt

2 tablespoons olive oil
2 tablespoons butter
4 cloves of garlic, finely minced
2 teaspoons dried parsley

Place the flour in a large bowl and set aside.

In a small bowl, add the water, olive oil, yeast, sugar and salt. Stir to dissolve the yeast. Pour the water mixture over the flour and stir with a wooden spoon until the water is fully incorporated and all of the flour is moistened.

Transfer the dough out to a lightly floured surface and knead for a minute or two, until the dough is soft and slightly tacky. Add more flour if the dough is too sticky, and more water if it is too dry. Place the dough in a well-oiled bowl, turning once to coat the top of the dough. Cover with plastic wrap, and place in a draft-free area until doubled in size, about 1 1/2 to 2 hours.

Line up to four baking sheets with parchment paper; set aside. (If you do not have 4 baking sheets, line as many as you have, then lay plastic wrap on the counter for the remaining rolls. You will have to transfer the formed dough knots to the lined, cooled baking sheets later.) Transfer the dough to a lightly floured surface, and divide into two. Take the first half and press down into a rough rectangle to release any trapped gasses. Flip the dough over and press down again. Using a rolling pin, roll the dough into a rectangle measuring 5 inches by 16 inches, and 1/2-inch thick. Using a pizza cutter or a sharp knife, slice the rectangle into 5-inch by 3/4-inch strips.
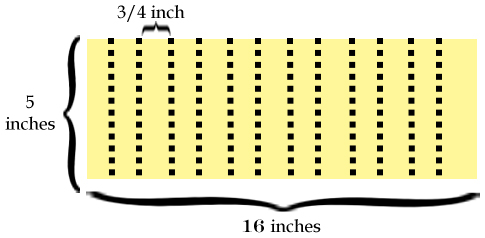

Lightly sprinkle the strips with flour. Gently roll each strip it back and forth (think play-doh snake) to create an even rope, 7-9 inches long. Tie it into a knot and place on a prepared baking sheet, about 1 1/2 inches apart. Repeat with the remaining dough, the again with the second half of the dough. Cover the baking sheets with a dry kitchen towel and place in a warm, draft-free area. Allow knots to rise for 30 minutes to 1 hour, or until doubled in size.

While the knots are rising, preheat the oven to 400 degrees F.

Once the knots have doubled in size, bake uncovered, one pan at a time, for 12 to 15 minutes, or until golden brown.

Meanwhile, prepare the garlic coating. In a small saucepan, warm the olive oil, butter and garlic over low heat. Add the parsley, cover and set aside.

Tranfer the knots from the oven to a cooling rack. While the knots are still warm, using a pastry brush, brush them with the garlic coating. Sprinkle with additional kosher salt to taste. Serve warm or at room temperature. Baked rolls can be individually wrapped and frozen in an airtight freezer bag. Rewarm in a 350 degree F oven for about 5 minutes.

Makes: 40 rolls


I was very excited to taste these rolls, as my kitchen was starting to smell wonderful. After smothering them with the garlic sauce, I oh-so-impatiently let them sit for another 5 minutes or so, to really soak up that garlic flavor. Finally... one bite in, two bites in... hmmm. Not quite what I expected. The outside crust was much firmer than I was hoping for, although the inside was still nice and chewy. Then I noticed that the garlic sauce hadn't soaked through at all (most likely due to the harder crust) and the inside was really lacking flavor. Bummer. These worked well when it came to dipping and soaking up soup (once bitten into), but on their own they were a bit lackluster in my book. I'm still trying to figure out if I missed something in these as the recipe came with glowing reviews.


Nutrition Facts
Amount per serving
Calories 89Calories from fat 25
% Daily Value
Total Fat 2.8g4%
Saturated Fat 0.7g3%
Cholesterol 2mg1%
Sodium 63mg3%
Total Carbs 13.7g5%
Dietary Fiber 0.6g2%
Protein 2.0g
Vitamin A 0%Vitamin C 0%
Calcium 0%Iron 5%

LinkWithin

Related Posts with Thumbnails
 
Pin It button on image hover