Sunday, November 8, 2009

I'm still here...


I promise I haven't disappeared. Okay, well maybe I have, but only because I've been buried under piles of journal articles and other school related items. And honestly, there hasn't really been a lot new happening in my kitchen as of late. Class from 4:30-7:10 four days a week (plus a 1/2 hr drive each way) has really been killing the whole making dinner thing. So we've pretty much been sticking to our tried and true recipes... at least on the nights that we actually cook.


I think I do have a recipe or two hiding out that I have yet to post... that is when I get a breather from trying to finish up a big paper I'm working on. In the meantime, I figured I'd give you a couple pictures of a cake my sister and I made for her husband as he's getting ready to be deployed to Louisiana for training, and then Afghanistan for a total of 9 months! Guess they need doctors over there, too... :(

Thursday, October 15, 2009

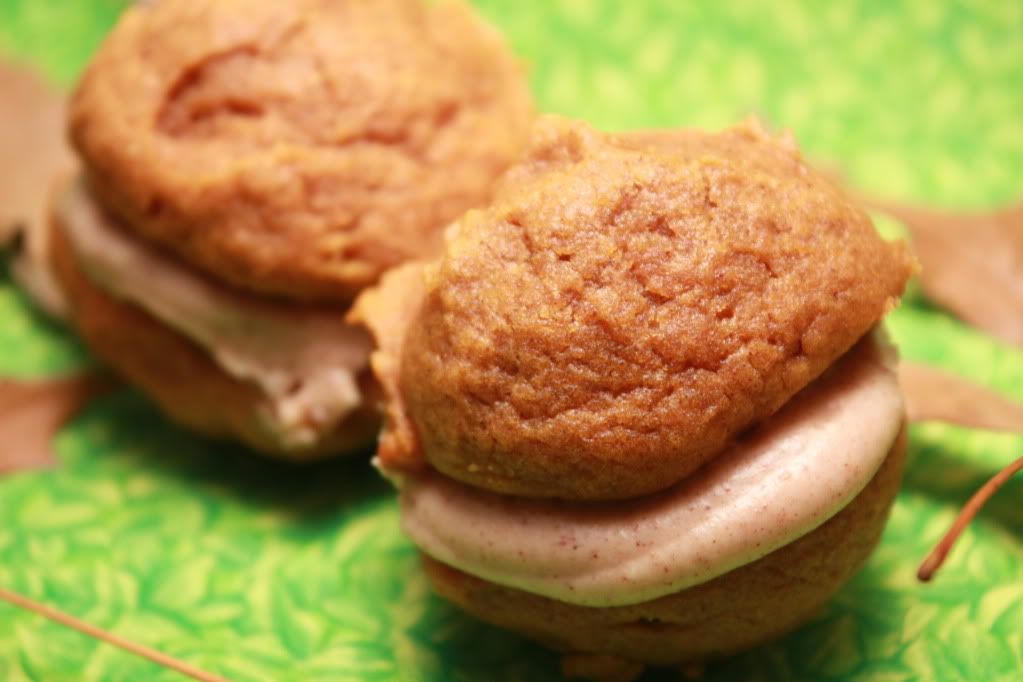
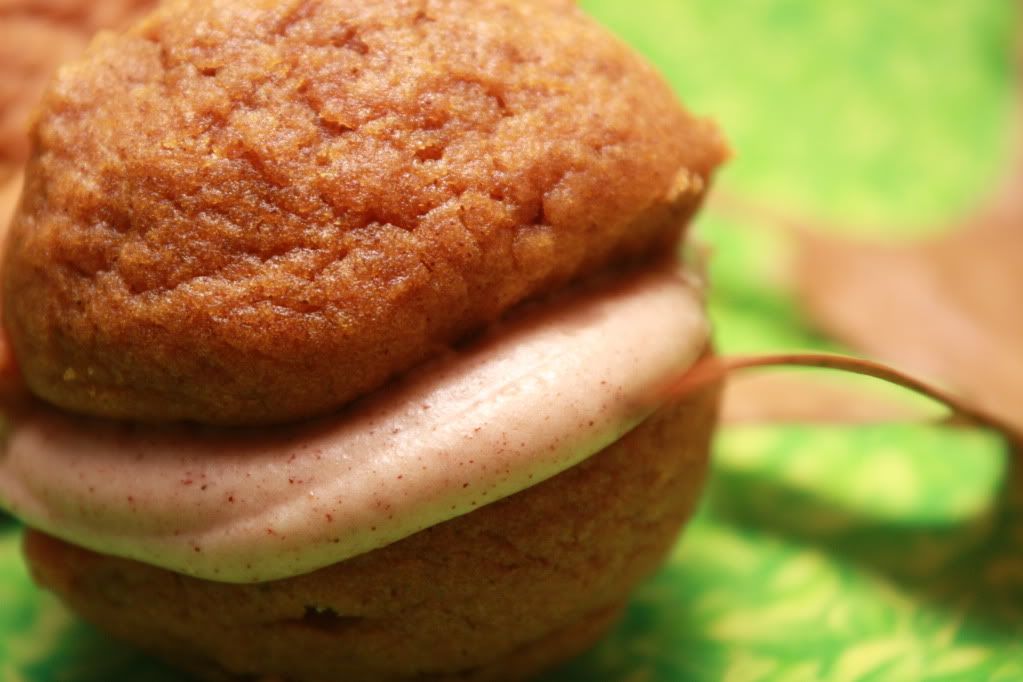
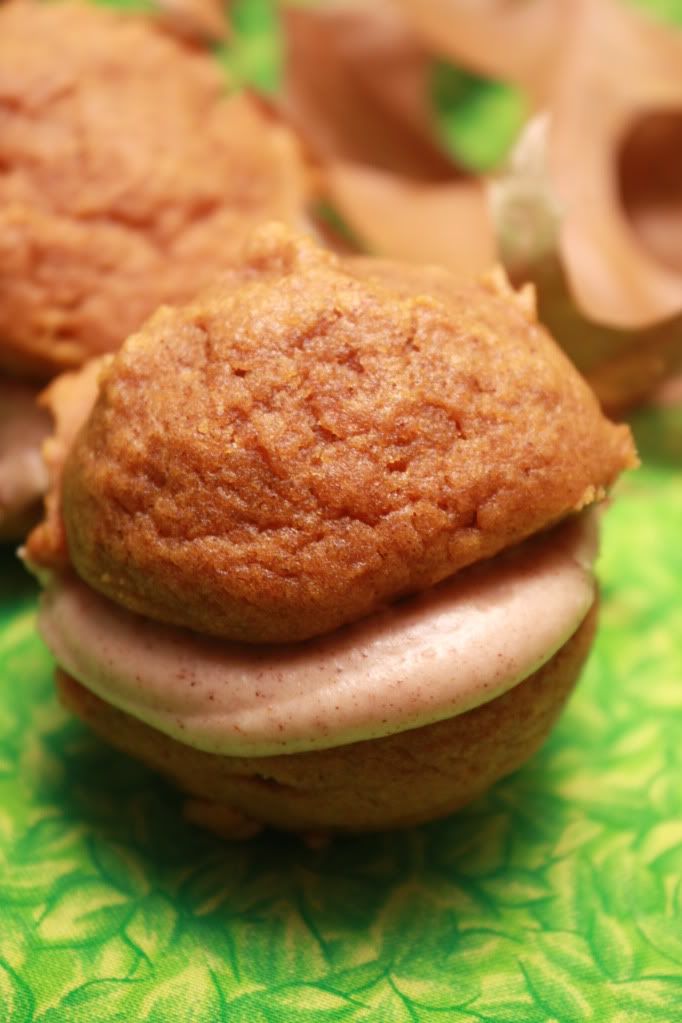
Pumpkin Whoopie Pies


I know I mentioned before that fall is my favorite season. I might have to retract that statement. Fall is typically my favorite season. Not this year though. Usually, fall starts as a slow progression of nippy mornings and warm afternoons to chilly mornings and cool afternoons. And after a less-than-hot summer, fall decided to follow suit. It has been pretty much nothing but chilly and rainy here. I'm sorry, did I misplace my October and jump straight to November somehow?

Frustrating as it is, the change in weather definitely kicked my craving for pumpkin into gear early this year. I actually made these a while ago as a "tribute" to the start of fall. (So yes, this was way back in September some time.) I didn't want to go the traditional route and pop out a pumpkin pie, and quite honestly, I wasn't really feeling like a pie anyways.

So I wandered back through my Google reader and discovered these Pumpkin Whoopie Pies from Cast Sugar from almost a year ago. I cannot believe that I waited so long to make these. They are so moist and delicious and pumpkin-y and the filling totally reminds me of cinnamon rolls and I just want to completely cover these with it.


Pumpkin Whoopie Pies
From: Baked: New Frontiers in Baking
Via: Cast Sugar

3 c. all-purpose flour
1 tsp. salt
1 tsp. baking soda
1 tsp. baking powder
2 Tbsp. cinnamon
1 tsp. ground ginger
1/2 tsp. ground fresh nutmeg
1 c. granulated sugar
1 c. dark brown sugar, firmly packed
1 c. canola oil
3 c. chilled pumpkin puree
2 large eggs
1 tsp. vanilla extract
3 c. powdered sugar
1/2 c. unsalted butter, at room temperature
8 oz. cream cheese, at room temperature
1 Tbsp. cinnamon
1 tsp. vanilla

Preheat oven to 350F. Prepare to baking sheets lined with parchment paper.

In a large bowl, whisk together the flour, salt, baking soda, baking powder, and spices. Set aside.In a separate bowl, whisk to sugars and oil together. Add the pumpkin puree and whisk to combine thoroughly. Add the eggs and vanilla and whisk until combined.

Sprinkle the flour mixture over the pumpkin mixture and whisk until completely combined. Use a small ice cream scoop with a release mechanism to drop healing tablespoon of the dough onto the prepared baking sheets, about 1 inch apart.

Bake for 10-12 minutes, until the cookies are just starting to crack on top and a toothpick inserted into the center of a cookie comes out clean. Remove from the oven and let the cookies cool completely on the pan while you make the filling.

For the filling: In the bowl of an electric mixer fitted with a paddle attachment, beat the butter until smooth with no visible lumps. Add the cream cheese an beat until combined. Add the powdered sugar, cinnamon and vanilla and beat until smooth. Be careful no to overbeat the filling, or it will lose structure.

To assemble: Turn half the cooled cookies upside down. Pipe filling (about a tablespoon) onto that half. Place another cookie, flat side down, on top of the filling. Press down slightly so that the filling spread to the edges of the cookie. Repeat until all the cookies are used. Put the whoopie pies in the refrigerator for about 30 minutes to firm before serving.


The only reason these guys lasted for any length of time around our house was because this recipe yields a TON of whoopie pies and there is only two of us. I kept trying to get Adam to take some into work, but he pretty much refused.

The only thing I would change is trying to spread out the batter on the baking sheets a little bit instead of leaving them in little balls. Adam actually called these "pumpkin balls" instead of whoopie pies because they puffed up so big and round. (Which actually kind of made it a little difficult when it came to keeping them upright when assembling them.)

Oh, and maybe I would add more filling. As much as humanly possible. And then dip each one in it before eating. :)


Nutrition Facts
Amount per serving
Calories 225Calories from fat 101
% Daily Value
Total Fat 11.3g17%
Saturated Fat 3.6g18%
Trans Fat 0.0g
Cholesterol 25mg8%
Sodium 145mg6%
Total Carbs 29.9g10%
Dietary Fiber 1.2g5%
Sugars 20.0g
Protein 2.2g
Vitamin A 67%Vitamin C 1%
Calcium 3%Iron 6%

Thursday, October 8, 2009

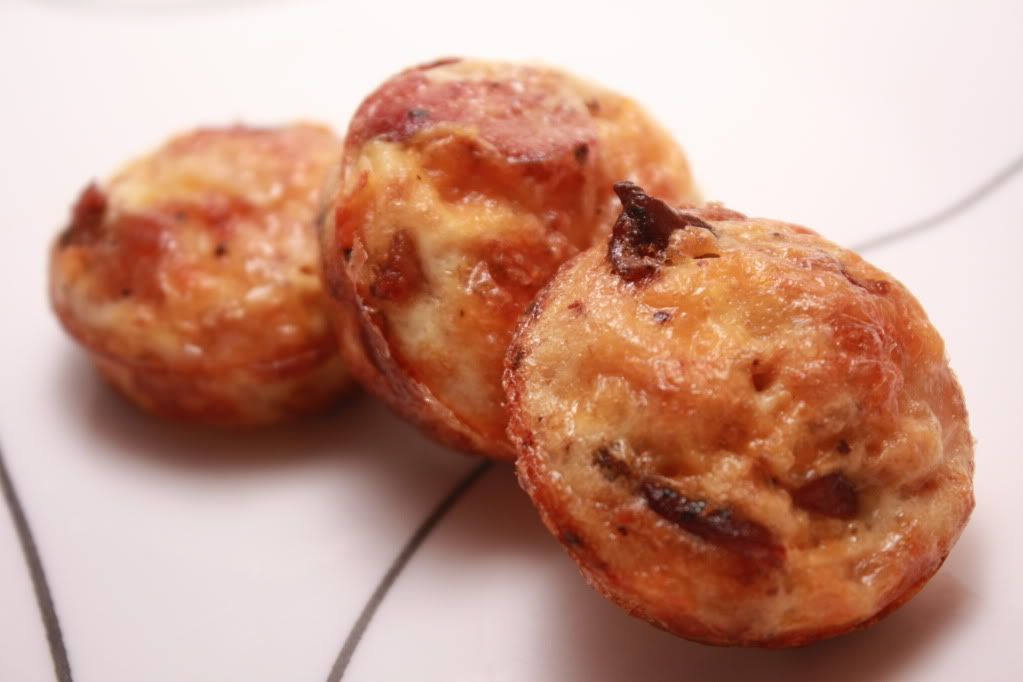
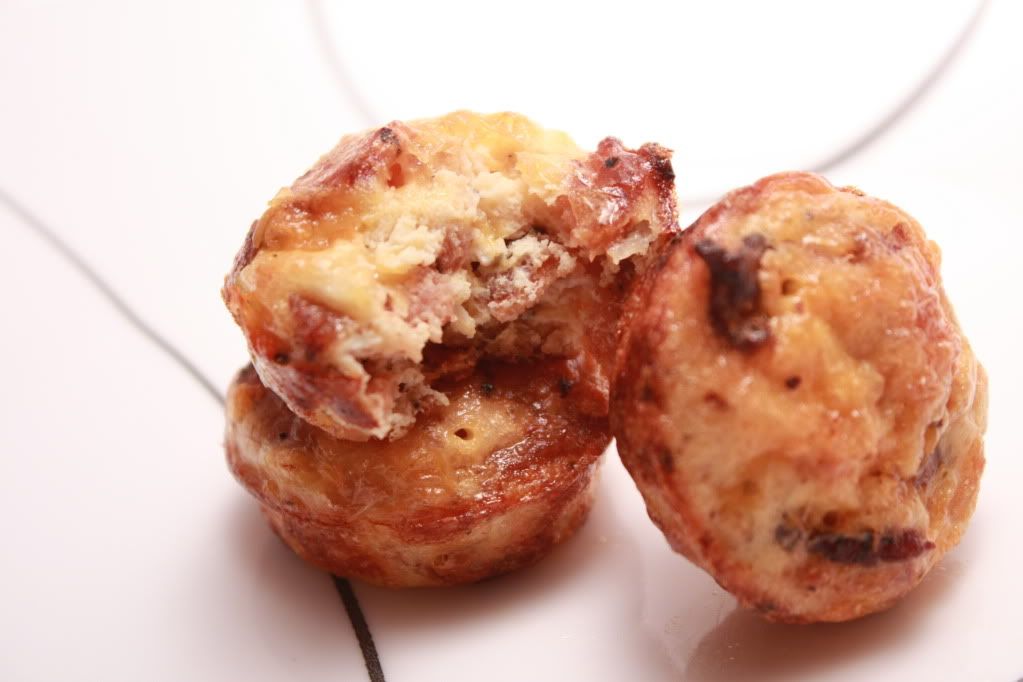
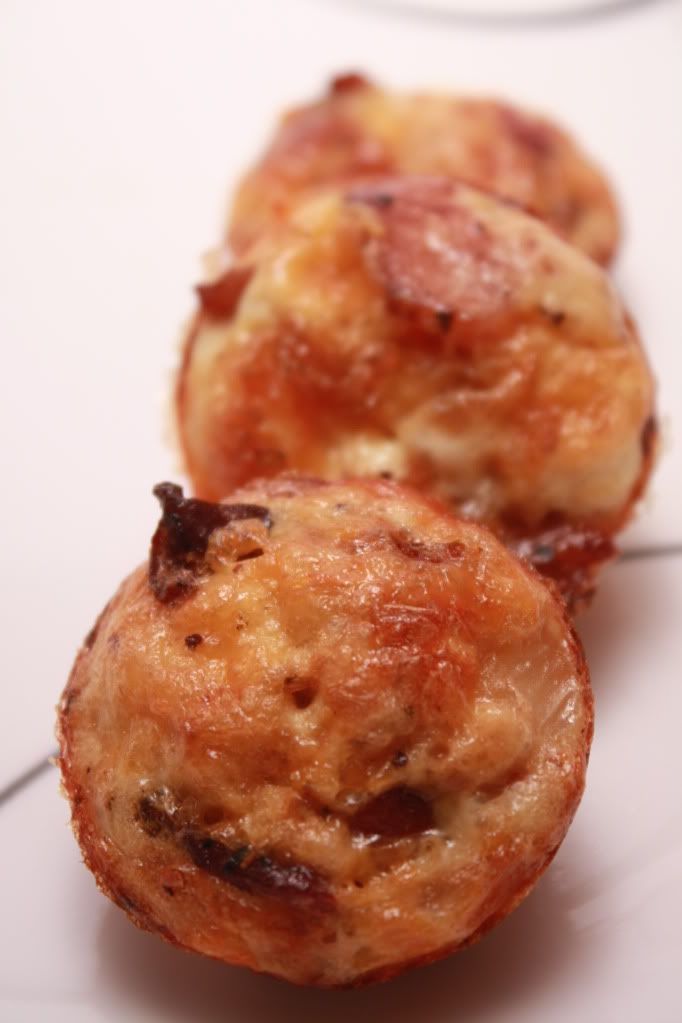
Mini Frittatas with Bacon and Cheese


Appetizers, also known as hors d'œuvres, are typically the items served before the main course. Unless you're like me, and decide you like the appetizer so much, getting the main course just really isn't worth it. Yup, that's right, I eat the appetizers as my meal.(Okay, not every time we go out, but I do occasionally.)

So, no surprise when I saw these apps on my reader from Macaroni and Cheesecake and decided to make a meal out of them. And they barely, just barely work as a meal between Adam and I. The recipe claims that you can get 24 mini frittatas out of this, but both times we've made them, we can only get 23. We definitely sit next to eat other when eating these and count out how many each of us has had -- to make sure the one of us doesn't get more than the other. Yeah, they're that good that counting matters.


Mini Frittatas with Bacon and Cheese
Adapted from: Cooking Light, December 2001


Cooking spray
1/2 cup finely chopped onion
4 slices peppered bacon
1/3 cup shredded extra-sharp cheddar cheese
2 teaspoons dried chives
1/8 teaspoon dried thyme
1/8 teaspoon black pepper
4 large egg whites
1 large egg

Preheat oven to 350°.

In a large nonstick skillet, cook bacon until done, but not crisp, and remove from pan. Discard all but about 1 tablespoon bacon grease. Turn heat to medium-high. Add onion; sauté 5 minutes. Remove from heat; cool 5 minutes. Crumble bacon. Combine remaining ingredients in a large bowl; stir with a whisk. Add bacon and onions, stirring with a whisk. Spoon mixture into 23-24 miniature muffin cups coated with cooking spray. Bake at 350° for 20 minutes or until set.

Serves: 8 (3 frittatas per serving)


Even after eating almost half a batch of these, I still keep looking at the plate, hoping Adam will stop before he's done with his half. But we all know that's not going to happen.

While we always go for dinner with these, they would probably be more appropriate for breakfast or brunch, or as appetizers/finger food at a party. Just make sure to watch your fingers when going for one of these.


Nutrition Facts
Amount per serving
Calories 116Calories from fat 74
% Daily Value
Total Fat 8.2g13%
Saturated Fat 3.1g16%
Trans Fat 0.0g
Cholesterol 47mg16%
Sodium 393mg16%
Total Carbs 1.1g0%
Protein 9.1g
Vitamin A 2%Vitamin C 1%
Calcium 4%Iron 2%

Tuesday, October 6, 2009

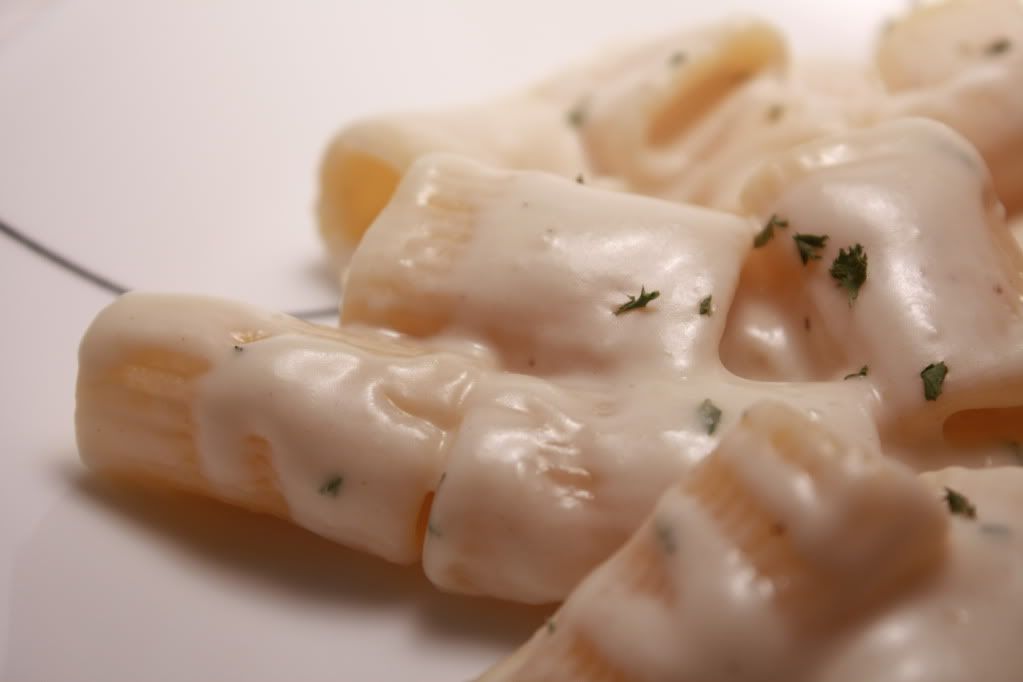
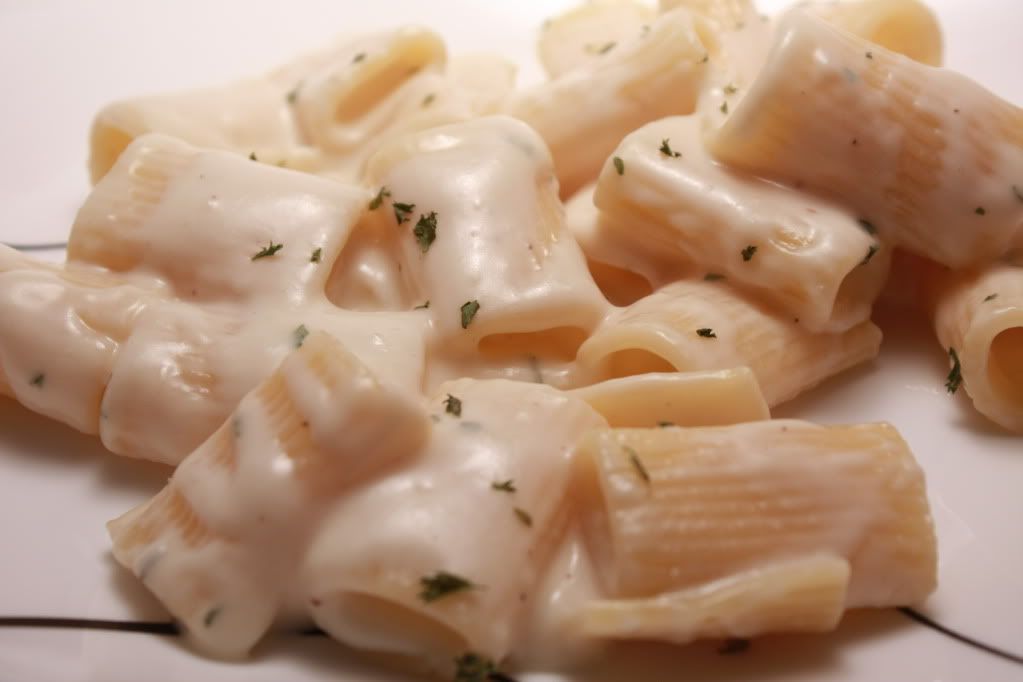
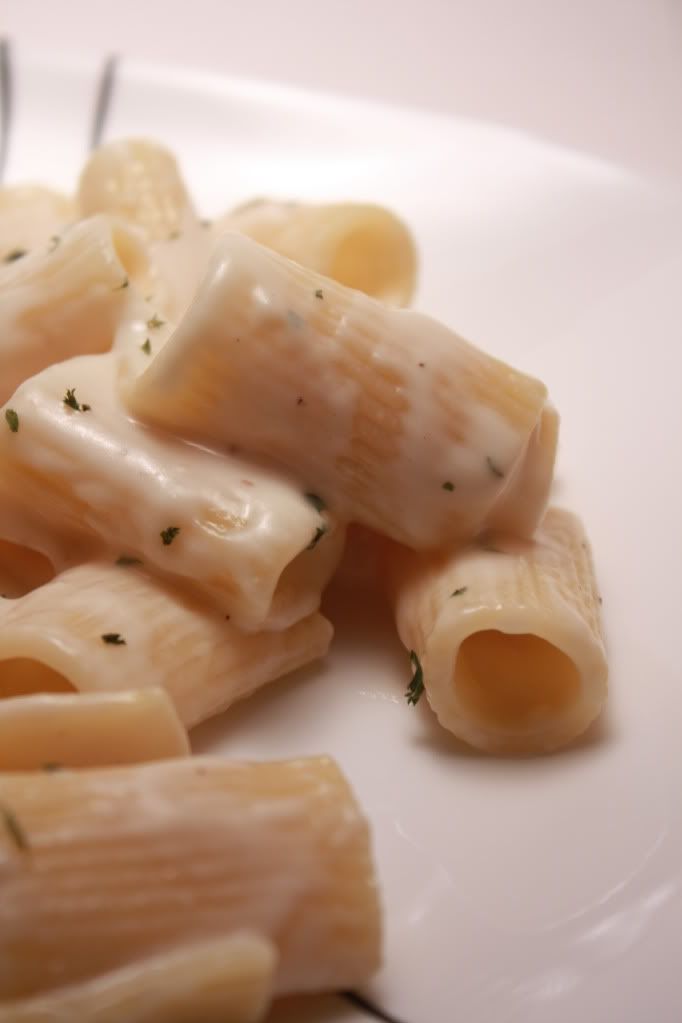
Creamy Rigatoni with Gruyère and Brie


So I promise I haven't completely dropped off the face of the earth. Not yet anyways. I have even been spending lots of time on my computer. Unfortunately, it's been to research lots of literature for a paper for my seminar class or to figure out my stats homework, not to talk about all the yummy food I've been eating lately. :(

I was very excited when the Cooking Light September issue arrived and I discovered it had a section on making mac n cheeses. Yum. Definitely one of my favorite "comfy" meals. Of the couple recipes I pulled out, this was the first one we gave a shot. Although, I would liken this more to an alfredo than your typical mac and cheese.


Creamy Rigatoni with Gruyère and Brie
From: Cooking Light, September 2009


3 1/2 teaspoons salt, divided
12 ounces rigatoni pasta
3 tablespoons all-purpose flour
2 cups 2% reduced-fat milk, divided
1 tablespoon butter
1 1/4 cups (5 ounces) finely shredded Gruyère cheese (I used Swiss)
3 ounces soft-ripened Brie cheese, rind removed
1/2 teaspoon freshly ground black pepper
Fresh flat-leaf parsley leaves (optional)

Bring 6 quarts water to a boil in a large saucepan. Add 1 tablespoon salt and pasta; cook 6 minutes or until al dente. Drain.

Place flour in a medium saucepan over medium heat; add 1/2 cup milk, stirring with a whisk until smooth. Gradually add remaining 1 1/2 cups milk to pan, stirring with a whisk; bring to a boil, stirring constantly with a whisk. Cook 2 minutes or until slightly thick, stirring constantly; stir in butter. Remove from heat; let stand 4 minutes or until sauce cools to 155°. Add cheeses; stir until smooth. Stir in remaining 1/2 teaspoon salt, pepper, and pasta. Garnish with parsley, if desired.

Serves: 6


Well, this fit the bill of creamy and cheesy... although with brie and swiss, I felt like there wasn't really a super strong taste. Or at least not one that left lasting impressions on me. Not too bad for an alfredo/white creamy type pasta.


Nutrition Facts
Amount per serving
Calories 362Calories from fat 128
% Daily Value
Total Fat 14.2g22%
Saturated Fat 8.4g42%
Trans Fat 0.0g
Cholesterol 85mg28%
Sodium 1553mg65%
Total Carbs 39.5g13%
Sugars 4.6g
Protein 18.6g
Vitamin A 10%Vitamin C 0%
Calcium 31%Iron 13%

Tuesday, September 29, 2009

Spice-Rubbed Pork Tenderloin


Prior to this recipe, I had never made anything/had anything with pork tenderloin. Shocking, right? So I was a little leary going into this since all I could think about was how finicky pork-chops are. Cook too little and it's not safe to eat, cook too much and it's gets dry and tough.

But I figured since the hubby was looking for something other than chicken, we would give this a go. I've had this recipe for a couple months begging to be made, but I really hadn't been in the mood, since the seasonings are geared more towards "cold" weather.

Well, if you've been up in the northeast area as of late, you know that fall has definitely arrived. So I thought it was just the right time to bring this out. If I had any hesitations before about using this pork, they definitely disappeared. This turned out so nice and juicy, not to mention flavorful.


Spice-Rubbed Pork Tenderloin
From: Cooking Light, March 2009


1 teaspoon sugar
1 teaspoon garlic powder
3/4 teaspoon salt
1/2 teaspoon freshly ground allspice
1/2 teaspoon ground cumin
1/4 teaspoon dried thyme
1/4 teaspoon freshly ground nutmeg
1/4 teaspoon ground cinnamon
1/8 teaspoon ground red pepper
1 (1-pound) pork tenderloin, trimmed
2 teaspoons olive oil

Preheat oven to 350°.

Combine first 9 ingredients; rub over pork. Let stand 20 minutes. Heat oil in a medium ovenproof skillet over medium-high heat. Add pork to pan; cook 4 minutes, browning on all sides.

Bake at 350° for 15 minutes or until a thermometer registers 155° (slightly pink), turning after 7 minutes. Let stand 10 minutes. Cut pork crosswise into 1/2-inch-thick slices.

Serves: 4


Oh, did I mention the fact that this comes together really fast and easy? Because it does. Just the icing on the cake. :)

Note: If you don't have a ovenproof skillet, I don't really see a problem with transfering this to a deep baking pan after browning the pork (just put it in the oven to bring it up to temperature first).


Nutrition Facts
Amount per serving
Calories 191Calories from fat 57
% Daily Value
Total Fat 6.4g10%
Saturated Fat 1.7g9%
Trans Fat 0.0g
Cholesterol 83mg28%
Sodium 504mg21%
Total Carbs 2.1g1%
Sugars 1.3g
Protein 29.9g
Vitamin A 1%Vitamin C 1%
Calcium 1%Iron 9%

Tuesday, September 22, 2009

Manchego-Jalapeño Beer Bread


Beer bread attempt #2: Fail. Okay, I shouldn't say complete failure. The inside of the loaf was actually pretty moist and tasty. But it's the though chewy outside that always gets me.

This was actually a different version of a beer bread from this recipe I tried a couple months ago. And I had the exact same problems this go-around as last time: the hard crust and very little beer taste that actually came through (we didn't use the beer they recommended, same as last time -- we used Modelo instead of Dos Equis).

Thus, I am back on the hunt for a new beer bread recipe -- this one is officially retired.


Manchego-Jalapeño Beer Bread
From: Cooking Light, November 2008


Click here for the recipe


Monday, September 21, 2009

Potato-Bacon Torte


Ever had one of those meals that might not have been the best.thing.you.ever.ate, but after a couple days you found yourself craving it again? This was definitely one of those meals. Don't get me wrong now, it's not like this wasn't good to begin with, because it was.

It's that warm comfort type food with an extra kick from the bacon (I used peppered bacon, of course). And yes, we are slowly but surely sliding back into our comfort food mode, and that can only mean one thing.... it's fall! I'm so excited! As much as I am totally smitten with summer, I still think fall tops my list of favorite seasons.

Fall is just the season for being busy outside and enjoying the weather. There's all kinds of festivals (lots of wine festivals and oktoberfests!) and it's apple season! All of which give way to Halloween which rolls us right into the Holiday Season. And best of all you're not outside sweating and burning to death, nor are you too hurried going from point A to point B lest you freeze on the way. It's the perfect season. :)


2 pie crusts (use your own or Pilllsbury Ready-Made Crust)
4 slices bacon, cooked crisp (more never hurts!)
3 medium baking potatoes, peeled
Salt & freshly ground black pepper
1/4 cup grated Swiss cheese
2/3 cup heavy cream
1/4 teaspoon dried thyme
1 egg yolk, whisked with a splash of water

Preheat the oven to 375°F.

Remove the pie crusts from the refrigerator. Line the bottom and sides of a 9" pie pan with one of the crusts.

Slice the potatoes in half lengthwise, and then thinly slice into half moons. Working in circles, arrange the potato slices in the pie crust to cover the bottom. Season with salt and pepper, and crumble one piece of the bacon over the potatoes. Repeat the layers three more times. The pan should be nearly full. Top with the shredded cheese.

Whisk the dried thyme into the cream and slowly pour the cream around and over the entire pie, allowing it to seep down between the potato slices.

With the remaining pie crust, cover the pie with the dough and crimp the edges closed. Brush the top and edges of the crust with egg wash. Make a few slits in the center of the top crust, for the steam to escape, and put the pie pan on a baking sheet.

Bake the torte until the crust is browned and crispy and the potatoes are cooked through, 50 to 60 minutes. If the crust edges get too brown, cover them with some strips of aluminum foil. Remove the pie from the oven and let rest at least 15 minutes before serving.

Serves: 8


So I have to admit. I cheated on this one. The original recipe actually calls for you to make your own pie crust... but I just really didn't feel like taking the time. I figured my taste buds could handle the ready-made stuff (and they did). The actual recipe also calls for Gruyere cheese -- although why you are using Gruyere cheese for a $10 meal is beyond me. So I followed what Michelle at Brown Eyed Baker did and substituted Swiss instead. And it worked fine. Obviously, because this guy is on our menu again for this week. :)

This dish not only reheats really well, but it also works well to make in sections -- if you're like me and have class that falls right over dinner-making time. I basically assembled the entire torte and pie crusts without adding the egg wash, covered it in saran wrap and stuck it in the fridge. Thus, all my good ol' hubby had to do was pull it out of the fridge, let it come to room temp while the oven was preheating, add the egg wash, and then pop it in the oven to cook while I was on my way home. Yay for having dinner at a reasonable time! (Do you really think it went that smoothly? Not so much, but I can always hope.)


Nutrition Facts
Amount per serving
Calories 429Calories from fat 241
% Daily Value
Total Fat 26.8g41%
Saturated Fat 8.9g45%
Trans Fat 0.0g
Cholesterol 59mg20%
Sodium 1171mg49%
Total Carbs 36.0g12%
Dietary Fiber 2.3g9%
Sugars 0.9g
Protein 11.2g
Vitamin A 4%Vitamin C 11%
Calcium 5%Iron 13%

LinkWithin

Related Posts with Thumbnails
 
Pin It button on image hover