
Making the bedding isn't the only DIY thing I've decided to do for baby girl's nursery. There are other little oddball things here and there I would like to tackle -- not only to save money, but also so everything coordinates without being so matchy-matchy.
I came across a couple tutorials for clothing dividers for closets and thought they were super cute. Are they necessary? Absolutely not. But if it's something that's going to help me stay organized from the get-go rather than trying to figure it out later, then I'm all for it.

And you don't necessarily need to have a nursery in order to have an excuse to make these. I'm weirdly anal about my closet, and have everything organized by type of clothing and color. I still get grief about it from Adam. But it makes sense to me, so I stick with it. I can totally see making another set of these for myself someday, only with the adult version labels: tank tops, short sleeves, long sleeves, sweaters, etc. You could even use this for your guy's side of the closet with "polos", "dress shirts", "dress pants", and so on. That's what's so great about these - you can customize them any way you want.
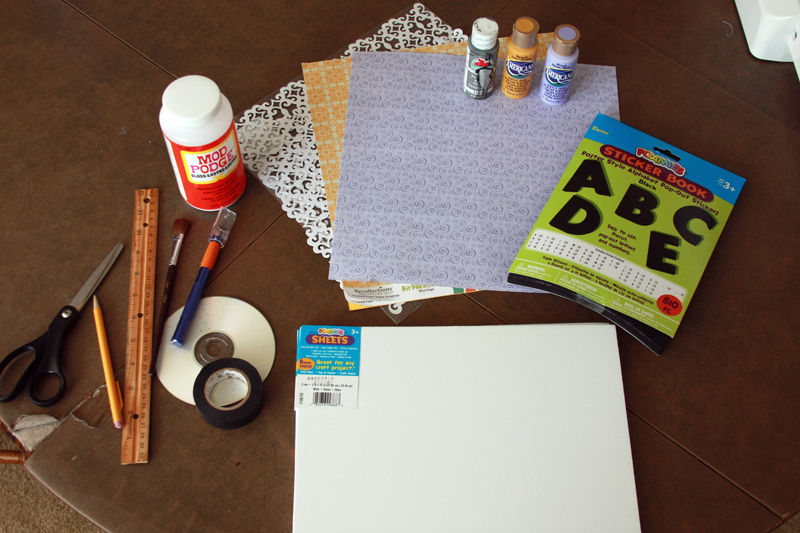
Things you need (to make 5 dividers)
2 6mm-thick pieces of foam board (9"x12")
An item or pattern in the shape you want your dividers to be (I used aCDred solo cup)
A circular item that is larger than the widest part of your closet bar (I have a 1" square bar, so I used the inside of a roll of tape, which was 1 1/2")
Pencil
X-acto knife
Cutting board or mat
Scrapbook paper (~2 sheets 12"x12" paper or however many print you want)
Acrylic paint (that matches your scrapbook paper)
Small paint brush
Scissors
1/2" foam number and letter stickers
Mod Podge (I used glossy, but matte would also work)
1/4"-wide ribbon that matches or coordinates with scrapbook paper
Hot glue gun
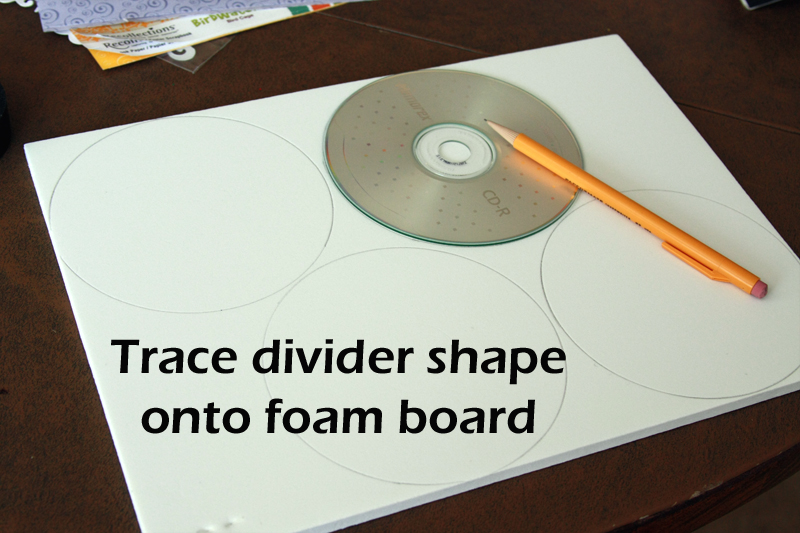
All of the tutorials for making these I had found involved using small wooden "O" letters from the craft store. While great in theory, how do you get them on the closet bar without taking it down? Unless you cut a wide enough gap at the bottom to slide it down over (and any time it spins it will fall off), you can't. Problem. So while wandering one of the 3 craft stores I went to yesterday, I discovered thick 6mm foam board. Perfect. It's thick enough to stand on it's own without bending, and it's pliable enough to cut a small slit into then twist slightly to get it onto the bar. Sold. (I also think thick cardboard, such as from a heavy duty box, would work here.)
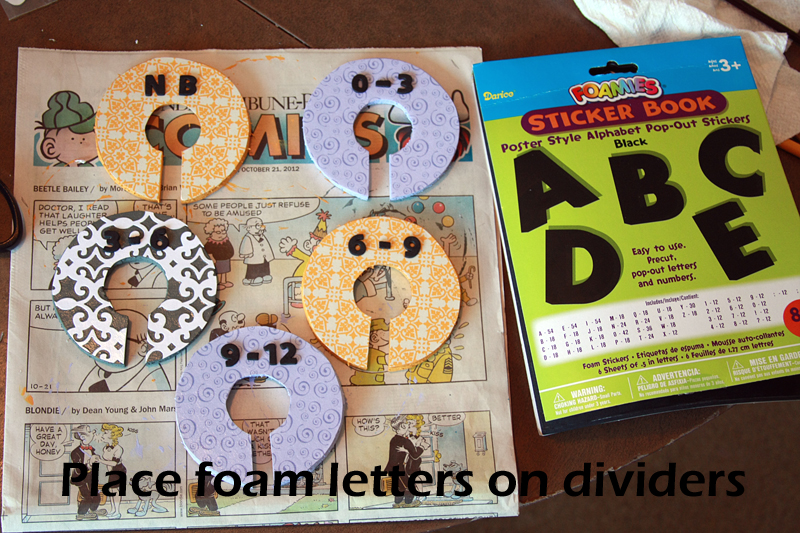
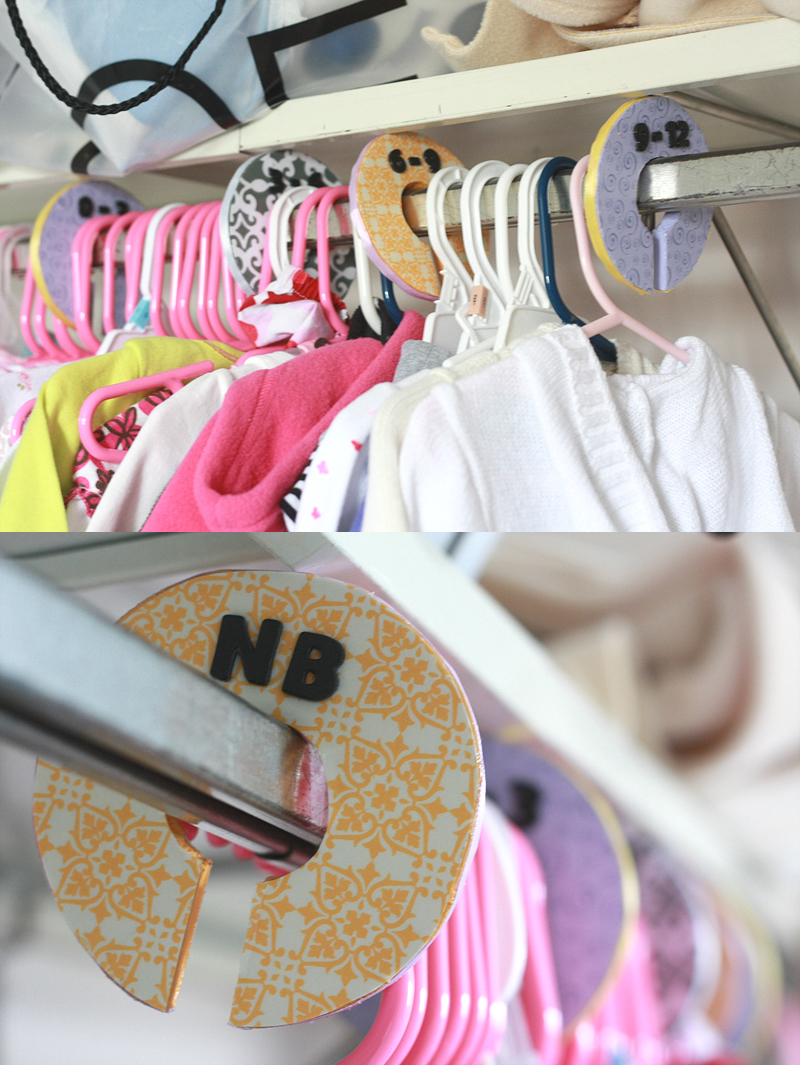
I decided to go with 5 dividers for my closet: newborn, 0-3 months, 3-6 months, 6-9 months, and 9-12 months. I figure after that point her growth with slow down considerably and I probably won't have as much hanging up. But, feel free to make however many you want, just adjust the amount listed above so you have enough materials.
The other great thing about using foam board is you can make these dividers into whatever shape you want. You could do squares, circles, ovals, stars, or any other custom shape. I went simple with circles.
Note: If you have a shelf over your closet bar, you may want to make sure your desired shape will fit. I did not do this and had to cut all my circles down to a smaller size.
To start, trace your shape or pattern onto the foam board.
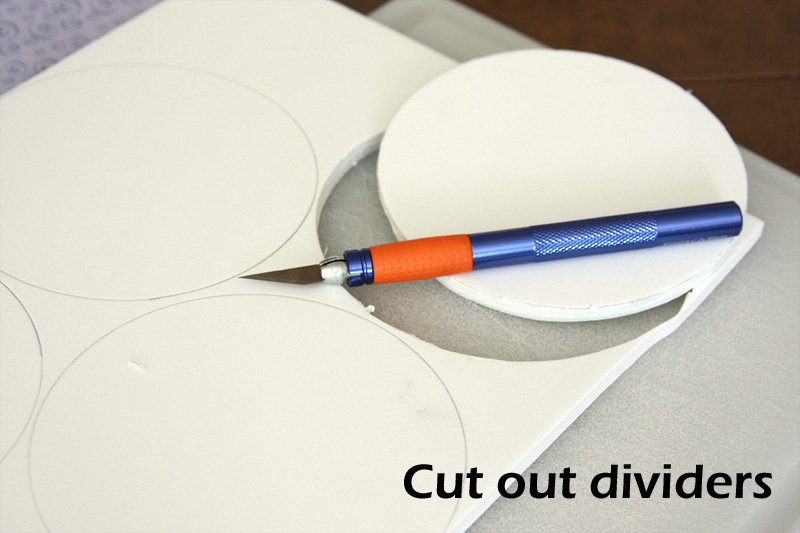
Using the X-acto knife, cut out each divider. Make sure you place your cutting board or mat underneath before you start!
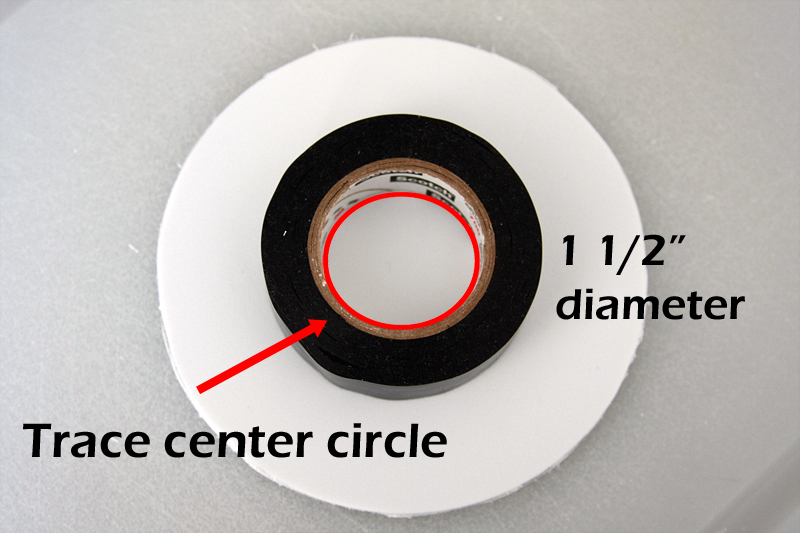
Now trace out the circles for the center hole for the bar to pass through. I used the inside of a roll of tape, which had a 1 1/2" diameter, but double check the size of your bar. Cut the circle out.
At the bottom of the inner circle, measure out 1/2" as centered as possible.
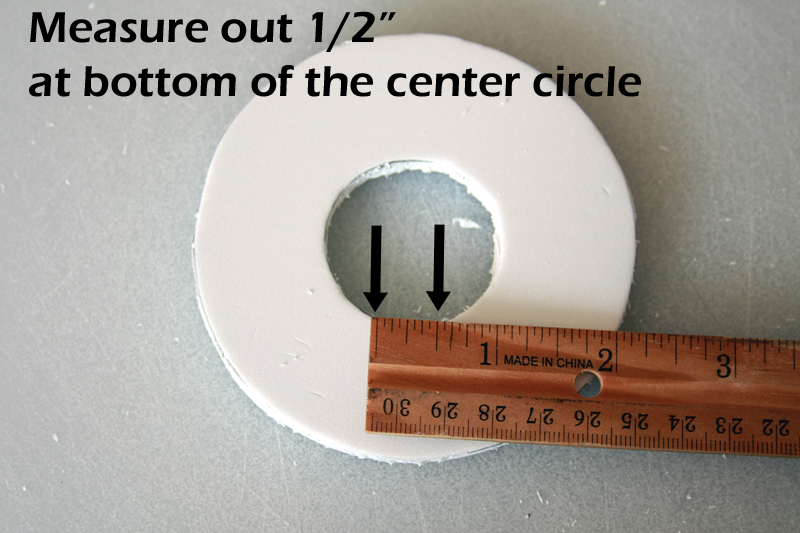
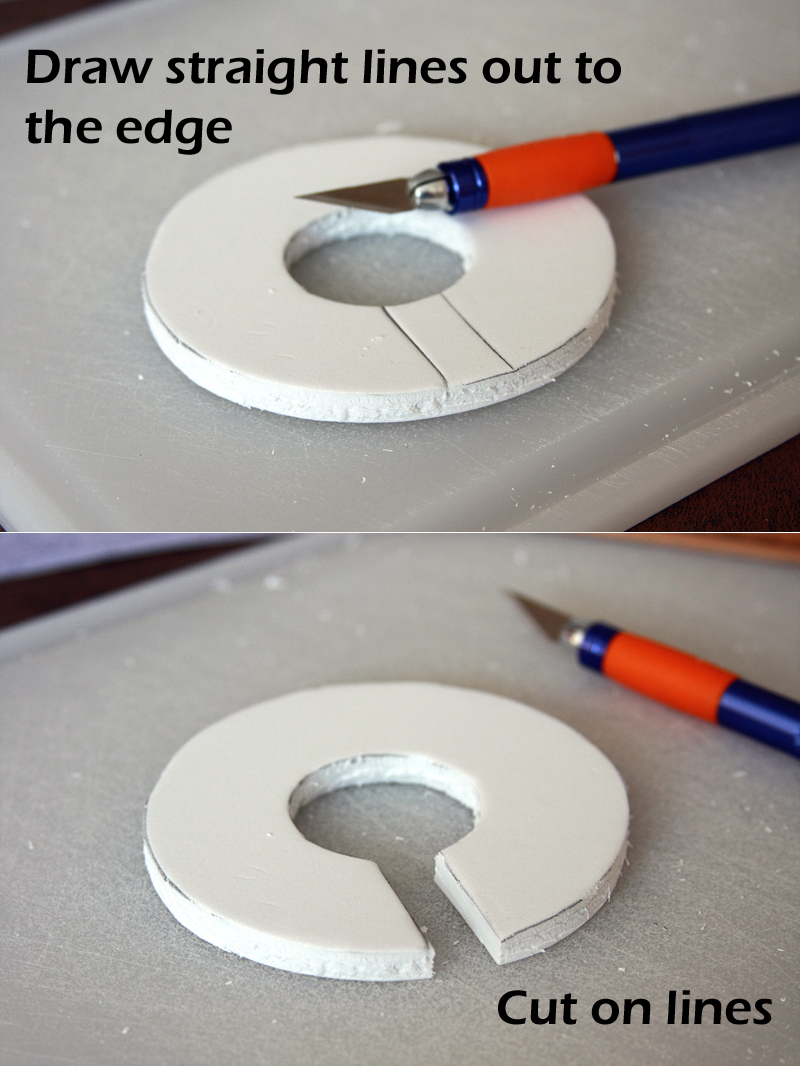
Draw lines from the 1/2" marks straight out to the outer edge. This will be the small gap that allows you to get the divider on the bar. Cut on the lines.
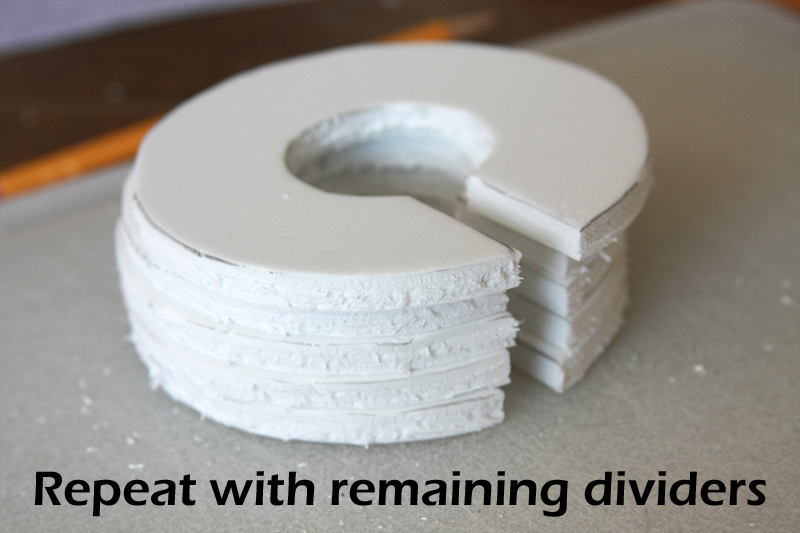
Repeat with remaining dividers. I simply traced the 1/2" portion I had cut out from the first divider rather than remeasuring each one.
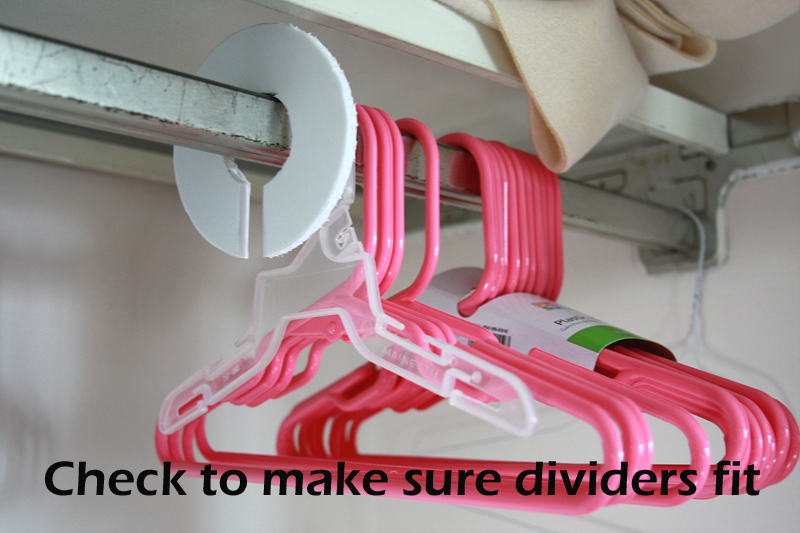
Check to make sure your dividers fit. It's pretty easy at this point to readjust - not so much if you finish them then realize they don't fit.
Now it's time to start decorating. Lay out an old piece of newspaper, and place the dividers on top in a single layer.
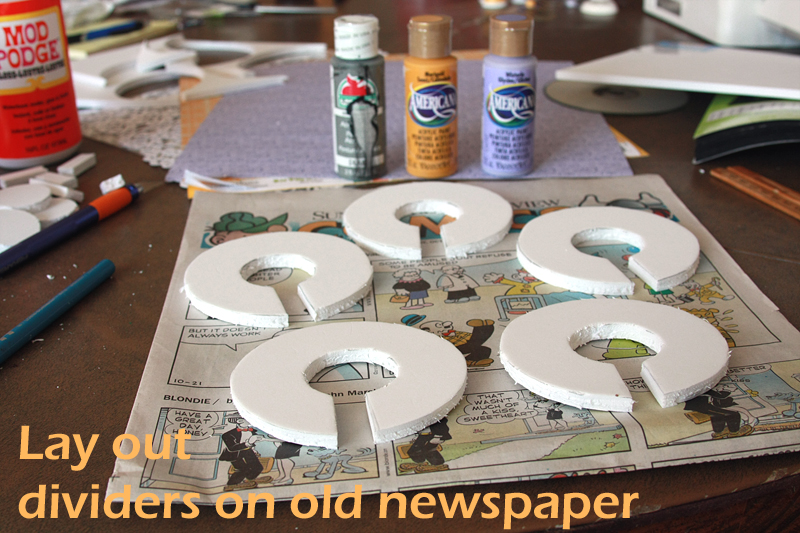
Coat each divider (including front, back, and sides) with 2 coats of paint. Let paint dry 1 hour between coats. This may seem pointless, and you could probably skip this step, but I like to have the back-up in case I misalign/mis-cut the scrapbook paper or ribbon. That way you don't see bright white peeking through.

Once the paint is completely dry, place one divider on top of the matching scrapbook paper that is face down. Trace along all the edges of the divider (outer edge as well as gap and inner circle). I traced each divider separately, rather than just using my original shape, as I noticed I am unable to cut perfect circles. So just trace one side of each divider for now, we'll get to the other side in a bit.
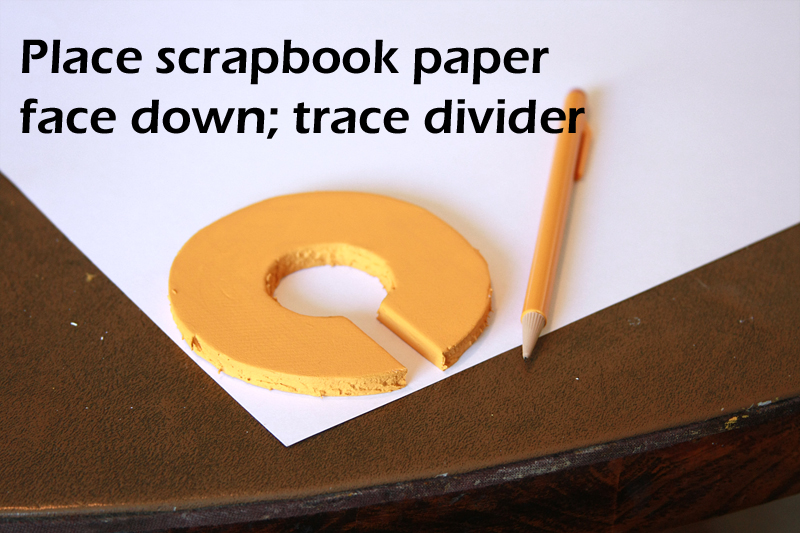
Cut out each traced piece from the paper, flip the divider over, and place the paper on top.
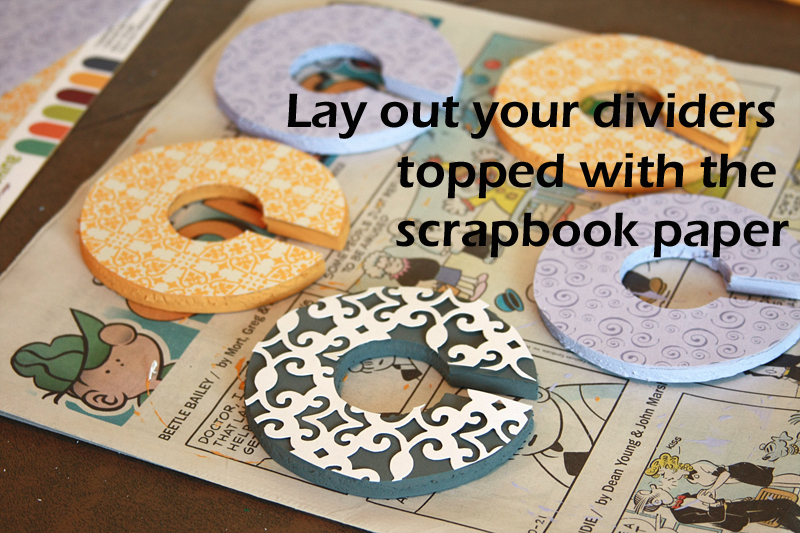
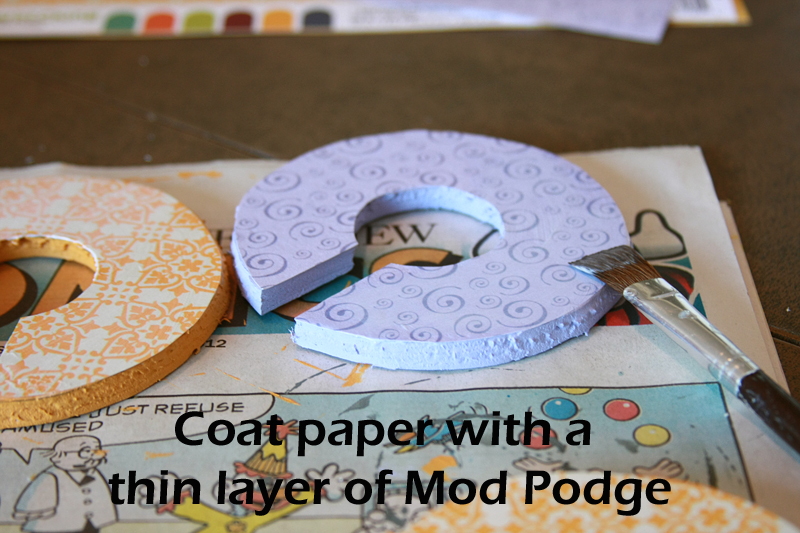
Remove the paper from the top of a divider and paint a thin coat of Mod Podge on the top (don't worry about the sides, we'll take care of those later). Place the paper back on top of the divider, lining up as best possible with the divider. Smooth out, making sure there are no air bubble trapped beneath. Repeat with remaining 4 dividers. Let dry for 15-20 minutes.
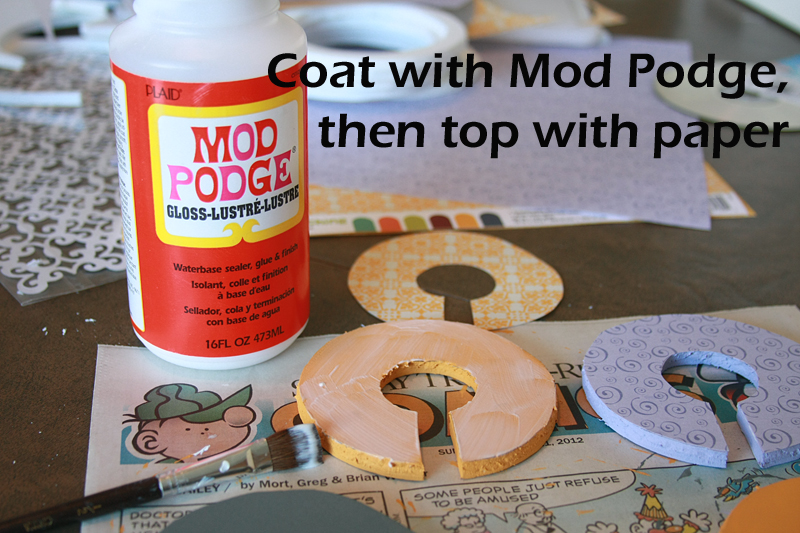
Once dry, coat the paper on each divider with a thin layer of Mod Podge. Let dry for 15-20 minutes (it should no longer be tacky to the touch).
Place foam letters/numbers on each divider in desired location (I used the "I" cut in half for the dashes). You can do this before the first Mod Podge coat, but it's much easier to move them on top of the Mod Podge if necessary. You can also wait and put your wording on after all the Mod Podge coats, but I just don't trust the stickiness to last very long, so I'm using the Mod Podge to help glue them to the dividers. (You could also use letter stickers here, but I couldn't find any I liked in the right size, and they're more expensive.)
Top with another thin coat of Mod Podge, making sure to go around the sides of the letters/numbers. Let dry 15-20 minutes. Repeat 3 more times.
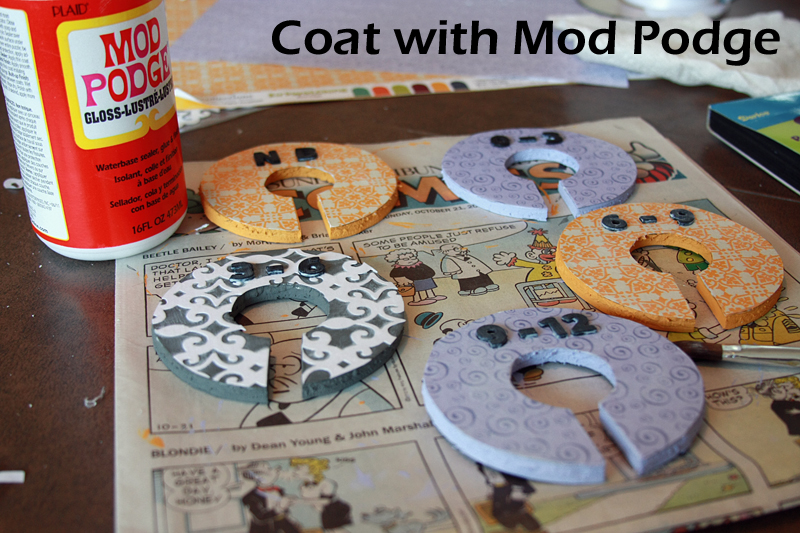
After you finish one side, flip over and repeat with the other side. When finished, each side should have a total of 5 coats of Mod Podge.
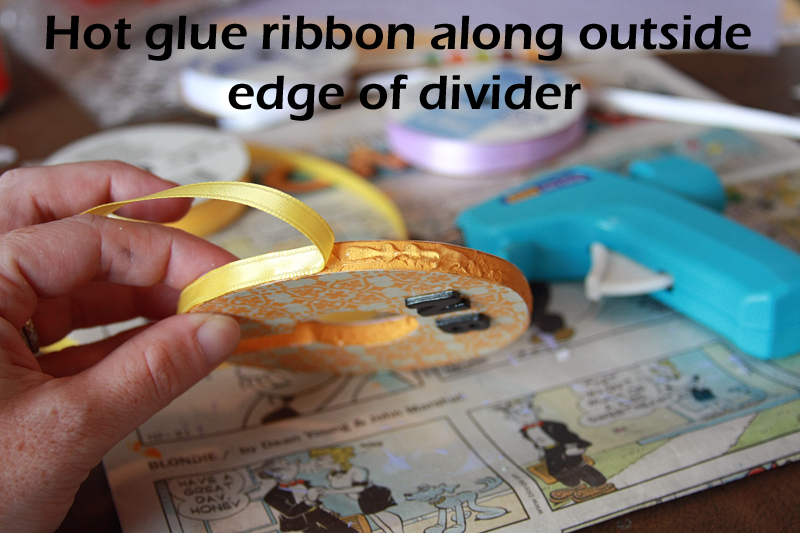
Last step here! Pick out coordinating 1/4"-wide ribbon to cover up those lovely rough edges. After covering all the edges with matching ribbon, I decided a coordinating-but-not-matching color actually looks better. So ripped it all off and did it again.
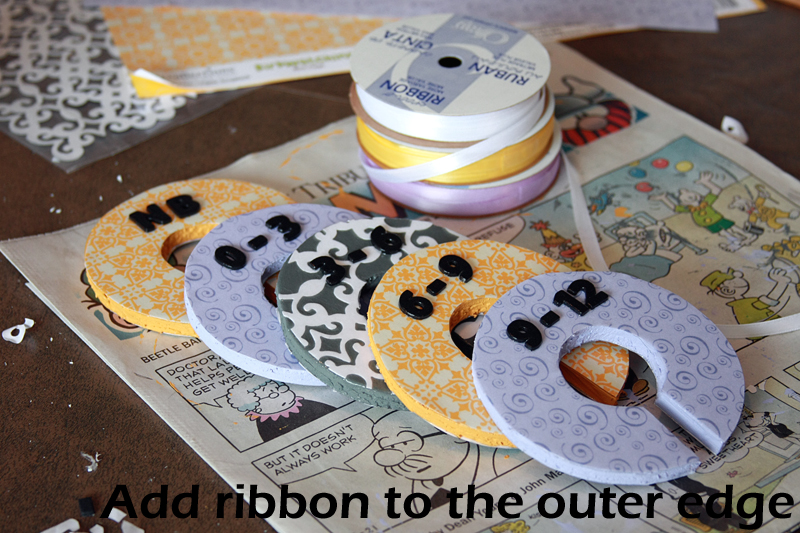
Using a hot glue gun (I like the low heat version), generously glue the ribbon along the outer edge of each divider. Press down firmly.
And ta da! Finished clothing dividers. Place them in your closet and admire your handy work.
Final price to make your own dividers?
2 6mm-thick pieces of foam board (2 @ $0.89) = $1.78
3 sheets Scrapbook paper (3 @ $0.59) = $1.77
3 colors acrylic paint (3 @ $1.00) = $3.00
1/2" foam number and letter stickers = $2.39
3 spools 1/4"-wide ribbon (3 @ $0.50) = $1.50
Final Price = $10.44
Of course, if you plan ahead and hit up some sales or use 40% off coupons, you can always do this for cheaper. In comparison, you can buy 5 plastic rings with stickers printed and stuck on for about $13.50 from Etsy. Not a huge difference in the long run, but I still like picking my own coordinating pieces.


0 comments:
Post a Comment