Monday, March 31, 2008

I blame it on the cheese...


Ever since before Easter I have had my eye on this yummy-looking macaroni and ham bake in the March Cooking Light magazine (page 204 if you're interested). I was all prepped and ready to go last Tuesday, but my sister and her husband took off for Ohio to look for a new house (they are moving in May) and my other roommate was at home in Puerto Rico for her spring break.

I was not about to bake a huge casserole for little ol' me. No way no how am I ever going to bake a casserole for me to eat day after day, for lunch and dinner. I just can't handle it.

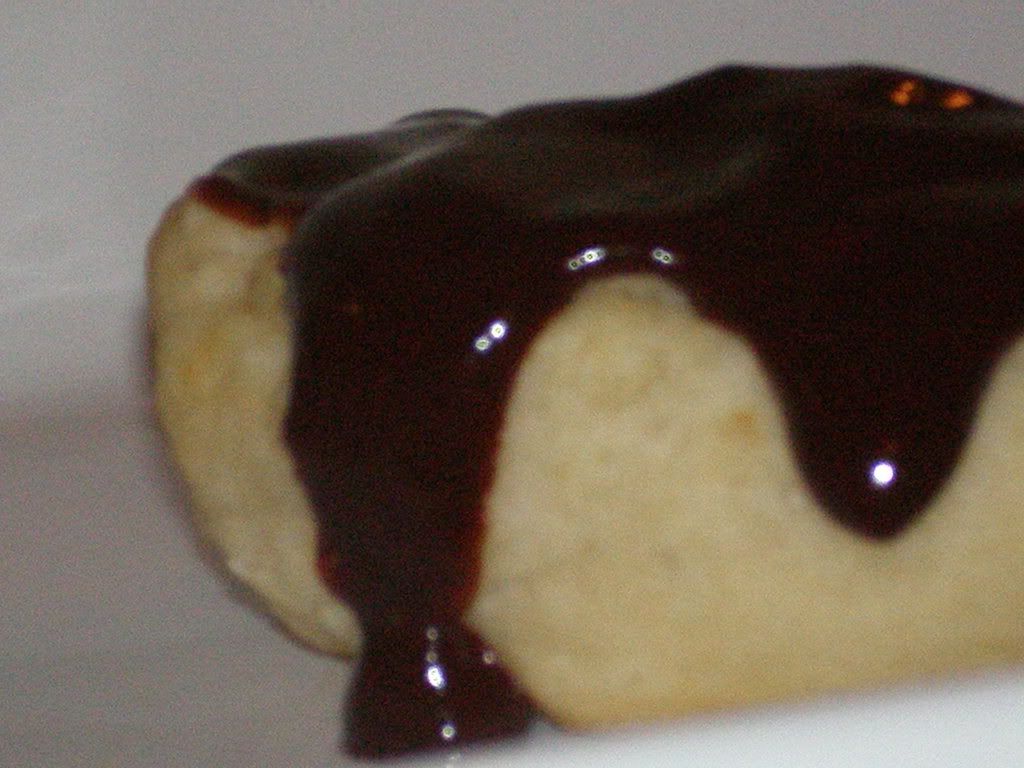
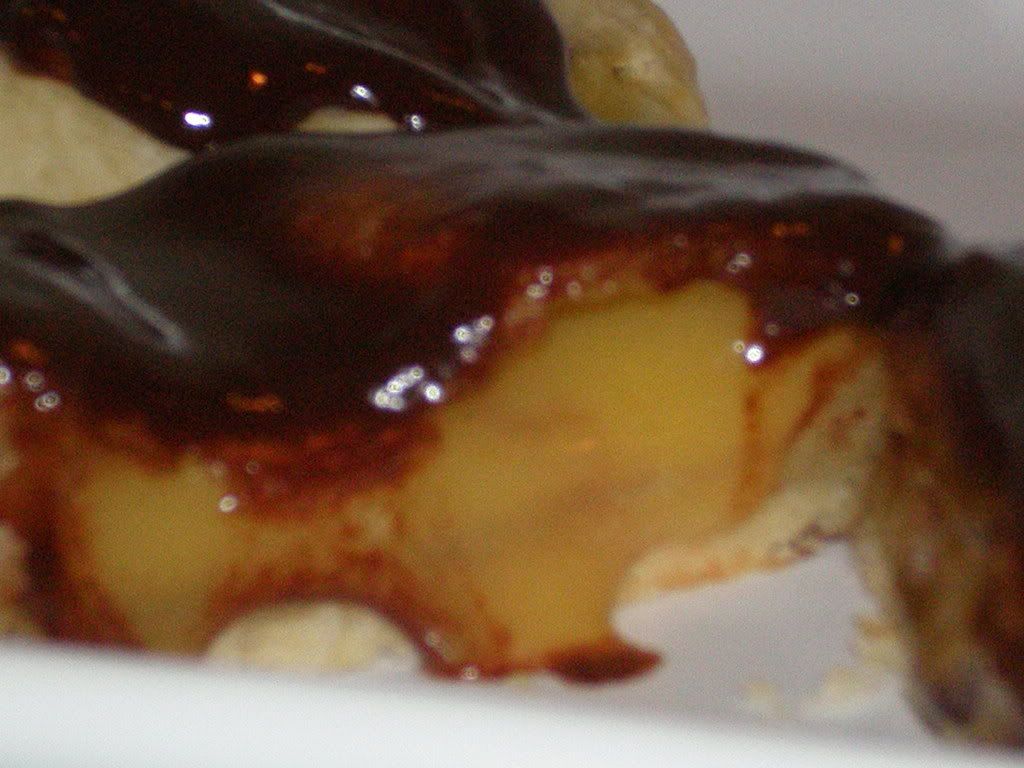
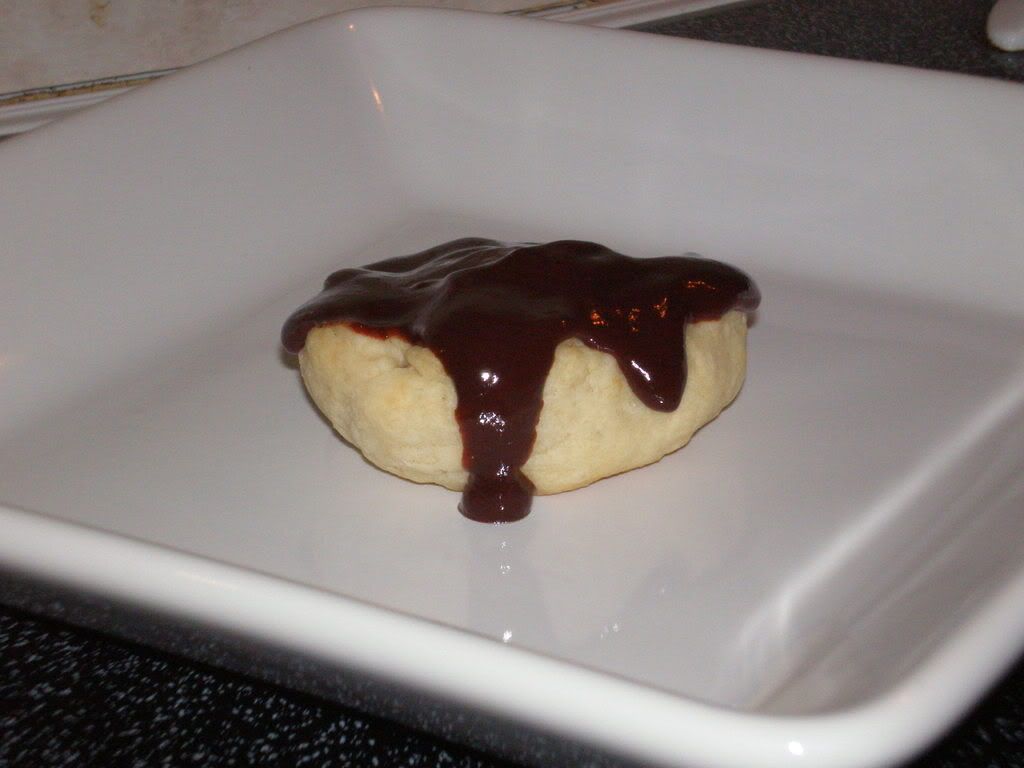
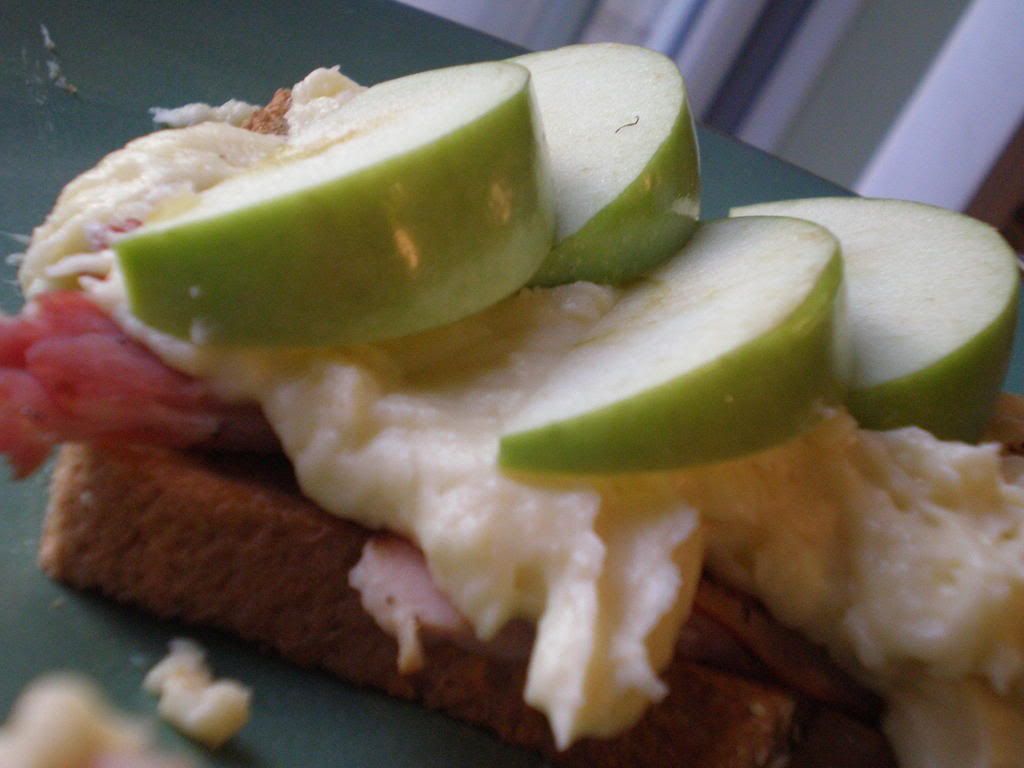
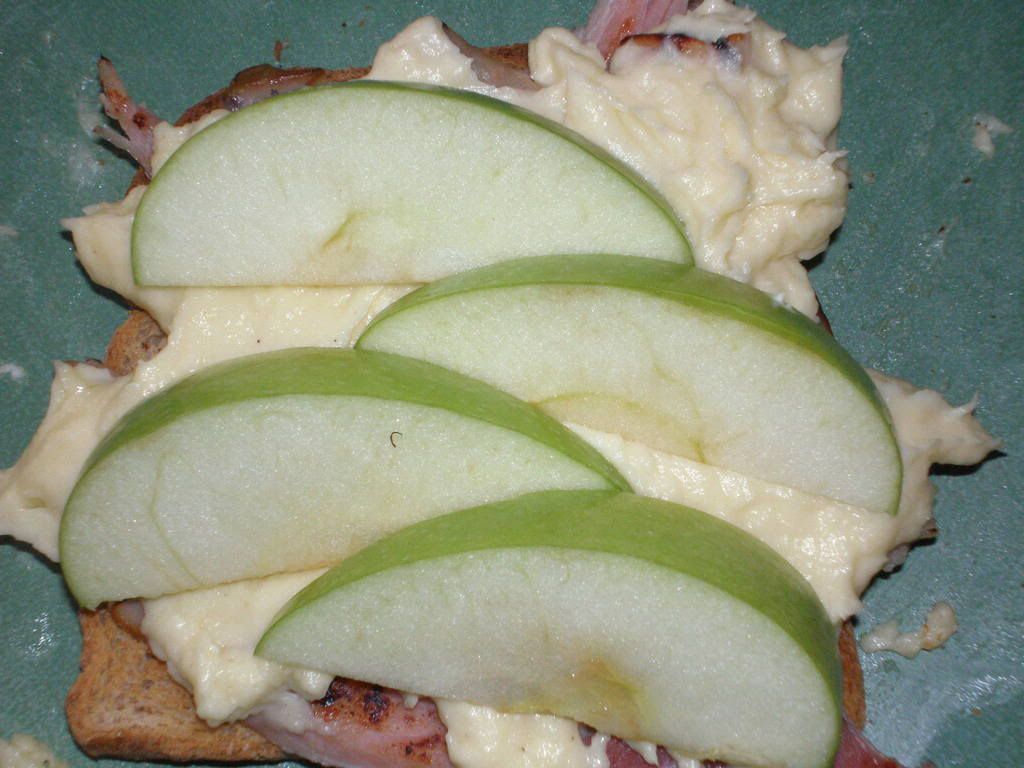
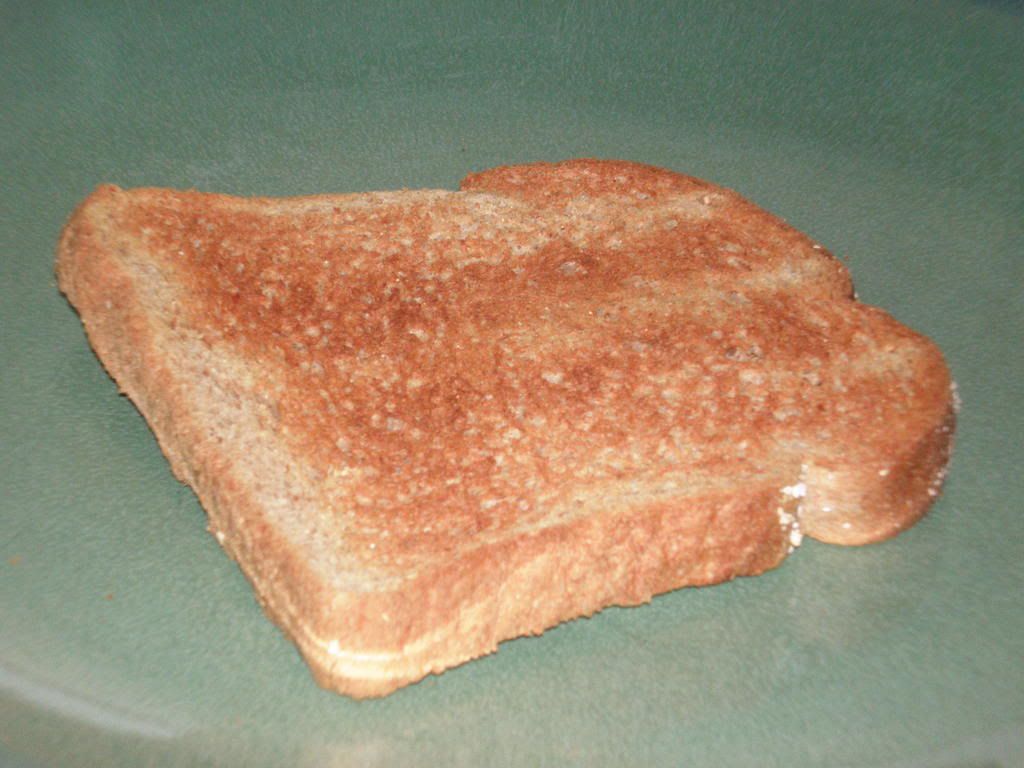
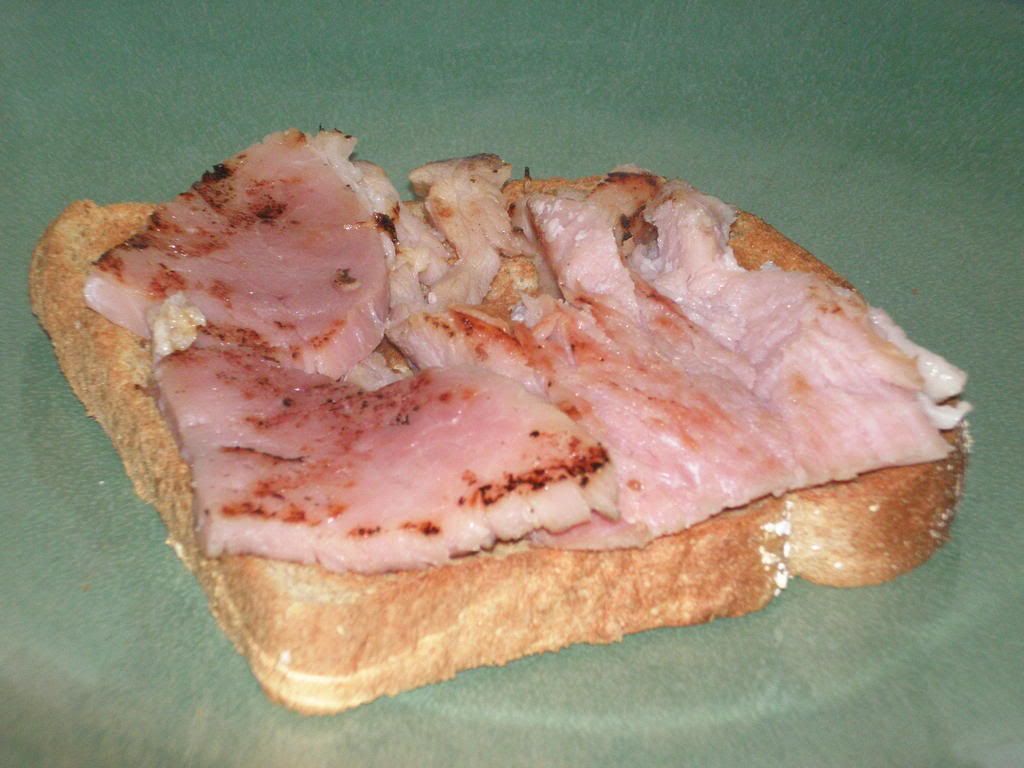
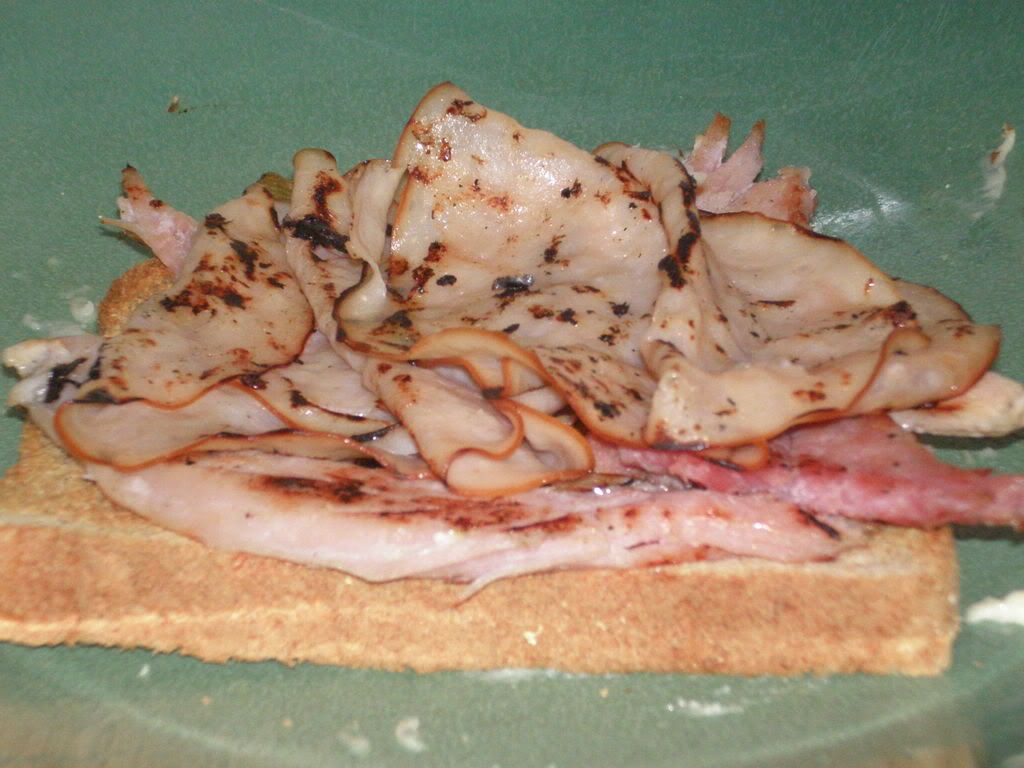
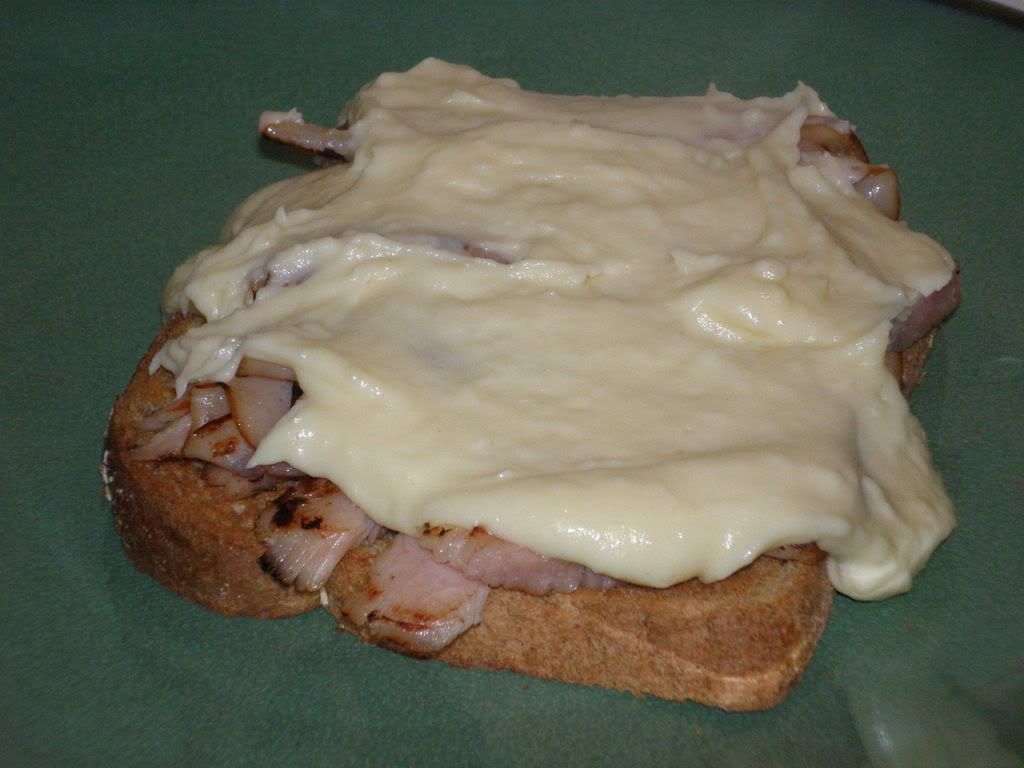
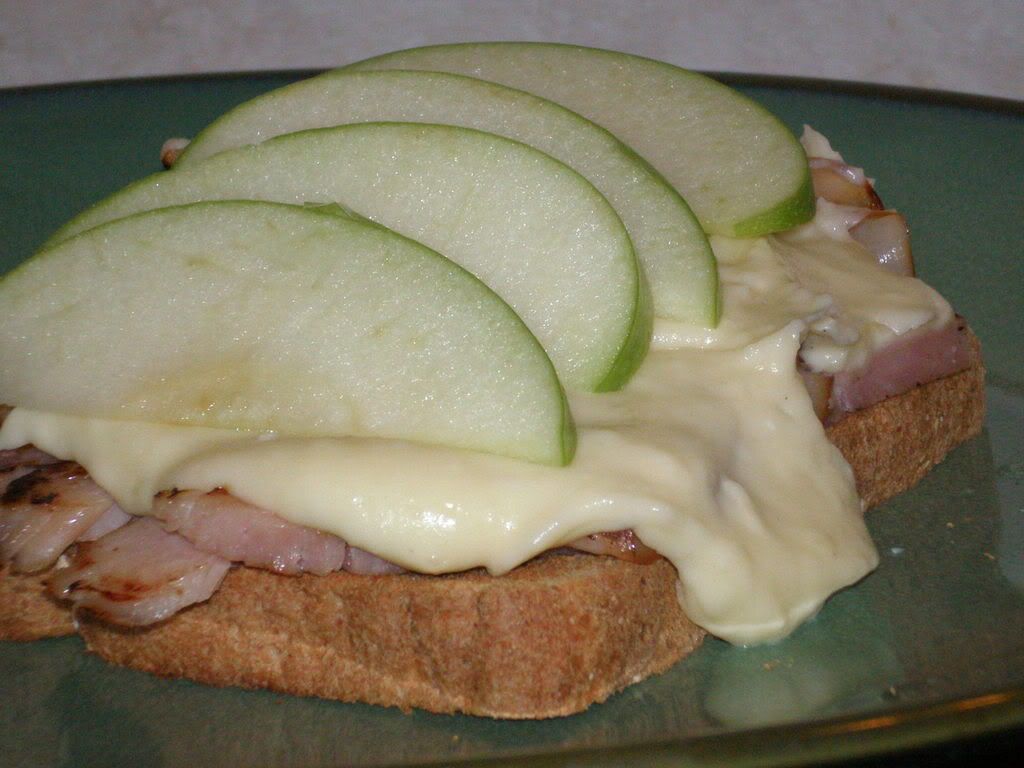
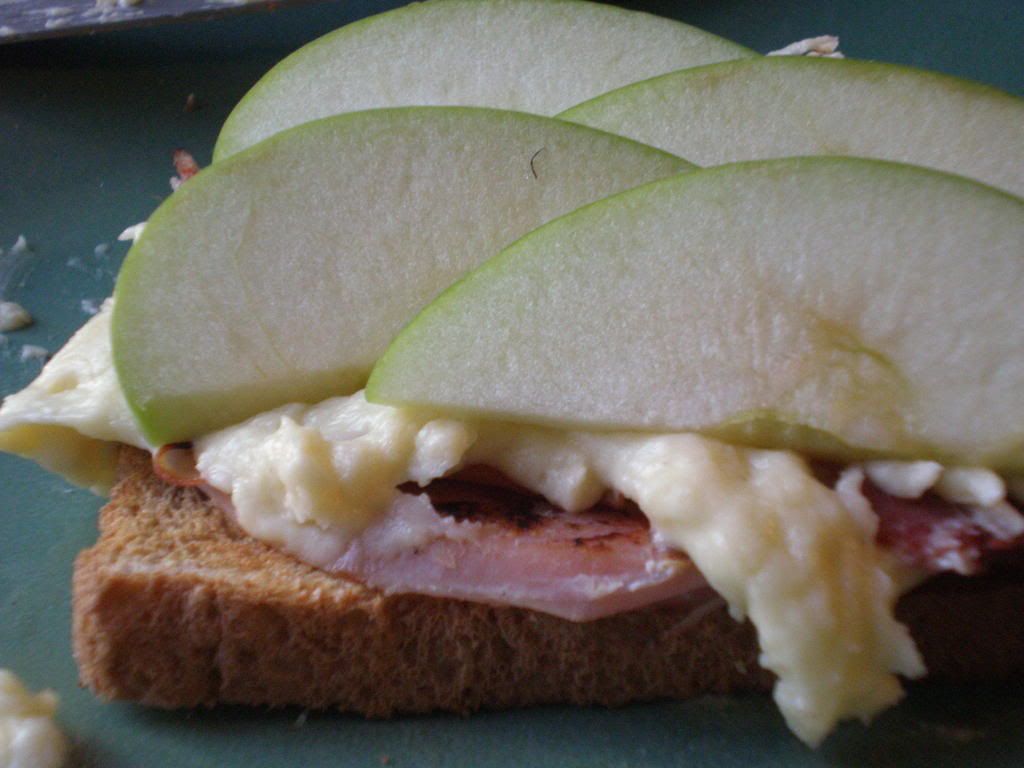
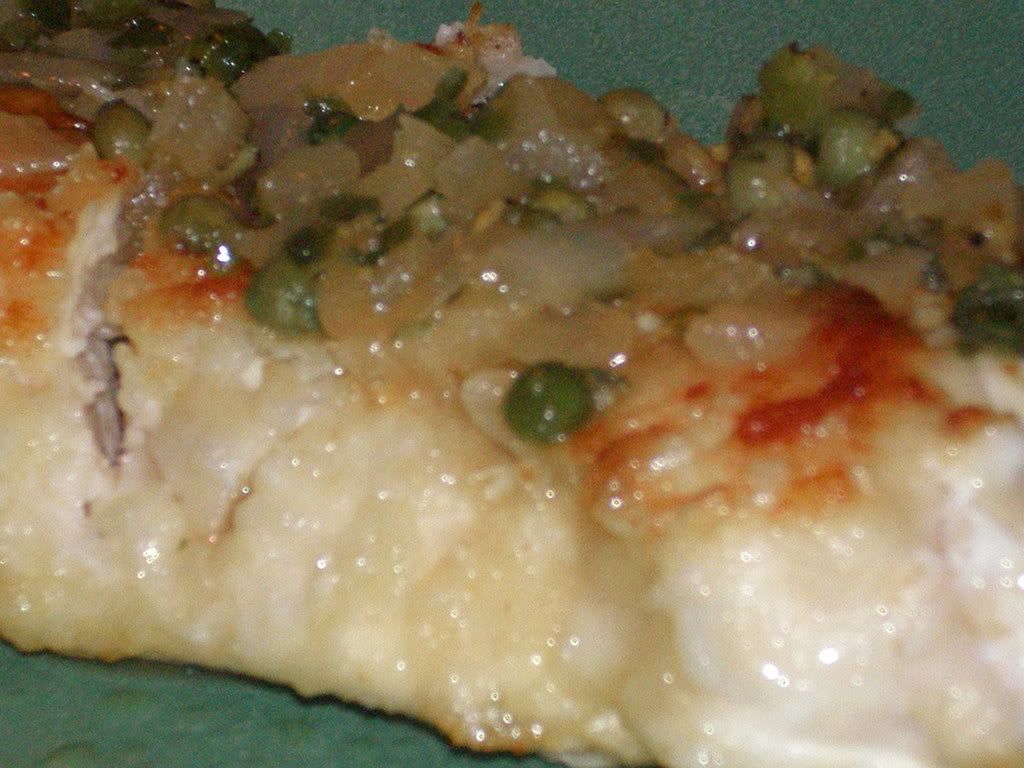
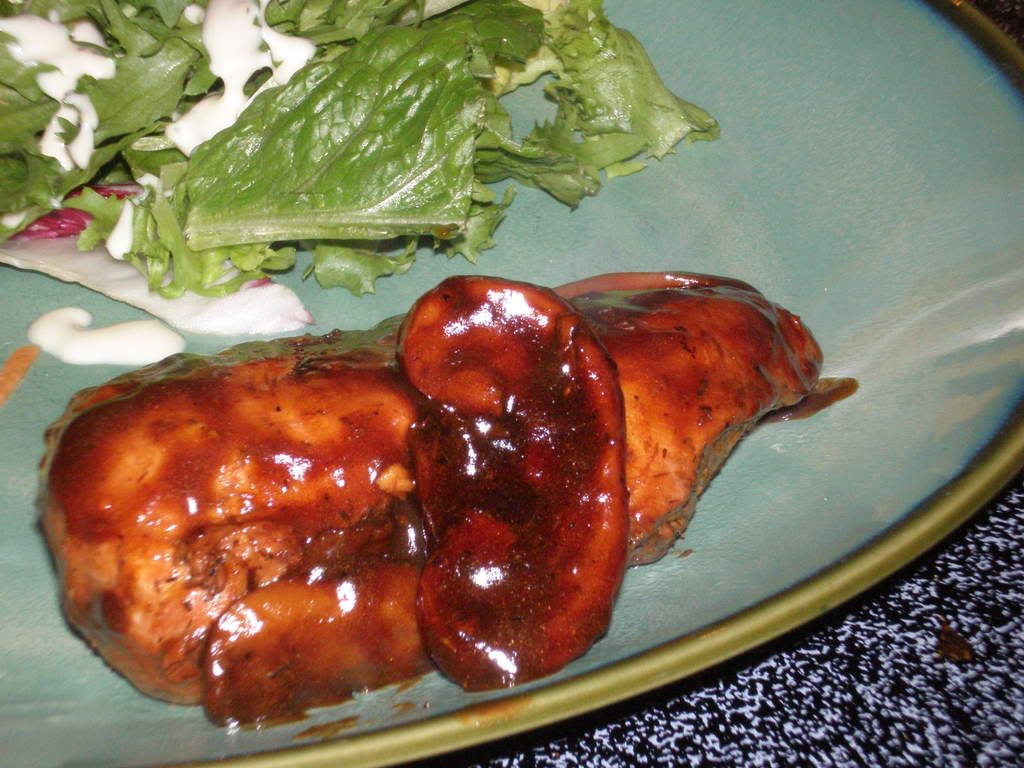
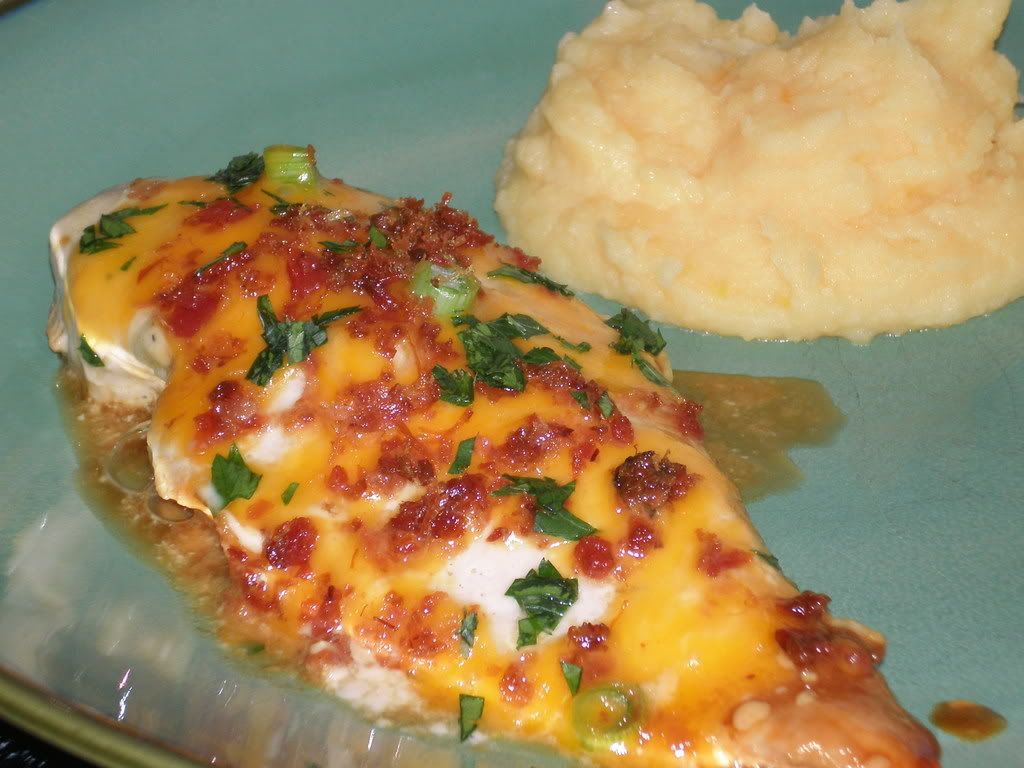
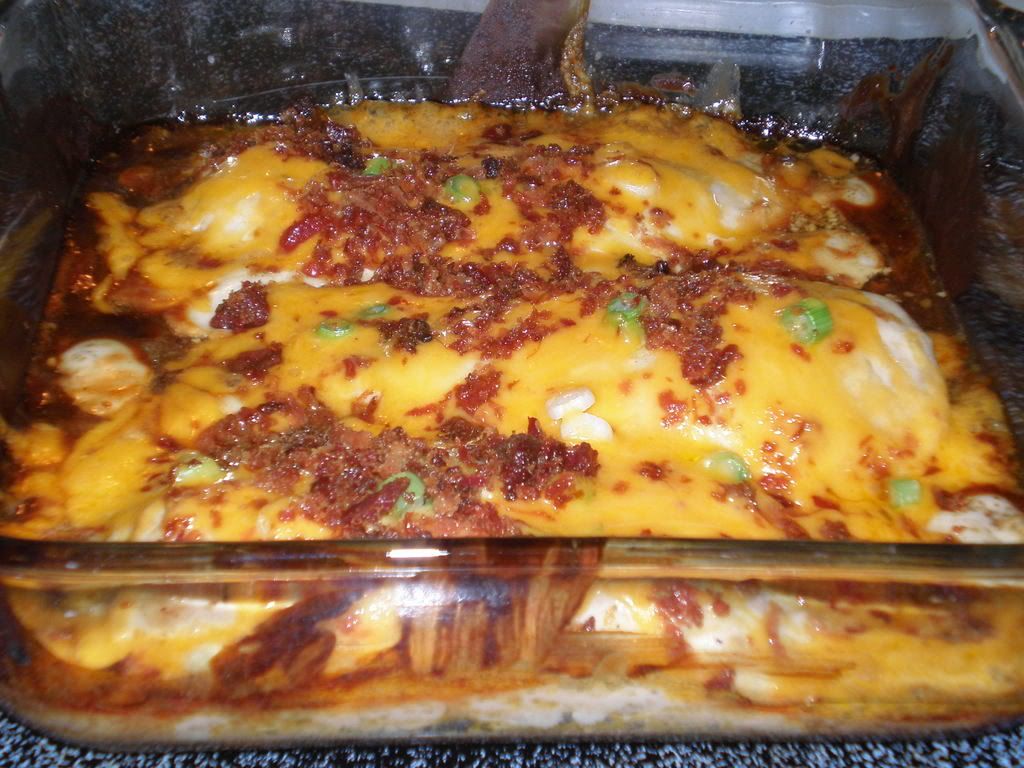
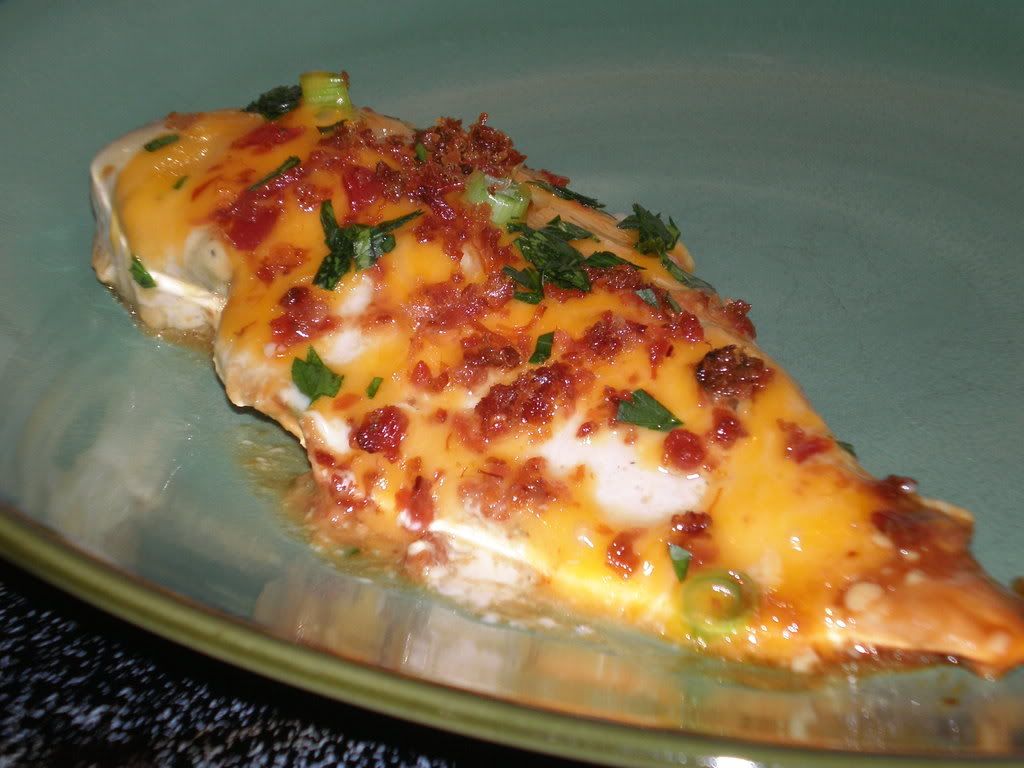
So I didn't make it. I made my lovely twist-on-a-Hot-Brown instead. Which worked just as well.


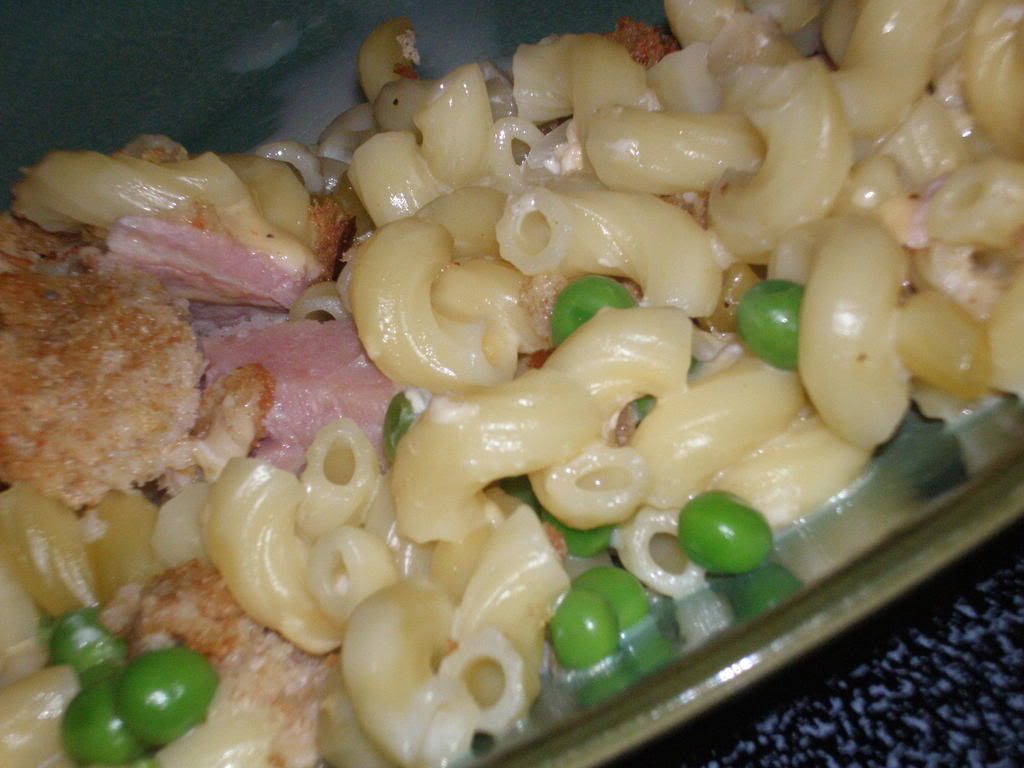
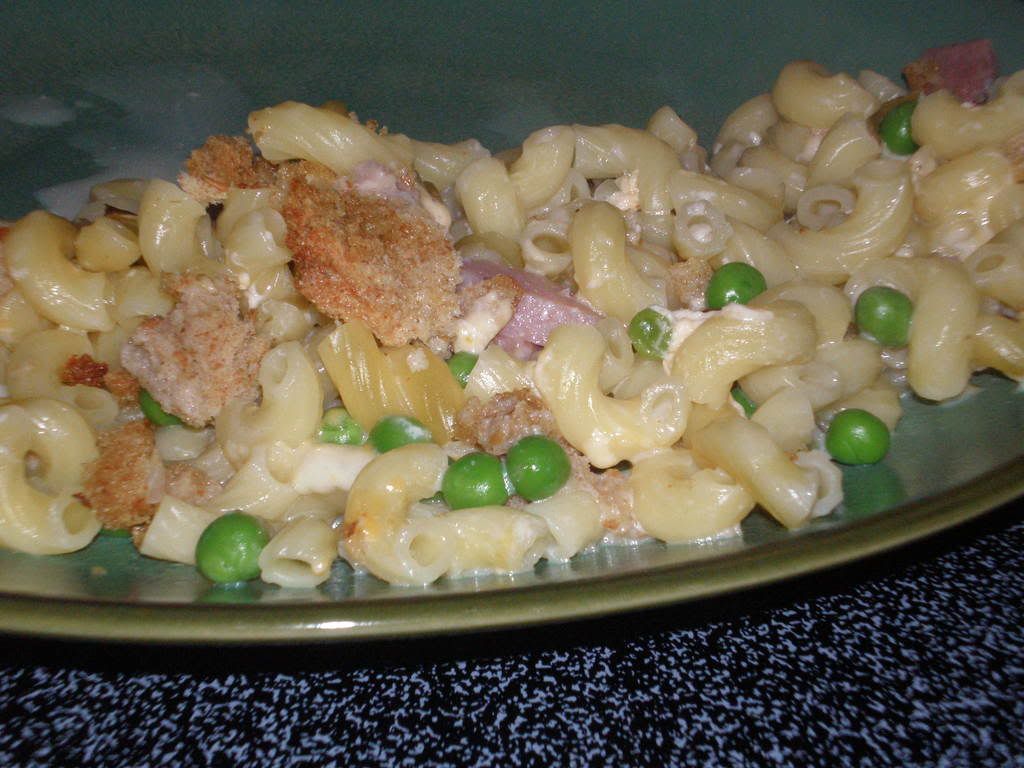
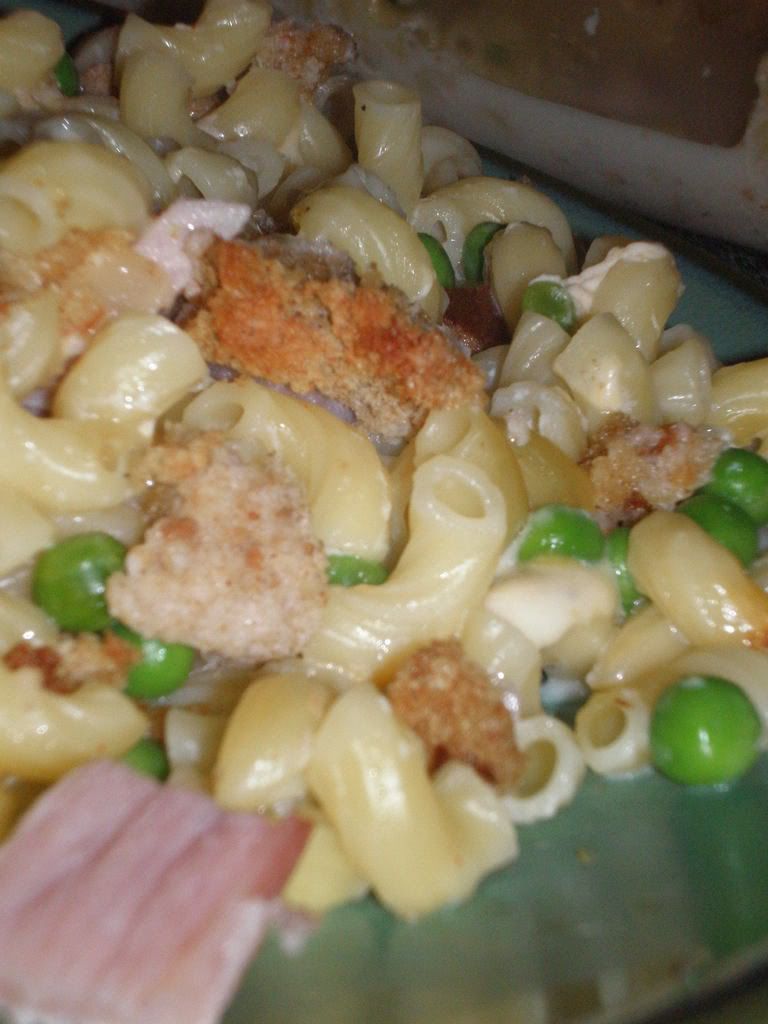
So about this casserole -- I mean, Ham and Cheese Macaroni Bake with Peas. It looked very appetizing in the picture, hence why I wanted to make it, but it didn't quite turn out how I thought it would.

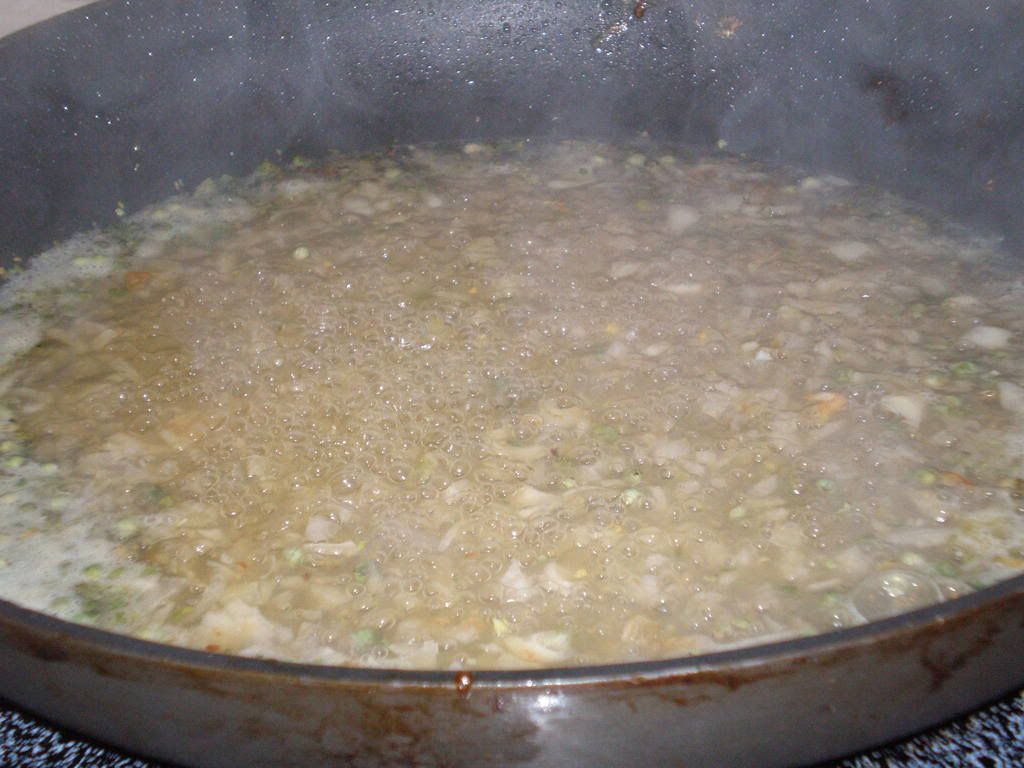
First off, I scoured the cheese bin, looking for a block of Swiss and I accidentally picked up the "Light" Swiss cheese. Everything was going just fine and dandy while putting together this recipe. Then enter the cheese. After hastily shredding my 2 cups of cheese, I shook it into the pan with the simmering milk mixture, and it completely globbed up on me. Even after lots of stirring.

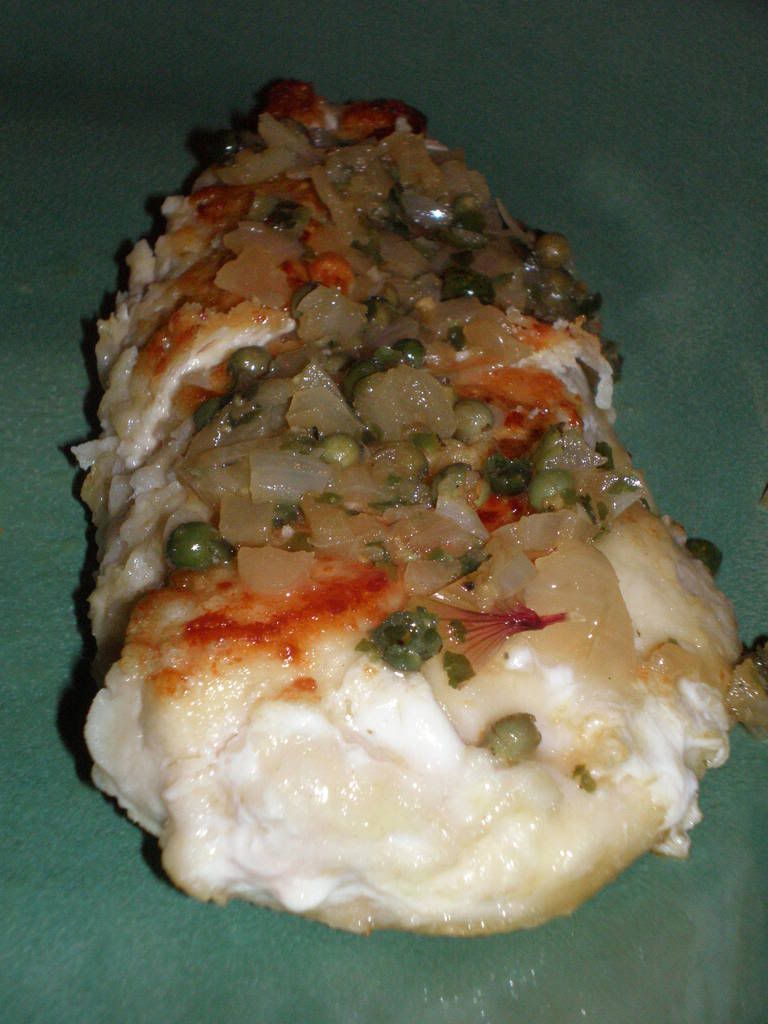
I mixed the clumpy sauce into the noodles, peas, and ham and then tossed it in the oven, hoping some heat would help the issue. I was wrong. It was still clumpy when we were eating it, not all melty and gooey as I had hoped.

However, I will say, even with all the cheese globs, it was still pretty tasty -- three of us polished half of it off. I really liked the extra flavor the red pepper gave. So maybe next time I will try the "regular, full-fat" Swiss cheese, and I will have normal looking macaroni bake.


Ham and Cheese Macaroni Bake with Peas

1 lb. uncooked medium elbow macaroni
1 1/2 c. chopped lean ham
1 1/2 c. frozen peas
Cooking spray
1/2 c. finely chopped onion
3 cups 2% reduced fat milk
1 c. (4 0z.) shredded reduced-fat extrasharp cheddar cheese
1 c. (4 oz.) shredded Swiss Cheese
3/4 tsp. salt
1/4 tsp. freshly ground black pepper
1/8 tsp. ground red pepper
2 (1-oz) slices white bread
2 tbsp. butter, melted

Preheat oven to 400 degrees.

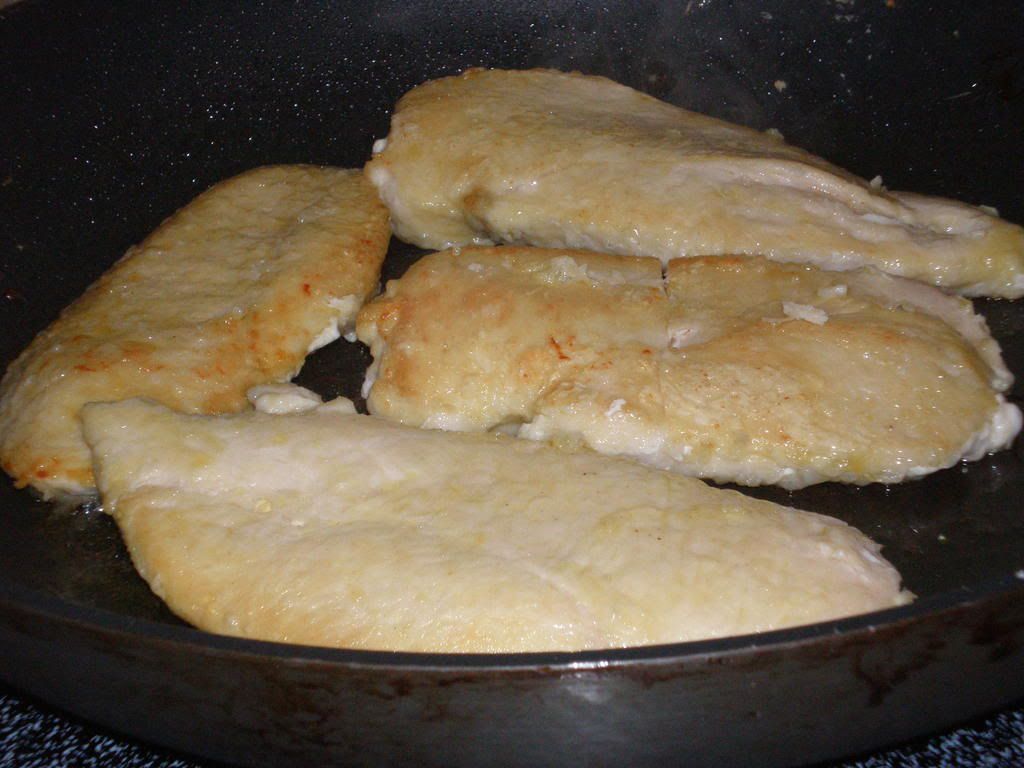
Cook pasta in boiling water 6 minutes. Drain and rinse with cold water; drain. Combine pasta, ham, and peas in a large bowl.

Heat a medium saucepan over medium heat. Coat pan with cooking spray. Add onion to pan; cook 4 minutes, stirring frequently. Add milk; bring to simmer. Remove from heat; stir in cheeses, salt, and peppers. Pour cheese mixture over pasta mixture; stir to coat. Spoon pasta mixture into a 13x9-inch baking dish coated with cooking spray.

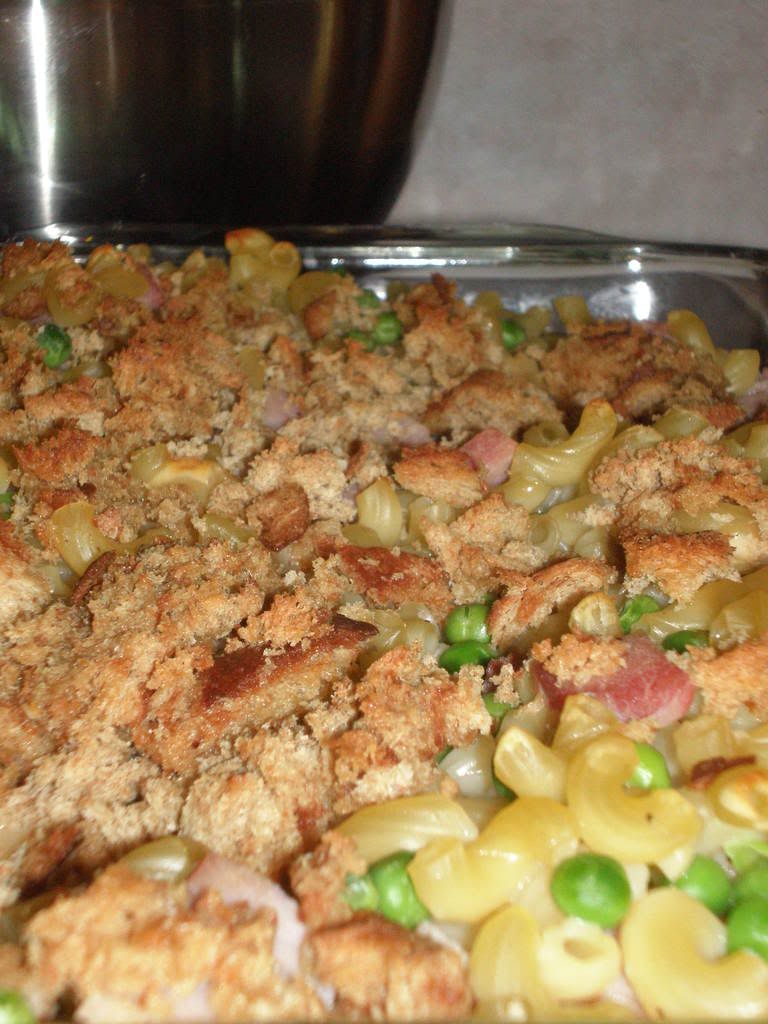
Place bread in a food prcessor; pulse 10 times or until coarse crumbs measure 1 1/4 cups. Combine breadcrumbs and butter in a bowl. Arrange breadcrumb mixture evenly over pasta mixture. Bake at 400 for 20 minutes or until lightly browned.

Yield: 8 servings.


A few side notes:

Make sure to prep as much as you can ahead of time -- as in, don't wait until you are almost done cooking the onions to shred the cheese. Not that I did this or anything...

Use the white bread -- I used wheat and it had a pretty distinctive taste.

I used regular cheddar and "light" skim, as well as fat free milk. Chalk whichever one you want up to clumpy cheese.


Nutrition Facts
Amount per serving
Calories 476Calories from fat 149
% Daily Value
Total Fat 16.6g26%
Saturated Fat 9.3g47%
Trans Fat 0.0g
Cholesterol 57mg19%
Sodium 772mg32%
Total Carbs 56.8g19%
Dietary Fiber 3.9g15%
Sugars 8.5g
Protein 23.9g
Vitamin A 15%Vitamin C 21%
Calcium 35%Iron 17%

Saturday, March 29, 2008

A Chocolate-Covered Mess


So I had an idea a few days ago for my roommate's bridal shower -- a pastry-type ball filled with pudding and fruit or something like that. Turns out that this little combination is a little bit more difficult to pull off than I expected.

I decided to use a regular pie crust (since I know it doesn't rise and holds its shape fairly well through cooking), and regular french vanilla pudding and raspberries. First off, the whole "ball" idea didn't work so hot. I kept squeezing out a lot of the pudding, which was frustrating me to no end. So I decided to switch it up, and make little bowls, then cover the top with another piece of pie crust. It worked a lot better.


Except now I basically had made covered tartlets. Without a pan. So they looked pretty ugly and misshapen. Le sigh, I guess every idea isn't meant to come to fruition. However, ugly as they may have been, they were pretty tasty, so I may just have to splurge on a mini-tart pan for the party. Darn. :)


Chocolate-Covered Tartlets

Pie Crust:

1 c. all-purpose flour
1/2 tsp. salt
1/3 c. plus 1 tbsp. shortening (I used 3 1/3 tbsp. shortening and 3 tbsp. margarine)
2-3 tbsp. cold water

Filling:
1 pkg. Jell-o Instant French Vanilla Pudding
Raspberries
2 cups cold milk

Preheat oven to 400 degrees.

Mix flour and salt in bowl. Cut in shortening, then sprinkle in water until dough almost cleans side of bowl. Gather dough into ball. Tear off small sections of dough and form small cups.

Beat pudding mix into 2 cups cold milk in bowl with wire whisk for 2 minutes. Let sit for 5 minutes. Stir in raspberries.

Fill pie cups 2/3 of the way full with pudding/fruit mixture. Cover and seal with another piece of dough.

Bake for about 15 minutes or until crust is a light golden brown.

Chocolate Ganache

1 tbsp. heavy whipping cream
1/2 tbsp. unsalted butter
1 1/2 oz. semi-sweet chocolate, finely chopped

Heat cream and butter in saucepan over medium heat, until the butter is melted, and mixture is hot. Remove pan from heat and stir in chocolate, until melted and well combined.

Pour ganache over tartlets and let sit until chocolate is set and no longer runny. Enjoy!

Tuesday, March 25, 2008

Artery Clogging Goodness


Originially, I had planned to try out a tasty-looking Ham and Macaroni Bake recipe from my new Cooking Light magazine, but as I ended up being the only one around for dinner... You know, casseroles just don't work for one person. So what was I to do with all this leftover ham from Easter? My housemates have run off, leaving it up to me to eat it all.

A few days ago, a post for ham recipes prompted me to start thinking about what all I could use the leftover ham for. I immediately thought of Kentucky Hot Browns, before remembering that the base meat is turkey -- not ham. Now, I must admit, even though I grew up in Kentucky I have never had a Kentucky Hot Brown, much less even heard of one until a few months ago (thanks to Throwdown with Bobby Flay).


An original Kentucky Hot Brown consists of toast topped with turkey, tomato, cheese gravy, and two strips of bacon. Well, I had ham. Not turkey. And I don't like tomatoes. So instead, I put a little spin on the good ol' Hot Brown and ended up with something pretty fantastic.

The D.C. Hot Brown
Start with a piece of toast.
Fry up a little bit of ham and place on
top.
Fry thin-sliced turkey, and add to top. I used regular deli-style turkey slices.
Smother with cheese gravy.
Top with a sliced apple. I used a quarter
of an apple per Hot Brown.

In other words, this basically isn't a Hot Brown at all. But I honestly have no idea what to call it. Therefore, it becomes the D.C. Hot Brown.

I wasn't really sure about the whole apple-on-top idea, but I was looking for something to replace the tomato on the original Hot Brown. Turns out, it was an excellent idea. I used Granny Smith apples, and I would definitely recommend using them, as they add just the right amount of sweetness and bite to the dish.

While I did come up with the ingredients, I borrowed the cheese gravy recipe from the Original Hot Brown from Allrecipes.com.

Original Hot Brown
(just the Cheese Gravy part)

2 Tbsp. butter
2 Tbsp. flour
3/4 c. milk
1 Tbsp and 1 1/2 tsp. parmesan cheese, grated
1 egg, beaten
1 1/2 tsp. heavy cream
salt and pepper to taste

Melt butter in a saucepan over medium heat. Stir in flour with a whisk or fork, and continue to cook and stir until it begins to brown slightly. Gradually whisk in milk so that no lumps form, then bring to a boil, stirring constantly. Mix in the parmesan cheese and then stir in the beaten egg to thicken. Do not allow the sauce to boil once the egg has been mixed in. Remove from heat and stir in cream.

**I added in about 1/2 an egg (since 1 egg is used in the full recipe for 4 servings) and I probably added in too much.


Nutrition Facts
Amount per serving
Calories 626Calories from fat 269
% Daily Value
Total Fat 29.9g46%
Saturated Fat 14.3g72%
Trans Fat 0.0g
Cholesterol 308mg103%
Sodium 1987mg83%
Total Carbs 46.6g16%
Dietary Fiber 3.2g13%
Sugars 11.0g
Protein 41.5g
Vitamin A 17%Vitamin C 7%
Calcium 30%Iron 28%

Sunday, March 23, 2008

Happy Easter!

The Ultimate Peep Show

I know, I know this picture has been going around for a while, but it's so darn cute I couldn't help posting here also.

Here is the link to this year's Washington Post Peep Diorama Contest:
http://www.washingtonpost.com/wp-dyn/content/article/2008/03/20/AR2008032002753.html

Sorry, no new pics or recipes for today -- just wanted to wish everyone out there a Happy Easter! However, we have a TON of ham leftover, so expect some ham recipes showing up in the near future!

Wednesday, March 19, 2008

Happy St. Patty's Day -- slightly belated


Yes, I am well aware that St. Patty's day was on Monday, a full two days ago. However, I had to make an emergency trip to Kansas City for a few days. Long story short -- Adam's cousin died, so we were in town for a funeral. Not the best way to spend St. Patty's day, but when something of that nature arises, one can't exactly be picky.

Anyhoo, so on my flight back to DC yesterday, I decided to grab some reading material and actually ended up buying my first Cooking Light magazine. I have heard great things about this magazine, and know that they often have delicious recipes. And I figured, why not? Just to check it out.

I ended up really liking it! I would totally subscribe except I'm moving in the next couple months and I really don't want to deal with changing all my addresses. As I'm flipping through, a recipe for Chicken with Green Peppercorn Sauce catches my eye. What the heck is green peppercorn, and what makes it so different?

As I'm at the store today, I realized the first major difference -- it cost me $8 freaking dollars just for a jar of them! But as I was set on making this, I went ahead and bought them anyway. The recipe was fairly easy to make, and for once my chicken actually turned out cooked and not burnt on the stovetop.

(Isn't it beautiful?)


Chicken with Green Peppercorn Sauce

1/4 cup all-purpose flour
1/2 teaspoon paprika
4 (6-oz.) skinless, boneless chicken breast halves
1/2 teaspoon of salt
1 tablespoon of olive oil
1/4 cup finely chopped shallots
2/3 cup dry white wine
1/2 cup fat-free, less-sodium chicken broth
1 tablespoon green peppercorns, crushed
1 tablespoon of butter


Combine flour and paprika in a shallow dish. Sprinkle chicken with salt. Dredge chicken in flour mixture.

Heat oil in a large nonstick skillet over medium heat. Add chicken to pan; cook 5 minutes on each side or until done. Remove chicken from pan; keep warm.

Increase heat to medium-high. Add shallots to pan; saute 1 minute. Stir in wine, broth, and peppercorns; bring to a boil. Cook until reduced to 1/4 cup (about 7 minutes). Remove from heat; stir in butter.

Yields: 4 servings


Going back over this recipe I realize now that I completely forgot to add the butter at the end, and we didn't have any paprika so I didn't add that either. Maybe that explains why the dish was good, but not wow-me-spectacular. I felt like it was missing something, of course, butter. Ah, better luck next time.


Nutrition Facts
Amount per serving
Calories 456Calories from fat 173
% Daily Value
Total Fat 19.2g30%
Saturated Fat 5.8g29%
Cholesterol 159mg53%
Sodium 557mg23%
Total Carbs 10.0g3%
Dietary Fiber 0.7g3%
Protein 51.2g
Vitamin A 9%Vitamin C 2%
Calcium 4%Iron 18%

Wednesday, March 12, 2008

I Hate Big Bewbies!


Chicken bewbies, that is. It seems like everytime I let someone else pick up chicken at the store for me, I end up with gigantic chicken breasts that take forever to cook. See, I know this Chicken Marsala recipe from Weight Watchers works in the time frame it says because I have made it before and it was super tasty. However, it took almost twice as long to cook the breasts, so my sauce became too reduced and I had to add extra wine and broth -- but mostly wine as I ran out of broth. I guess it wasn't too bad, it was just slightly thicker and darker than I remember.


Chicken Marsala
2 tsp. olive oil
1 cup mushrooms, fresh, sliced
1 lb. uncooked boneless, skinless chicken breasts (four 4 oz. pieces)
1 tsp. dried thyme
1/2 tsp. table salt
1/4 tsp. black pepper
1/2 c. wine, Marsala variety
1 1/4 c. canned beef broth, reduced-sodium, divided
1 1/2 tbsp. cornstarch

Heat oil in a large skillet over medium-high heat. Add muschrooms and saute until tender and releasing liquid, about 5 min.


Meanwhile, place chicken on a plate and season both sides with thyme, salt, and pepper. Move mushrooms to outer edge of skillet once cooked. Place chicken in center of skillet and saute until golden, about 2-3 minutes each side.


Add wine to skillet; simmer 1 minute. Add 3/4 cup of broth and simmer, uncovered, until chicken is tender and cooked through, about 8 minutes. Dissolve cornstarch in remaining 1/2 cup of broth in a small bowl; add to skillet. Simmer until sauce thickens, stirring constantly and incorporating mushrooms into the liquid, about 1 min.


Serve chicken with mushroom sauce spooned over top.
Yields about 3 oz. of chicken and 1/3 cup of sauce per serving.
WW Point value: 4
Pretty good, especially for a "diet-type" meal.


Nutrition Facts
Amount per serving
Calories 288Calories from fat 100
% Daily Value
Total Fat 11.217%
Saturated Fat 2.8g14%
Trans Fat 0.0g
Cholesterol 101mg34%
Sodium 630mg26%
Total Carbs 4.6g2%
Sugars 0.7g
Protein 34.9g
Vitamin A 1%Vitamin C 1%
Calcium 3%Iron 12%

Tuesday, March 11, 2008

Super Easy Mexican Night


Mmm. I heart Mexican food. And I have totally been craving lately. Let's see, I went to On the Border with Adam on Friday, I had good ol' Taco Bell last night, and I whipped up some more south of the border treats tonight too. At least I'm not making baked good after baked good any more -- although I am having to restrain myself a bit.

Anyhoo, so I haven't made Rockstar's famous Slow Cooker Salsa Chicken in a while, and I was looking for a simple easy meal to make. It's so simple, in fact, that I was done making the entire meal by 3:20pm this afternoon -- all I had to do was wait for it to cook.

Slow Cooker Salsa Chicken
4 chicken breasts
1/2 package taco seasoning
1 can reduced fat cream of mushroom soup
1 cup salsa
1 green pepper, roughly chopped
1/4 cup chicken broth
1/2 cup reduced fat sour cream
4 servings brown rice
Place chicken breasts and chopped peppers in a slow cooker with broth.


In separate small bowl, combine soup, salsa and seasonings. Stir until combined. Pour mixture over chicken.


Cook on low for 5 hours. Chicken should shred easily towards the end of cooking. Serve over hot brown rice.


So I always forget the rice, but it's still super tasty anyways. I'm glad I had 3 breasts in the cooker, because they were so tender it took me until the third breast to keep it together for the picture.

Now that I think about it, I'm sure you're supposed to shred the chicken and mix it in with the rice, but we just eat it as the whole breast and it's still mmm mmm good.

As for my mom's Bean Dip. It's super easy (like the chicken) and uses a whopping 4 ingredients.


Bean Dip
1 can refried beans
Sour cream
Salsa
Shredded cheese (usually cheddar, pepperjack, or the mexican style mixture)

In a small bowl, combine refried beans and salsa, to taste. (I use approximately 1/4 cup of salsa -- just make sure the mixture doesn't become too runny or too spicy.) Spread mix on the bottom of an 8x8 baking dish. Layer with sour cream, to taste. (I typically make it about 1/4-1/2 inch thick.) Cover with shredded cheese.


Enjoy with Tostitos or any other corn chips!


Sorry that it's mostly a "to taste" recipe, but some people tend to like more or less sour cream than others. Not to mention I've never seen a recipe for this -- gotta love those hand me down family recipes.

Thursday, March 6, 2008

Almost as good as Grandma's


I have been absolutely craving cinnamon rolls/caramel rolls so bad lately. I'm blaming this craving on the fact that I have to walk past Cinnabon every time I go grab dinner from the food court while I'm working. And I must say that I absolutely heart Cinnabon. Yes, I was rather upset when I had a layover in the Minneapolis airport a couple weeks ago and discovered that Cinnabon had been replaced by some burrito place. Who does that?

So I finally gave in to my craving today, and pulled out my Grandma's Caramel Roll recipe. Every time we go home for Christmas there are always these rolls waiting for us in the freezer. However, after looking at the recipe, I felt like half of it was missing. It doesn't say anything about how to make the dough -- simply to thaw out frozen dough.


I quickly checked through some recipes on Allrecipes.com and settled on using refrigerated biscuit dough, and they still turned out scrumptious. I basically just eyeballed everything, so I unfortunately don't have exact amounts to give you, but I'll do my best. And actually, these were super easy to make!


Caramel Rolls

For the Caramel:
1/2 cup whipping cream
1/3 cup white sugar
1 cup brown sugar
1 tablespoon butter

For the Rolls:
Butter
Sugar
Cinnamon
Refrigerated biscuit dough (I used Pillsbury Grands Buttermilk)

Blend separate biscuits into one ball of dough, let sit until it reaches room temperature. Coat large area of table/counter with flour. Once the dough is room temperature, roll dough into a rectangle. Cover with butter, then sprinkle with cinnamon and sugar (I was very generous with the portions). Roll up and cut into slices.

Combine the caramel ingredients in a saucepan and melt. Do not boil; just melt over low heat. Pour caramel into bottom of pan, and arrange rolls in pan.

Bake 20-25 minutes at 350 degrees.


Well, they turned out slightly undercooked, but I really didn't care since I like mine gooey anyways. (I put mine in for only 20 min.) I still ate two of them. Okay, well, one big one and the little guy in the middle (he looked lonely). AND, not to mention that I got caramel ALL over my jeans when flipping the pan over onto the plate. Oops. Might want to wait for them to cool a bit next time before doing that.


Monday, March 3, 2008

No more procrastinating - my Meme!

Nemmie, from the wonderful Cast Sugar, and also a KC Realie, has tagged me for a meme. When I first saw this, I was like "what the heck is a meme?" Apparently, you simply list 5 (or however many) facts about yourself, and then pass on the tag. I do feel honored though to be tagged by such a good cook, that I definitely can't refuse to post. So, ladies and gents, my meme:


5 interesting facts about Me:

1) When people ask me where I'm from, I always say Kentucky, although I'm technically "from" all over the place. By the time I was in 3rd grade, I had already lived 6 different places -- including over seas. Yes, I was an Army brat. I am currently on location number 8, getting ready to go to location #9 as soon as I get married!

2) I have a severe phobia of heights. When taking abnormal psych in college, I actually looked up the qualifications for a phobia in the DSM handbook and I fit almost every single one. So yes, I do have an actual phobia of falling from some place high.

3) After completing high school and earning a BS in college, I still have no idea what I want to do when I grow up. I keep saying I want to do one thing, but I'm not really sure that's what I truly want to do. The only other thing that interests me is completely unrelated to my degree and I would have to go through my schooling all over again which I kind of really don't want to do.

4) My sister is currently pregnant with her first child -- I can't wait to become an aunt in April! Although I'm pretty sure that my fiance might be more excited about spoiling the kid than I am. He's so cute around kids it almost makes me sick.

5) And last but not least, I am a definite bookaholic. I love buying new books and reading them all the time, and I pretty much refuse to part with them, even though I know I probably won't read them again. Adam and I do want to have a library in our house someday way in the future though, so my excuse is that I'm collecting them for then. :)

And that's it! Those are my oh so interesting 5 facts about me. However, since I am new here, I don't really know too many other blogs around aside from the ones that were tagged with me, so once I get to know some more people and their blogs, I'll pass this along.

And here are the rules for my future to be tagged people:

"5 Things" Meme Rules:

1. Link to your tagger and post these rules.
2. Share 5 facts about yourself
3. Tag 5 people at the end of your post and list their names (linking to them).
4. Let them know they've been tagged by leaving a comment at their Blogs.

Meh, not the 4.5 star taste I was expecting...


Man I was struggling to find something new to make for this week. Yes I know it's only Monday, but I figured I'd go ahead and get a jump on it. So after perusing Allrecipes.com (again), I found a recipe for Anniversary Chicken which had a pretty high rating. (I'm not really sure how it got its name, but you know, somethings we just aren't meant to know.)


Anyhoo, so I made it, didn't quite follow the recipe like I normally do -- I pretty much just eyeballed all the ingredients rather than measuring them out, and maybe that's why I wasn't overly impressed with the dish. I will admit that I might have overcooked the chicken a tidge, but it wasn't enough to ruin it by any means. So here's the recipe, and feel free to correct me if I'm wrong, but the flavors to me just didn't fit overly well together.

Anniversary Chicken

1 tablespoon and 1 teaspoon vegetable oil
4 skinless, boneless chicken breast halves
1/3 cup teriyaki basting sauce
1/3 cup Ranch-style salad dressing
2/3 cup shredded Cheddar cheese
2 green onions, chopped
1 (3 oz.) can of bacon bits
2 teaspoons fresh parsley, for garnish

Preheat oven to 350 degrees.

In a large skillet, heat oil over medium-high heat. Add chicken breasts, and saute 4-5 minutes each side, until lightly browned.

Place browned chicken breasts in a 9x13-inch baking dish. Brush with teriyaki sauce, then spoon on salad dressing. Sprinkle with cheese, green onions, and bacon bits.

Bake for 25 to 35 minutes, or until chicken is no longer pink and juices run clear. Garnish with parsley and serve.


Like I said, I did tweak the recipe a bit, I didn't saute the chicken breasts to keep them from drying out (except overcooking them tends to do that too...). I only put on the teriyaki and ranch at first, and then added the cheese, bacon bits, and scallions for the last 10 minutes (as many reviews recommended).

LinkWithin

Related Posts with Thumbnails
 
Pin It button on image hover