Monday, January 31, 2011

Chipotle Mac 'n' Cheese


It is well known that Adam and I are lovers of Mac and Cheese. Pretty much any kind of mac and cheese. So much so that we even keep an emergency stash of Blue Box Blues in the pantry for those nights we just run out of time or are too tired to really cook anything. Don't hate on the powdered cheese.

So it was only natural that as soon as I saw this recipe I immediately bookmarked it, and it quickly made its way to the top of my "to make" list. Chipotle peppers in mac and cheese? What a brilliant idea! Well, hold on to your hats and grab a large glass of water (or milk), because there is definitely some spice going on in this version!

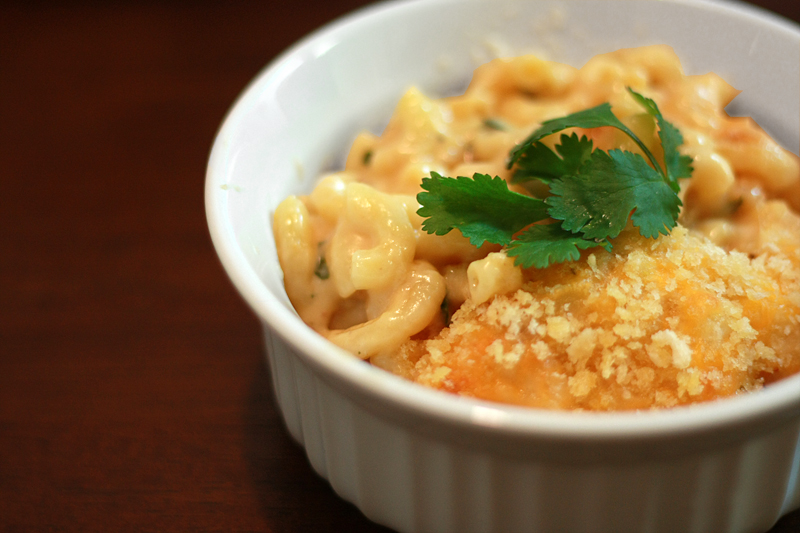
Chipotle Mac and Cheese
Adapted From: Smells Like Home

3 cups elbow macaroni, cooked and drained
6 tablespoons butter
1/4 cup flour
1 teaspoon Kosher salt
1/2 teaspoon ground black pepper
1/2 teaspoon garlic powder
1/4 teaspoon onion powder
2 1/2 cups milk
1/4 cup chipotle peppers in adobo sauce, chopped
2 teaspoons adobo sauce
1/4 cup cilantro, roughly chopped, plus extra for garnish
8 ounces mozzarella cheese, divided
4 ounces pepper jack cheese, divided
4 ounces sharp cheddar cheese, divided
1/2 cup reserved pasta water, as needed
1/2 cup Japanese panko breadcrumbs

Preheat oven to 350 degrees F.

Bring a large pot of water to boil over high heat. Cook the pasta until al dente according to package instructions. Reserve about 1/2 cup of the cooking liquid prior to draining.

Meanwhile, in a large saucepan, melt butter over medium heat. Whisk in flour until the mixture is smooth. Continue cooking for 1 1/2 minutes, stirring occasionally. Add salt, pepper, garlic powder, and onion powder. Slowly whisk in milk, taking care to remove any lumps that may form. Add chipotle peppers, adobo sauce, and cilantro, stirring to combine. Raise the heat to medium-high and continue to stir frequently until the mixture thickens, and begins to simmer. Continue to simmer for 2 minutes, then remove from the heat.

Whisk in all but a few tablespoons of each cheese. Keep whisking until the cheeses are fully melted. If the sauce becomes too thick and stringy, add some reserved pasta water, 2 tablespoons at a time to help thin it out.

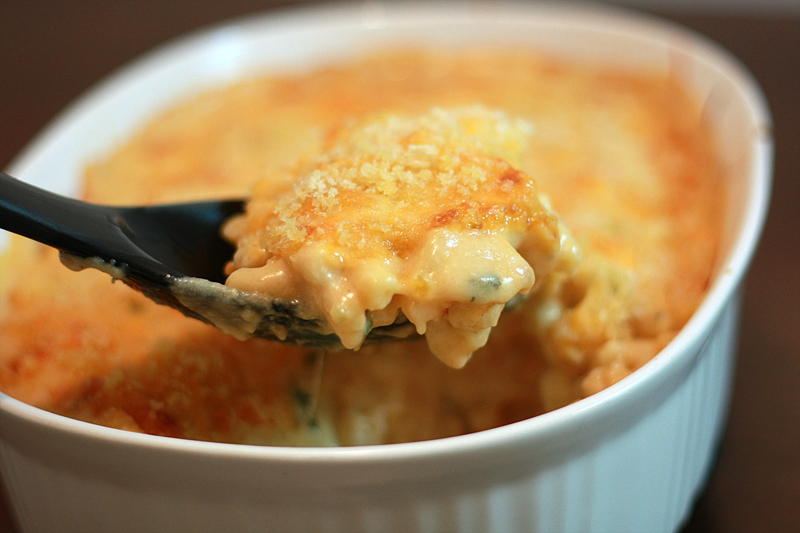
Add the drained pasta to the cheese mixture (or combine both in the pot you cooked the pasta in) and stir until all of the pasta is coated in the cheese sauce. Transfer the pasta to a 2 1/2 quart baking dish. Sprinkle the remaining cheese and Japanese panko breadcrumbs evenly over the top. Bake uncovered for 20–25 minutes or until the sides begin to bubble and top is nicely browned. Let the dish set for 5 minutes before serving. Garnish with any extra cilantro.

Serves: 8


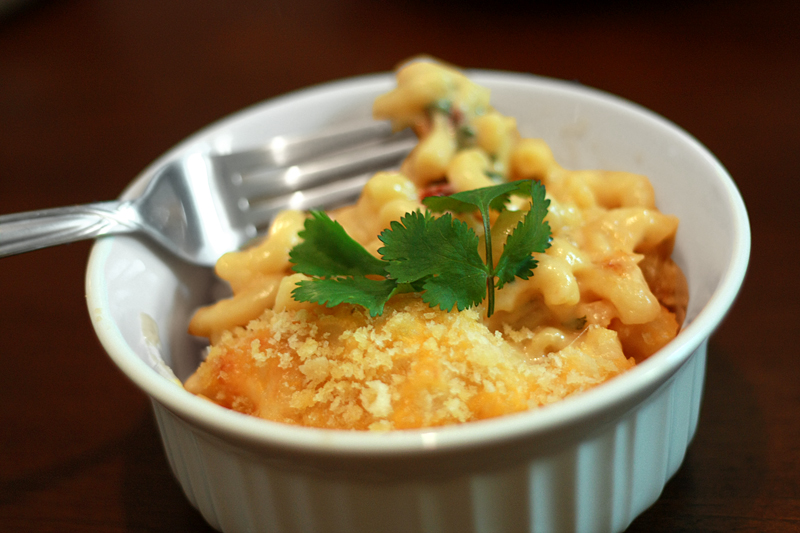
This dish was one of those that was spicy, but so good that you just kept eating it anyways, regardless of how your tongue felt. If you want to back off on the heat a bit, I would sub out some or all (if you really can't handle spice) of the Pepper Jack for some simple Monterey Jack instead. But leave those peppers and adobo sauce alone. They bring this warm almost earthy meaty something special to this dish. Adam gave this version two thumbs up, even if you can't see the second one as it's busy holding the glass of milk...


Nutrition Facts
Amount per serving
Calories 476Calories from fat 234
% Daily Value
Total Fat 26.0g40%
Saturated Fat 16.2g81%
Trans Fat 0.0g
Cholesterol 74mg25%
Sodium 800mg33%
Total Carbs 37.9g13%
Dietary Fiber 1.6g6%
Sugars 6.0g
Protein 22.6g
Vitamin A 19%Vitamin C 20%
Calcium 52%Iron 10%

Friday, January 28, 2011

Want Some Red Velvet Whoopie Pies?

Yesterday my stand mixer broke. I almost had a heart attack, then almost cried. Turns out it was only the pin that holds the head up came out, but I was unable to fix it. Good things for husbands. :)

Now I can make lots and lots more of these:


Don't they just look delicious? Let me assure you, they are.

Would you like to try some? You know you do!

Well, you're in luck! I have donated a dozen Red Velvet Whoopie Pies to Steph's Online Bake Sale over at Steph's Bite By Bite which will go to the highest bidder (bids start at $15)!


Photo from Steph's Bite By Bite


A bake sale? That's right! Steph is currently training for a marathon with The Leukemia & Lymphoma Society's Team in Training and is aiming to raise $1,900 for their cause.

So make sure you head over to Steph's Bite By Bite on Monday, January 31 to place a bid on these scrumptious morsels! Bidding is open 7am to 9pm EST.

Here's all the deets per Steph:
Online Bake Sale Rules and Logistics:

First off, please remember that all donations from this bake sale will go directly to my Team In Training efforts to benefit the Leukemia & Lymphoma Society. You will be supporting a great cause and helping to make a huge difference in the lives of many.

On Monday, January 31st at 7am EST. I will post all of the items each baker has donated. Each item will have a minimum bid of $15. Once the items are officially posted all buyers will then e-mail stephsbitebybite@gmail.com with a bid of what they would like to purchase.

To have an official bid on an item you must e-mail me at stephsbitebybite@gmail.com any bids left in the comments section will not be reviewed, only bids e-mailed will be considered official and affirmative.

Think of the bid as a silent auction of sorts. All buyers will have until 9pm EST to submit their bid for the auction.

I will be updating the current bids at the bottom of the bake sale post throughout the day so that you can see the current high bid. I am hoping this will encourage others to bid higher for the items they really want or bid for items that have not had a bid yet.

All winners will be announced a few hours after the bake sale has closed

Each winner will then donate the specified amount to my TNT fundraising page. Once the donation goes through I will e-mail the baker the winner’s address and it will be the baker’s responsibility to send the baked goods to the winner within 72 hours.

The winner has 24 hours to make the online donation. If in that time frame the donation is not made, the next highest bidder will be contacted or the item will go back up for bid.

Thursday, January 27, 2011

Quiche Lorraine


Sunday was apparently deemed "breakfast day" last weekend. Not only did we bust out some scones for breakfast brunch, but we continued with the breakfast theme into dinner with Quiche Lorraine. I had seen recipes for it here and there, but really, what was so special about this particular quiche?

I bookmarked this recipe over a year ago -- yes, it really took me that long to work up the gumption to make it. But it involves caramelizing the leeks! But it involves making my own crust! But, but, but. I finally quit making excuses and picked a day with plenty of time to spend in the kitchen. (Yes, that's what happens when we don't have things going on over the weekend -- I go into the kitchen and cook.)


Quiche Lorraine
Adapted from: Smitten Kitchen

1 3/4 cups leeks, diced, white and light green parts only
3/4 cup onion, diced
3 teaspoons olive oil
1 1/4 cups flour
1 tablespoon plus 2 teaspoons cornstarch
1/2 teaspoon salt
6 tablespoons butter, diced
4 eggs, divided
Water (optional)
1/2 cup plus 1 tablespoon heavy cream
1 cup plus 2 tablespoons sour cream
1/4 teaspoon nutmeg
1/4 teaspoon pepper
1 1/2 cups diced ham
3/4 cup grated Swiss cheese

In a large sauté pan over low heat, sauté the leeks and onions in the olive oil 30 to 40 minutes until caramelized, stirring occasionally. Remove from heat and set aside.

Meanwhile, combine the flour, cornstarch and one-fourth teaspoon salt in a mixing bowl. Cut the butter in with a pastry blender until the mixture has a crumb-like texture. Add one egg and mix it until a dough forms. If dough is too dry to fully incorporate all the ingredients, add water, 1 tablespoon at a time just until all the ingredients are wet.

Roll out the dough into a 12-inch disk on a lightly floured surface. Transfer the dough to a 9-inch pie plate, and press to remove any air bubbles. Crimp the edges, and refrigerate for 30 minutes.

While the quiche shell chills, in a medium bowl, mix together the heavy cream and sour cream. Whisk in the remaining three eggs, nutmeg, remaining salt, and pepper to form a batter.

Preheat the oven to 350 degrees.

Remove the shell from the refrigerator and spread the leek and onion mixture evenly over the bottom. Sprinkle the ham, followed by the cheese over the leeks and onions. Pour in the batter and place the quiche in the oven. Bake until puffed and golden, about 25 to 30 minutes. Remove from the oven and cool slightly on a rack. Serve warm or at room temperature.

Serves: 8


Looking back, I wish I hadn't waited so long to make this. Adam quickly took down 3 slices, and was eye-balling a fourth until he realized there just simply wasn't any more room. I was just fine with my one slice. I bet you can guess who won the leftover fight the next day (definitely wasn't me). This quiche has almost a custard-y quality to it, with the heavy cream and sour cream forming an almost silky-smooth texture.

One note: I ended up having to cook my quiche for almost and hour to get it golden brown and puffed (and it was in no way overdone). The edges definitely browned up much faster than the middle, so I simply covered the outside edges with foil and kept baking until I got the color I was going for in the middle.


Nutrition Facts
Amount per serving
Calories 397Calories from fat 252
% Daily Value
Total Fat 27.9g43%
Saturated Fat 15.3g76%
Cholesterol 167mg56%
Sodium 614mg26%
Total Carbs 23.6g8%
Dietary Fiber 1.4g6%
Sugars 1.7g
Protein 13.4g
Vitamin A 23%Vitamin C 8%
Calcium 16%Iron 12%

Wednesday, January 26, 2011

Bacon, Cheddar, & Chive Scones


There are two things I very rarely ever do in the kitchen: 1) make a side dish to go with dinner, and 2) make breakfast for breakfast (besides from pouring cereal in a bowl). Now hold on to your seats here... Adam and I actually made breakfast not just one day this past weekend, but both days. In our house that is almost completely unheard of. Okay, well both of these were more like a brunch, but I say it still counts as we never do that either.

Saturday we kept things simple and fast, as Adam has a habit of never mentioning he's hungry until he is starving. Just some cheesy scrambled eggs and bacon, nothing too fancy. As I was scanning through my Google Reader looking for things to eat for dinner in the upcoming week I spotted these Bacon Cheddar Scones from Annie's Eats I had bookmarked a while back. I pretty much had everything on hand, so I figured, why not make something on Sunday, too?

Unlike other scone recipes that involve a ton of tender-love-and-care and lots of down time, these scones came together fairly quickly and went straight into the oven. No rise-time or resting-time involved. That's my kind of baked good.


Bacon, Cheddar, and Chive Scones
Adapted from: Annie's Eats

3 cups all-purpose flour
1 tablespoon baking powder
1/2 teaspoon salt
1 1/2 teaspoons ground black pepper
8 tablespoons (1 stick) cold butter, cut into small cubes
1 1/2 cups grated cheddar cheese
2 tablespoons dried chives
10 slices bacon, cooked and chopped or crumbled into small pieces
1 cup buttermilk* (plus up to ½ cup extra, if needed)

1 large egg
2 tbsp. water

Preheat the oven to 400 degrees F.

In a large mixing bowl, stir together the flour, baking powder, salt and black pepper. Slice the stick of butter into small cubes, then add to the flour mixture. Using a pastry cutter, cut the butter into the flour mixture until the butter pieces are about the size of small peas. Add in the grated cheese and mix just until incorporated.

Stir in the chives, bacon, and 1 cup of the buttermilk into the flour mixture. Mix with a wooden spoon until all the ingredients are incorporated. If the dough is too dry (there is still unincorporated flour remaining) mix in additional buttermilk a tablespoon or two at a time until the dough can be formed into a ball. Transfer the dough to a lightly floured surface and pat the dough into an 8-inch disk. Slice into 8 wedges.

Separating the wedges, transfer scones to an ungreased baking sheet. In a small bowl, combine the egg and water and whisk together. Brush each wedge lightly with the egg wash. Bake for 18-20 minutes, or until golden brown and a toothpick inserted in the center comes out clean.

Makes: 8 scones

*If you don't have buttermilk on hand, you can simply add 1 tablespoon distilled white vinegar to a liquid measuring cup, then add milk up to the 1 cup line. Allow to sit for 5 minutes, then use as you would buttermilk.


For being so quick and easy to make, these definitely beat out those hard dry scones you find sitting on the pastry shelves at restaurants. Adam thought they were slightly on the dry side, but nothing a sunny-side up egg wouldn't fix. I thought they were just fine, although really dense. You honestly don't need much more than one of these to cure a grumbling stomach.

These also are easy to freeze (wrap in wax paper followed by aluminum foil), which makes breakfast during the week a snap. Just transfer how ever many scones you want to the fridge the night before, then throw into the microwave for about 45 seconds the next morning, and viola! A warm hearty breakfast in about the same amount of time it takes you to pour a bowl of cereal.


Nutrition Facts
Amount per serving
Calories 511Calories from fat 269
% Daily Value
Total Fat 29.8g46%
Saturated Fat 15.4g77%
Trans Fat 0.0g
Cholesterol 107mg36%
Sodium 953mg40%
Total Carbs 39.1g13%
Dietary Fiber 1.4g6%
Sugars 1.8g
Protein 20.9g
Vitamin A 13%Vitamin C 1%
Calcium 29%Iron 17%

Tuesday, January 25, 2011

Chicken & Herbed Dumplings


Well, it's still winter and there is still snow on the ground out there. That can only mean one thing, okay maybe two: 1) I want it to be summer out, and 2) I'm still in my "comfort food/heavy eating" mode. There's just something about sitting down to a nice warm meal on a chilly day (yeah, think in the teens with a wind-chill below 10 degrees).

This was actually the second time I made this -- just long enough for Adam to forget all about it and love it all over again. :) The first go-around I foolishly decided to make this right before a night class, and of course, ran out of time to take any pictures and had to take it with me to eat in class. Sigh. Will I ever learn? Probably not.


Chicken and Herbed Dumplings
Adapted from: foodies @ home

1 pound boneless, skinless chicken breast halves
Salt and Pepper
1 1/2 tablespoons olive oil
1 1/2 tablespoons butter
1/2 cup onion, diced
1/2 shallot, thinly sliced
2 tablespoons flour
1 1/2 cups low-sodium fat-free chicken broth
1/3 cup heavy cream
2 tablespoons dry sherry
4 medium carrots, peeled and cut into 1/2 inch slices
1 bay leaf
1/4 teaspoon ground nutmeg
1/2 teaspoon finely chopped fresh oregano leaves
1/2 teaspoon finely chopped thyme leaves
1/3 cup frozen peas

1/2 cup + 2 tablespoons flour
1/3 cup cornmeal
1 1/4 teaspoons baking powder
1/4 teaspoon salt
3 1/2 tablespoons chilled butter
1/2 teaspoon dried rosemary
1/2 cup milk
1/4 teaspoon kosher salt

Preheat oven to 425 degrees F.

In a Dutch oven, heat 1/2 tablespoon oil over medium-high heat. Slice chicken breasts into 1-inch cubes, then season with salt and pepper. Add chicken to Dutch oven and cook until chicken is cooked through (no longer pink), about 5 minutes. Remove chicken from pan and place in a warm spot (I usually stick mine in the microwave).

Using the same Dutch oven, lower the heat to medium, and melt your butter in the pan. Add the onion and shallots and cook until onion turn soft and translucent, about 5 minutes. Whisk in 2 tablespoons flour, then the broth, cream, and sherry. Let the mixture come to a boil, whisking frequently, then reduce heat. Add the carrots and next 4 ingredients (through thyme). Season with salt and pepper, and allow the mixture to simmer for 5 minutes. Stir in the chicken and peas and cook for another 5 minutes.

Meanwhile, stir together the remaining flour, cornmeal, baking powder and salt in a medium mixing bowl. Using a pastry cutter, cut the butter into the flour mixture until it is in pea-sized chunks. Stir in the rosemary, the slowly add the milk. Stir the batter together until all the dry ingredients are fully incorporated. The batter will be wet and slightly sticky.

Drop about 2 tablespoon-sized dumplings on top of the chicken mixture in the Dutch oven (make roughly 7-8). Place the Dutch oven in the oven and bake for 20-25 minutes, or until the dumplings are golden brown.

Serves: 4


If you didn't notice in the pictures, I was actually missing the peas for this dish, and it really does need them (my freezer stash failed me this time). I ended up cutting this dish in half (changes are reflected above) since it was just for the two of us -- we are already up to our eyeballs in leftovers, we don't need tons and tons more. This amount ended up working out beautifully, as I can usually count on Adam to take down at least two servings.

Both of us really enjoyed this, I really loved the extra punch the rosemary gives the dumplings, and Adam just loved the fact he was getting a very hearty "comfort" meal (well, he also really liked how it tasted, too). This is definitely a keeper for a cold day!

(Oh, and for those of you who wanted to see pics of my new little nephew, you can click here.)


Nutrition Facts
Amount per serving
Calories 620Calories from fat 298
% Daily Value
Total Fat 33.1g51%
Saturated Fat 15.0g75%
Trans Fat 0.0g
Cholesterol 155mg52%
Sodium 596mg25%
Total Carbs 39.0g13%
Dietary Fiber 4.3g17%
Sugars 5.9g
Protein 39.8g
Vitamin A 226%Vitamin C 11%
Calcium 17%Iron 22%

Monday, January 24, 2011

Butternut Squash & Goat Cheese Stuffed Shells


Every once in a while I feel very stuck in a rut when it comes to cooking. I don't want the same thing over and over for dinner, but yet everything "new" I find that sounds appealing is very similar to another recipe I already have in my arsenal. My pasta dishes can usually be found hanging out with a red or white sauce, or some variation of them, and on a good day, maybe a pesto or an oil based-sauce. Very rarely do I ever make a pasta dish with a brown butter sauce -- in fact, I think I've only made it once before to tag along with some butternut squash gnocchi. Which, might I add, is the only other time I've used butternut squash as well.

When I saw this recipe I hesitated at first. It's outside my comfort zone. It didn't have a red sauce or white sauce and for goodness sakes it's filling is primarily a vegetable! But the combination of the flavors sounded too good to pass up. So I earmarked it for later. Looks like "later" finally came.

Butternut Squash and Goat Cheese Stuffed Shells
Adapted from: I Don't Cook, But My Boyfriend Does!

2 pound butternut squash
2 tablespoons olive oil
1 cup onion, finely chopped
1 tablespoon fresh sage, chopped finely
1 tablespoon butter
1 garlic clove, minced
4 ounces goat cheese
1/2 cup Parmesan Reggiano cheese, grated

1/2 cup walnuts, chopped
1/4 cup granulated sugar
1/4 teaspoon salt

9 ounces (3/4 of a box) jumbo shell pasta
1/4 cup butter
2 tablespoons shallots, minced
1 tablespoon garlic, minced
1 teaspoon fresh sage, minced

Preheat oven to 400 degrees F.

Cut squash in half length-wise. Scrap out and discard the guts and seeds. Place squash skin-side down on a baking sheet. Drizzle each half with 1 tablespoon of olive oil, then roast in oven for 45-60 minutes, or until flesh is tender. Remove from oven and set aside until cool enough to handle. Scoop out flesh into a medium mixing bowl and discard skin. Smash the squash until smooth.

Meanwhile, combine the sugar and 1/4 teaspoon salt in a small saucepan over medium heat. Line a counter-top with parchment paper. Once the sugar starts to melt, begin to frequently stir with a wooden spoon. Once the sugar has completely melted, continue to stir for another 1-2 minutes, or until the sugar has caramelized (a light brown color). Working quickly, stir in the walnuts, making sure each piece is coated. Pour nuts out onto the parchment paper, using a fork to separate the pieces. Allow to cool and harden before using.

Bring a large pot filled with water to boil over high heat. Add the jumbo shells and cook to al dente according to package directions. Drain and rise with cool water. Set aside.

Lower oven temperature to 350 degrees F.

In a large skillet, melt 1 tablespoon butter over medium heat. Add onion, 1 clove garlic, and 1 tablespoon sage, stirring frequently. Season with salt and pepper. Cook for 5 minutes, or until onion in golden brown. Remove from heat.

Once onion mixture has cooled a bit, add mixture to the bowl with the squash. Add the Parmesan and goat cheese, and stir well until cheese is evenly distributed throughout the mixture.

Lightly spray a 9x13 baking dish with cooking spray. Fill each shell with about 1 tablespoon of squash filling, then place in rows in the baking dish (shells should be touching). Top with candied walnuts. Once dish is full, cover with aluminum foil and bake at 350 degrees for 30 minutes.

While shells are baking, heat the remaining butter in a small sauté pan over medium-high heat until completely melted. Then cook for an additional 2-3 minutes, or until the butter turns a nice medium brown (the solids on the bottom should not be black). Add the shallots, garlic and sage, cooking for another 1-2 minutes, or until the shallots are golden brown. Remove from heat a season with salt and pepper. Use immediately.

Serve shells with brown butter sauce drizzled over top and garnished with freshly grated Parmesan.

Serves: 6


I am so glad I finally decided to switch things up. Adam is too -- he kept commenting throughout the whole meal how good these were. While I also thought these were fantastic, I do think these might work a bit better as ravioli as the shells were kind of awkward to eat.

Also, if you can find candied walnuts at your grocery store, by all means, use them! I found candied pecans, honey roasted peanuts, and everything else under the sun except for candied walnuts. They aren't difficult to make, but it does involve those few extra steps.

Next time, I might even be tempted to add some bacon into the butter sauce. You know, because you can never have enough bacon in your life. ;)


Nutrition Facts
Amount per serving
Calories 547Calories from fat 275
% Daily Value
Total Fat 30.6g47%
Saturated Fat 13.3g67%
Cholesterol 84mg28%
Sodium 377mg16%
Total Carbs 54.3g18%
Dietary Fiber 4.3g17%
Sugars 13.1g
Protein 18.4g
Vitamin A 337%Vitamin C 57%
Calcium 37%Iron 19%

Thursday, January 20, 2011

The Cinnamon-less Cinnamon Rolls


They came out of the oven looking so pretty. But we were in a rush to get out the door to grab some lunch for my sister and brother-in-law who were up at the hospital enjoying their new baby. So I tossed the warm, delicious smelling rolls still in the pan onto a wire rack to let them cool, and we left. That was mistake #2.

Let me back up a minute. Adam and I had been in New Jersey for about a day and a half at this point, watching our nephew while my sister was in the hospital having their second child. I had this grandiose idea that I was going to make them lots and lots of freezer meals that they could pull out whenever they were too tired to cook (which I expected to be the first few days, or weeks). After getting in very late Thursday night, we got up to a very loud alarm clock ("Uncle Adnam! Get UP!"), ate some breakfast, then I hit the grocery store.

I whipped up two batches of lasagna without blinking an eye. The marinara? Easy. Then we got "the call", or rather, picture mail. "He's here!" At this point our nephew was still down for his afternoon nap so we decided it would be best if we went up to the hospital after dinner. As the timetable had been sped up a few hours faster than expected, I hurriedly made a double batch of some skinny chimis which we ended up eating half of for dinner.

Due to some medical issues we weren't able to see the new little guy that first night, which was kind of disappointing. So we trucked back home and prepared to head back the next day. The next day came far too early, and I think my lack of sleep clouded my judgement that it would be a good idea (and I would have plenty of time) to make some Gooey Sticky Cinnamon Buns to take to my sister. The dough was easy enough to put together and rolled out without a hitch. Then I forgot the cinnamon. And had no.idea. I merrily rolled up the dough with the butter and sugar, sliced it and sent it into the oven.

After arriving back from the hospital the second time, I immediately went over to check on the rolls. Hard.as.a.rock. Not only were the rolls hard, the melted sugar had seeped underneath my wax paper lining, and had glued the rolls to the bottom of the pan. Not what I wanted to deal with. After prying one roll out I was able to finagle the remaining rolls out in one piece. Maybe they weren't as bad as I thought? Maybe just a quick reheat would work?


Then I tried it. Something was missing. I hadn't put the icing on yet, but they still weren't screaming gooey and sticky to me. As I was taking the first pictures it hit me. No cinnamon. Well, you can't exactly call them cinnamon rolls without the main ingredient, and they definitely could have used it for a flavor boost.

On a last minute whim I decided to try to make a cinnamon icing to see if I could cover my mistake.


Sometimes, there's just nothing you can do but to start over.

Which I didn't. I still had 2 batches of Potato Soup and a baked pasta dish to make yet. Sigh, such is life.

I fully intend on making these again. Sometime in the near future, as I never did get my gooey cinnamon roll fix.

Wednesday, January 19, 2011

Honey White Bread


I have been slowly changing from a snack mood into a bread-making mood as of late. I've been having the urge to whip up a loaf of bread or bagels or something else equally tasty. Well, I did make a batch of cinnamon-less cinnamon rolls (which ended up in the trash), but that story is for another day. So when my sister suggested we try our hand at some simple white bread to try out her brand spankin' new KitchenAid mixer, I jumped at the chance. (Yes, I am still hanging around at my sister's.)

As this was a last minute decision, we had to find a recipe that would work with the ingredients we had on hand. Luckily, my sister had already found an easy recipe in the booklet that came with her mixer. I put my own little twist on it by switching out the sugar for honey -- I love that extra little hint of sweetness it gives the bread.

Honey White Bread
Adapted from: KitchenAid

1/3 cup low-fat milk
3 tablespoons honey
2 teaspoons salt
3 tablespoons unsalted butter
2 (1/4 ounce) packages active dry yeast
1 1/2 cups warm water (105 - 115 degrees F)
5+ cups all-purpose flour

In a small saucepan over low heat, combine the milk, honey, salt, and butter. Stir until butter is melted. Remove from heat and set aside.

In the bowl of a stand mixer, mix together the yeast and warm water. Add milk mixture once it is lukewarm and 4 1/2 cups flour. Mix using the dough hook on medium-low for about 1 minute or until most of the flour is incorporated.

While continuing to mix, add remaining flour 1/2 cup at a time. Mix until dough clings to the hook and cleans the sides of the bowl, about 2 minutes. Knead for an additional two minutes or until dough is smooth, elastic, and slightly sticky to the touch.

Place dough in a lightly oiled bowl, turning once. Cover with plastic wrap or a towel and let rise in a warm draft-free spot for 1 hour, or until doubled in bulk.

Turn dough out onto a lightly floured surface and punch down. Divide into two equal pieces. Roll out each piece into a 7x14 rectangle. Starting with a long side, roll dough up jellyroll-style and place in greased loaf pans. Cover and let rise in a warm draft-free spot for 1 hour, or until doubled in bulk.

Preheat oven to 400 degrees F. Bake loaves for 30 minutes or until golden brown. Remove from pan immediately and cool on a wire rack.

Makes: 32 slices (16 per loaf)


We went into this endeavor thinking we were making your typical white sandwich bread. Which to me screams floppy, thin, and light (hence why I never buy it any more). This bread was none of that. It smelled wonderful in the oven, and I totally wish we hadn't waited until late at night to begin on this project. A taste test would have to wait until the next day.

Instead of that lifeless loaf of bread you get off the shelf at the grocery, this bread has substance. It's far denser than your typical white bread, which means you can load it up with goodies all that much more. Is this an amazing bread recipe? While it definitely is better than your run-of-the-mill-grocery-store white bread, I think I'm still on the hunt for "the" white bread recipe.


Nutrition Facts
Amount per serving
Calories 89Calories from fat 12
% Daily Value
Total Fat 1.3g2%
Saturated Fat 0.7g4%
Cholesterol 3mg1%
Sodium 157mg7%
Total Carbs 16.8g6%
Dietary Fiber 0.6g2%
Sugars 1.8g
Protein 2.3g
Vitamin A 1%Vitamin C 0%
Calcium 1%Iron 6%

Monday, January 17, 2011

Italian Wedding Soup


Usually when it's cold and snowy out is when I start to crave comfort food the most. You know, the food that makes you all warm and full inside and oh-so-happy that you are currently inside rather than tromping around in the snow and wind. After days of snow with not really an end in sight, I was in full swing comfort food mode.

I've always wanted to try Italian Wedding Soup, but usually other things catch my eye on the menu and lure me away. I had to finally put my food down and make it myself. I love the fact that these meatballs contain turkey sausage, as it gives the meatballs an extra little punch of flavor and spice that is so often lacking in most meatballs. This soup is one of those meals that just embodies the concept of comfort food -- warm, hearty, delicious.

Italian Wedding Soup
Adapted from: Scarpetta Dolcetto

3/4 pound ground turkey
1/2 pound uncooked turkey breakfast sausage (casings removed)
2/3 cup bread crumbs
2 cloves garlic, minced
3 teaspoons dried Italian parsley
1/4 cup Romano, grated (plus extra for serving)
1/4 cup Parmesan, grated
3 tablespoons milk
1 egg, lightly beaten
1/2 teaspoon salt
1/4 teaspoon ground black pepper

2 tablespoons olive oil
1 cup onion, minced
1 cup carrots, diced
10 cups chicken broth
1/2 cup dry white wine
1 cup orzo, or other small pasta
1/4 cup fresh dill, minced
10 ounces baby spinach, washed and trimmed

Preheat oven to 350 degrees. Line two baking sheets with parchment paper.

In a large bowl, combine the first 11 ingredients (through pepper). Gently hand-mix the meatball ingredients together and roll into 1″ meatballs. Bake for 30 minutes, or until cooked through.

Meanwhile, in a dutch oven over medium heat, heat the olive oil. Add the onion, celery and carrots and cook until fragrant, about five minutes, stirring occasionally. Add the wine and broth and bring to a simmer. Add the pasta and cook until tender according to the package directions. Add the meatballs, dill, and spinach and cook for 1 minute. Serve with additional grated cheese.

Serves: 8


So I may have cheated. (Don't I always?) Kate (from Scarpetta Dolcetto) swears you must make this with homemade chicken stock rather than store-bought broth, and that it absolutely makes this much better. And I'm sure it does. I just don't have the energy or gumption to make my own stock. I can be lazy at times. Okay, most of the time. You know what though? This was still fantastic and completely hit the spot (but what else do you expect when the original recipe comes from the Barefoot Contessa?).


Nutrition Facts
Amount per serving
Calories 460Calories from fat 200
% Daily Value
Total Fat 22.2g34%
Saturated Fat 6.4g32%
Trans Fat 0.1g
Cholesterol 96mg32%
Sodium 1562mg65%
Total Carbs 28.9g10%
Dietary Fiber 1.8g7%
Sugars 3.3g
Protein 31.6g
Vitamin A 90%Vitamin C 16%
Calcium 18%Iron 22%

Friday, January 14, 2011

Happy Birthday Ethan!

I was going to post a super tasty Italian Wedding Soup recipe today. Really, I was.

But then I got a text from my very pregnant sister late Wednesday night -- there is a possibility she's going to be induced a couple weeks early. As in, this weekend.

So instead of lounging around at home in my sweats for the first weekend in over a month, Adam and I spent today chasing this kid around.


And I found myself looking at this after a nice trip to the grocery store (and this was probably less than half the haul).


We spent some time making a couple batches of this lasagna,


2 batches of skinny chimis (don't worry, I won't hold out on you), and some marinara sauce.

I got to try out my brand spankin' new immersion blender for the first time. So I was happy. And it is awesome -- totally beats trying to transfer hot liquid to a blender.

But it is all worth it. I mean, I got Michael to actually eat half of a skinny chimi tonight. Which is pretty good for a 2 1/2 year old. Oh. Wait, there's another reason it's worth it.


That's right, it's Ethan James birthday today! Couldn't ask for a better reason to give up a weekend at home!

Must crawl into bed now. Lots more cooking to do tomorrow!

Thursday, January 13, 2011

Cheese Straws


I have been really good lately, focusing more on meals and actually figuring out what's for dinner more than 5 minutes before I need to start cooking it. I had a nice break from sweets and snacks and everything I shouldn't be eating between meals.

And then I ran across these. All I could think of was homemade Cheez-Its. For days.

Homemade Cheez-Its, people.

Over a cup of cheese is involved. Have I convinced you yet? Because I think I might have convinced myself, again.

Cheese Straws
Adapted from: Gourmet, via How Sweet It Is

1 1/2 cups coarsely grated extra-sharp Cheddar
1 cup all-purpose flour
3/4 stick cold unsalted butter, cut into tablespoons
1/8 teaspoon smoked paprika
1/8 teaspoon cayenne
1 1/2 tablespoons milk

Preheat oven to 350 degrees F with racks in upper and lower thirds.

In the bowl of a food processor, combine cheese, flour, butter, paprika, and cayenne. Pulse until mixture resembles coarse meal. Add milk and continue to pulse until dough forms a ball.

On a lightly floured surface, roll out dough with a lightly floured rolling pin into a 1/4-inch thick rectangle. Using a lightly floured pizza wheel or lightly floured sharp knife, slice the dough into 1/3-inch-wide strips. Carefully transfer to 2 ungreased baking sheets or 2 baking racks sprayed with cooking spray. Arrange strips 1/4-inch apart. (If strips tear, pinch back together.)

Bake until pale golden, 12-15 minutes, switching position of sheets halfway through baking. Allow to cool completely on baking sheets or racks, about 15 minutes.

Makes: about 24 straws


The straws that came out of the oven all golden and lovely were everything I hoped they would be. Cheesy with a little kick from the cayenne and paprika. But then there was the other half. Those that were a little thinner, thus a little browner. Once they passed from that perfect yellow color towards having a hint of brown, the Cheez-It dream was over. While they weren't necessarily bad, you could definitely taste the overdoneness, and a few were just downright burnt. I think it's high time I invest in some Rolling Pin Rings. That way I can go back to stuffing my face with a full batch of perfectly cooked cheese straws.


Nutrition Facts
Amount per serving
Calories 45Calories from fat 26
% Daily Value
Total Fat 2.9g5%
Saturated Fat 1.8g9%
Trans Fat 0.0g
Cholesterol 8mg3%
Sodium 21mg1%
Total Carbs 4.0g1%
Protein 0.6g
Vitamin A 2%Vitamin C 0%
Calcium 0%Iron 1%

LinkWithin

Related Posts with Thumbnails
 
Pin It button on image hover