Tuesday, January 31, 2012

Slow Cooker Posole


Winter isn't only a time for snow and chilly weather. It also ushers in the classic cold and flu season. Joy. As much as I try and avoid it, at some point the cold always catches up to me. In some form or another.

Which is why I spent most of yesterday morning surrounded by a sea of kleenex followed by an evening of not being able to breathe due to a stuffy nose. And it looks like I'm in for a repeat today.

At least it's just confined to my nose, right?

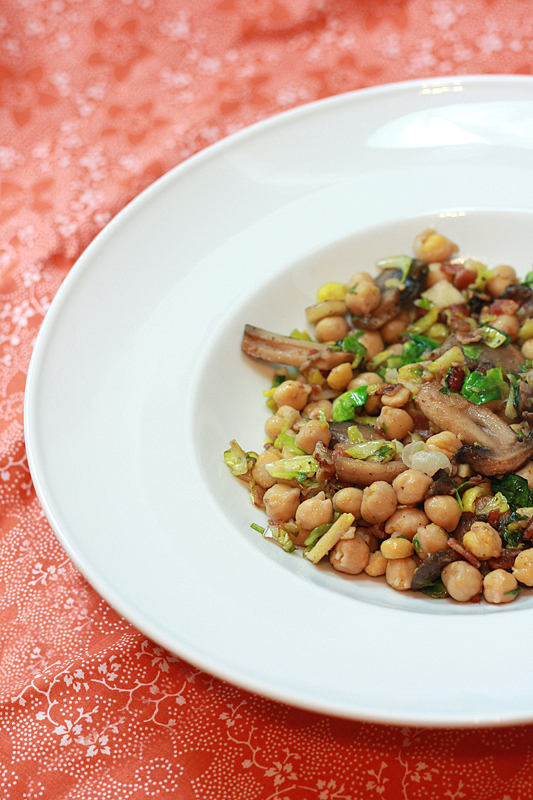
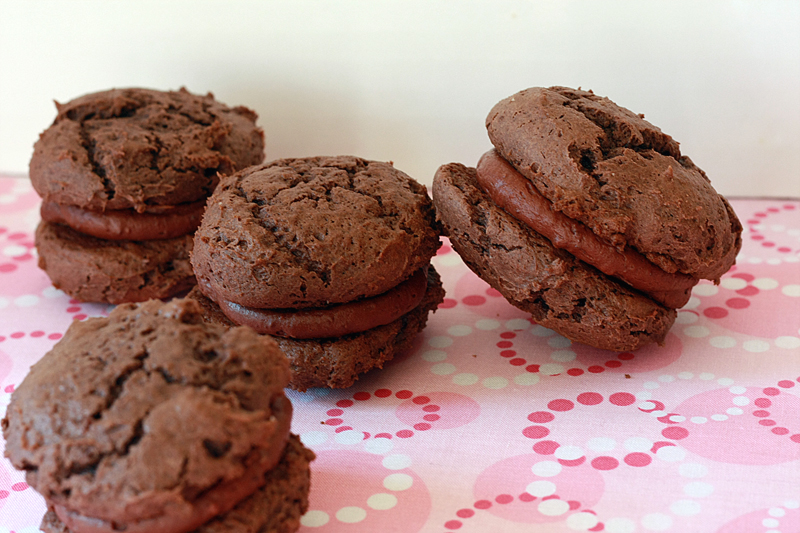
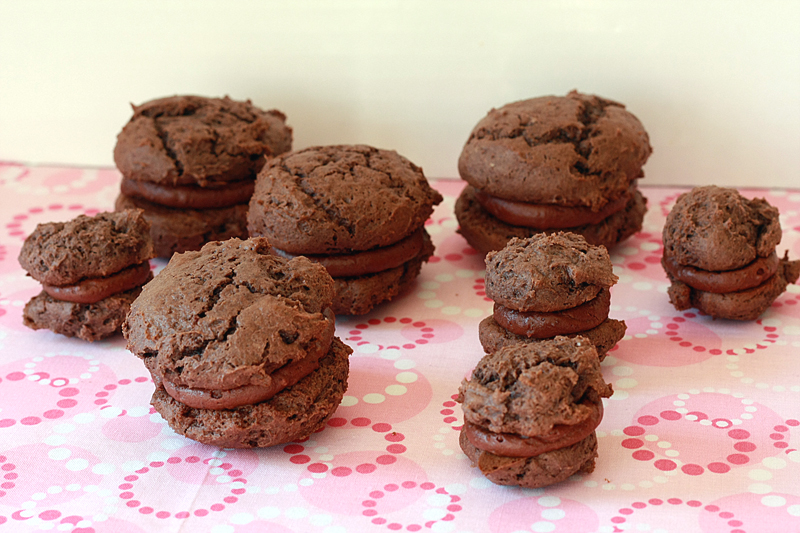
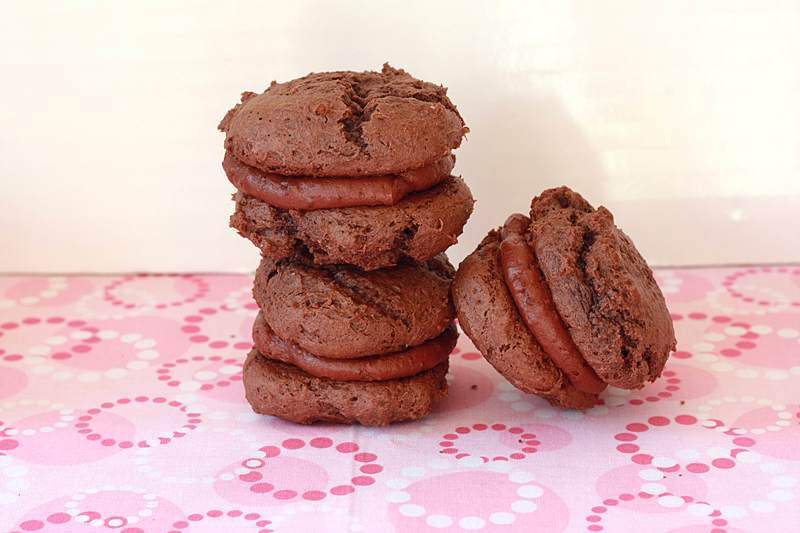
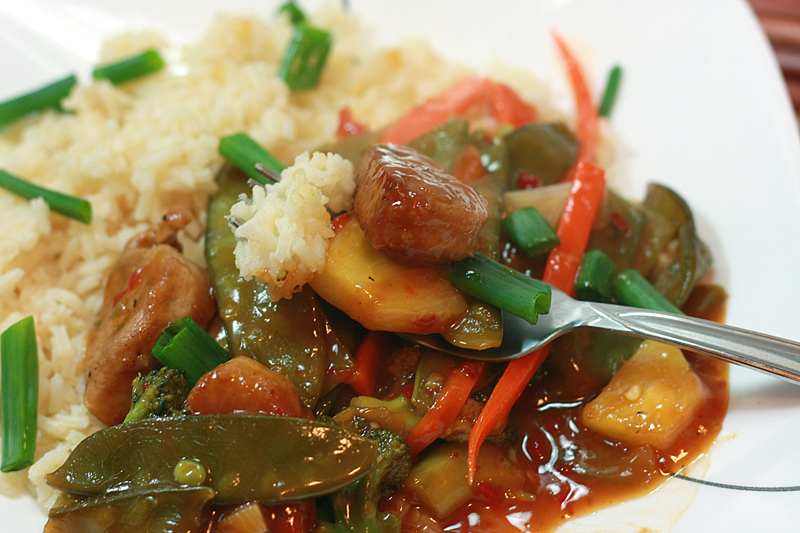
Too bad this soup is long gone. I could definitely go for a bowl right about now. All steamy and full of warm cozy flavors. Someone make me another batch, stat!

And let's just ignore the cornbread that has completely fallen apart because I was far too impatient/hungry to let it rest a bit. Tasted way better than it looks, promise. But we'll get to that another day. ;)

Slow Cooker Posole
Adapted from: Bon Appetit, January 2012

1 tablespoon ground cumin
1 teaspoon garlic powder
1 teaspoon smoked paprika
1/2 teaspoon kosher salt
1/4 teaspoon ground black pepper
2 pounds boneless pork shoulder
1 cup onion, diced
1/2 cup water

1/4 cup vegetable oil
1 cup onion, diced
3 cloves garlic, minced
3 ounces fresh baby spinach, chopped
6 cups fat-free reduced-sodium chicken broth
28 ounces pinto beans, undrained
28 ounces white hominy, drained
28 ounces diced tomatoes, undrained, pureed
1 tablespoon oregano
2 teaspoons ground cumin
1/2 teaspoon kosher salt
1/4 teaspoon ground black pepper
4 ounces grated cheddar cheese
1/4 cup chopped cilantro

In a small bowl, mix together the first 5 ingredients (through pepper). Rub mixture over pork. Cover a slow cooker with a slow cooker liner. Place pork in the slow cooker with 1 cup onion and water. Cook on low for 6-8 hours or until easily shredded with forks. Remove pork from slow cooker and shred.

In a large dutch oven over medium heat, warm the oil. Add onion and cook under tender, about 5 minutes. Add garlic, stirring often, and cook for another 2 minutes. Add broth, beans, hominy, tomato puree, oregano, and cumin. Bring to a boil, then reduce heat to low. Cover and simmer, stirring occasionally, for 30 minutes. Add pork and simmer for another 30 minutes. Season with salt and pepper.

Divide posole between bowls, topping each with shredded cheese and cilantro.


Serves: 10


Why yes, I do realize that it does take about an hour to finish this dish outside the slow cooker. However, I have no intentions of letting pork simmer on the stove for 5-6 hours. I just don't feel comfortable leaving it if I have to step out for a minute. Or an hour. Thank goodness for crockpots.

And really though, after the slow cooker it's pretty much just a dump and heat process. That's my kind of dinner. Especially when it brings variety to the table. Not to mention fiber. Tricky tricky.


Nutrition Facts
Serving Size 529g
Amount per serving
Calories 595Calories from fat 131
% Daily Value
Total Fat 14.6g22%
Saturated Fat 4.9g24%
Cholesterol 78mg26%
Sodium 908mg38%
Total Carbs 68.4g23%
Fiber 16.1g64%
Sugars 6.9g
Protein 46.7g
Vitamin A 19%Vitamin C 30%
Calcium 22%Iron 38%

Sunday, January 29, 2012

Half Marathon Training: Week #3

Wow. What a doozey of a week. Well, at least it started off good...

Sunday: Rest
 
Monday: 3.5 mi run + strength
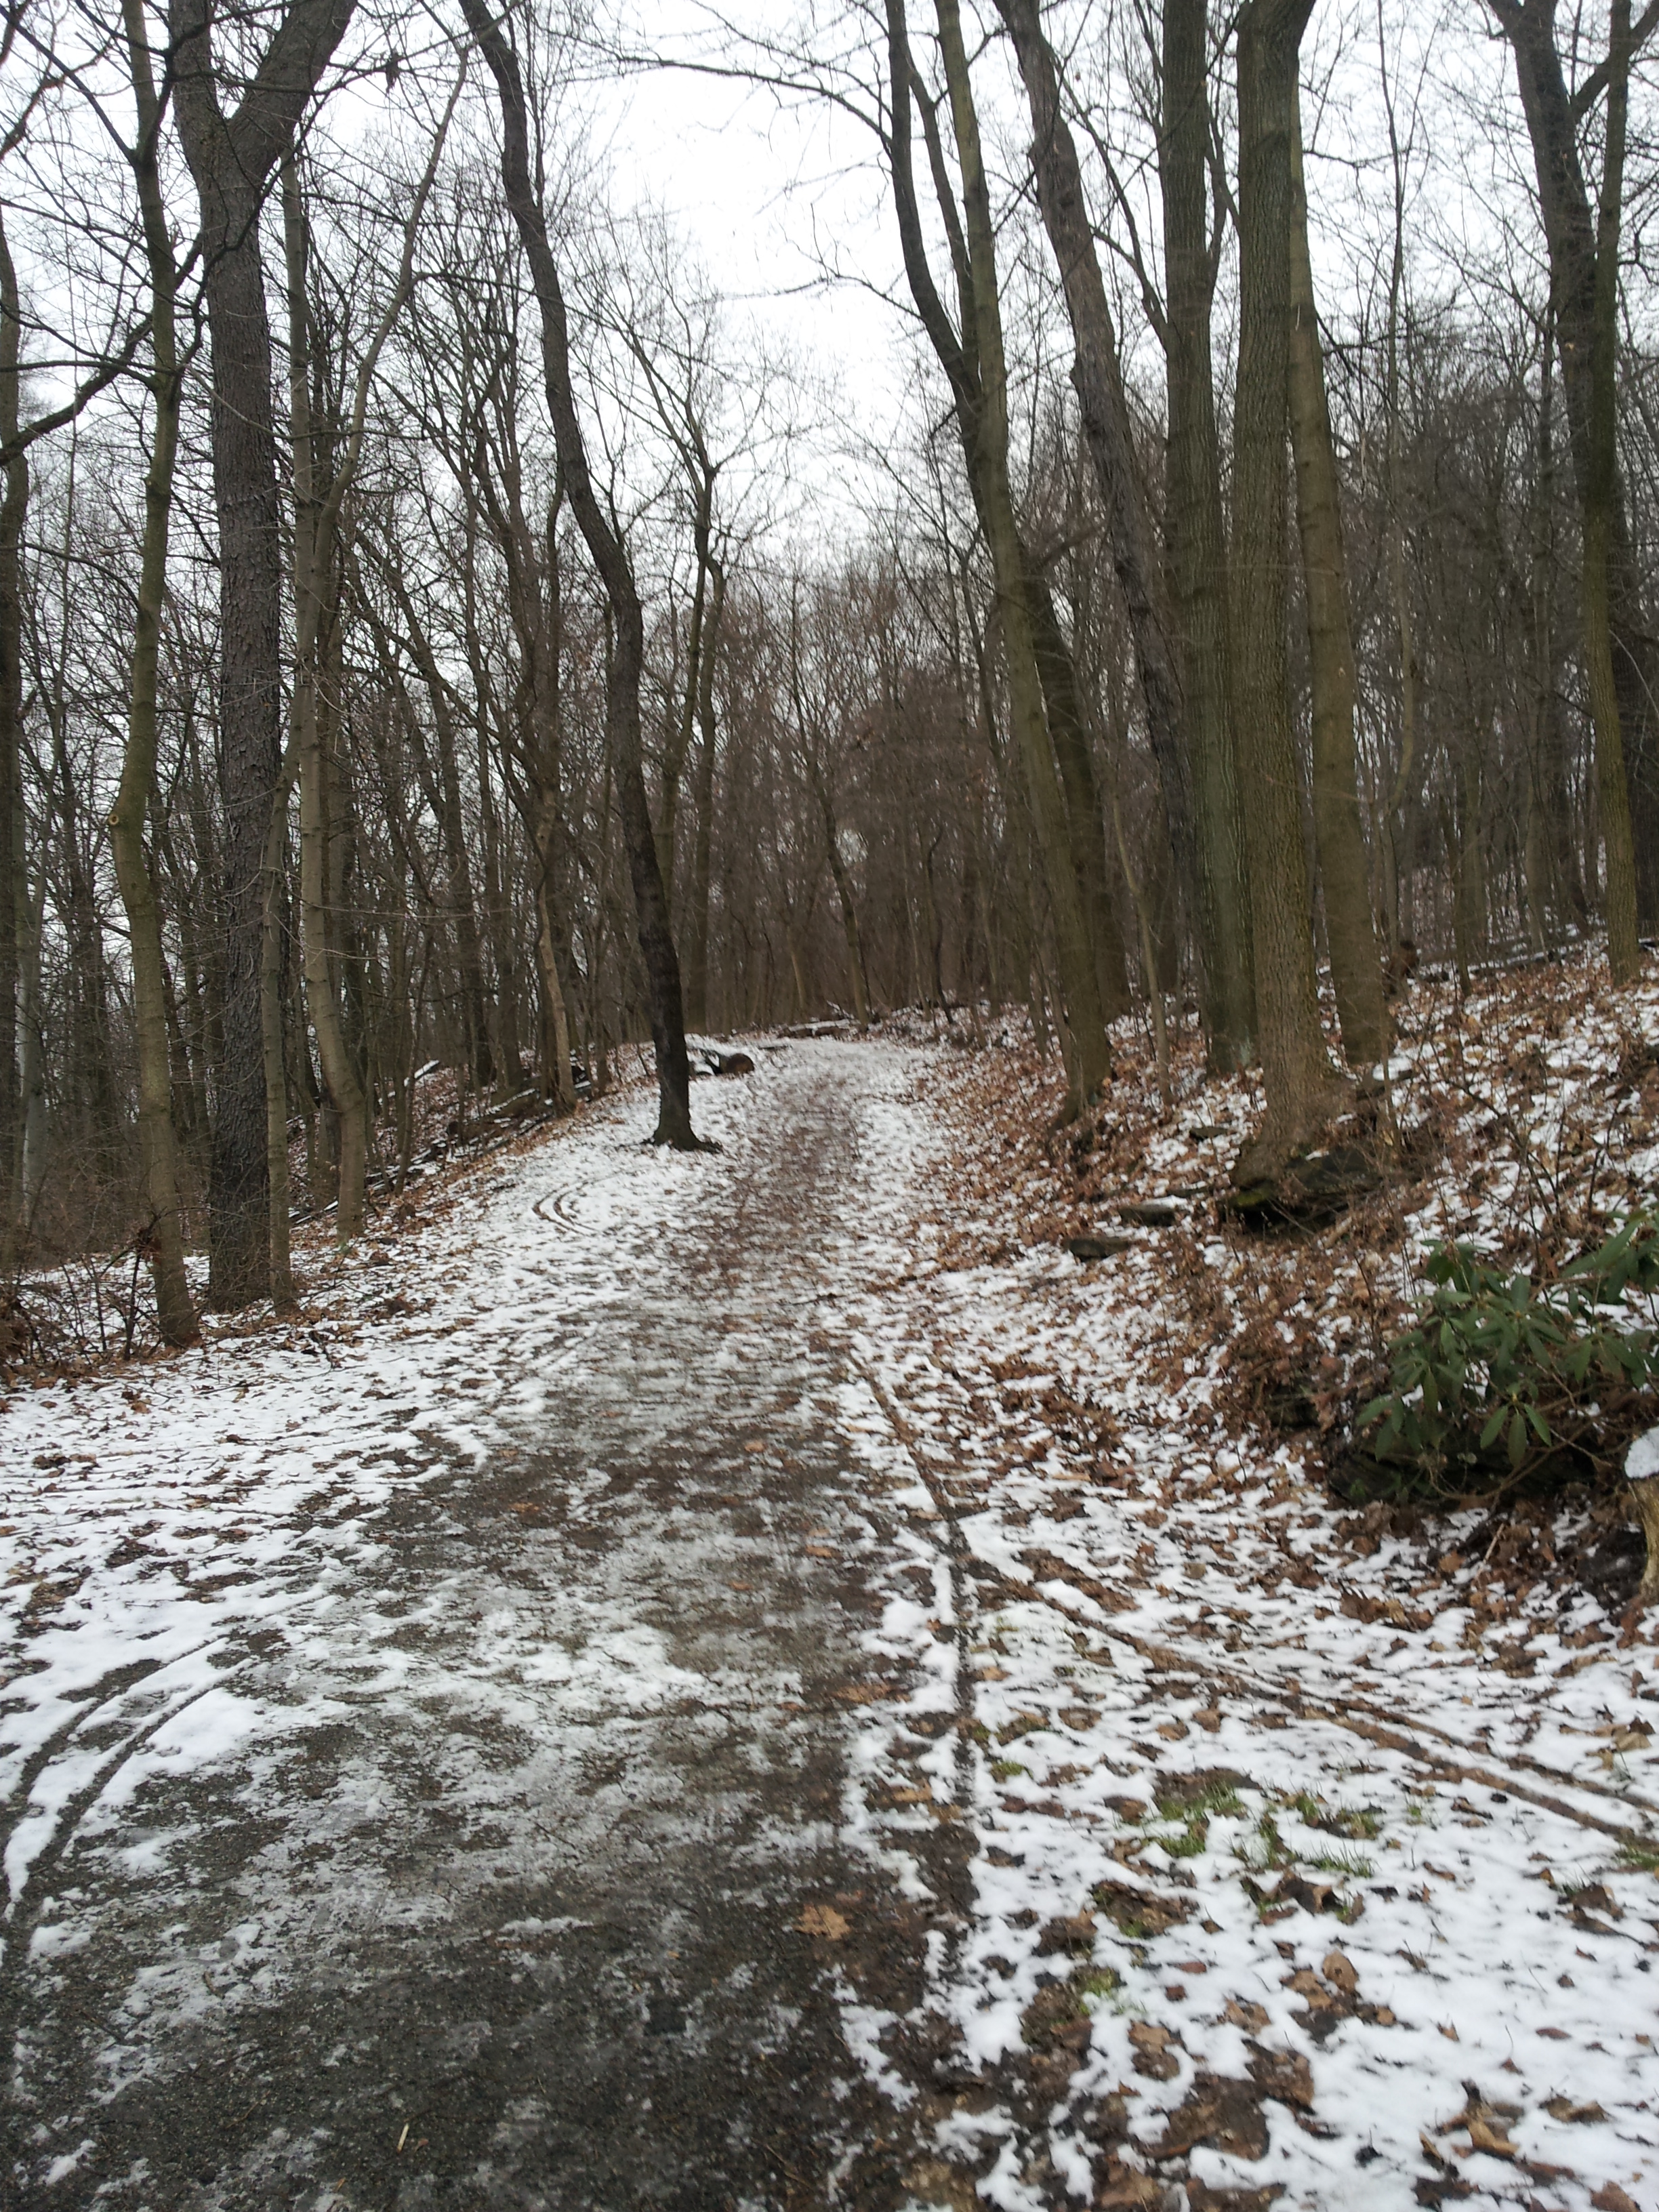
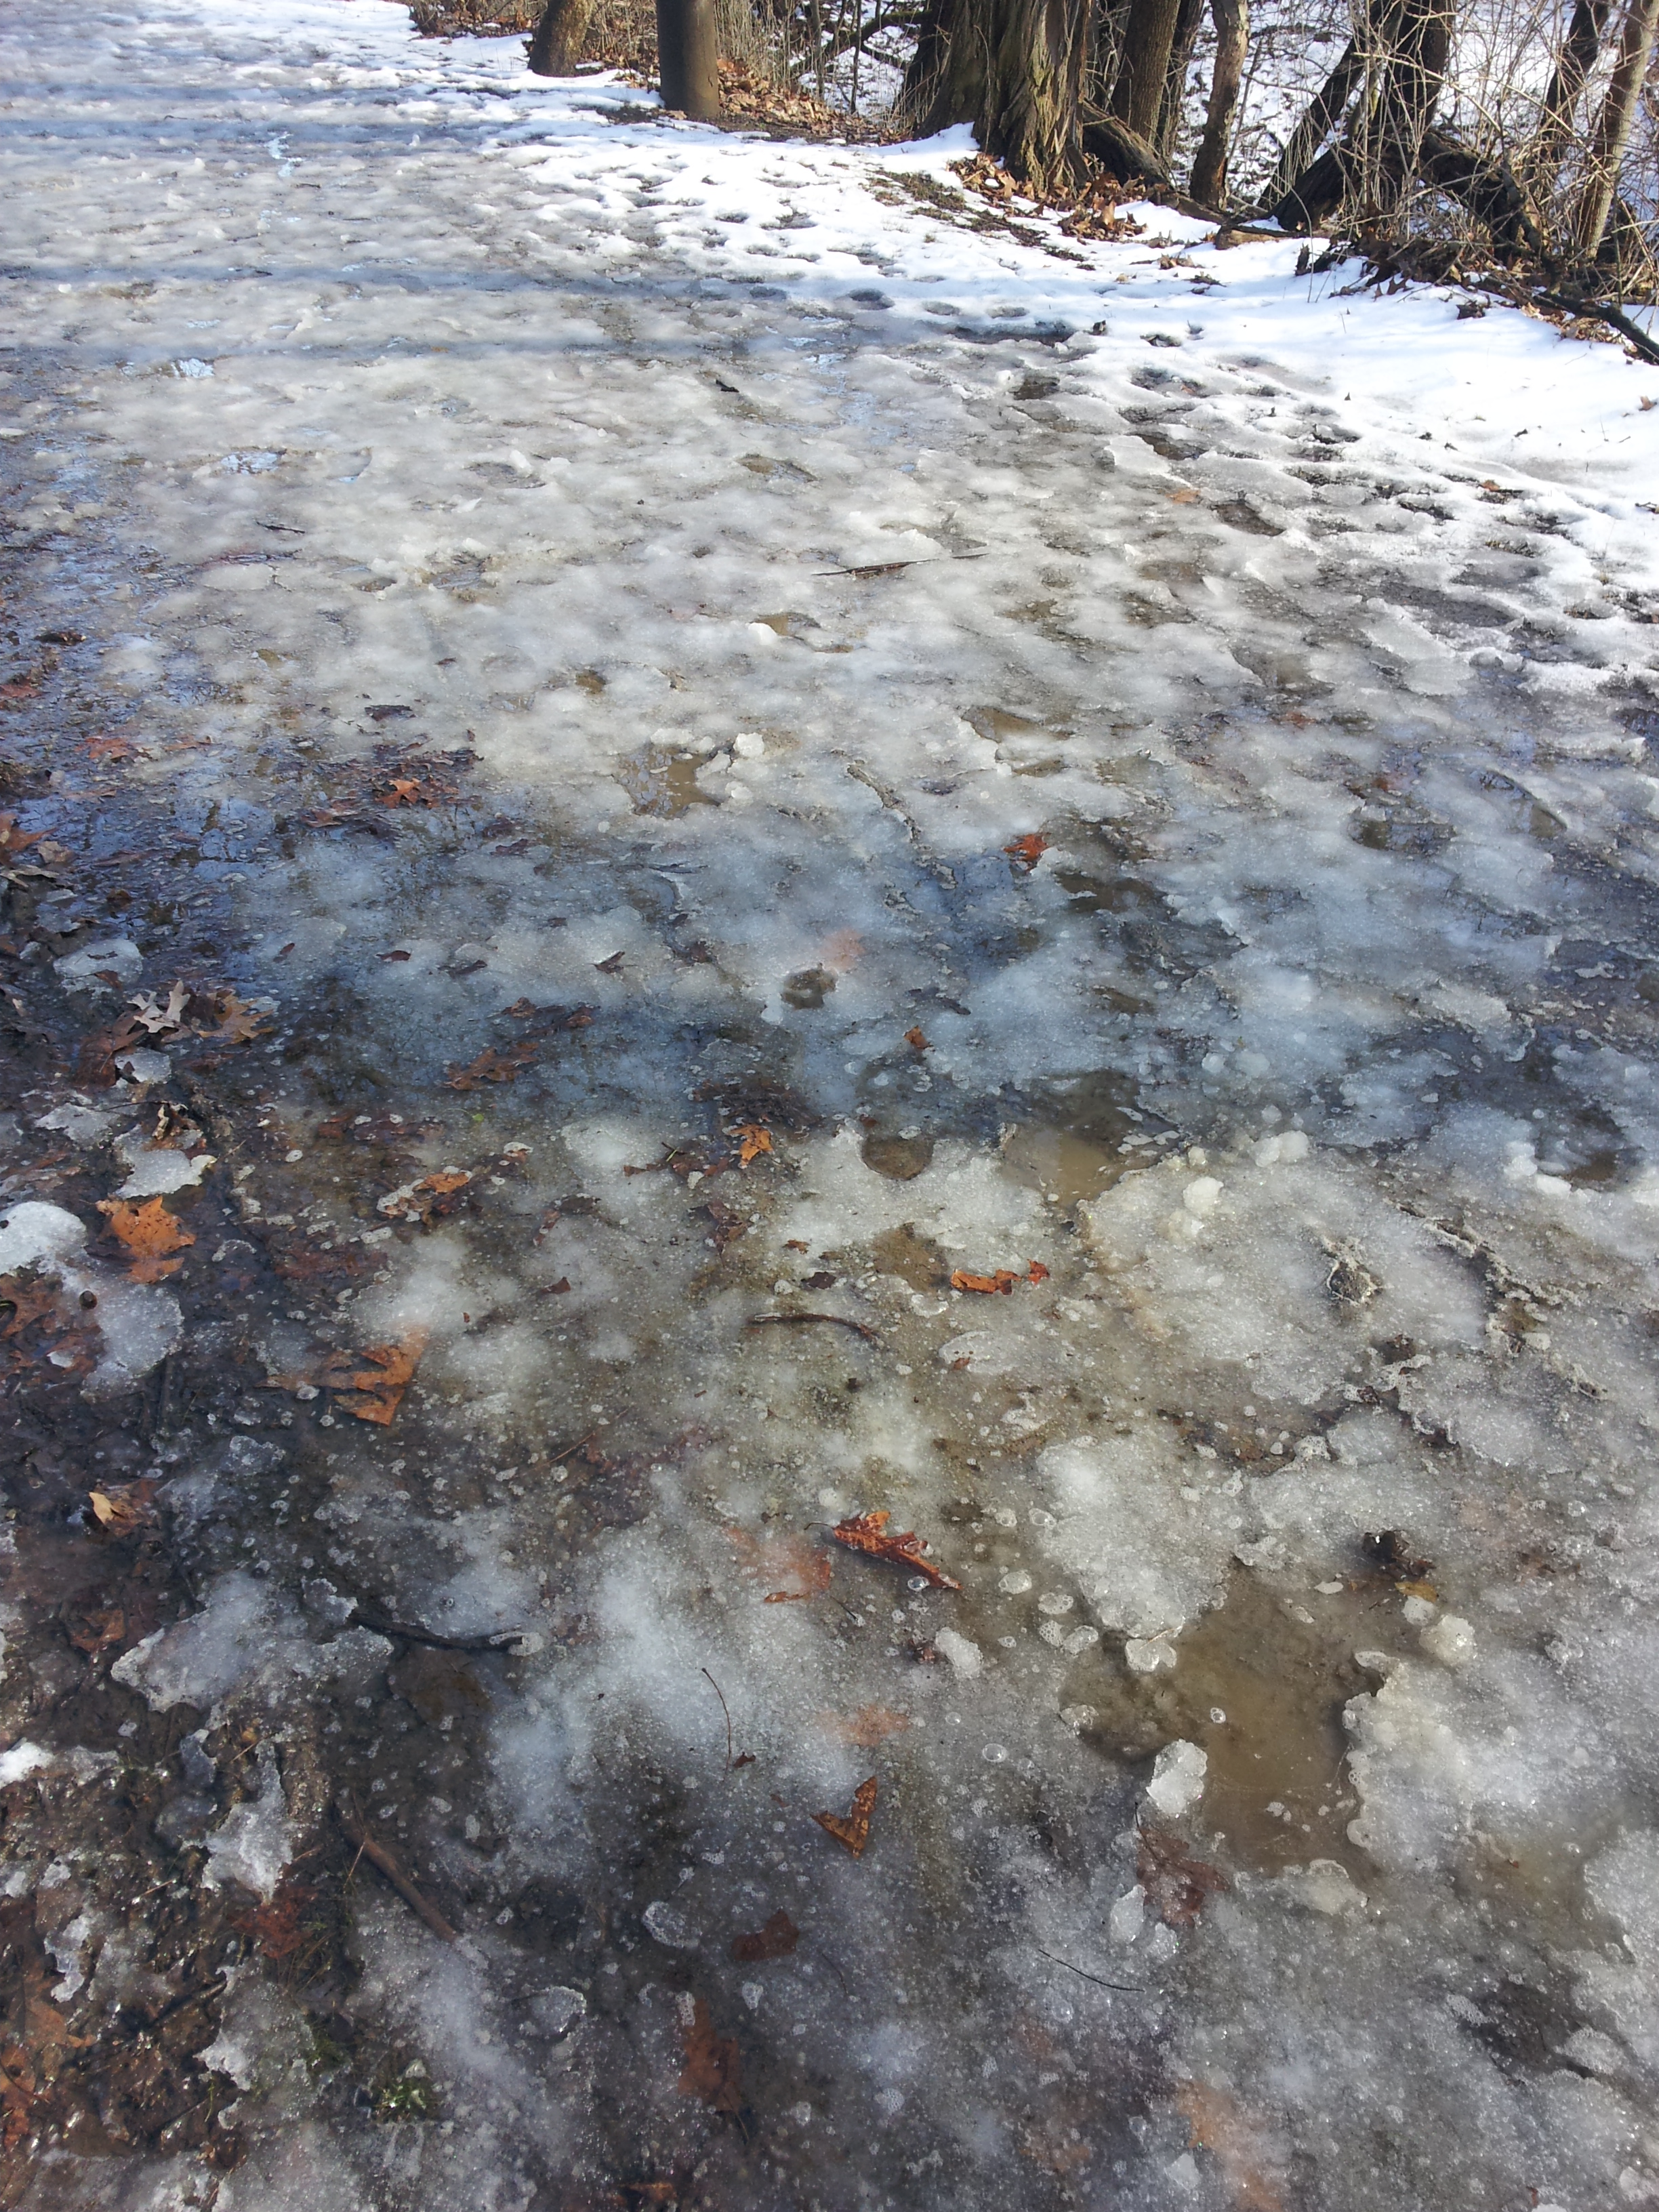
Mother Nature, how sneaky you are. After giving us a nice layer of ice and snow over the weekend, you turn around and change your mind come Monday. I woke up to pouring rain, followed by sunny skies and pushing 50 degrees in the early afternoon. I was a bit hesitant to how the trails would be but figured I'd give them a shot anyways. Instead of being covered in what looked like a nice layer of ice, the trails were covered in inches of melting slush or simply pools of water. Yeah, not going to happen for 3 1/2 miles.

I debated with myself for a while: go run the neighborhood across the street until I hit my mileage or have hubby take me to the gym later? I just couldn't pass up the incredibly warm winter weather. Although I forgot that even though the sidewalks would most likely be clear of slush, slush turns into... water. So I was definitely bobbing and weaving around a ton of puddles. Definitely by far not my fastest pace ever, but seeing as I was mostly wandering around, I'm really not surprised.
 
Tuesday: Yoga + 6 x 400 Intervals
After seeing what the trails looked like on Monday I knew they were still going to be a hot mess the following day. So I broke down and had Adam guest pass me into the gym so I could do my interval training on a nice, dry, non-slippery surface. Also known as the treadmill. While I kind of sort of consider hopping on a treadmill cheating (since there is no variation in the terrain and no wind resistance, things you'll never have in a race) I made sure to bring along my handy dandy heart rate monitor to make sure I was pushing myself enough. Although, when it comes to high speeds, and pushing yourself, and treadmills, one thing always looms in the back of my mind...
Yeah. I don't want to be that kid. Luckily, I felt awesome during the workout, and as expected, ran much faster than I would have outside. Usually outside I aim for 2:00 or under (giving about an 8:00 pace), and I definitely was well under that indoors: 1:55, 1:51, 1:51, 1:50, 1:48, under 1:47. And the great news is I felt like I could have done at least two more intervals. Woot!
 
Wednesday: 3 mile run
Well. So much for that good "I can run forever feeling". Definitely feeling the effects of the day before mixed with slippery muddy trails again. Not a horrible run, but not one of my best either.

I got sidetracked with hurrying to pick something up from school right after my run, which totally killed the whole working out vibe and I ended up skipping my strength work out. Oops. Really regretting that decision, but as we all know, hindsight is 20/20.
 
Thursday: Indoor Soccer Game
I went to bed Wednesday night determined to get in at least a 2 mile run and my strength workout before our soccer game. I woke up Thursday morning to a ridiculously dry throat (that took forever to go away) and feeling like I had just performed a super strenuous upper body workout the day before. Needless to say, the 2 mile run was passed on, as well as the strength workout.

The soccer game left me exhausted and unable to catch my breath (which isn't normal), only reaffirming my decision to back off of the workouts earlier in the day. Sometimes I need to yell at myself to quit being lazy, and sometimes I just need to listen to my body. Honestly though, it's kind of hard to tell which to do at times.
 
Friday: 7 mile run
After not feeling so hot the night before, I was a little nervous about moving the long run up a day. But, seeing as we were helping a friend move on Saturday, which would most likely take up a large portion of the day, it was the right thing to do.

I caught up with a couple friends 2 miles into their 9 miler. Which actually worked out pretty good. We held around a 9 minute or better pace for most of the run, which I was kind of surprised I was able to keep up as long as I did seeing how I felt the day before. Then around the last 5 1/2 mile mark I could feel myself slowly losing steam. I was also starving, which didn't help matters. Despite having a blah mile between 5.5 and 6.5, I finished out the run pretty strong, which I was happy about. It may or may not have helped that it was starting to get chilly as the sun was going down and I really just wanted to be done. Eh, it happens. Hopefully I'll be feeling a little stronger next week.
 
Saturday: Rest Helping a friend move.


Even though this week wasn't to the level I was expecting, I still have high hopes for next week. And I need to make sure I stopping skipping my strength workouts. :)

We've opted to move the long run to Friday again as our soccer game is on Saturday rather than the normal Thursday. Trying to do sprints after a long run = fail.


We'll see how it goes... chances of this staying "as is" is pretty slim if we go by the previous few weeks.

Friday, January 27, 2012

Chocolate Peppermint Whoopie Pies


4 years.

You can do a lot in 4 years.

Get married.

Move.

Go back to school.

Move again.

Buy a car.

Keep up with a blog.

You would think at least the last thing would easily fall by the wayside in 4 years. Yet for some reason, it never did. So here we are, 4 years after the start of this blog. It's amazing how things change.

Like the photography, the cooking ability... although some things never do change. Like me trying to burn the place down.

I thought it only fitting, on the eve of my 4 year blog birthday, to have another recipe re-do. Taking a trip down memory lane to the first I ever made a cheesecake. Or in this case, cheesecakes. These Mini Mint Chocolate Cheeesecakes were rich, and dense, and definitely in-your-face minty. Which, isn't exactly my favorite flavor.


I went back and forth and back and forth trying to figure how I wanted to re-do this recipe. Make another cheesecake? But I didn't feel like cheesecake. Chances are 90% of it would end up in the trash. No, it needed to be something else.

Something portable. Why, cookies of course!


Chocolate Peppermint Whoopie Pies


Adapted from: cdkitchen & Gingerbread Bagles

1/4 cup butter
8 ounces reduced-fat cream cheese
1 egg
1/4 teaspoon vanilla extract
1 (17.5 ounce) box chocolate cake mix

3 cups powdered sugar
1/2 cup butter, melted
2/3 cup unsweetened cocoa powder
1 teaspoon peppermint extract
1/2 teaspoon vanilla extract
1/3 cup half & half

In the large work bowl of a stand mixer, cream together the butter and cream cheese. Stir in the egg and vanilla until fully incorporated. Slowly add in the cake mix, 1/3 at a time. Cover and chill for 30 minutes.

Preheat oven to 375 degrees F. Line baking sheets with parchment paper. Using a scoop (or a tablespoon) drop dough onto prepared baking sheets. Bake for 8-10 minutes or until done. Let cookies rest on pan for 1 minute, then transfer to a wire rack to cool.

In a large bowl, mix together the butter and cocoa for about 4 minute until smooth. Stir in peppermint and vanilla extracts. Slowly stir in half of the powdered sugar, followed by half of the half and half. Repeat with remaining powdered sugar and half and half until combined, then increase speed to medium-high for 3 minutes, or until mixture is smooth.

Transfer frosting to a piping bag (a ziploc bag with the corner snipped off works well too). Spread frosting on the upturned side of half of the cookies, top with the remaining cookies.


Makes: 24 whoopie pies


Alright, I can't lie, I kind of screwed up on these. I was going for waaaay more of a cheesecake-y vibe than I got from these. Silly me, I thought simply adding the cream cheese into the cookies would come through enough, but it really doesn't at all. I should have gone with my gut on the frosting and went with a simple cream cheese buttercream with peppermint. Sigh.

And you would think after all these years I would've learned...

However, if you didn't know I was going for the whole cheesecake-reincarnation-in-a-cookie thing, you would have thought it was light and fluffy chocolate cookies sandwiching peppermint buttercream. Not a bad combo, and definitely not a bad whoopie pie.


Nutrition Facts
Serving Size 60g
Amount per serving
Calories 235Calories from fat 109
% Daily Value
Total Fat 12.1g19%
Saturated Fat 6.2g31%
Cholesterol 31mg10%
Sodium 254mg11%
Total Carbs 31.8g11%
Dietary Fiber 1.3g5%
Sugars 23.0g
Protein 3.0g
Vitamin A 6%Vitamin C 0%
Calcium 5%Iron 7%

Wednesday, January 25, 2012

Sweet & Sour Pork Stir Fry with Sesame Ginger Rice


Let me tell you a story about me trying to burn the house down. It involves pork and a wok pan. And two smoke detectors that would not shut up.

Okay, so there may not have been any actual flames (lame, I know) but there was definitely smoke and very loud beeping noises and omgcanyounottelliamjustcookingdinner? all in one go. Oh, not to mention me being clueless about any smoke whatsoever and merrily going about stirring my little pieces of pork.

Oh dear.

But somehow the pork was cooked just fine and I am still indignant about the fact that there was any smoke. Trust me. I know smoke when I see it. Been there, done that. Whatever. Maybe the fact that there's smoke detectors every 3 feet in this house doesn't help either.

Irregardless of my cooking ability, this is still delicious. Definitely spicy with a nice touch of sweet from the pineapple and pineapple juice. Yum.

Sweet & Sour Pork Stir Fry with Sesame Ginger Rice
Adapted from: Cuisine at Home, December 2011

6 ounces pineapple juice
2 tablespoons chili garlic paste
3 tablespoons rice vinegar
3 tablespoons soy sauce
3 tablespoons brown sugar
2 tablespoons cornstarch
2 tablespoons cooking sherry
1 pound pork tenderloin, trimmed, cut into 2-inch pieces
1/2 teaspoon kosher salt
1/2 teaspoon ground black pepper, grated
3 tablespoons canola oil, divided
1 tablespoon garlic
1 teaspoon ground ginger
8 ounces frozen broccoli
1 cup match-stick cut carrots
6 ounces frozen snow peas
1 bunch green onions, cut into 1-inch pieces
1 cup fresh pineapple, cubed

3 cups fat-free, reduced-sodium chicken broth
1 1/2 cups long grain white rice
2 teaspoons ground ginger
1 teaspoon sesame oil

In a small bowl, whisk together the first 7 ingredients (through sherry). Set aside.

Sprinkle the salt and pepper onto the pork tenderloin. Heat a wok or large non-stick skillet over medium-high heat. Add 2 tablespoons canola oil. Cook the pork in two batches until browned, about 5 minutes per batch. Remove pork to a paper towel-lined plate and set aside. Wipe wok out with a clean paper towel.

With the heat still at medium-high, add the remaining canola oil. Add the garlic and ginger, stir frying for 30 seconds. Add the broccoli and cook for 1 minute. Add the carrot and cook for another 2-3 minutes. Add the snow peas and white parts of the green onion, cooking for 1-2 minutes. Toss in the pineapple and reserved sauce mixture. Simmer until sauce thickens, about 2 minutes, continuing to stir. Stir in cooked pork and continue to simmer until heated through, about 2 minutes. Garnish with remaining green portions of green onions.

Meanwhile, bring broth to a boil in a medium saucepan over medium-high heat. Add rice, ginger, and sesame oil, stirring well. Return mixture to a boil. Cover, and reduce heat to medium-low. Cook 15-20 minutes or until rice is tender.


Serves: 6


Apparently, not only do I like to set off smoke detectors, but I also can't read. Instead of adding chili garlic sauce, I added paste. Um, yes, definitely a difference. Let's just say our sinuses were very cleared out after we finished eating. (Don't worry, I've adjusted the amount above to be more, shall we say, tolerable.) Despite all my flubs, we still really enjoyed the dish.


Nutrition Facts
Serving Size 438g
Amount per serving
Calories 460Calories from fat 100
% Daily Value
Total Fat 11.1g17%
Saturated Fat 1.7g8%
Trans Fat 0.1g
Cholesterol 55mg18%
Sodium 980mg41%
Total Carbs 60.5g20%
Fiber 4.0g16%
Sugars 13.1g
Protein 27.0g
Vitamin A 76%Vitamin C 115%
Calcium 8%Iron 25%

Monday, January 23, 2012

Creamy Mac 'n' Cheese with Spinach


Hot. Creamy. Cheesy. Pretty much everything you ever wanted out of macaroni 'n' cheese.

I was originally going for straight cheddar, until I realized I needed a whole pound of it and only had half. Enter the cheese drawer.

I had a few ounces of this, a few ounces of that, oh gross and that has some mold on it, into the trash it goes. Needless to say, after scrounging around in the fridge, I had a hodgepodge of cheeses heaped on the counter.

A whole lot of cheddar. A chunk of cream cheese. A little block of Swiss. Some grated Parm.

And that spinach hiding out back there looks like it's on its last legs. Alright, you can come join the party, too. It might make me feel only slightly less guilty about adding an entire pound of cheese to one.single.dish.

Eh, who am I kidding? I love me some cheese. Like a 7th grade celebrity crush love on cheese. Except better. Because I can actually have this.

Creamy Mac 'n' Cheese with Spinach
Adapted from: The Pioneer Woman

4 cups dried macaroni
4 tablespoons butter
1/4 cup all-purpose flour
2 1/2 cups 1% milk
1 teaspoon dry ground mustard
1 egg, lightly beaten
8 ounces extra sharp cheddar cheese, shredded, divided
5 ounces reduced-fat cream cheese
2 ounces Swiss cheese, shredded
1 ounce Parmesan cheese, grated
3 ounces fresh baby spinach, chopped
1/4 teaspoon garlic powder
1/4 teaspoon onion powder
1/2 teaspoon ground white pepper
1/8 teaspoon cayenne pepper
1/8 teaspoon paprika
1/8 teaspoon thyme

Preheat oven to 350 degrees F. Coat a 9x13-inch baking pan with cooking spray; set aside.

Bring a lot pot of water to boil over high heat. Add macaroni and cook 1 minute short of package instructions. Drain and set aside until ready to use.

In a large saucepan over medium-low heat, melt butter. Whisk in the flour and cook for five minutes, whisking continuously.

Increase heat to medium. Add milk and mustard, whisking until smooth. Cook for five minutes, or until very thick. Reduce heat to low.

Pour 1/4 cup of the sauce into a small bowl with the beaten egg, whisking vigorously to prevent the egg from cooking. Once smooth, pour egg mixture into the sauce and whisk until smooth. Stir in all the cheese except 3/4 cup shredded cheddar, until melted and smooth. Whisk in the seasonings. Fold in the spinach and macaroni, stirring until completely coated with sauce.

Transfer macaroni to the prepared baking dish and top with remaining cheddar cheese. Bake for 15-20 minutes or until cheese is bubbly and golden.


Serves: 8


Even though I was going for all cheddar, I'm so glad I miscalculated. The cream cheese totally adds a nice creaminess that cheddar alone could never achieve. (I still love you anyways Cheddar!) As for that spinach? Well, you can't even taste it, it makes the dish look prettier, and it kindofsortofatleastinmymind makes the dish healthier.

Next time around I may pass on the egg and all that tempering business and the whole baking the mac 'n' chee. That's just prolonging the amount of time between cheese heaven in a bowl and my belly. Not cool.


Nutrition Facts
Serving Size 203g
Amount per serving
Calories 469Calories from fat 220
% Daily Value
Total Fat 24.4g38%
Saturated Fat 14.9g75%
Cholesterol 95mg32%
Sodium 408mg17%
Total Carbs 40.4g17%
Fiber 1.8g7%
Sugars 6.1g
Protein 21.7g
Vitamin A 39%Vitamin C 5%
Calcium 43%Iron 13%

Sunday, January 22, 2012

2012 Goal #2 - Training for a Half Marathon: Week 2

Let's just jump into the week's recap, shall we?

Sunday: Rest
Ahhh, blessed rest. Man I love it. Just not really a good thing to do it two days in a row (I had Sat off too).

Monday: 3 mi run + strength
Didn't exactly feel bad, but I could totally feel those two back to back days I had off.

Cold and snowy. But at least it kept the mud at bay.

Still hovering around a 9:30 pace, which I wish was closer to or under 9 minutes. I blame all the rutted out bike tracks and ice on the path for slowing me down. I can do that, right?


Tuesday: 30 minute tempo run + yoga
Let's just say that the day did not start out great as all I really wanted to do was curl up in a ball on the couch and not step a foot outside all day. I really did. It took a lot of motivation and yelling at myself that I was simply being lazy and there was no reason I couldn't go out and run. I think my main deterrence was I was slightly anxious about doing a tempo run -- something I've never done before. And the thought of doing something new, and hard, in the rain and cold just wasn't appealing.

But I had to. I promised myself I would actually train for a race. I couldn't give up in week 2.

Since this workout involved pushing myself (up to a "comfortably hard" pace) I decided to stay away from slippery trails and rutted out bike tracks so I could actually focus more on my pace rather than where my next step was going to be.

For those of you who aren't sure what a tempo run is exactly, it's basically a workout to help increase your lactate threshold. Say what? In short, it forces you to extend the time/distance you can run at a faster pace without dropping on the pavement thinking your legs just turned to jelly and your lungs are going to explode. (Or, ahem, maybe a better explanation is here.)

I wanted to do a warm up for the first third of the run, build up to my peak pace by the 2/3 mark, then slow back down for the last little bit. Instead of going by pace during this run, which would involve me checking my phone every 5 seconds, then chucking it in the river, I opted to focus on my heart rate instead. Here's the breakdown for my 30 minute run:

0-10 minutes - Warm up @ 9:00-9:30 pace
10-15 minutes - keep HR between 165-175 (65-75% HRR)
15-20 minutes - keep HR above 180 (75-85% HRR)
20-25 minutes - keep HR above 185 (90%+ HRR)
25-30 minutes - Cool down, roughly a 9:00-9:30 pace

Oh, and then I did yoga. And thought my hamstrings were going to peel themselves off my legs and walk away. More on that later.


Wednesday: 2.5 mi easy run
Since my hamstrings were about die a fiery death by yoga, I decided it'd be best to back it off a bit, especially since this wasn't designed to be a run to push myself on anyways.

The first mile is almost all a gentle downhill with the second mile being almost completely flat. That's my kind of cheat easy run.

You can barely see the stairs back up a super not fun hill in the picture. This is where I stop and walk back up to my car. I call it my "cool down".


Thursday: 2 mi run + Strength + Indoor Soccer Game
Thank goodness the hamstrings started to chill back out a bit. I added back in the strength training I cut out from the day before. A necessary evil in my mind. Sigh. Do I have to?

Friday: Yoga
Okay, let's get something out of the way here. When I talk about doing yoga, I am most definitely a beginner. A ridiculously inflexible one. Let me demonstrate. One of the poses is something called the Needle:
I am pretty sure it's named this for feeling you get in this pose. As in, there's about a thousand needles poking you in the hamstring all while laughing at your pathetic attempt to get your back foot higher than your head. Which is pointing at the ground. Epic fail.

So yeah. That's why I do this at home.

Saturday: 6 mile run
Here's the story of my 6 mile run. In 3 inches of powdery snow plus a whole lotta slushy stuff.

The regular powder wasn't actually all that bad, but the slushy, heavy, wet snow dumped on the trail by passing cars and snow plow was a whole different story. Despite working even harder to fight through the stuff, all I did was slow down. There was just no traction whatsoever. Thank goodness I was running with a couple friends or these areas would have been a complete disaster.

It's funny looking at our pace through these areas (which is kind of an awesome feature of the iMapMyRun app), we easily added 1:00-1:30 min/mile to our pace when going through that mess. Overall, though, considering the conditions, I'm pretty happy we finished in under an hour.


Whew. Holy long-windedness.

So. Moving on. Next week.

Very similar to Week 1, with an extra rep added to the interval training.

And I'm out. Off to curl up on the couch and enjoy my day off.

Friday, January 20, 2012

Baked Mushroom Bao


I have a love/hate relationship with snow. There are times I love it -- sledding, tubing, even when I'm out running (I will totally take snow over cold rain), and it's a perfect excuse to curl up on the couch and watch reruns of totally mind-numbing shows. There's something about it that makes everything just a bit softer and a bit quieter and a bit more peaceful.

Until I try and drive somewhere. There's where we get into the hate part of the relationship. One speck of snow and immediately everything slows down. Frustrating. Of course it's always best to be prudent, but 30 mph on the highway in drive-able conditions? Hair pulling.

Let's not even go into the part where the snow always seems to find its way down into my socks when I'm walking to the car and then magically dumps 5 pounds of itself into the driver's seat when I open the door. Splendid. That's my favorite.

But these little bao buns don't have such a love/hate relationship with me. Just love. I used the bao bun recipe I've used in the past and simply swapped out the filling. The buns are slightly sweet and pair so well with the uber flavorful mushroom filling. Vegetarian? Almost (sorry, there's fish sauce), but trust me, you won't miss the meat in this one.

Baked Mushroom Bao
Adapted from: Katherine Martinelli

2 tablespoons sugar
1/2 cup very hot water
2 teaspoons vegetable oil
1/3 cup 1% milk
2 1/4 teaspoons instant yeast
2 cups all-purpose flour

1 egg yolk
1 teaspoon sugar
2 teaspoons water

1/2 tablespoon vegetable oil
1/4 cup shallot, finely diced
5 1/2 cups diced mushrooms (any mix will do)
1 tablespoon soy sauce
1 tablespoon fish sauce
1 tablespoon hoisin
1 teaspoon sesame oil
1/4 cup vegetable broth (can also use chicken broth)
1 teaspoon cornstarch

In a large bowl, stir together 2 tablespoons sugar and hot water. Let sit until sugar has completely melted (may need to put in the microwave for a few seconds). Add 2 teaspoons vegetable oil and milk. Allow mixture to cool to 110-115 degrees F. Add yeast and stir well. Cover with a towel and let sit for 10 minutes in a warm, draft free spot. Mixture should be foamy on top when ready.

Stir in flour with a wooden spoon until the flour is mostly incorporated and the mixture looks shaggy. Knead dough by hand until no longer sticky, about 5 minutes. Transfer to a lightly oiled bowl, turning once to coat. Cover with a towel and let rest in a warm, draft free area until doubled in size (25 minutes).

Preheat oven to 400 degrees F. Line a baking sheet with parchment paper and set aside.

Meanwhile, heat 1/2 tablespoon vegetable oil in a wok or large saute pan over medium-high heat. Add the shallots and cook until they start to soften, about 1-2 minutes. Add the mushrooms and cook until they have released their liquid and most of it has evaporated, about 5-7 minutes. Stir in the soy sauce, fish sauce, hoisin, and sesame oil. Cook for an additional 2-3 minutes.

In a small bowl, whisk together the broth and cornstarch until no lumps remain. Pour into the mushroom mixture, cooking until thickened, 1-2 minutes. Transfer mushroom mixture to a bowl to cool until ready to use.

Divide dough into 12 equal portions. Flatten each section into a 3-inch round, leaving the center thicker. Add a heaping tablespoon of filling to the center of each disk, then fold the ends over each other to form a ball. Seal the seams well. Place buns seam-side down on the baking sheet.

In a small bowl, whisk together the egg yolk, 1 teaspoon sugar, and 2 teaspoons water. Brush egg wash over each bun. Bake for 15-20 minutes, or until buns are golden brown.


Serves: 4 (serving size: 3 buns)


Unfortunately, I did a little miscalculation when I made these. The filling recipe claimed it made 12 buns, my bun recipe said it only made 6 buns. So I halved the filling. And it was only until I was already in the midst of things that I realized the dough amount in each original recipe was the same. Oops. So we just had really big, fluffy rolls. Next time I am definitely going for the whole filling recipe (which is reflected above). And yes, there will most definitely be a next time for these.

Side note: These pair great with some Sichuan Green Beans (which honestly might be the hubby's favorite side dish. Ever.).


Nutrition Facts
Serving Size 268g
Amount per serving
Calories 376Calories from fat 69
% Daily Value
Total Fat 7.7g12%
Saturated Fat 1.7g8%
Cholesterol 54mg18%
Sodium 706mg29%
Total Carbs 64.8g22%
Fiber 3.3g13%
Sugars 11.5g
Protein 12.8g
Vitamin A 4%Vitamin C 5%
Calcium 5%Iron 23%

Wednesday, January 18, 2012

Pollo con Mojo de Ajo


Don't be afraid. It just sounds fancy. It's not. Promise.

It's simple and quick and oh yeah, it's Garlic Chicken.

Not all-up-in-your-face Garlic Chicken, but a nice muted but not quite subtle Garlic Chicken. A very simple profile of flavors which all come together nicely and really make a basic piece of chicken shine.

Which is a good thing. Blah chicken is just so, well, blah. Pair this with some Mexi Rice and you're golden.

Pollo con Mojo de Ajo
Adapted from: Cooking Light, January 2005

4 (4 ounce) boneless, skinless chicken breasts
1/4 teaspoon salt
1/4 teaspoon ground black pepper
1 tablespoon vegetable oil
1 tablespoon butter
4 cloves garlic, thinly sliced
3/4 cup fat-free, reduced-sodium chicken broth
1 tablespoon lime juice
1 tablespoon cilantro, minced
4 lime wedges

Line a work surface with plastic wrap. Lay the chicken breasts in a single layer across it and cover with a second piece of plastic wrap. Pound chicken to a 1/2-inch thickness. Remove plastic wrap and sprinkle chicken with salt and pepper.

Meanwhile, in a large non-stick skillet over medium heat, warm the oil. Add the chicken and cook for 6 minutes on each side, or until done. Transfer chicken to a plate and keep warm.

Reduce heat to medium-low. Melt the butter in the pan. Add garlic, cooking for 1 minute, taking care not to brown it. Pour in broth and bring to a boil. Scrape the pan to loosen any browned bits with a wooden spoon. Cook, stirring frequently, until broth mixture has reduced to 1/2 cup, about 5 minutes. Remove from heat. Stir in lime juice.

Serve chicken topped with 2 tablespoons sauce, sprinkled with cilantro, and a lime wedge.


Serves: 4


So, double score on working on two of my goals for the year -- take that #4 (serve more sides) and #5 (clean out my Google Reader starred items).

It's been so long since I've actually made a straight-chicken-no-frills dish. No, really, I can't remember the last time. I have to admit, it was kind of a nice change. Even the hubby, you know, the one who begged me forever ago to stop with all the chicken dishes, gave it two thumbs up.


Nutrition Facts
Serving Size 181g
Amount per serving
Calories 280Calories from fat 132
% Daily Value
Total Fat 14.7g23%
Saturated Fat 4.8g24%
Cholesterol 109mg36%
Sodium 351mg15%
Total Carbs 2.3g1%
Protein 33.3g
Vitamin A 3%Vitamin C 8%
Calcium 3%Iron 8%

Tuesday, January 17, 2012

Warm Chickpea Salad


I warned you I was going for some more veggies in my diet. You know, those things I don't like to eat?

But, when they're smothered and covered in bacon drippings... they're tolerable. Even the green ones.

Honestly, I was a little scared when I was making this. Not because I thought I wouldn't like it, but I was a bit worried I may be scrounging around for something else for the hubby. That I would get that look. The "what the heck is this and why am I supposed to be eating it?" look.

Yet the look never came. I didn't have to go back into the kitchen to try and poke around for some leftovers or who knows what else. I think it was the bacon. It's excellent at hiding things. Or at least convincing you that there is most definitely meat present, and a lot of it. Even when it's not true.

Not that you have to worry about not being full from this meal. The chickpeas take care of that. Maybe, just maybe, I can get the hang of this whole eating veggies thing down. With a little help from my friend bacon.

Warm Chickpea Salad
Adapted from: How Sweet It Is

3 slices bacon
1 cup sliced mushrooms
7 Brussels sprouts, thinly sliced
1 (15 ounce) can chickpeas, drained and rinsed
2 tablespoons chopped pecans
1/4 teaspoon ground black pepper
1/8 teaspoon ground nutmeg
2 tablespoons grated Parmesan cheese

Place bacon in a large skillet over medium heat. Cook until bacon is browned but not completely crisp. Transfer to a paper towel-lined plate. Remove all drippings from the pan except for 2 tablespoons.

Add mushrooms to the pan and cook for 5 minutes, or until they start to release their juices, stirring occasionally. Add the Brussels sprouts and cook an additional 5 minutes. Stir in the chickpeas, bacon, pecans, pepper, and nutmeg. Cook for another 5-6 minutes, or until mixture is heated through.

Divide the mixture evenly between three plates. Sprinkle each with 1/3 of the Parmesan.


Serves: 3


Despite the fact that this can be a high calorie meal, it's actually fairly healthy for you. (I'm pretty sure you'll be set on some fiber for a while.) Although you could always opt for having this as a side rather than as the entree. Which, I think is definitely doable -- coming from someone who is horrible at timing foods together and rarely makes sides. I guess that says something, right? (And the fact that the hubby actually commented on how much he liked it says something too, I should add.)


Nutrition Facts
Serving Size 232g
Amount per serving
Calories 697Calories from fat 217
% Daily Value
Total Fat 23.6g39%
Saturated Fat 6.7g34%
Cholesterol 18mg6%
Sodium 256mg12%
Total Carbs 91.7g31%
Fiber 27.1g108%
Sugars 16.8g
Protein 33.6g
Vitamin A 9%Vitamin C 73%
Calcium 21%Iron 55%

LinkWithin

Related Posts with Thumbnails
 
Pin It button on image hover