Tuesday, February 28, 2012

Cinnabon Cinnamon Rolls


Growing up, we never lived very close to our extended family. Come Christmas-time or any other time to visit family, this entailed a 24 hour drive or some very expensive flights. The older we got, the more often my parents opted for the plane rides rather than the ridiculously long drive.

I loved it when we flew. Mostly because we always had a layover at the Minneapolis airport. And the Minneapolis airport = Cinnabon cinnamon rolls. It never failed. Unless we had a crazy short layover requiring the "airport sprint", my sister and I always made a stop at the Cinnabon in the central shopping area. Always.

Nowadays, the Cinnabon is long gone, replaced by some taco or burrito joint. Seriously? Bitter, party of one, right here.

That said, I haven't had a Cinnabon cinnamon roll in years. But for some reason, out of the blue, I was craving them. For weeks, actually. So I finally broke down and poked around on the internet to see what I could find. Knowing full well that there are a ton of copy-cat recipes out there.

It took probably less than 5 minutes to come across this recipe which had 5 stars with over 4600 reviews. Okay, I'm sold.


Cinnabon Cinnamon Rolls
Adapted from: Allrecipes.com

1 cup warm 1 % milk (105-115 degrees F)
2 1/4 teaspoons active dry yeast
1/2 cup granulated sugar
2 eggs, at room temperature
1/3 cup butter, melted
1 teaspoon kosher salt
4 1/2 cups bread flour

1 cup packed brown sugar
2 tablespoons ground cinnamon
1/3 cup butter, softened

3 ounces reduced-fat cream cheese, at room temperature
1/4 cup butter, at room temperature
1 1/2 cups powdered sugar
1/2 teaspoon vanilla extract

In a large mixing bowl, stir together the milk, yeast, and 1 tablespoon granulated sugar. Let sit for 5-10 minutes, or until the top of the mixture is foamy. Mix in the eggs, melted butter, salt, and remaining sugar. Slowly add in the flour, one cup at a time, until a soft dough forms. If using a stand mixer, switch out the paddle attachment for the dough hook, add any remaining flour, and knead on medium speed for 6-8 minutes. Otherwise, turn out the dough onto a lightly floured work surface, add any remaining flour, and knead for 8-10 minutes, or until dough is slightly tacky and elastic.

Coat a large bowl with cooking spray. Shape the dough into a ball, then transfer to the bowl and cover with plastic wrap. Place bowl in a warm, draft-free area and let dough rise until doubled, 1-2 hours.

While the dough is rising, combine the brown sugar and cinnamon in a small bowl; set aside. Once the dough has doubled in size, turn out onto a lightly floured work surface. Punch down, then let cover and rest for 10 minutes.

Roll dough out into a 16 x 21 inch rectangle. Spread 1/3 cup butter evenly across the dough leaving a 1/4-inch margin on the shorter sides. Sprinkle the sugar and cinnamon mixture evenly across the butter. Starting from a short side, roll dough up, pressing the final 1/4-inch margin of dough gently into the roll to seal. Cut dough with a serrated knife into 12 slices. Coat a 9 x 13 inch baking pan with cooking spray. Transfer the rolls to the pan. Cover pan with a towel and let the rolls rise until they have about doubled, 30 minutes.

Preheat oven to 400 degrees F. Bake rolls for 15 minutes, or until tops are golden brown. Cool for 5 minutes, then place a baking sheet face down over the pan. Holding the two pans together, flip over so the rolls are now on the baking sheet upside down.

Meanwhile, in the large work bowl of a mixer, beat the cream cheese and 1/4 cup butter until smooth. Add the vanilla. Slowly stir in the powdered sugar until fully incorporated. Spread frosting over warm rolls.


Serves: 12


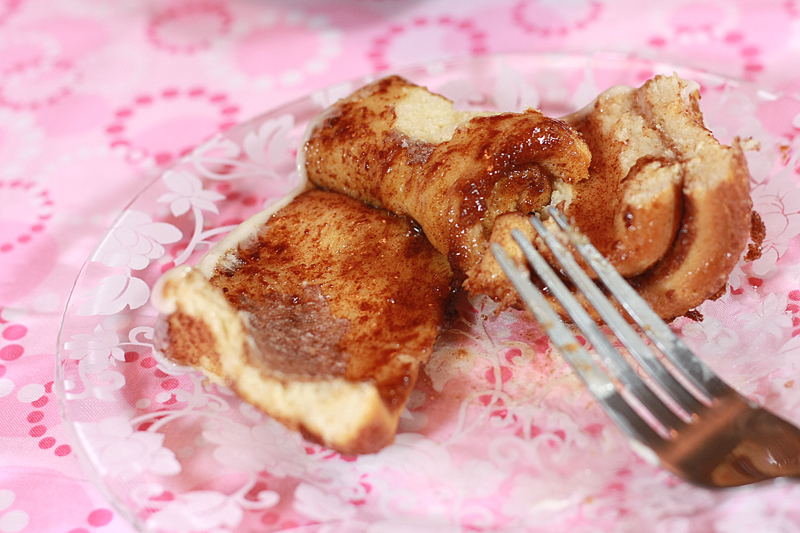
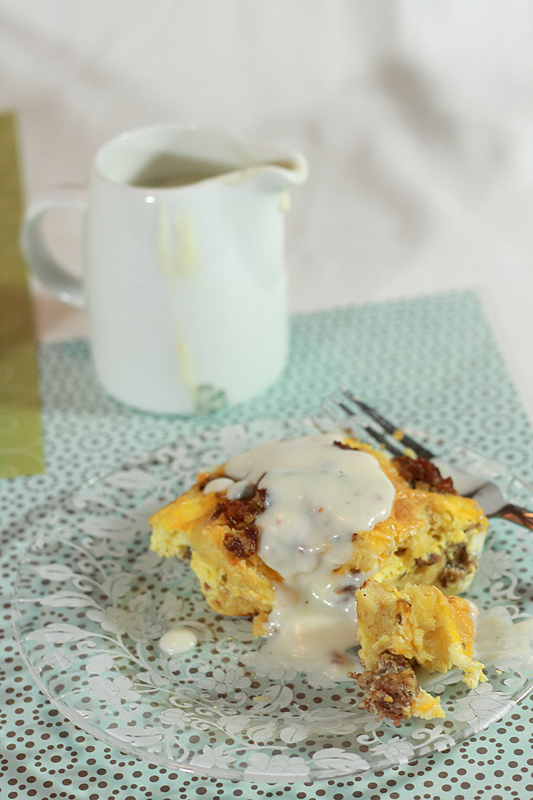
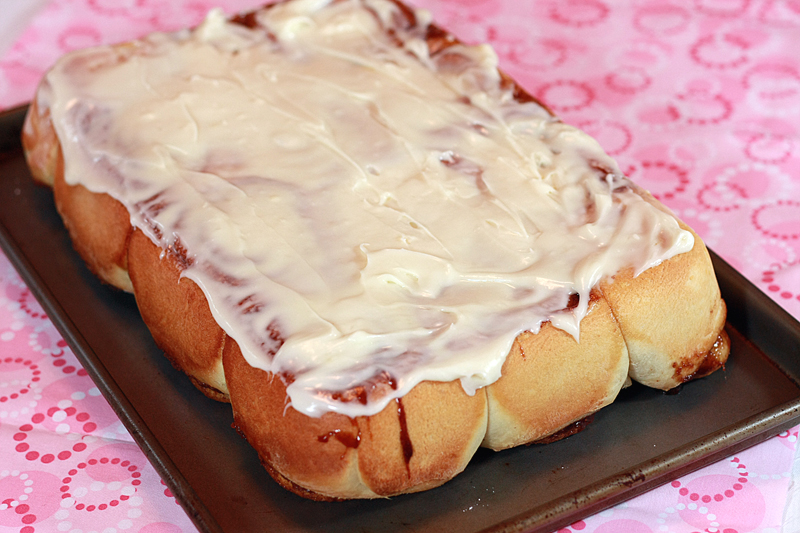
Yes, I realize that flipping these bad boys over does not for a pretty picture make. However, flipping the rolls over almost right out of the oven allows all the molten brown sugar/cinnamon/butter gooey filling to flow back into the rolls, rather than running out of the bottom and sticking to the pan. And seriously, that's what we're here for.

I was literally almost sick with the amount and thickness of brown sugar that went in as the filling, but I honestly don't think in the end you can ever have too much. It's really the best part. Though if you're going to go true Cinnabon-style, you have to have the cream cheese frosting, and that's pretty darn good too.

Adam and I gave these two thumbs way up, and I think they are definitely close to the real thing. The problem is, unfortunately, that instead of curing my craving, it really only made me want more. Wait, is that really a problem?


Nutrition Facts - crust only
Serving Size 137g
Amount per serving
Calories 474Calories from fat 155
% Daily Value
Total Fat 17.2g26%
Saturated Fat 10.4g52%
Cholesterol 75mg25%
Sodium 346mg14%
Total Carbs 73.4g24%
Fiber 2.0g8%
Sugars 36.3g
Protein 7.6g
Vitamin A 12%Vitamin C 0%
Calcium 7%Iron 15%

Monday, February 27, 2012

Half Marathon Training: Week #7


Sunday: Rest


Monday: 4.5 mile easy run
Great weather + mostly dry trails = good running conditions. Having to go to the bathroom almost as soon as you start to run = one very uncomfortable run. Argh$^#&alsdfhas. That is all I have to say about that.

Tuesday: 8 x 400m speed workout + Strength
Once again I had that "blah" and "I-don't-feel-like-doing-this" day. But, I already had told the hubby he was going to take me to the gym after work
(days before, and I reminded him everyday), so I couldn't talk myself out of doing the workout. Dang it.

Based on how I felt 2 weeks ago during this workout I set the treadmill to the faster end speed of my recommended speed work range (hitting right around 1:46s). My legs felt very sluggish and tired the first couple sets, but it gradually got easier as I went on. Well, kind of easier. I was just mentally not focused -- if I had been out on my own this workout would have almost for sure been a complete disaster.

After I was done my hamstrings and quads were very tight, which was kind of unusual for this workout compared to my previous speed work. At least the hubby convinced me to come do some core and upper body strength work with him so I didn't put that off another day like I was originally planning.

Wednesday: 3.2 mile easy run
Nice and easy, definitely not pushing myself after the day before. My legs were still tight and tired.

Thursday: Yoga + Indoor Soccer Game
2 days after my speed work, 48 hours out from my 10 mile race, and I was still feeling the effects of my speed work. Not a good sign. Thus, I nixed my planned run prior to my soccer game and focused more on getting my muscles nice and stretched out. Enter yoga and lots of foam rolling. Despite my stretching attempts, I still felt a step slower than normal during our game, which made me very worried for Saturday.

Friday: Rest


Saturday: 10 mile RACE RECAP
First and foremost, can I just say how happy I am that this race had a 10am start? Of course the weather all week had been wonderful, hanging out in the 40s and 50s, but just had to drop into the high 20s/low 30s for Saturday. Not to mention some gusting winds taking the windchill down into the teens. Ugh. But I bundled up and away we went. (Okay, side note: I don't really think that the low 30s is really all.that.cold. for a run, but it was seeing the "Real Temp" = 11 degrees that was kind of throwing me for a loop.)

I kind of felt like this:

(Don't even tell me you don't know what movie this is from...)

compared to everyone else hanging out in their running gear. But no, I didn't run in a snowsuit, even though that would have been awesome. I prefer to not have a heatstroke in the middle of winter.

Anyhoo, after standing around for 45 minutes or so, it was finally time to take off my toasty layers and start the run. I apparently have an incredible knack for finding the wrong spot to line up in at the start. I'm always way too far back, thus having to perform the infamous bob & weave for the first mile or so. Frustrating.

After coming through the first mile mark at 9:07, I was a little discouraged, but it wasn't totally unexpected since I knew I'd lose time at the start. Things started to spread out a bit heading into mile 2 and I finally hit my groove. I was still having to pop onto the shoulder or time my passes to get around people, but I ended up knocking out an 8:20 and 8:34 for my next two miles. Apparently, mile 4 had a nice tailwind going as I cruised in right under 8 minutes not feeling like I was working all that hard. But the nice-sized hill and a headwind in mile 5 ate back those extra seconds giving me an 8:38.

Mile 6 became the mile I lost focus a bit and strolled through with a 9:12. For my goal, this was unacceptable. At first I started doubting myself -- that I could actually run 10 miles at an 8:30 pace. Maybe I went out too fast, and now I was dying? I refused to accept that this was the case, so I pushed myself to go faster, to keep up with the "group" I had been running with and to slowly start to close the gap that had formed. I had to tell myself I COULD do this, and I WOULD. This was not meant to be a training run, but a race. I told myself I needed to feel strong and good for the rest of the race to finish at my goal time, and it became sort of a mantra for me the remaining 3 miles.

Apparently it worked as I came through mile 7 in 8:30. I picked up the tailwind again in mile 8 once again coming in right under 8:00. I was determined to hold on to that pace for the remaining two miles, even with a headwind and a hill. I really focused in on closing the gap between me and a few runners who had passed me earlier, and successfully passed them in mile 9. I knew once I hit the mile 9 flag I knew I was so.close. A little over 1/2 of the way through the final mile I checked my watch and saw I was less than 3 minutes away from my goal time. I could see the finish way up ahead, but could I make it? I really pushed myself, and coming into the final 150m, Adam was there cheering me on. Coming around the last corner I saw the clock and I knew I had to go. So I emptied what little left I had in the tank and gave it everything I had, finishing out the final mile in 7:57.

Final time? 1:24:09 (chip time & new PR)
Avg pace = 8:24

So. How did my efforts stack up?
Goal #1 - Sub 1:30:00 Check
Goal #2 - Sub 1:25:00 Check
Goal #3 - Sub 1:20:00 Maybe next time

I honestly wasn't expecting to hit Goal #3, so I'm overall pretty happy with how the race turned out. Chilly windy weather and all.


Hopefully all this good momentum carries into next week!

Wednesday, February 22, 2012

Homemade Pizza Dough


I may have mentioned in the past how spoiled I am when it comes to pizza. Occasionally friends of ours will have us over for homemade pizza. They always make their own crust and then go to town with creative toppings. (I'm pretty sure last time around we had a Big Mac pizza.)

To me, one of the most important parts of a pizza is the crust. Yeah, yeah, I know it's just a vehicle for moving the toppings from the plate to your mouth, but a bad crust can really ruin what would otherwise be an awesome pizza. It has to be well balanced between crispy and chewy (not a huge fan of the crisp-all-the-way-through crust), and flavorful enough that the outer edge of the pizza is good enough to stand on its own -- something you want to eat, not just a handhold for the rest of the slice.

I might be biased, since I automatically go for any slices with the huge crust bubbles, but that just makes the crust all that much more important.

As for this crust, it totally fits the bill on all accounts. Which is exactly why I had to arm wrestle the family recipe away from our friends. Ooor maybe just gave them a quick phone call... but whatever. How I got it is neither here nor there. What matters is that I have it, and I'm sharing it with you. Because I like you. You're special. :) Now go make some pizza.

Homemade Pizza Dough
Adapted from: Corey Broton

2 1/4 teaspoons active dry yeast
1 cup water (105-115 degrees F)
1 cup white wine (105-115 degrees F)
1 tablespoon honey
1 tablespoon olive oil
1 teaspoon kosher salt
4 1/2 cups all-purpose flour
1/4 cup cornmeal

In a large bowl, add the yeast, water, and wine. Let sit for 5-10 minutes or until the top becomes foamy.

Whisk in 2 cups flour, salt, and olive oil until all the lumps are gone and the mixture is smooth. Stir in the cornmeal and 2 more cups of flour. Turn dough out onto a lightly floured work surface. Add remaining 1/2 cup flour and knead for 10 minutes. Add an additional 1/2 cup flour if dough is too sticky.

Coat another large bowl with cooking spray. Form dough into ball and place in bowl, turning once to coat with spray. Cover bowl with plastic wrap and place in a warm, draft-free area (such as an oven) until doubled, about 1 1/2 hours.

Preheat oven to 450 degrees F. Transfer dough to a lightly floured surface and punch down. Let rest for 10 minutes. Divide dough into four sections. Each section can be rolled out to a 14-inch pizza or frozen for later use.

When ready to use, roll dough out to between a 1/8-inch and 1/4-inch thickness. Transfer to a pizza pan* coated with cooking spray. Top with any sauce, cheese, and toppings. Bake for 10 minutes, then reduce heat to 400 and bake for another 10 minutes.


Serves: 32 (8 slices per pizza)

*In my opinion, a pizza stone works much better than a pan to cook the pizza. If you are lucky enough to have one, preheat the stone at 500 degrees F for at least 2 hours prior to baking the pizza. Transfer dough to a pizza peal dusted with cornmeal, top as desired, then transfer prepared pizza to the heated stone inside the oven. Bake for 7-8 minutes or until done.


Warning: Pizza made with this dough can be very addicting. I recommend roughly 1 pizza for two people. No joke. This go around Adam was wanting to replicate a pizza he had at a restaurant just a few days before -- this included regular tomato pizza sauce topped with fresh mozzarella, mushrooms, thinly slice prosciutto, and spinach. Divine. As expected.

Oh, and we totally recommend using fresh mozzarella over the pre-shredded bagged variety. Do a simple taste test between the two and you'll never go back. True story.

Side note: if you don't have white wine, or run out, you can always substitute blush or red wine in its place. You may or may not end up with a purple pizza crust, however, it pretty much still tastes the same.


Nutrition Facts - crust only
Serving Size 35g
Amount per serving
Calories 80Calories from fat 6
% Daily Value
Total Fat 0.6g1%
Saturated Fat 0g0%
Cholesterol 0mg0%
Sodium 75mg3%
Total Carbs 15.0g5%
Fiber 0.6g2%
Sugars 0.7g
Protein 2.0g
Vitamin A 0%Vitamin C 0%
Calcium 0%Iron 5%

Tuesday, February 21, 2012

Roasted Garlic Black Bean Dip


As I mentioned last week, Jalapeno Cheddar Hummus wasn't the only thing on my mind when it came to making something for the Superbowl. I have seen countless recipes floating around for a black bean dip, which intrigued me, but for some reason I decided to go off on my own for this one.

I knew going in that I wanted to somehow incorporate roasted garlic into the dip because I love it so. Originally, I was only going to use one head of garlic, but I made up a second just.in.case. Definitely the right move. It may seem like a ton of garlic, but since it's roasted, it becomes much more subtle and doesn't come through in an "in your face" sort of way. Which is a good thing when we're talking 2 heads of garlic.

I simply topped the dip off with a few seasonings (cumin and cayenne) and away we went. Very easy to throw together, and the only time consuming thing was roasting the garlic. The rest utilized the "dump and blend" method. Perfect for those times you really don't feel like making anything but don't want to go the store-bought route.

Roasted Garlic Black Bean Dip
Original Recipe

2 heads garlic
2 tablespoons olive oil

2 (15 ounce) cans black beans
1/4 cup extra-virgin olive oil
2 tablespoons tahini (sesame seed paste)
1/2 teaspoon cayenne pepper
1 teaspoon ground cumin
1 teaspoon kosher salt
1 tablespoon lemon juice
1 1/2 teaspoons dried chives

Preheat oven to 375 degrees. Tear two squares of aluminum foil and lay flat on a work surface. Cut the top 1/4 off each head of garlic. Place one head of garlic in the center of each foil square. Drizzle each with 1 tablespoon olive oil. Wrap foil around garlic and roast in the oven for 1 hour. Remove and let cool at least 15 minutes, or until able to handle.

Squeeze the cloves out of the heads of garlic into the bowl of a food processor. Add the black beans. Pulse until ingredients are pureed. With the processor still running, pour in the olive oil until the mixture becomes smooth and creamy. Add tahini and remaining 4 ingredients. Process again until the mixture is smooth, adding water if it becomes too thick.

Serve with pita chips or veggies.


Serves: 20 (2 tablespoons per serving)


Next time around, I think incorporating fresh chives (and more of them) or green onions would be a must. Most of the flavors in this dish a very mild and mellow, and I think adding one of those options would really brighten things up. Overall though, not too bad for doing my own thing. :)


Nutrition Facts
Serving Size 55g
Amount per serving
Calories 199Calories from fat 50
% Daily Value
Total Fat 5.5g8%
Saturated Fat 0.8g4%
Cholesterol 0mg0%
Sodium 121mg5%
Total Carbs 29.0g10%
Fiber 6.7g27%
Sugars 1.0g
Protein 9.8g
Vitamin A 1%Vitamin C 4%
Calcium 7%Iron 14%

Sunday, February 19, 2012

Half Marathon Training: Week #6

Dear iMapMyRun app,

Please stop dropping GPS during my runs. It's getting old having to go back and fix the routes. Not appreciated, and makes your pace tracking feature kind of pointless.

KThanksBye.

Sunday: 4 mile easy run Off
Sigh. I knew this day would come sooner or later during this training period. Doesn't make it any less disappointing. My first dropped run. I was originally scheduled for an easy 4 miler, but a couple inches of snow and visiting family made it just a little too easy to stay inside instead of getting out and hitting the trail. Sad day.

Monday: 40 minute tempo run
After skipping out on my run the day before, I knew today's run had to be a good one. Unfortunately, there was still snow covering the sidewalks where I do my hill work, so I switched days up and went for the tempo run.

Since I once again didn't feel like dealing with snow, I gave the hubby some puppy dog eyes and convinced him to take me to the gym with him again. I started out at an easy 9:30 min/mi warm up pace for the first 10 minutes, then gradually started to increase the speed every 5 minutes, ending up at around an 8:00 min/mi pace before slowing back down to 9:30 for a 5 minute cooldown.

As much as I hate to admit it, hitting my speed work goals is actually easier on the treadmill than outdoors. From a third party perspective -- duh. I just set the speed and away I go, can't do that outside. I've gone back and forth, debating the merits of both -- inside: I actually achieve my set goals, but I'm not the one setting the pace, vs. outside: I set the pace and listen more to my body, but I might not always hit my goal pace. While there are definitely bonuses and drawbacks to each setting, I've decided that for right now, teaching my body that it's actually capable of hitting these certain times is a little more important than trying to incorporate terrain and wind resistance for a more "race-like" situation.

Tuesday: 3.25 mile easy run
What a nice way to spend Valentine's Day than out for a nice easy run? At least it frees up some room for some dessert! :)

Wednesday: 5 x 400m hill workout
Wednesday rolled around and the sidewalks were finally clear of snow, which meant time to get in a repeat of the hill workout that made me sore for over 3 days a couple weeks ago. At least this time around I knew I was at least capable of making it up the hill 3 times at a (very slow) run, so my goal was to add in a 4th time up with a 5th time walking. And success. A little slower than the previous time, but much much less sore the next day.

And just for kicks and giggles... this is what the actual elevation of my route looks like:

Note: 0% is yellow and 14% is purple (!)

What it seems like to me:

Thursday: Strength + Indoor Soccer Game

Friday: 3 mile easy run
Originally, I had a hot date lined up at the gym with the hubby at 4:30ish when he got home from work. However, worked called and he ended up not getting home until after 7. Boo. But we still had our date. I just made sure to go nice and easy knowing that I had an 8 miler waiting for me in about 15 hours.

Saturday: 8 mile run
Even though I was a bit worried how my previous day's run might affect the run on Saturday, I went in feeling pretty good. Luckily, that feeling stuck around for the whole run, and this time around for 8 miles we kept a fairly consistent pace (versus last time when we were all over the map from a 10:30 min/mi pace to under 8:30). We also timed things perfectly and missed getting stopped by the dreaded traffic lights this time. Annnnnd I finished out the last mile with a sub 8:00 pace which just totally made my day, even if I was almost completely out of gas by the end. Woot! (I will say, this is really where having running buddies comes in handy.)


I can't believe I'm already halfway through my half marathon training. It seems like it's flown by so much faster than my training for the full (maybe because it's only been 6 weeks versus 9??). And that my 10 mile race is already this coming Saturday. Nervous!

Fingers crossed that my motivation decides to show up this week!

Friday, February 17, 2012

Jalapeno Cheddar Hummus


Hummus is one of those things that is rarely allowed in our house. Not because we don't like hummus. On contraire, once we get going, or ahem, once one of us gets going, it's far too easy to eat almost the entire container before realizing it. We won't say whom that might be.

So when the opportunity presented itself to bring a food dish to share with friends (*cough*superbowl*cough), my mind immediately jumped to some sort of savory dip. I didn't have a ton of notice was too lazy to come up with something wildly crazy, so opted for something simple with ingredients I knew I could pick up at the small-ish grocery store down the street.

I originally had a different idea for a dip going into it, but I decided last minute to pick up the things for this hummus as well just.in.case. the other one didn't turn out like I'd planned.

So glad I did. Not because the other dip didn't turn out (I'll be sharing that next week), but because this was definitely tasty. I love the addition of cheddar and jalapeno to hummus, and so did the other guests!

Jalapeno Cheddar Hummus
Adapted from: The Spiffy Cookie

2 (14.5 ounce) cans chickpeas, drained and rinsed
1 jalapeno, chopped, seeds and membranes removed
1/4 cup extra-virgin olive oil
2 tablespoons warm water
2 tablespoons tahini (sesame seed paste)
1 teaspoon kosher salt
1 teaspoon ground cumin
1/2 teaspoon cayenne pepper
1 teaspoon garlic powder
1 cup freshly shredded cheddar cheese

In the bowl of a food processor, combine the chickpeas and jalapeno. Pulse until ingredients are pureed. With the processor still running, pour in the olive oil and water until the mixture becomes smooth and creamy. Add tahini and remaining 5 ingredients. Process again until the mixture is smooth, adding more water if it becomes too thick.

Serve with pita chips or veggies.


Serves: 20 (2 tablespoons per serving)


As written, this hummus turns out a bit thicker that your normal store-bought hummus, but I kind of enjoyed it that way. You can always add more water if you like it more on the thinner side. As much as I did enjoy what the cheddar and jalapenos brought to the table, I almost wish it would have been more. I felt like the chickpeas really kind of muted the cheddar more than I was expecting, and I could have gone for keeping a few of the seeds with the jalapeno, as this was not spicy - at all. Still, even with the hummus the way it was, I could have definitely chowed down on at least half a bowl. ;)


Nutrition Facts
Serving Size 54g
Amount per serving
Calories 206Calories from fat 71
% Daily Value
Total Fat 7.9g12%
Saturated Fat 1.9g10%
Cholesterol 6mg2%
Sodium 163mg7%
Total Carbs 25.5g9%
Fiber 7.3g29%
Sugars 4.5g
Protein 9.7g
Vitamin A 2%Vitamin C 3%
Calcium 9%Iron 16%

Wednesday, February 15, 2012

Spicy Thai Chicken Nuggets


Chicken nuggets to American children is like peanut butter to jelly. Or chocolate. Even if the parents are completely pro non-hormone, non-fried, do-not-dare-feed-that-McDonald's-to-my-child, I'm sure the child has had, in some form or fashion, a chicken nugget. And they.love.them.

Admission: I still get chicken nuggets whenever we go to Chick-Fil-A. I pink puffy heart them.

There's a reason children people love them so much -- they're portable, easy to eat, and the good ones are seasoned well, juicy, and flavorful. But the buck doesn't have to stop there when it come to chicken nuggets. Clearly people have figured this out when it comes to chicken wings, and let's face it, boneless chicken wings is just a grown-up name for large chicken nuggets.

So there's absolutely no reason we can't bring home a little bit of that flavor to a healthier, non-fried version. Chicken nuggets for adults don't have to be plain Jane breadcrumb-crusted pieces of chicken any more.

Spicy Thai Chicken Nuggets
Inspired by: The Realistic Nutritionist

3 (4 ounce) boneless skinless chicken breasts
2/3 cup mild sweet Asian chili sauce (such as Maggi)
1 tablespoon garlic chili paste (sambal oelek)
1/2 cup panko
1/4 cup lightly salted peanuts
1/2 teaspoon dried basil

Slice chicken breasts into bite-sized pieces. (I was able to get 7 pieces from a 4 ounce breast.) In a small bowl, whisk together the chili sauce and the garlic chili paste. Place the chicken breast pieces in a large ziploc bag. Pour the sauce over the chicken, seal the bag, and marinate in the refrigerator for at least 4 hours up to overnight.

Preheat oven to 500 degrees F. Coat a 9 x 13-inch baking dish with non-stick spray; set aside. Remove chicken from the fridge; set aside.

Place the panko in a wide, shallow bowl or plate. Place the peanuts into the bowl of a food processor, and grind until very fine. Mix ground peanuts and dried basil with the panko, tossing to combine. Roll each piece of chicken in the breadcrumb mixture, completely coating, then place in the prepared baking dish. Repeat with remaining chicken, making sure the pieces do not touch in the baking dish. Bake for 10-12 minutes, or until chicken is done.


Serves: 3 (7 nuggets per serving)


Originally I added 1 teaspoon of basil to the recipe, but I felt it's flavor was a little on the strong side, so I have adjusted the recipe above to reflect a lower amount. But feel free to add more if you love it! I also think next go around I'll add more sambal oelek as the spice didn't come through in quite the way I was hoping. Or maybe I'll toss some red pepper flakes in the panko.

And trust me that they'll be a next go around. Adam wasn't even completely done going through 14 nuggets before telling me I HAD to make these again. Soon. Sounds good to me, especially since they take all of 10 minutes total of prep time.


Nutrition Facts
Serving Size 191g
Amount per serving
Calories 467Calories from fat 126
% Daily Value
Total Fat 14.0g22%
Saturated Fat 3.2g16%
Cholesterol 101mg34%
Sodium 1019mg42%
Total Carbs 46.3g15%
Fiber 1.5g6%
Sugars 17.3g
Protein 37.6g
Vitamin A 2%Vitamin C 3%
Calcium 6%Iron 15%

Tuesday, February 14, 2012

Simple Sugar Cookies


Sugar cookies and I go way back. Like back when eating the raw dough at an unbelievably young age didn't faze people. (And I still totally stand by my dough eating habit.) I used to love going to the mall purely for the fact that I could get a soft and chewy sugar cookie the size of my head. Welcome to my heaven.

As much as I do love me some chocolate chip cookies, or chocolate cookies, and even rolled and iced sugar cookies, there's just something special about the simplicity of a plain ol' sugar cookie. And I have yet to find "the one".

I've had this recipe bookmarked on my Google Reader for eons, and I finally said enough was enough. It was time to give these guys a try.

Simple Sugar Cookies
Adapted from: Annie's Eats

2 cups all-purpose flour
1/2 teaspoon baking soda
1/4 teaspoon salt
1/2 cup butter, at room temperature
1/2 cup vegetable oil
1/2 cup granulated sugar + 2 tablespoons extra
1/2 cup powdered sugar
1 egg
2 teaspoons vanilla extract
1 teaspoon almond extract

Preheat oven to 350 degrees F. Line baking sheets with parchment paper; set aside.

In a medium bowl, whisk together the flour, baking soda, and salt.

In the large work bowl of a mixer, beat the butter until smooth, about 1 minute. Add the vegetable oil and beat on medium-high until well incorporated. Stir in the granulated and powdered sugars until fully combined, about 1 minute. Mix in the egg. Add the vanilla and almond extracts, stirring until fully blended. Add the dry ingredients, half at a time, and slowly beat into the wet ingredients. Once mixed, add in the remaining dry ingredients. Refrigerate dough for 1 hour or freeze for 15 minutes.

Drop scoops of dough (I used a size 50 scoop) onto the prepared baking sheets. Using wet hands or the back of a wet spoon, gently press down on the dough to flatten the cookies. Sprinkle with extra granulated sugar. Bake for 8-10 minutes, or just until the edges very very slightly begin to turn golden. Let rest on baking sheets for 10 minutes, then transfer to a wire rack to cool completely.


Makes: 33 cookies


While delicious, soft, and chewy, especially right out of the oven, I'm not quite sure these win "the one" title. After a few hours I noticed these turned slightly greasy and dried out really fast. Or at least some of them did, others didn't. My mind is boggled. Either way, still a little disappointing. I'm not trying to knock a good cookie, but when the bar is set so high... you have to be uber critical.


Nutrition Facts
Serving Size 22g
Amount per serving
Calories 106Calories from fat 57
% Daily Value
Total Fat 6.3g10%
Saturated Fat 2.5g12%
Cholesterol 13mg4%
Sodium 60mg3%
Total Carbs 11.4g4%
Sugars 5.6g
Protein 1.0g
Vitamin A 2%Vitamin C 0%
Calcium 0%Iron 2%

Monday, February 13, 2012

Half Marathon Training: Week #5

I apologize for getting this out late. Again. We had family visiting this weekend so not a lot of time for blogging. That being said, I'm going to make this short and sweet, as I'm sure you're here for the food, not the running.

Sunday: 4 mile easy run
Nice, easy, and definitely necessary to stretch my legs back out after Friday's run. Thank goodness my very sore glutes and calves were calming down.

Monday: 7 x 400 speed work + Strength
Although the original goal for my training involved performing all of my runs outdoors, I decided that I was more concerned about getting my body to actually hit and maintain certain speeds during my speed workouts versus incorporating slight terrain nuances and wind resistance. Thus, I opted to move indoors to the treadmill where I could have full control of my pace.

According to the McMillan Running Calculator, my goal pace for these should fall between 1:46 and 1:52. My splits turned out:
1 - 1:50
2 - 1:49
3 - 1:48
4 - 1:48
5 - 1:45
6 - 1:42
7 - 1:41
Seeing as I was able to go under the bottom end for several of the splits, I need to focus more on starting out faster and holding that pace.

Tuesday: 3.4 mile easy run
Once again, another easy run falling within in my goal pace range (9:30-10:00 min/mi). A little bit longer than originally intended, but I had to switch routes mid-run or end up swimming through a good mile of slippery thick mud. Yeah, it didn't take much to veto that mud.

Wednesday: 3 mile @ pace
I knew going into this run that "pace" means to run at your goal race pace. But I just couldn't help myself and had to push a little harder, ending up with a 24:29 (8:09 min/mi) pace. And I proved to myself that I will not be racing at that pace anytime soon.

Even though I felt like I had a pretty good run, going in the gym, on the treadmill without the constant switching of the pace every 2 minutes-ish (like with the interval training), was really hard for me. Of course I didn't bring any headphones to listen to the TVs, or my ipod, so I was struggling to stay on task. Outside, I almost never have a problem with getting bored, but inside is just a whole other story. I need to make sure I bring headphones/music of some sort next time I do any treadmill work that isn't intervals.

Thursday: Strength
All day was spent cleaning, cleaning, cleaning, in preparation for our company, so I really only had time to squeeze in a quick strength session before having to shower then head out to the airport. Oh well, if anything is going to get cut, I'd prefer it to be yoga.

Friday: 10 mile run
It's hard trying to keep yourself on schedule with eating the right things and the right amounts before a long run when company is around. For some people this isn't all that important, but I tend to run into GI issues when I start getting into higher mileage, so it's really important I don't bog myself down with too much or the wrong kind of food ahead of time. Luckily, we went to a local cafe where I was able to get something light before heading out.

After last week's run feeling so great, I was a bit worried I'd swing back the other way again this week. Especially since I kind of felt like I struggled a bit with the speed workouts. Fortunately though, we started off at a great pace and fell right into a rhythm. The only issue I had pretty much the entire run was getting stuck at a traffic light (twice) which held us up for easily close to 90 seconds. Can I just say how much my body hates starting back up from a stop when I'm well over 5 miles into a run?

On the bright side though, 7 of the 10 miles were under a 9 minute pace and one of the miles which wasn't, included the time stuck at the light. I was a little concerned how I would feel near the end of the run since I was jumping 2 miles this week instead of 1, but surprisingly I held in there pretty well. I'm starting to think I may just be able to pull off a half marathon in under 2 hours.

Saturday: Rest


The countdown is on: 2 weeks until my 10 mile race and 7 until the half. I'm starting to get excited! I can't believe next week marks the halfway point. Since I've cruised into the double-digit mileage about 3 weeks early, I'm going to rearrange the long runs in the back-half of the schedule to better reflect my higher mileage and to better prepare me for 13.1.

Up next though, I'm going to insert a drop down week (8 mi) between now and my 10 mile race to help really firm up my endurance at this mileage.

Wednesday, February 8, 2012

Sausage, Egg, & Biscuit Casserole


Let me let you in on a little secret. Breakfast just isn't for breakfast any more. Shocking, I know.

If fact, breakfast for dinner (or brinner) is pretty much the only way I eat "breakfast-y" type foods anymore. Well, aside from vacations, but that's another story.

Let's be honest here. I like my sleep. I like to eat when I get up. I don't like to wait hours for my food to be done. But every once in a blue moon I do like the nice warm comfort of breakfast food. And there's no written law stating that eggs and sausage smothered in gravy must be eaten for breakfast. [A fact someone should pass on to fast food restaurants that end breakfast service at 10.]

Nope, here we do those kinds of things for dinner. And relish them. In all their calorie-laden comfort glory. Which, let's face it, is really how these types of meals roll.


Sausage, Egg, and Biscuit Casserole
Adapted from: Cuisine at Home, December 2011

1 pound bulk pork breakfast sausage
7 eggs
1 1/4 cups 1% milk
3/4 cup heavy cream
1/2 teaspoon kosher salt
1 teaspoon ground black pepper
8 refrigerated buttermilk biscuits, sliced in half hamburger-style
1 1/2 cups shredded Cheddar cheese, divided

3 tablespoons butter
3 tablespoons all-purpose flour
2 cups 1 % milk
1 tablespoon fresh sage, minced
1/2 teaspoon crushed red pepper flakes
1/2 teaspoon ground black pepper

Preheat oven to 375 degrees F. Coat a 9 x 13-inch baking dish with non-stick spray; set aside.

In a large skillet over medium heat, brown the sausage, breaking up with a spoon. Transfer cooked sausage to a paper towel-lined plate and set aside until ready to use. Leave drippings in pan.

In a medium bowl, whisk together the eggs and next 4 ingredients (through 1 teaspoon ground pepper).

Layer the bottom half of the biscuits in the prepared baking dish. Top with half of the sausage. Sprinkle with half of the cheese. Add another layer of biscuit dough with the remaining biscuit tops. Top with remaining sausage. Drizzle the egg mixture evenly over the sausage and biscuits.

Bake for 30 minutes. Sprinkle remaining cheese over top and bake for another 10-15 minutes, or until the center no longer jiggles (165 degrees) and a toothpick inserted into a biscuit comes out clean. Let stand for 10 minutes.

While casserole is baking, melt the butter in the skillet with the sausage drippings over medium heat. Whisk in flour until smooth, continuing to stir for 2 minutes. Pour in milk and whisk until smooth. Continue cooking gravy until mixture becomes thickened, 5-8 minutes. Stir in sage, red pepper flakes, and 1/2 teaspoon ground black pepper. Serve poured over casserole.


Serves: 8


If you are dead set on making this for breakfast, make the casserole the night before, cover and refrigerate, then pop it in the oven when you get up. It will still take the full 55-60 minutes to bake, but you shaved off around a half hour of frying and whisking. If you also make the gravy ahead of time, place plastic wrap directly onto the surface of the gravy before storing in the fridge to prevent that lovely skin from forming on the top. Simply reheat when ready to use.


Nutrition Facts
Serving Size 259g
Amount per serving
Calories 534Calories from fat 351
% Daily Value
Total Fat 39.0g60%
Saturated Fat 18.0g90%
Cholesterol 257mg86%
Sodium 1023mg43%
Total Carbs 20.8g7%
Fiber 0.7g3%
Sugars 7.2g
Protein 23.8g
Vitamin A 19%Vitamin C 1%
Calcium 34%Iron 13%

Tuesday, February 7, 2012

Spicy Asian Chicken Noodle Soup


Chicken Noodle Soup is the ultimate "feel better" soup. (Unless you're my husband and want vegetable soup in that scenario, but he's just weird.) I totally grew up on the Campbell's version of the soup, but you really can't beat it when it's homemade. (Um, of course, you can add three times as many noodles!)

Usually though, when I'm not sick, I tend to steer away from the comforts of the Chicken Noodle Soup. Not that I don't enjoy it, but, it has it's time and place -- when I'm sick. However, this version of Chicken Noodle Soup is one I definitely embrace sick OR healthy.

Sick version: up the amount of Sriracha and red curry paste and you will be guaranteed to clear out those sinuses. Even if you can't taste it.

Healthy version: keep "as is" and enjoy a nice spicy Asian flavored soup.

See, that's just a win-win for me.

Spicy Asian Chicken Noodle Soup
Adapted from: RavieNomNoms

3 cups fat-free, reduced-sodium chicken broth
1 1/2 cups water
8 ounces cooked shredded chicken
1/2 cup grated carrots
1/2 cup snow peas, thinly sliced
1 1/2 teaspoons Sriracha
2 teaspoons soy sauce
1 1/2 teaspoons Thai red curry paste
1 2-inch piece fresh ginger
3 ounces uncooked rice flour noodles
1 tablespoon lime juice
1/4 cup chopped fresh cilantro
1/4 cup green onions, sliced into 1/4-inch pieces

In a large saucepan over medium heat, add the first 9 ingredients (through ginger). Bring to a simmer for at least 5 minutes, then keep warm.

Meanwhile, bring a large pot of water to a boil over high heat. Add the rice noodles and cook according to package instructions; drain. Transfer 1/4 cup noodles into each soup bowl.

Remove ginger from broth mixture. Add lime juice and stir. Ladle about 1 1/2 cups soup into each bowl. Sprinkle with a tablespoon each of cilantro and green onions.


Serves: 4


Not only is this super tasty, but it's also a breeze to throw together. Simply heat the ingredients in a large pot and away you go. Kind of sounds like the canned Chicken Noodle Soup. But tastier.


Nutrition Facts
Serving Size 400g
Amount per serving
Calories 195Calories from fat 22
% Daily Value
Total Fat 2.4g4%
Saturated Fat 0.7g4%
Cholesterol 44mg15%
Sodium 648mg27%
Total Carbs 22.6g8%
Fiber 2.1g8%
Sugars 1.8g
Protein 19.5g
Vitamin A 53%Vitamin C 22%
Calcium 4%Iron 10%

LinkWithin

Related Posts with Thumbnails
 
Pin It button on image hover