Friday, July 29, 2011

Blueberry Lemonade Soda


It's National Blueberry Month. And I have missed it. Seriously?

Well, I haven't missed it completely... I have hoarded pints and pints of blueberries in my house specifically for my eating pleasure. But as for actually making anything with them? Zip. Zero. Zilch.

Time to change that.

As soon as I saw this recipe over at Eat Live Run I knew I had to make. Like now. I even braved 90+ degrees in a car with almost no A/C to go and buy a juicer. Just for this. Really.


Every time I think of flavored lemonade I automatically think of strawberry or raspberry. But blueberry? Genius!

Tart on sour made sweet with simple syrup. One word.

WON.DER.FUL

Absolutely perfect for those sweltering summer days.

Or add a splash of vodka for a little adult treat to help cool down those sticky, humid nights. Either way, you can't go wrong.

Blueberry Lemonade Soda


Adapted from: Eat Live Run

3/4 cup sugar
1 cup water
1 cup fresh lemon juice, about 9 lemons
1/2 cup blueberry juice (such as Ocean Spray)
3 cups soda water

In a small saucepan, bring the sugar and water to a simmer. Stir until sugar has dissolved, then remove from heat. Allow simple syrup to come to room temperature, then chill in the fridge for at least an hour.

Meanwhile, juice lemons. Pour juice into a pitcher through a strainer to remove any seeds and pulp. Mix in blueberry juice and simple syrup. When ready to serve, mix together juice and soda water in a 1:1 ratio in a glass, stirring well.


Makes: 6 8-ounce servings


If you're not into the whole soda thing, you can also substitute sparkling water or just regular water instead. It will still be delicious.

Now go crank out some lemon juice, pull up a chair on the patio, kick back, and relax with a tall glass. Just don't forget the citronella candle. Or a fan.


Nutrition Facts
Amount per serving
Calories 118Calories from fat 0
% Daily Value
Total Fat 0.0g0%
Saturated Fat 0.0g0%
Cholesterol 0mg0%
Sodium 30%
Total Carbs 31.1g10%
Fiber 0.1mg0%
Sugars 28.3g
Protein 0.1g
Vitamin A 0%Vitamin C 31%
Calcium 0%Iron 0%

Thursday, July 28, 2011

Gemelli Salad with Asparagus, Pistachios, and Lemon-Thyme Vinaigrette


Summer is almost gone. I can't believe it. I swear it was still June 5 minutes ago.

What happened to lazy days spent out by the pool? Nevermind the fact that sunburns like to find me instead of tans.

Or roasting marshmallows over a fire? i.e. catching them on fire and crazily hopping about and waving your flaming ball of marshmallow around while simultaneously trying to blow it out.

Or outdoor barbecues with friends? You know, the kind where it's a 253 degrees out and you end up being that sweaty kid and go home smelling like you sat in front of the grill the entire time.

Ah, good times, summer. It's a good thing I didn't make a summer bucket list, as I've seen from so many other people. I would have racked up a big ol' goose-egg under the accomplished section.

Even though summer is running away from us, and fast, it's not quite over yet. So for those of you who also can't believe it's the end of July, pull up a chair and have a big helping of summer-in-a-bowl for dinner. (Okay, if it was truly summer-in-a-bowl, it'd be ice cream, but seeing as we can't have that for dinner -- at least not every night, this is a great substitute.)

Gemelli Salad with Asparagus, Pistachios, and Lemon-Thyme Vinaigrette


Adapted from: Cooking Light, May 2011

8 ounces uncooked gemelli
1 cup asparagus, trimmed and cut into 1-inch slices
2 tablespoons fresh thyme leaves, divided
2 tablespoons lemon zest (about 1 lemon), divided
1 tablespoon shallots, minced
2 tablespoons white wine vinegar
3 cloves garlic, minced
5 tablespoons extra-virgin olive oil
1/2 teaspoon kosher salt
1/2 teaspoon ground black pepper
1/2 cup shelled pistachios, chopped
1 ounce Parmesan cheese, grated

Bring a large pot filled with water to a boil over high heat. Cook pasta according to package directions. Add the sliced asparagus to the pasta pot during the last 4 minutes. Drain.

Meanwhile, in a small bowl, combine 1 tablespoon thyme, 1 tablespoon lemon zest, shallots, white wine vinegar, and garlic. Stir well. Slowly add in the olive oil, whisking constantly. Whisk in salt and pepper. Set aside.

In a large bowl, gently toss together the pasta with asparagus, pistachios, 1 tablespoon thyme, and 1 tablespoon lemon zest. Drizzle the vinaigrette over the pasta, continuing to toss to coat. Top each serving with Parmesan.


Serves: 4


The lemon and asparagus are what truly seals the deal for making this a "summer" dish. The bright and fresh flavor from the lemon mixes with the crunch from the asparagus and the nuttiness from the pistachios bringing flavor to the table that you just can't get in the winter months. Even though it's what I would consider a lighter pasta dish, it's still heavy enough to fill you up and keep you going while chasing around those fireflies in the backyard.


Nutrition Facts
Amount per serving
Calories 398Calories from fat 181
% Daily Value
Total Fat 20.1g31%
Saturated Fat 3.6g18%
Cholesterol 6mg2%
Sodium 402mg17%
Total Carbs 46.3g15%
Fiber 3.5g14%
Sugars 1.9g
Protein 10.9g
Vitamin A 7%Vitamin C 12%
Calcium 12%Iron 25%

Wednesday, July 27, 2011

Red Velvet Rice Krispie Treats


I have been informed by the hubby that I am apparently obsessed with red velvet. I don't know where he gets these notions.

Let's just not take into account I made these not too long ago, which was followed by the appearance of a nice pint of Ben & Jerry's Red Velvet Cake ice cream in the freezer. I still have no idea what he's talking about.

None. Whatsoever.

I made the original version of these Cake Batter Crispy Treats over the 4th of July with my sister when we found out at the last minute we were going to a party. Quick and easy is what we needed, and this recipe totally delivers. I was slightly disappointed in the lack of cake flavor that came through in the end. It was a little sweeter than normal, but it wasn't screaming "cake batter!" to me.

So what else to do but add more? And why not make it red velvet while we're at it. Because, well, supposedly I have a thing for it. Or something.

Red Velvet Rice Krispie Treats


Inspired by: How Sweet It Is

3 tablespoons butter
1 (10.5 ounce) bag mini marshmallows
1 teaspoon vanilla extract
1/2 cup red velvet cake mix
6 cups Rice Krispies cereal
1 tablespoon sprinkles
4 ounces white chocolate chips, melted

Line a 9x13-inch pan with wax paper; coat well with cooking spray. Set aside.

In a large saucepan, melt the butter over low heat. Add marshmallows, stirring frequently, until melted. Stir in vanilla and cake mix until fully combined and no lumps remain. Stir in cereal, making sure it is well-coated with marshmallow mixture. Transfer Rice Krispie mixture to the prepared pan, pressing down until the top is level. Top with sprinkles and drizzle with melted white chocolate.


Makes: 16 bars


Despite the shockingly red color, once again the whole cake flavor didn't really come through as expected, even though I doubled the amount of cake mix called for. Hmm. Either way, it's still a Rice Krispie treat, which means it's still scrumptious. Even when you take them outside in 500 degree heat to take pictures and they start melting all over again.

Except for those dang white chocolate chips. Which refused to melt for anything. Not in the microwave, and not on the stove top. Odd and frustrating at the same time. Oh well, they work just fine sprinkled on as whole chocolate chips too.


Nutrition Facts
Amount per serving
Calories 162Calories from fat 42
% Daily Value
Total Fat 4.7g7%
Saturated Fat 2.8g14%
Cholesterol 7mg2%
Sodium 132mg5%
Total Carbs 28.4g9%
Fiber 0.0g0%
Sugars 14.5g
Protein 1.3g
Vitamin A 5%Vitamin C 5%
Calcium 2%Iron 20%

Tuesday, July 26, 2011

How To: Grilled Pizza


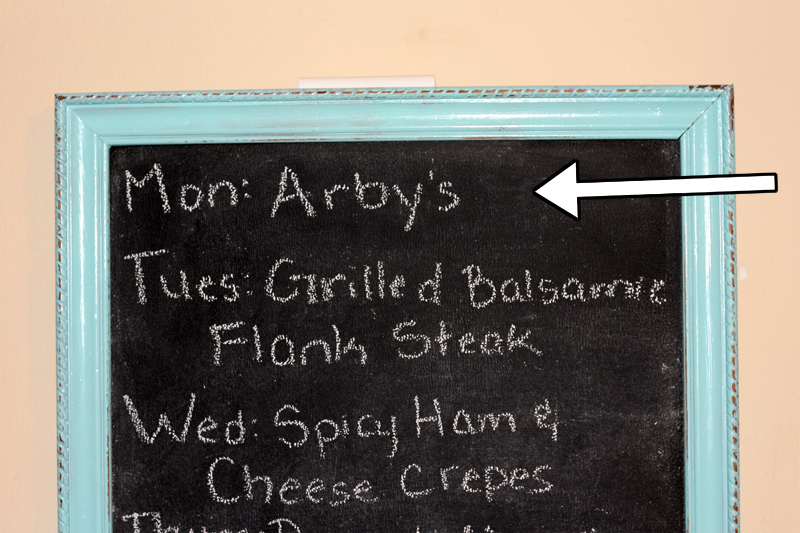
Adam and I have a new obsession. No, but really. And it involves the grill, surprise, surprise.

It could just be pent up not-being-able-to-grill frustration from the past three years. But that is neither here nor there, and I'm not going to be the one to speculate on that.

Grilled Pizza.

Oh, I'm sure you've heard of it, or maybe even tried it at a restaurant. It's one of those new-fangled fads going around. For a good reason.


Of course it's super tasty, because let's face it, what pizza isn't? But it's also 
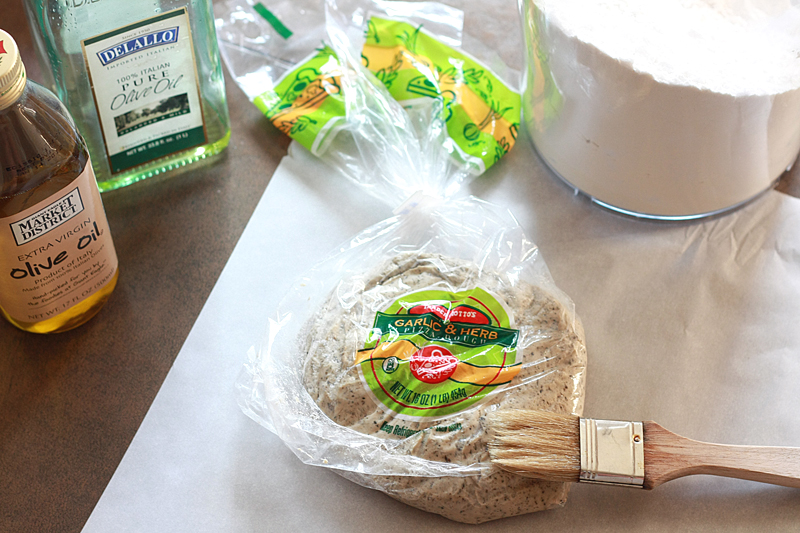
super easy to make. Especially when you use already-made dough. No, not the pre-packaged nasty stuff hanging out in the bakery area -- refrigerated pizza dough. The kind you get at Trader Joe's for a whopping $0.99. Um, can't really beat that.

So how do we go about making our own delectable grilled pizza at home?

First things first. You have to decide what kind of pizza you want. Sure you can go with the good ol' stand-bys of cheese, or pepperoni, or mushroom... but you might as well pick up the phone and order it from your local delivery guy if you're going to go that route. Start thinking, and get creative!

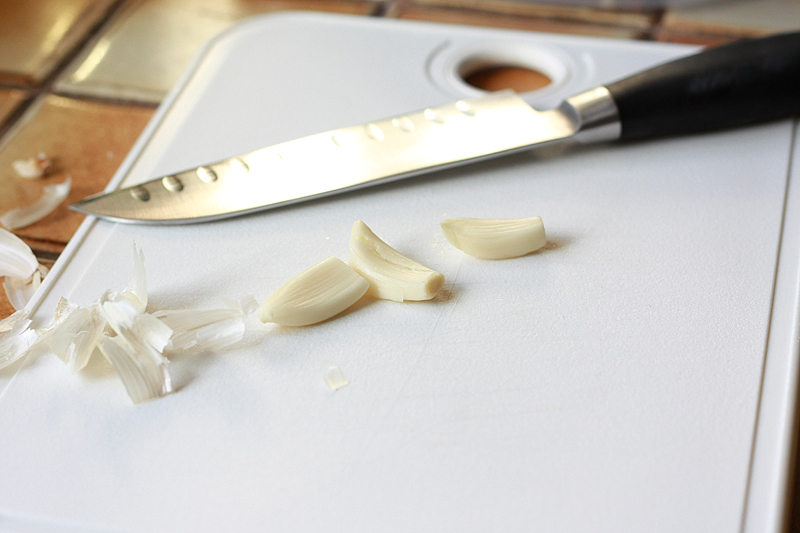
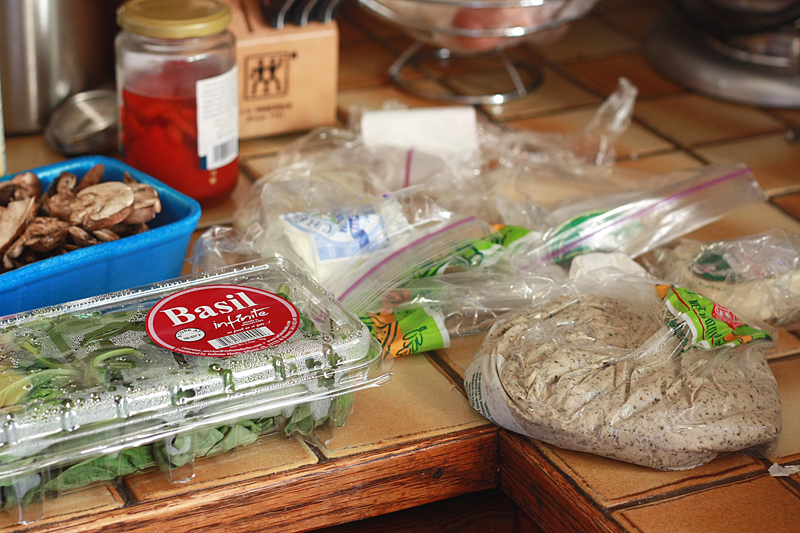
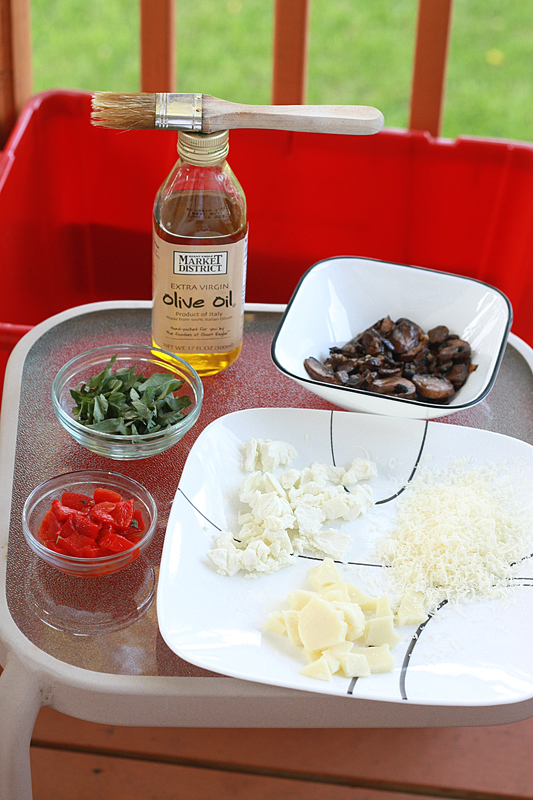
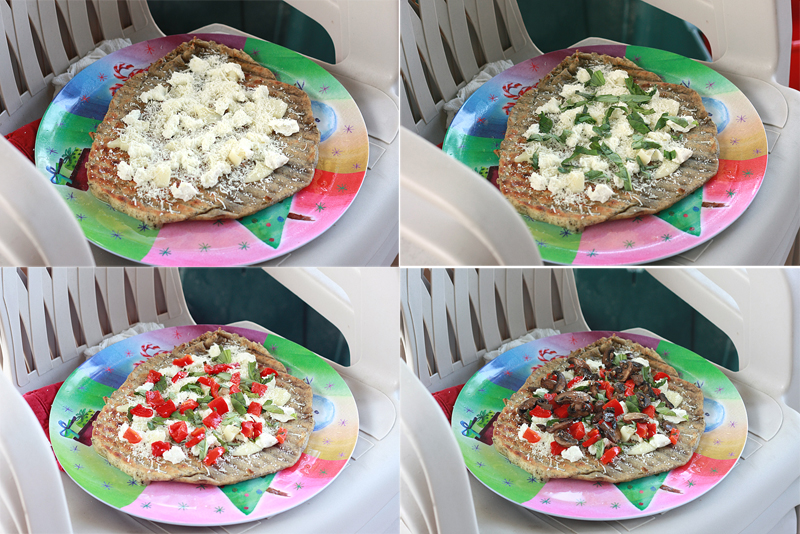
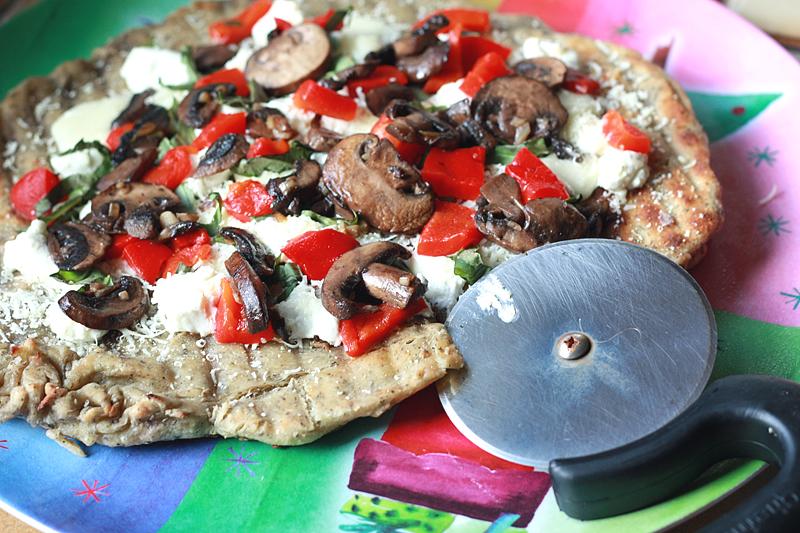
We decided to go simple with this one, and use up leftovers we had hanging out in the fridge: basil, mushrooms, roasted red peppers, garlic, Romano cheese, Mozzarella cheese, and my personal favorite -- goat cheese.


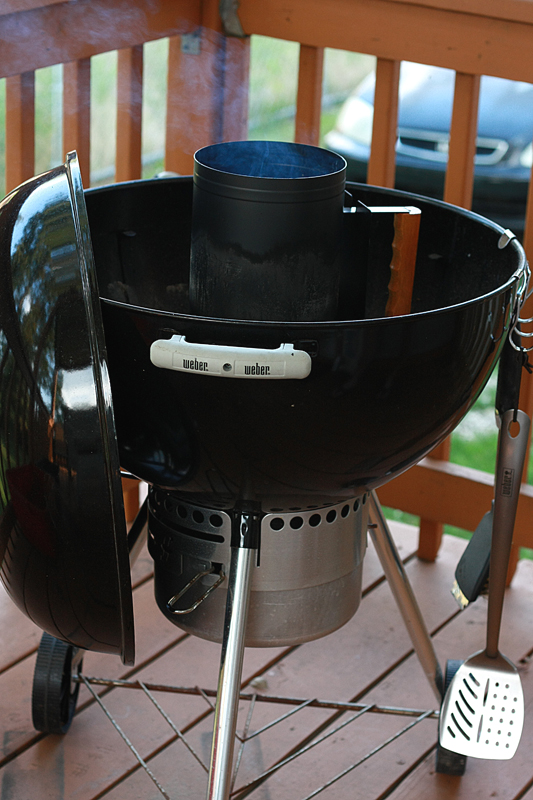
After you get your ingredients figured out, let your dough rest at room temperature for at least 20 minutes before working with it. While that's coming to temperature, get that grill going. You can use a chimney to start you off, but you don't have to. The end goal is to have the grill nice and hot (or go for medium-high if you have a gas grill).


Meanwhile, prep those ingredients! Keep in mind that your ingredients need to be "eating-ready" before they go on the pizza. Basically -- the grill isn't going to cook the ingredients, so they need to be cooked (if needed) beforehand. For our choice of ingredients, this involved giving the mushrooms and garlic a little sauteing over medium heat for about 7 minutes, or until the mushrooms were tender and just starting to release liquid. Make sure to grate any cheese and slice any herbs or veggies as well.


Once the grill is nice and hot and ready to go, it's time to play with the dough.

Item's you'll need:
Parchment paper
Lots of olive oil
Flour
Rolling pin
Pastry brush
Pizza Dough
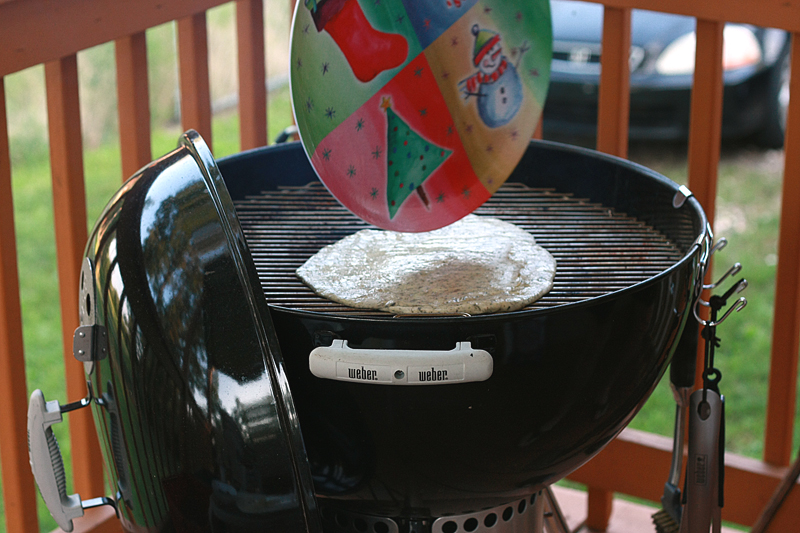
Pizza pan/peel (or Christmas cookie plate, don't judge)


Lay out a large sheet of parchment paper. Sprinkle lightly with flour. Place your dough on the parchment paper and start rolling out with a lightly floured rolling pin. It doesn't really matter if the pizza is a perfect circle or not, as long as the dough is a nice uniform 1/4" by the time you're done.

Drizzle 1-2 tablespoons of olive oil across the dough, then brush out so the entire side is covered in oil. Carefully flip dough onto an oiled cookie plate pizza pan. Brush the other side of the dough with another 1-2 tablespoons of olive oil.


Now comes the fun part. Get everything ready to go outside by your grill.


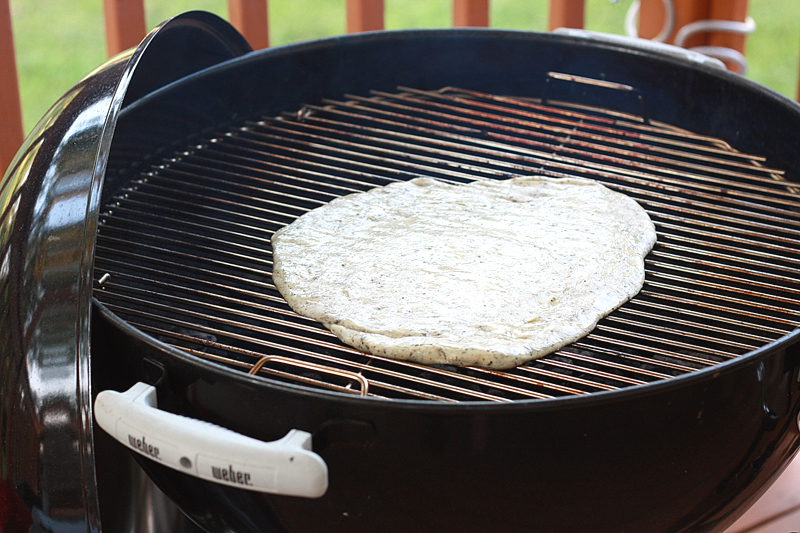
If you've oiled your plate and dough well enough, you should be able to slide the dough right off the plate onto your clean grill rack. If not, you can always flip it on to the grill as well.


Grill for 90 seconds - 2 minutes, or until nice brown marks are left.

Using a spatulas and tongs, remove the dough back to the re-oiled pizza pan, doughy side down.


Brush a coat of olive oil over the top of the dough (or add your sauce), then top away. Even if your next best table is a couple of stacked patio chairs. Doesn't matter, it will still taste amazing in the end -- promise.

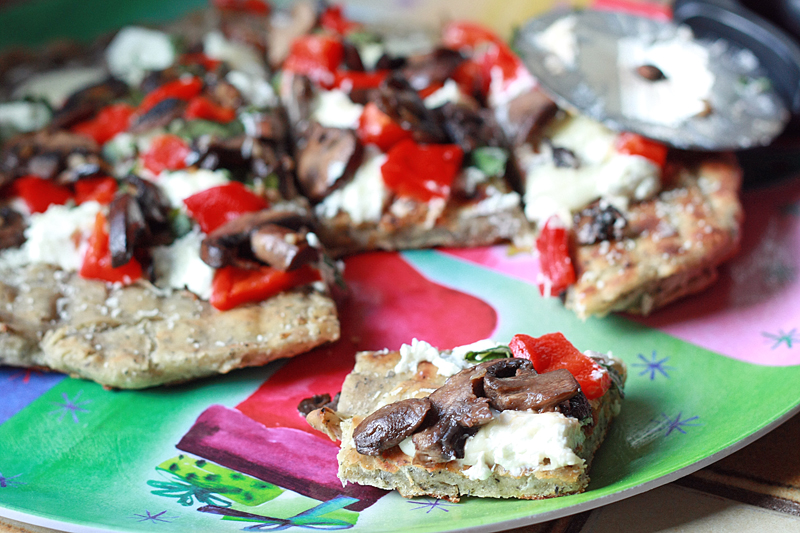
Slide your pizza back onto the grill, cover, and cook for another 1:30-2 minutes, or until dark brown marks appear on the bottom of the dough. Transfer back onto pizza pan, slice, and serve!


Just trust me on this one. Once you start making your own pizza, you'll never go back. Especially when you remember that Pizza Hut doesn't make Pierogie pizza, or Spicy Vodka Sauce with Banana Peppers and Hot Italian Sausage pizza, or... you get the idea.


This may quite possibly be a weekly event for us. No lie. It really is that good.

Monday, July 25, 2011

When all else fails...

...go out for back up.


Not every dish can be a success, and we finally found one tonight that we couldn't even finish. Much less take more than a few bites of.

At least the hubby and I found another thing we agree on -- dill should only be mixed with tzatziki and pickles. Not pasta. At least not this pasta.


But if you're a huge dill fan, you're more than welcome to try it out. You can find the recipe here.

And hey, lucky you! You just a caught a preview of what's coming up on the blog. Barring any more unfortunate situations, that is...

Quinoa & Black Beans


There are days when Adam and I are super compatible when it comes to food.

Coconut? Keep that out of our kitchen.
Raw tomatoes on the salad? Adam will gladly eat mine.
Water chestnuts in a dish? They magically find their way from Adam's plate to mine.

Then there are times we don't jive together so well. And it's almost always centered around seafood. He loves it. I can't stand it. Not a fan of the rubbery texture or smell. Therefore, seafood is rarely cooked in our home. (When it is, it's usually separate from the rest of the food and done by Adam.)

Enter the grill. Adam's new best friend. Now he can enjoy salmon while I have chicken, and I don't have to smell it for another 3 days. He is in love.

But you can't just have a slab of meat for dinner. Okay, well you can, but I prefer not to. I get overwhelmed and tired of the constant one flavor. And then you have to deal with the meat sweats later. Awkward.

While wandering around Trader Joe's for the first time in forever, I spotted a box of quinoa sitting on the shelf. Impulse buy. Weird, it didn't involve chocolate. Something funny's going on. Or maybe it's just my brain telling me I need a little bit healthier food after eating out constantly for the past month. Whatever the reason, that box ended up in the cart.

Turns out impulse buys can make for a great side dish. Unless they do involve chocolate, then no-so-much.

Quinoa and Black Beans


Adapted from: Allrecipes.com

1 teaspoon vegetable oil
1 cup onion, diced
3 cloves garlic, minced
3/4 cup uncooked quinoa
1 1/2 cups fat-free, less-sodium chicken broth (can also use vegetable broth)
1 teaspoon ground cumin
1/4 teaspoon cayenne pepper
1/2 teaspoon kosher salt
1/4 teaspoon ground black pepper
1 cup frozen corn kernels
1 (15 ounce) can black beans, rinsed and drained
1/2 cup fresh cilantro, chopped

In a medium saucepan, warm the oil over medium heat. Add the onion and garlic, and cook until lightly browned, about 7 minutes.

Stir in quinoa, then pour in broth. Add cumin, cayenne pepper, salt, and pepper, stirring well. Bring the mixture to a boil, then cover, and reduce heat to medium-low. Simmer for 20 minutes.

Add frozen corn to saucepan and simmer for an additional 5 minutes, or until corn in heated through. Stir in black beans and cilantro, and cook for another 1-2 minutes.


Serves: 10 (as a side)


Usually I have a hard time getting behind all these new healthy grains and seeds and whatnot that seem to keep popping up. Sometimes the texture's off, or the taste is weird, or I just don't see the point. But I'm glad I decided to take the plunge on this one. And it's a good one to start with -- it cooks up much like rice, is packed with fiber, and is one of the few plant sources containing complete proteins.

Despite being leery in the beginning about the texture, both Adam and I really enjoyed this dish. It's fairly simple to throw together, and doesn't seem quite as temperamental as rice can be. Maybe I'll keep it around a while longer and see what else I can stir up with it.

What's your favorite quinoa dish?


Nutrition Facts
Amount per serving
Calories 216Calories from fat 18
% Daily Value
Total Fat 2.0g3%
Saturated Fat 0.0g0%
Cholesterol 0mg0%
Sodium 322mg13%
Total Carbs 39.1g13%
Fiber 8.0g32%
Sugars 2.1g
Protein 12.0g
Vitamin A 2%Vitamin C 3%
Calcium 7%Iron 16%

Friday, July 22, 2011

Vegetarian Sloppy Joes


Question: What do you serve vegetarians for an entrƩe when you're throwing a scotch/bourbon tasting and the meat entrƩe is Whiskey-Glazed Ribs? Some sort of light fru-fru salad just doesn't seem to fit. While there are other directions I could have gone, I decided to keep with the BBQ picnic-type theme I had going on.

Tofu ribs? Um, pass. Tofu lettuce wraps? Couldn't really get the flavor combos to sync. What about Sloppy Joes? Done and done. The concept fit in perfectly with the other dishes -- I just had to keep my fingers crossed that the soy meat-substitute I picked up wasn't completely disgusting disappointing.

Turns out, it is pretty darn tootin' easy to make your own Sloppy Joes at home, even during a party. (Yes, the Manwich can scares me.) 15 minutes, and you're good to go. Oh, and about that meatless ground round? Let me assure you, it wasn't just the vegetarian guests who were going after these and enjoying them. I'm pretty sure if I hadn't told them it was vegetarian, they never would have known the difference.

Vegetarian Sloppy Joes


Adapted from: Group Recipes.com

1 tablespoon olive oil
2 cloves garlic, minced
2 jalapeƱos, membranes and seeds removed, diced
1 cup onion, diced
12 ounces meatless ground round (such as Yves)
2 tablespoons soy sauce
1 1/2 cups tomato sauce
1 tablespoon chili powder
1/2 teaspoon ground cumin
2 tablespoons barbecue sauce
8 hamburger buns

Warm oil in a large skilled over medium heat. Add garlic, jalapeƱos, and onion. Cook, stirring frequently, until onions and peppers have softened, about 5 minutes.

Stir in meatless ground round, breaking apart with a wooden spoon. Cook until heated through, about 5 minutes. Add remaining ingredients and stir until well blended and heated through, about 2 minutes. Spoon onto hamburger buns and serve.


Serves: 8


Of course, the first time I made these was in the middle of a party, so I neglected to get any pictures. So what else to do but go back and make them again? Not that I minded. Adam didn't really get a chance to try them on the first go-around, so I was a little nervous about how he was going to handle the meatless ground round. Surprisingly, these went over with two thumbs up and must-have-seconds. Not too bad coming from a guy. :)


Nutrition Facts
Amount per serving
Calories 89Calories from fat 21
% Daily Value
Total Fat 2.4g4%
Saturated Fat 0.0g0%
Cholesterol 0mg0%
Sodium 723mg30%
Total Carbs 10.1g3%
Fiber 2.8g11%
Sugars 4.5g
Protein 8.7g
Vitamin A 9%Vitamin C 9%
Calcium 5%Iron 16%

Wednesday, July 20, 2011

Radiatore with Caramelized Onions & White Wine


This morning I ran hill repeats. Just for kicks. And I thought I was going to have a heart attack -- several times. Then I took almost 2 hours to mow and weed-whack the lawn (which, by the way, has some nice little hills of its own). All before lunch.

I am so done for the rest of the day.

I seriously have a lack a motivation to do anything else I had planned for today. Which means it's a good thing this wasn't on tonight's menu. Caramelized onions and I have a love-hate relationship. I love to eat them, but really get annoyed when I have to make them. To truly do caramelized onions right you have to go low and slow -- sometimes taking up to an hour or more to get them just.right.

The night I made this dish I just did not have the patience for them. Clearly. As evidenced by my nice pale-looking onions. I will say, I factored in 20 minutes, as stated in the recipe, for these. 30 minutes later, well, I got hungry. So I gave up and ate them anyways. Even though they didn't get to that nice dark golden brown stage, I did cook them long enough to bring out the sweeter side which paired nicely with the white wine and garlic.

Radiatore with Caramelized Onions and White Wine


Adapted from: Cooking Light, April 2011

1/2 cup panko
3 tablespoons olive oil, divided
2 teaspoons minced garlic, divided
1/2 teaspoon kosher salt, divided
2 cups sweet yellow onions, sliced into 1/4-inch rounds
1/2 cup dry white wine
1/4 cup fat-free, reduced sodium chicken broth
8 ounces uncooked radiatore pasta, or other medium pasta
1/4 teaspoon ground black pepper

Preheat oven to 375 degrees F.

In a small bowl, stir together panko, 1 tablespoon olive oil, 1 teaspoon garlic, and 1/4 teaspoon kosher salt. Spread the breadcrumb mixture evenly across a baking sheet. Bake for 3 minutes, stir, then bake for an additional 3 minutes, or until golden brown. Transfer pan to a rack to cool.

Warm 2 tablespoons olive oil in a large skillet over medium-low heat. Add onions and cook for 30 minutes, stirring occasionally, until golden brown. Add 1 teaspoon garlic and wine, tossing to combine. Increase heat to medium-high and cook for 1 minute. Add broth. Reduce liquid to about 1/2 cup; about 4 minutes.

Meanwhile, bring a medium saucepan filled with water to a boil. Cook pasta according to package directions. Drain.

Once the liquid in the onion mixture has reduced, stir in the pasta, remaining salt, and pepper. Serve sprinkled with toasted panko.


Serves: 4 (1 cup pasta with 2 tablespoons panko)


While the dish was tasty, I'm not quite sure it's worth the work of caramelizing the onions to make it again. Although I suppose that could just be the impatience speaking. Maybe if there was some goat cheese involved I could be convinced...


Nutrition Facts
Amount per serving
Calories 171Calories from fat 99
% Daily Value
Total Fat 11.0g17%
Saturated Fat 1.6g8%
Cholesterol 0mg0%
Sodium 420mg17%
Total Carbs 11.1g4%
Fiber 0.7g3%
Sugars 1.1g
Protein 2.0g
Vitamin A 0%Vitamin C 1%
Calcium 3%Iron 5%

LinkWithin

Related Posts with Thumbnails
 
Pin It button on image hover