Showing posts with label Original Recipe. Show all posts

Tuesday, January 22, 2013

Dark Chocolate Mint Cupcakes


Oh man, it's been awhile since I've done a Recipe Re-Do. As in *cough* almost a year ago. Almost to the day. Obviously I didn't do so hot this past year with keeping up with my re-dos. Therefore I'm still pulling from February 2008. That's right. 2008.

Which on the bright side, means this little ol' blog has been hanging around for 5 years. Barely, this past year, but here we are, still carrying on. I'll take it.

5 years ago, I was in the middle of planning Adam and I's wedding while living in DC. Today, we've been in Pittsburgh for almost 5 years and are expecting our first child any day now. It's crazy how things change.

But that's not what we're here for, is it? Nope. We're here for the cupcakes. And you're lucky, because they're totally worth it. Back in 2008, I used a boxed cake mix and canned frosting. Smashed up a bunch of Girl Scout cookies, threw them in the batter and frosting and called it a day.
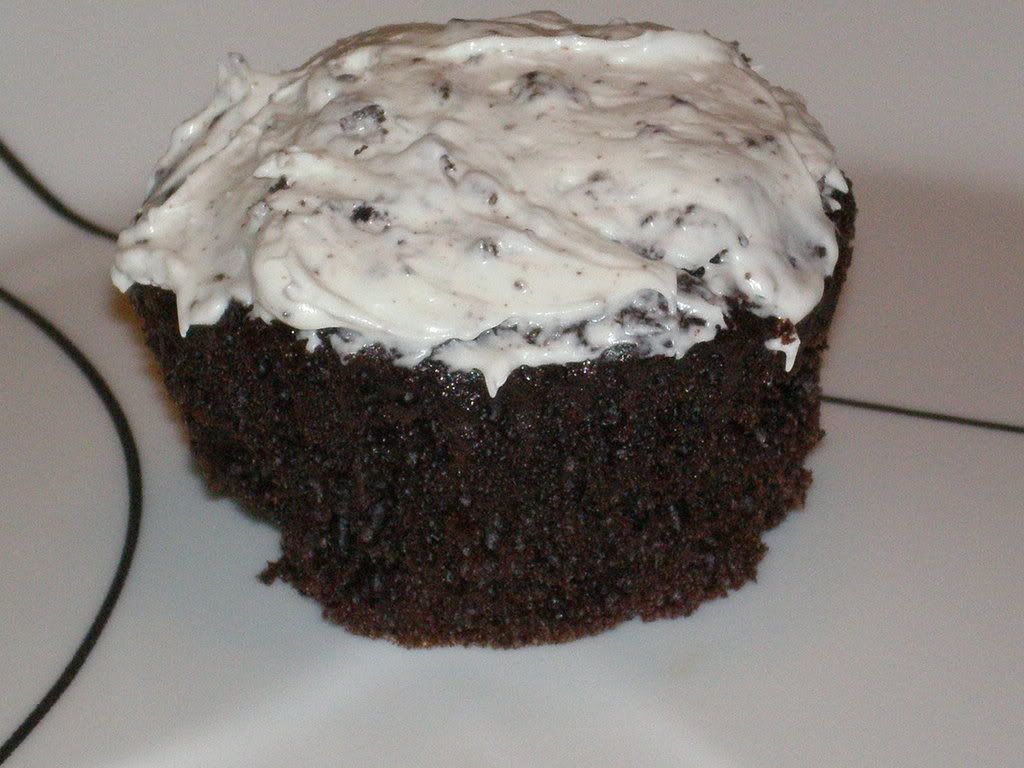

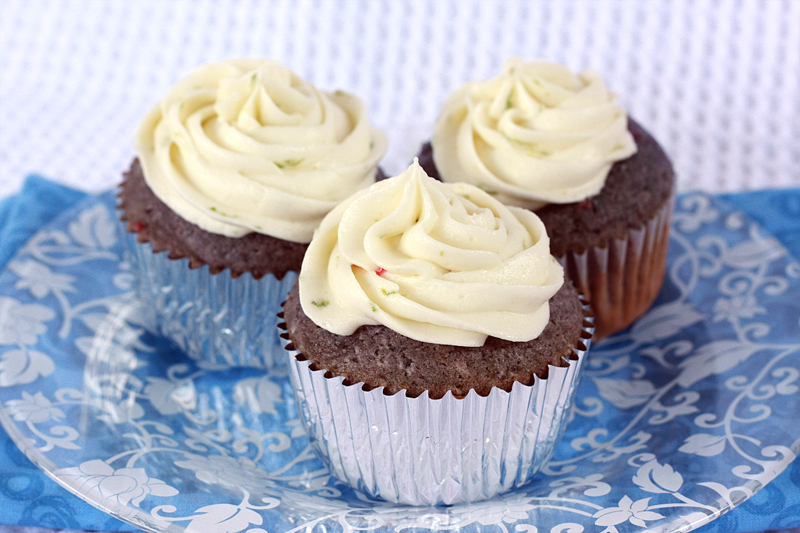
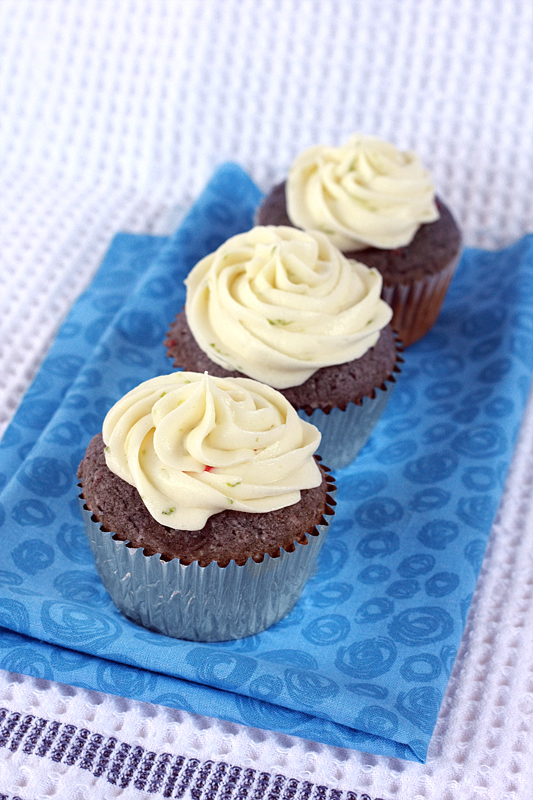
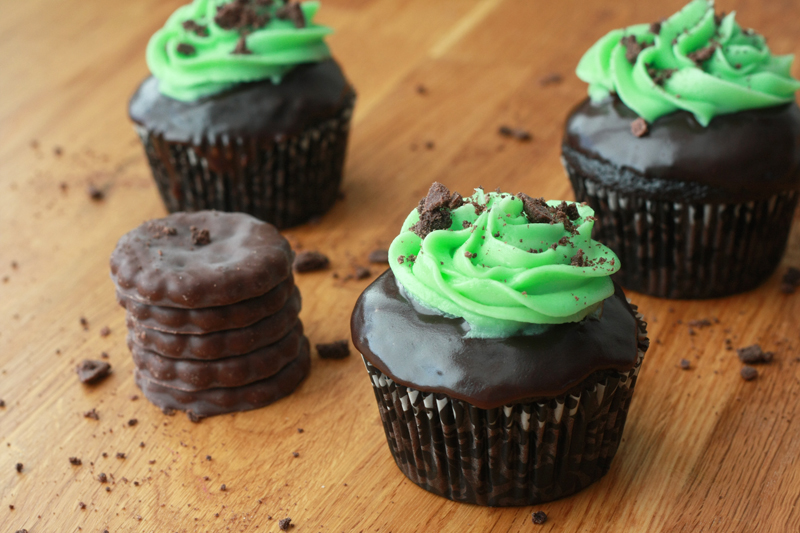
While that certainly isn't a bad way to make cupcakes, I decided it was time to give them a little update. A face lift if you will. I kept true to the flavors from those Dark Chocolate Thin Mint Cupcakes, but I altered how I infused the "mint" flavor into them. Instead of smashing up Girl Scout cookies (which, who wastes Girl Scout cookies like that?), I used dark chocolate mint candy melts to make a ganache instead. After dipping the cupcakes in the ganache, I topped them with a simple vanilla buttercream dusted with a few crushed up Keebler Grasshoppers. Thin Mints? No, but they do come pretty darn close. Much like the original cupcakes, the mint flavor isn't overpowering, but it's definitely there.

Now, who's going to take these away from me?
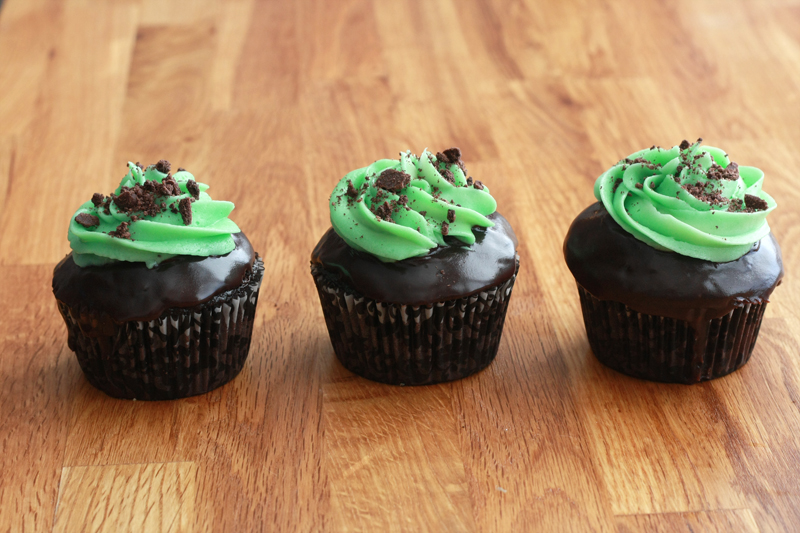

Dark Chocolate Mint Cupcakes
Original Recipe

2 cups boiling water
1 cup Hershey's Special Dark cocoa (or other dutch-processed cocoa)
2 3/4 cup cake flour
2 teaspoons baking soda
1/2 teaspoon baking powder
1/2 teaspoon salt
1 cup butter, softened
2 1/4 cups granulated sugar
4 eggs
1 1/2 teaspoons vanilla extract

1/2 cup heavy cream
4 ounces Wilton's Dark Chocolate Mint candy melts
2 tablespoons butter

1 cup butter, at room temperature
1 pound powdered sugar
1 teaspoon vanilla extract
5-6 drops green food coloring (optional)
5-6 Keebler Grasshopper cookies or Girl Scout Thin Mints, crushed

Preheat oven to 350 degrees F. Line two muffin tins with baking cups.

In a medium bowl, pour boiling water over cocoa; whisk until smooth. Let mixture cool.

In another medium bowl, sift together flour, baking soda, baking powder, and salt.

In the work bowl of a mixer, cream together butter and sugar until light and fluffy. Beat eggs in, one at a time, making sure each is fully incorporated before adding the next. Stir in vanilla. Add the flour mixture alternately with the cocoa mixture until all ingredients are fully incorporated. (Note: batter will be very thin and runny.)

Fill baking cups about 2/3 full, and bake at 350 for 18-22 minutes, or until a toothpick inserted in the center comes out clean. Allow to cool for 5-10 minutes in pan before removing to wire racks. Allow to cool completely.

To make the ganache, in a small bowl, heat the chocolate and butter in the microwave, 20-30 seconds at a time. Stir between each heating until melted. Slowly stir in the cream.

In a large mixing bowl, cream the butter. Add in the vanilla. Slowly add in 1 pound of powdered sugar and mix until smooth and creamy. Beat in food coloring if desired.

Once the cupcakes and ganache have cooled, turn the cupcake upside down and dip the top in the ganache. Slowly rotate so that the entire top of cupcake is covered, making sure ganache does not get on the cupcake liner. Shake cupcake slightly to remove any excess ganache. Flip right-side up, and allow the ganache to set. Pipe or spread on frosting. Sprinkle crushed mint cookies over frosting.


Makes: 30 cupcakes
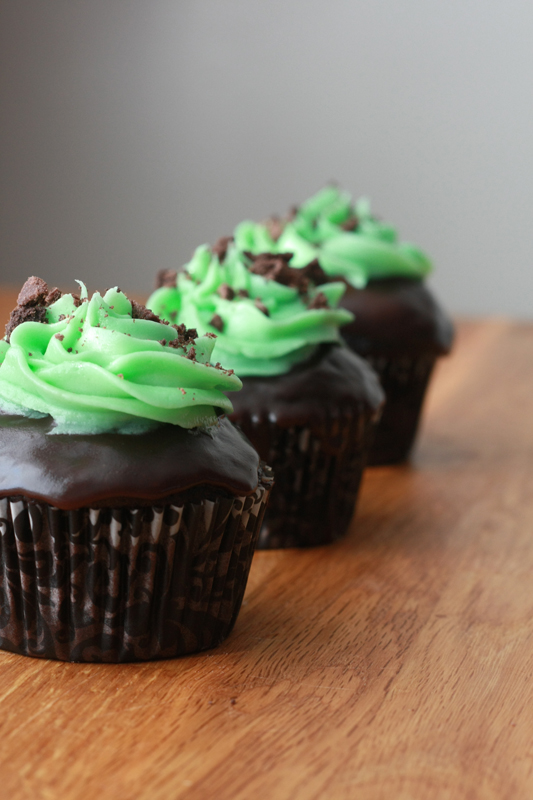

Dark chocolate cupcakes dipped in dark chocolate mint ganache topped with buttercream? Yes please. Although it is an additional step, I love the extra flavor and moisture the layer of ganache brings.

Alright, I will admit, I pretty much ripped off my own Chocolate Dipped Chocolate Raspberry Cupcakes making these. For some reason, I'm alright with it. :) Especially now that I don't have to wait until Girl Scout cookie season to make these.



Nutrition Facts
Serving Size 89g
Amount per serving
Calories 323Calories from fat 146
% Daily Value
Total Fat 16.2g25%
Saturated Fat 10.2g51%
Cholesterol 59mg20%
Sodium 268mg11%
Total Carbs 44.0g15%
Dietary Fiber 1.5g6%
Sugars 32.8g
Protein 2.7g
Vitamin A 9%Vitamin C 0%
Calcium 1%Iron 5%

Wednesday, November 7, 2012

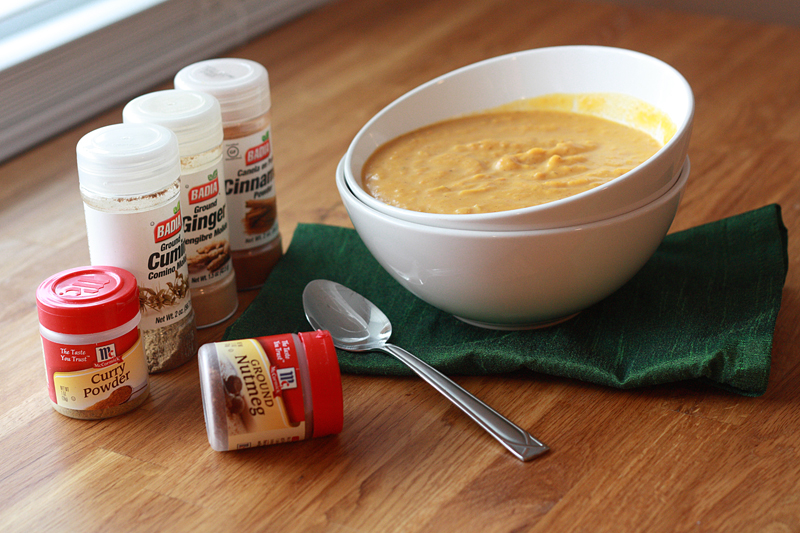
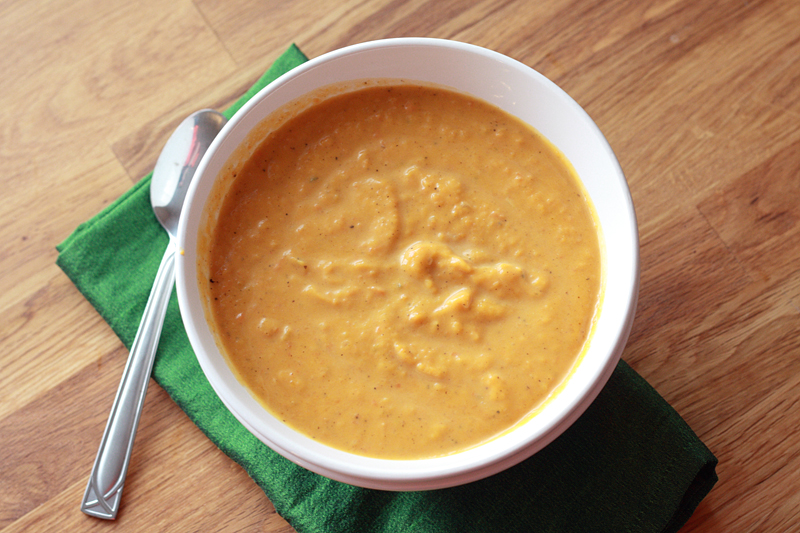
Butternut Squash Soup


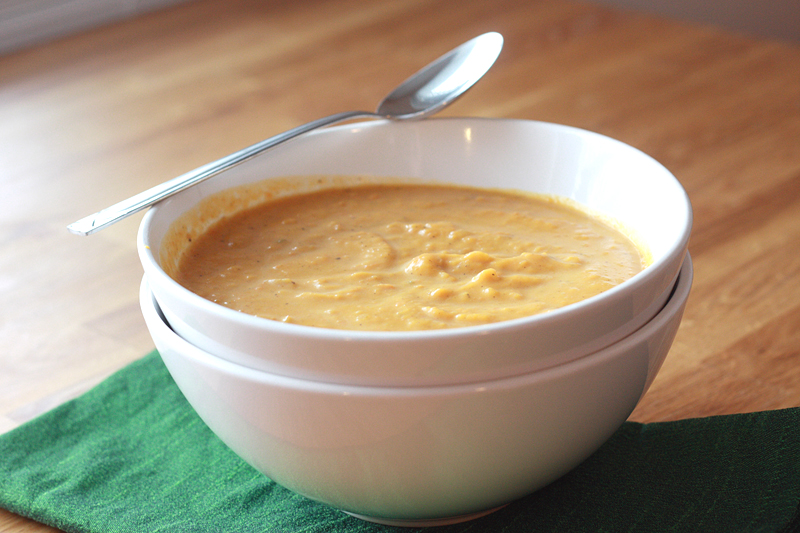
Speaking of comfort food, I have been massively crushing on any and all kinds of soup as of late. It never fails, every time we go out to Panera, I get a large bowl of Chicken Noodle soup and a baguette. Even when it was 80+ degrees out in the middle of August.

Now that the weather is going full on chilly, it's time for everybody else to enjoy what I have been for months. For the past year or two, I keep telling myself I am going to try my hand at a butternut squash soup, and it never happens. Then squash is out of season and I'm forced to wait until the leaves starting turning colors again. Not this year.

I thought I had a recipe all picked out and ready to go when I got started, but one thought led to another, and all of a sudden it was totally and completely different. I just added a bit of this here, that there, and doesn't this sound like it would go in great with all the flavors? I have to admit, I'm not sure I've ever been happier with an original dish outcome.

Butternut Squash Soup
Original Recipe

1 medium to large butternut squash (about 4-5 pounds whole)
1 1/2 tablespoons brown sugar
3 tablespoons butter, divided
1 stalk celery, diced
1 cup onion, diced
3 cloves garlic, minced
1 cup carrots, diced
4 cups fat-free, reduced-sodium chicken broth
1/2 teaspoon kosher salt
1/2 teaspoon ground black pepper
1/4 heaping teaspoon ground ginger
1/4 teaspoon ground cinnamon
1/2 teaspoon ground curry
1/8 teaspoon ground nutmeg
1/2 teaspoon ground cumin
1/4 cup heavy cream

Preheat oven to 400 degrees F. Line a rimmed baking sheet with aluminum foil. Cut the squash in half lengthwise and scoop out the seeds. Top each half with 1 tablespoon butter (cut into pieces), and about 3-4 teaspoons of brown sugar. Place squash in oven and roast for 1 hour.

Once the squash is done roasting, melt the remaining 1 tablespoon butter in a large pot over medium heat. Add the celery, onion, garlic, and carrots. Saute for about 5 minutes, or until the vegetables begin to soften. Add the chicken broth to the pot. While the broth is coming to a simmer, scoop out the squash and add it to the pot, discarding the skin. Cover pot, reduce heat to medium-low and let simmer for 40 minutes.

Transfer mixture in batches to a blender to puree until smooth, or use a hand blender. Add seasonings and spices to taste (add more ginger or cayenne pepper if you want the soup to have a little kick). Stir in the heavy cream and serve.


Serves: 6


This soup is thick and hearty, and I added close to (if not more than) a 1/2 teaspoon of ginger, so it definitely had a bit of a bite to it. The flavors all come together -- the sweet mixed with the savory, in such a perfect fall-ish way. Almost for a minute making me wish winter baking wasn't just around the corner. (But who am I kidding, cookies trump soup any day.)


Nutrition Facts
Serving Size 444g
Amount per serving
Calories 202Calories from fat 72
% Daily Value
Total Fat 8.0g12%
Saturated Fat 4.9g24%
Cholesterol 22mg7%
Sodium 563mg23%
Total Carbs 33.5g11%
Fiber 5.7g23%
Sugars 8.9g
Protein 3.7g
Vitamin A 549%Vitamin C 85%
Calcium 13%Iron 11%

Tuesday, February 21, 2012

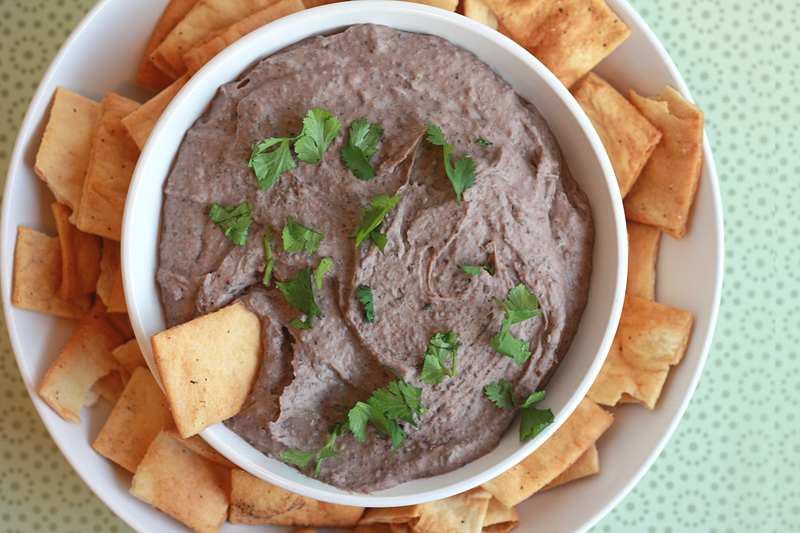
Roasted Garlic Black Bean Dip


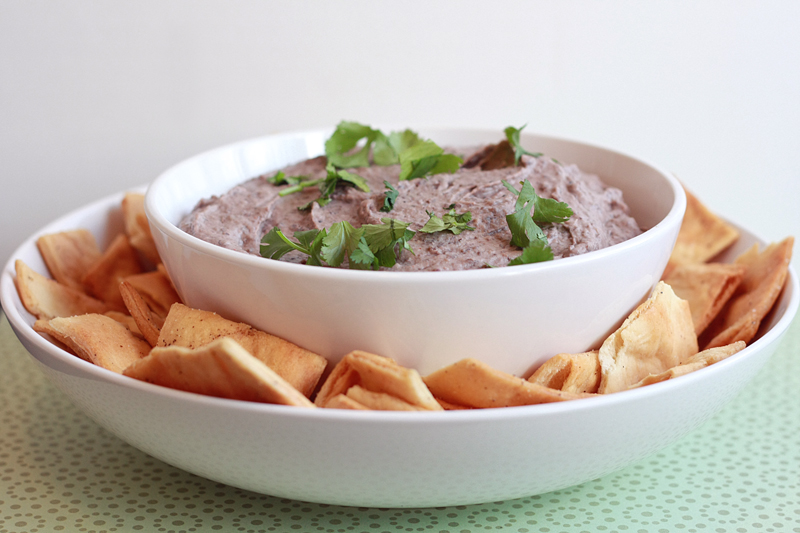
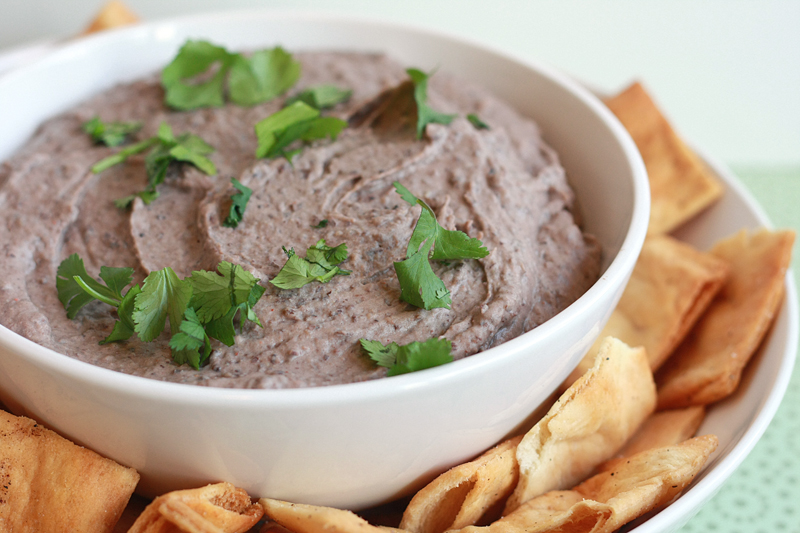
As I mentioned last week, Jalapeno Cheddar Hummus wasn't the only thing on my mind when it came to making something for the Superbowl. I have seen countless recipes floating around for a black bean dip, which intrigued me, but for some reason I decided to go off on my own for this one.

I knew going in that I wanted to somehow incorporate roasted garlic into the dip because I love it so. Originally, I was only going to use one head of garlic, but I made up a second just.in.case. Definitely the right move. It may seem like a ton of garlic, but since it's roasted, it becomes much more subtle and doesn't come through in an "in your face" sort of way. Which is a good thing when we're talking 2 heads of garlic.

I simply topped the dip off with a few seasonings (cumin and cayenne) and away we went. Very easy to throw together, and the only time consuming thing was roasting the garlic. The rest utilized the "dump and blend" method. Perfect for those times you really don't feel like making anything but don't want to go the store-bought route.

Roasted Garlic Black Bean Dip
Original Recipe

2 heads garlic
2 tablespoons olive oil

2 (15 ounce) cans black beans
1/4 cup extra-virgin olive oil
2 tablespoons tahini (sesame seed paste)
1/2 teaspoon cayenne pepper
1 teaspoon ground cumin
1 teaspoon kosher salt
1 tablespoon lemon juice
1 1/2 teaspoons dried chives

Preheat oven to 375 degrees. Tear two squares of aluminum foil and lay flat on a work surface. Cut the top 1/4 off each head of garlic. Place one head of garlic in the center of each foil square. Drizzle each with 1 tablespoon olive oil. Wrap foil around garlic and roast in the oven for 1 hour. Remove and let cool at least 15 minutes, or until able to handle.

Squeeze the cloves out of the heads of garlic into the bowl of a food processor. Add the black beans. Pulse until ingredients are pureed. With the processor still running, pour in the olive oil until the mixture becomes smooth and creamy. Add tahini and remaining 4 ingredients. Process again until the mixture is smooth, adding water if it becomes too thick.

Serve with pita chips or veggies.


Serves: 20 (2 tablespoons per serving)


Next time around, I think incorporating fresh chives (and more of them) or green onions would be a must. Most of the flavors in this dish a very mild and mellow, and I think adding one of those options would really brighten things up. Overall though, not too bad for doing my own thing. :)


Nutrition Facts
Serving Size 55g
Amount per serving
Calories 199Calories from fat 50
% Daily Value
Total Fat 5.5g8%
Saturated Fat 0.8g4%
Cholesterol 0mg0%
Sodium 121mg5%
Total Carbs 29.0g10%
Fiber 6.7g27%
Sugars 1.0g
Protein 9.8g
Vitamin A 1%Vitamin C 4%
Calcium 7%Iron 14%

Wednesday, February 15, 2012

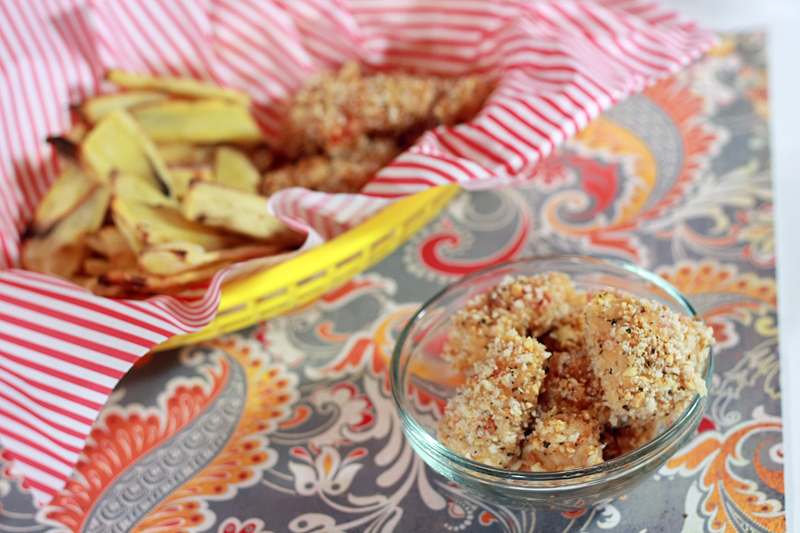
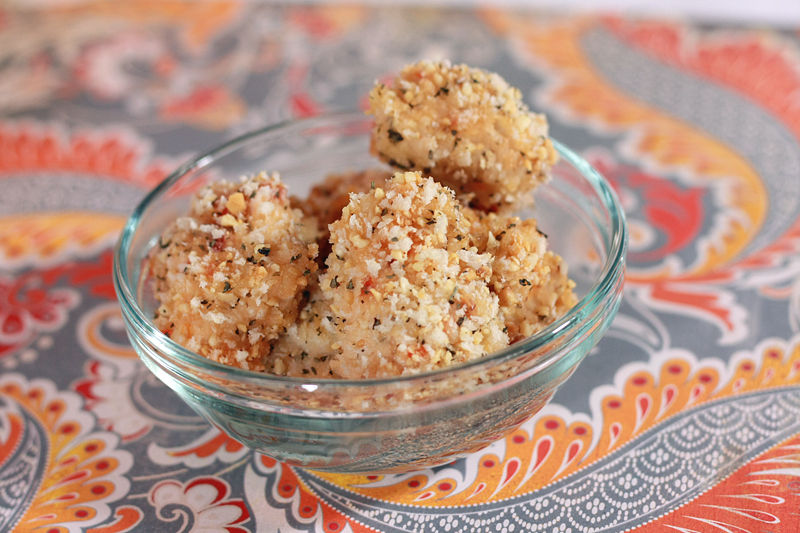
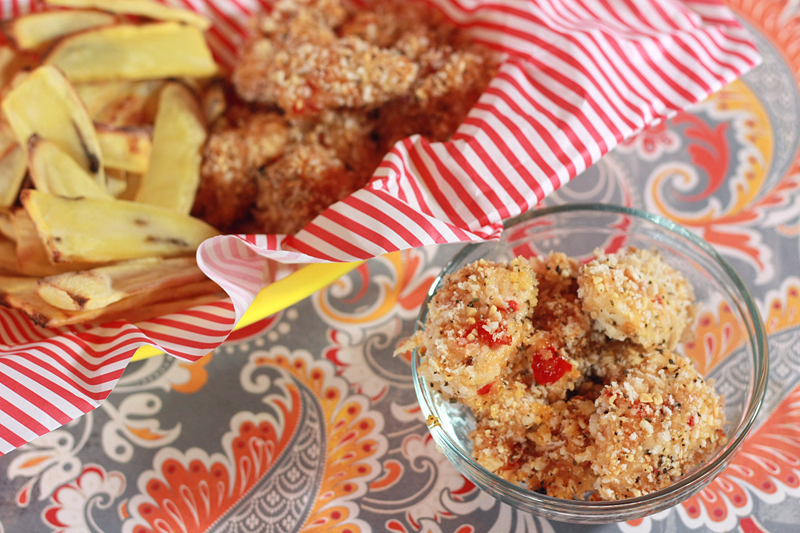
Spicy Thai Chicken Nuggets


Chicken nuggets to American children is like peanut butter to jelly. Or chocolate. Even if the parents are completely pro non-hormone, non-fried, do-not-dare-feed-that-McDonald's-to-my-child, I'm sure the child has had, in some form or fashion, a chicken nugget. And they.love.them.

Admission: I still get chicken nuggets whenever we go to Chick-Fil-A. I pink puffy heart them.

There's a reason children people love them so much -- they're portable, easy to eat, and the good ones are seasoned well, juicy, and flavorful. But the buck doesn't have to stop there when it come to chicken nuggets. Clearly people have figured this out when it comes to chicken wings, and let's face it, boneless chicken wings is just a grown-up name for large chicken nuggets.

So there's absolutely no reason we can't bring home a little bit of that flavor to a healthier, non-fried version. Chicken nuggets for adults don't have to be plain Jane breadcrumb-crusted pieces of chicken any more.

Spicy Thai Chicken Nuggets
Inspired by: The Realistic Nutritionist

3 (4 ounce) boneless skinless chicken breasts
2/3 cup mild sweet Asian chili sauce (such as Maggi)
1 tablespoon garlic chili paste (sambal oelek)
1/2 cup panko
1/4 cup lightly salted peanuts
1/2 teaspoon dried basil

Slice chicken breasts into bite-sized pieces. (I was able to get 7 pieces from a 4 ounce breast.) In a small bowl, whisk together the chili sauce and the garlic chili paste. Place the chicken breast pieces in a large ziploc bag. Pour the sauce over the chicken, seal the bag, and marinate in the refrigerator for at least 4 hours up to overnight.

Preheat oven to 500 degrees F. Coat a 9 x 13-inch baking dish with non-stick spray; set aside. Remove chicken from the fridge; set aside.

Place the panko in a wide, shallow bowl or plate. Place the peanuts into the bowl of a food processor, and grind until very fine. Mix ground peanuts and dried basil with the panko, tossing to combine. Roll each piece of chicken in the breadcrumb mixture, completely coating, then place in the prepared baking dish. Repeat with remaining chicken, making sure the pieces do not touch in the baking dish. Bake for 10-12 minutes, or until chicken is done.


Serves: 3 (7 nuggets per serving)


Originally I added 1 teaspoon of basil to the recipe, but I felt it's flavor was a little on the strong side, so I have adjusted the recipe above to reflect a lower amount. But feel free to add more if you love it! I also think next go around I'll add more sambal oelek as the spice didn't come through in quite the way I was hoping. Or maybe I'll toss some red pepper flakes in the panko.

And trust me that they'll be a next go around. Adam wasn't even completely done going through 14 nuggets before telling me I HAD to make these again. Soon. Sounds good to me, especially since they take all of 10 minutes total of prep time.


Nutrition Facts
Serving Size 191g
Amount per serving
Calories 467Calories from fat 126
% Daily Value
Total Fat 14.0g22%
Saturated Fat 3.2g16%
Cholesterol 101mg34%
Sodium 1019mg42%
Total Carbs 46.3g15%
Fiber 1.5g6%
Sugars 17.3g
Protein 37.6g
Vitamin A 2%Vitamin C 3%
Calcium 6%Iron 15%

Wednesday, September 28, 2011

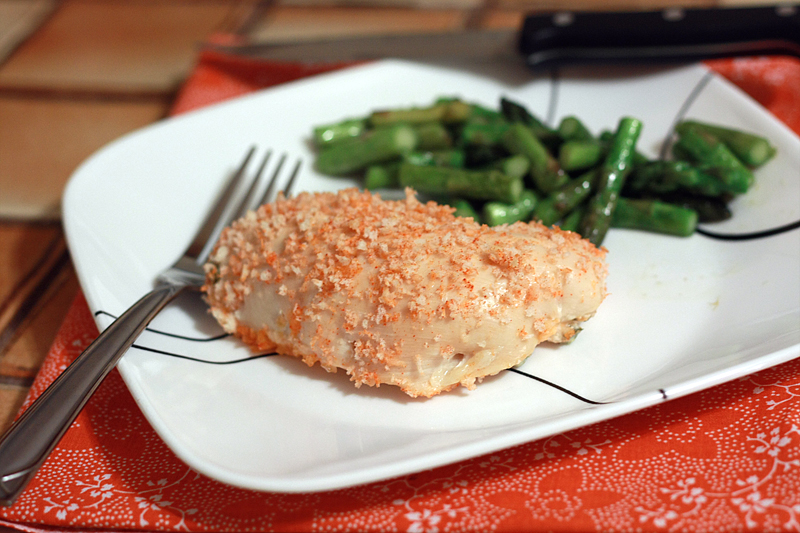
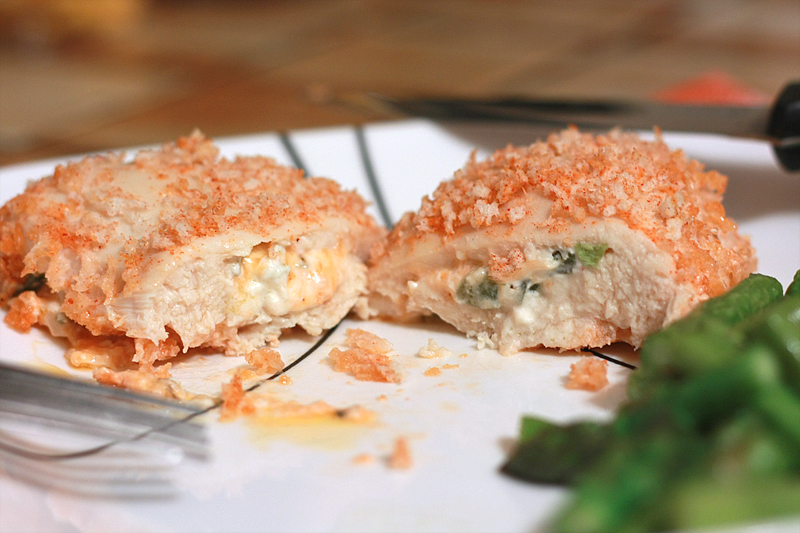
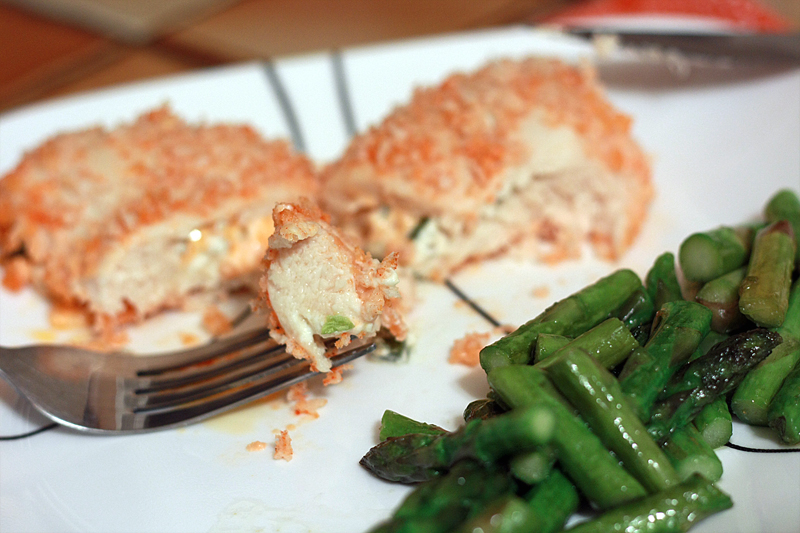
Cheesy Jalapeno Chicken


Unlike my last recipe re-do, where I wasn't thrilled with the original recipe, the starting recipe this time around is actually really good. This Garlic Lemon Double-Stuffed Chicken is a hot mess of gooey cheese and buttery crunchy breadcrumbs. Kind of hard to add or take away anything from that without losing the essence of the dish.


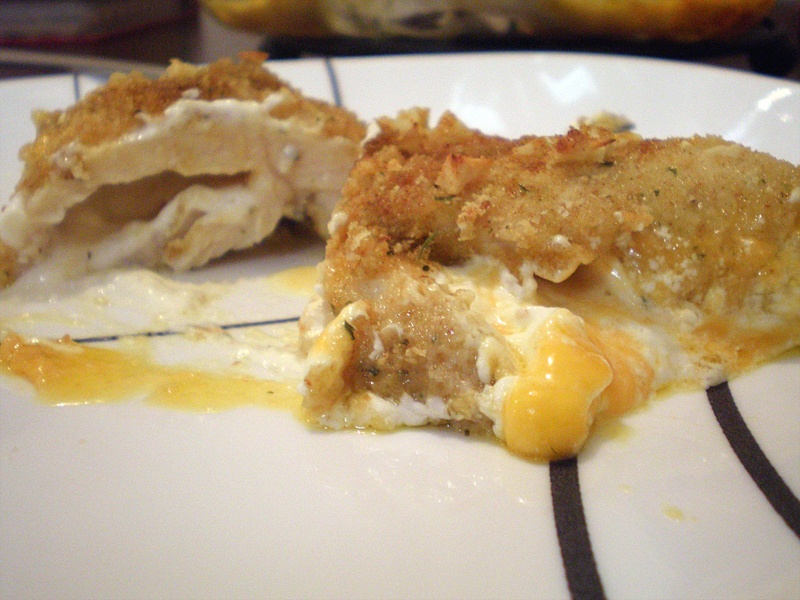
(The original post doesn't have a picture, but I unearthed a few from my hard drive, and now I know why. There's a whole lot of oozing cheese in this picture and it's hard to tell what else is going on.)

After struggling with this dilemma for a long time, a quick look at the nutrition facts made the decision for me. Clocking in at over 900 calories per serving is really quite a bit ridiculous. Especially when we're talking chicken.

What to do? The cheese has to stay -- it's what makes the dish! Instead, I omitted the butter, used reduced-fat cream cheese, and less cheddar -- shredding it instead of using a slice so I felt like there was still the same amount. A 400 calorie reduction later, and we now have a dish that went from a "special indulgence" to acceptable for dinner almost any night.


Cheesy Jalapeno Chicken


Original Recipe

Cooking spray
1 teaspoon olive oil
1 jalapeno, seeds and membranes removed, finely diced
2 cloves garlic, minced
2 ounces cream cheese
2 (4 ounce) boneless, skinless chicken breasts
4 tablespoons shredded cheddar cheese
1/2 cup 1% milk
1/2 cup panko (japanese-style breadcrumbs)
1/8 teaspoon smoked paprika

Preheat oven to 350 degrees F. Thoroughly coat a 8x8 baking pan with cooking spray; set aside.

In a small skillet over medium heat, cook the jalapeno for 3 minutes. Add the garlic and cook for an additional 2 minutes. Remove from heat and transfer to a small bowl. Add the cream cheese and mix together until the jalapeno mixture is fully incorporated. Set aside.

Using a sharp knife, slice each chicken breast in half horizontally through the center (butterfly), cutting almost but not completely through. Spread half the cream cheese mixture on the inside of a chicken breast. Sprinkle with 2 tablespoons of cheddar, then fold the unused half of the chicken breast back over, securing with toothpicks. Repeat with remaining chicken breast and cheese.

Pour milk into a shallow bowl. In another small bowl, toss together the panko and paprika. Dip each stuffed breast in milk, then roll gently in breadcrumb mixture, patting lightly to coat. Place breasts in the prepared baking dish. Bake for 25-30 minutes, or until chicken is no longer pink and juices run clear.


Serves: 2


I was a little leery at first dumping a whole jalapeno into the cream cheese for just two chicken breasts, but the cream cheese really mellows it out. It remains spicy, but definitely not overpoweringly so. I also really like that subtle hint of smokiness from just that little touch of smoked paprika -- it gives the chicken that extra little nuance of flavor.

Adam and I both gave this two thumbs up, and I really wished I had made more that just two chicken breasts so we could have leftovers the next day.


Nutrition Facts
Serving Size 257g
Amount per serving
Calories 505Calories from fat 214
% Daily Value
Total Fat 23.8g37%
Saturated Fat 10.4g52%
Cholesterol 139mg46%
Sodium 532mg22%
Total Carbs 24.1g8%
Dietary Fiber 1.5g6%
Sugars 5.2
Protein 45.3
Vitamin A 15%Vitamin C 7%
Calcium 27%Iron 16%

Tuesday, August 9, 2011

Blackberry Lime Cupcakes


The lowly blackberry. So often overshadowed by the stars of the berry family. That's right, I'm looking at you strawberries and blueberries.

Sometimes, a berry just needs its time to shine.

In a cupcake.

Smothered and covered with lime buttercream.

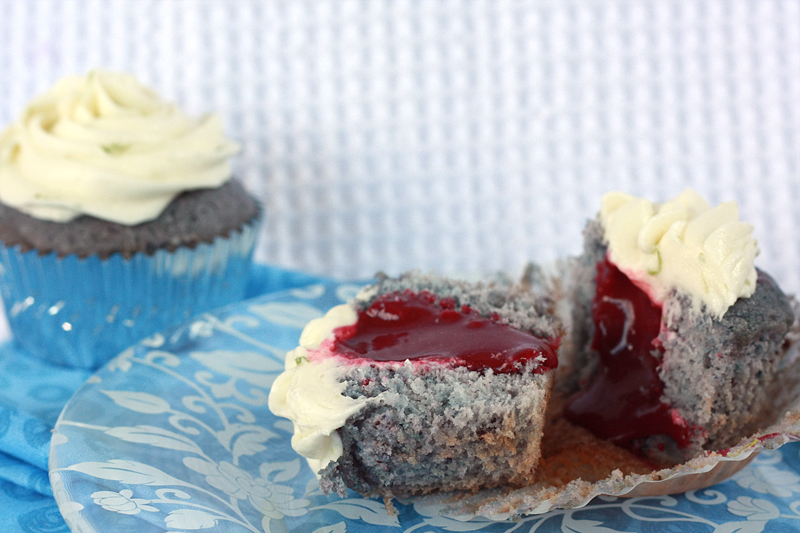
Filled with a sweet and tangy blackberry curd.

Need I say more? Alright blackberries, the stage is all yours.

Blackberry Lime Cupcakes


Original Recipe

For the blackberry cupcakes:
1 1/2 cups (3 sticks) butter, at room temperature
3 cups sugar
4 1/4 cups cake flour
5 1/4 teaspoons baking powder
1 1/2 cups pureed frozen blackberries
8 large egg whites
2/3 cup milk

For the blackberry curd:
2 pounds frozen blackberries
1/2 cup water
4 tablespoons flour
1 cup sugar
3 eggs
2 egg yolks
4 tablespoons unsalted butter

For the lime frosting:
1 1/2 pounds powdered sugar
1 1/2 cups (3 sticks) butter, at room temperature
1/2 teaspoon vanilla
2 tablespoons lime zest
2-3 tablespoons fresh lime juice

For the cupcakes:
Preheat the oven to 350 degrees F. Prepare muffin pans with liners or grease, if using.

In the bowl of a mixer, cream together the sugar and butter until light and fluffy. Mix in the blackberry puree. Don't worry if your batter looks super lumpy or chunky, it will work itself out.

In a medium bowl, sift together the flour and baking powder. Slowly (SLOWLY) add the flour to the creamed mixture. Once incorporated, increase the mixer speed to medium and mix for 2-3 minutes until once again it looks light and fluffy. (The end result has also been compared to looking like ice cream.)

In a large bowl, whisk together the egg whites and milk. Add to the batter in two or three additions, mixing only enough to incorporate between each.

Pour the batter into the prepare baking cups. Bake the cupcakes for 18 to 22 minutes, or until a toothpick inserted into the center comes out clean. Allow the cupcakes to cool in the pans for 5 to 10 minutes before removing to a wire rack.

For the curd:
In a medium saucepan, bring the blackberries and water to a boil. Reduce heat to low and simmer 5 minutes, or until the blackberries are soft and mash easily. Pour blackberry mixture through a fine strainer, discarding pulp and seeds.

Add the flour and sugar to another medium saucepan over medium-low heat. Whisk in the blackberry juice. Once flour and sugar are fully incorporated into the juice, add the eggs and egg yolks, whisking frequently until the mixture thickens, about 7 minutes. Remove from heat and stir in butter until completely melted. Cover and place in the refrigerator until completely chilled.

Transfer the curd to a pastry bag. Using an apple corer (or sharp knife), hollow out the center of each cupcake. Fill each hole to the top with the curd.

For the frosting:
In a large mixing bowl, beat the butter until light and fluffy. Slowly add in powdered sugar. Mix until it has a smooth consistency. Add the vanilla, lime juice, and lime zest. Mix until incorporated thoroughly. If frosting is too thick, add a tablespoon of milk and combine well.

Keep cupcakes refrigerated until ready to serve.


Makes: 36 cupcakes


Even though the blackberries give these light and fluffy cupcakes a great purple-blue coloring, the flavor in the cupcake alone didn't really come through the way I'd hoped. Enter, the blackberry curd. While it is a couple extra steps to put this together and pipe it into the cupcakes, I think given the light flavor of the cupcakes makes this part that much more important. It's definitely a great burst of flavor when you bite into it. Just don't forget that curd does need to stay chilled, so make room in the fridge!


Nutrition Facts
Serving Size 134g
Amount per serving
Calories 394Calories from fat 159
% Daily Value
Total Fat 17.7g27%
Saturated Fat 10.8g54%
Cholesterol 72mg24%
Sodium 139mg6%
Total Carbs 57.1g19%
Fiber 2.3g9%
Sugars 42.8g
Protein 3.8g
Vitamin A 13%Vitamin C 13%
Calcium 6%Iron 6%

Tuesday, August 2, 2011

Grilled Balsamic Flank Steak


Flank steak. Adam and I's arch nemesis in the kitchen.

You can count the number of times we have attempted making any kind of steak at home on one hand. Easily. It's 4.

And of those, how many times did we either overcook or massively under-cook (and spend forever trying to get it cooked to the right temperature) the steak? 4.

That might explain why we prefer to get steak elsewhere.

I must have been off in la-la land when picking this recipe out for dinner last week. Why on earth would I pick a steak recipe with our stellar track record, not to mention I'm not a huge steak person? Sometimes, things are meant to be.

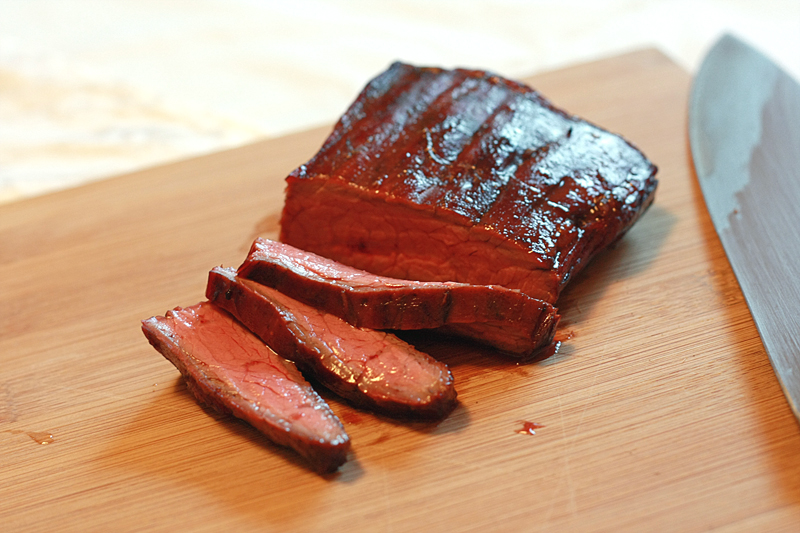
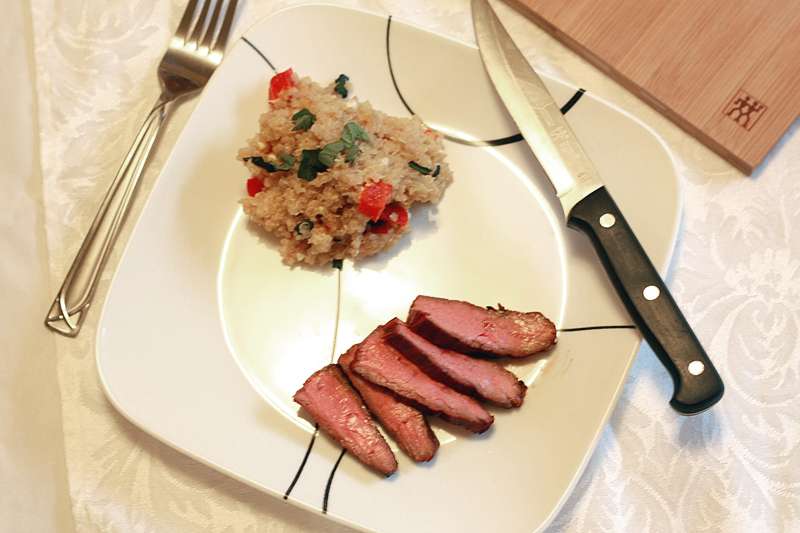
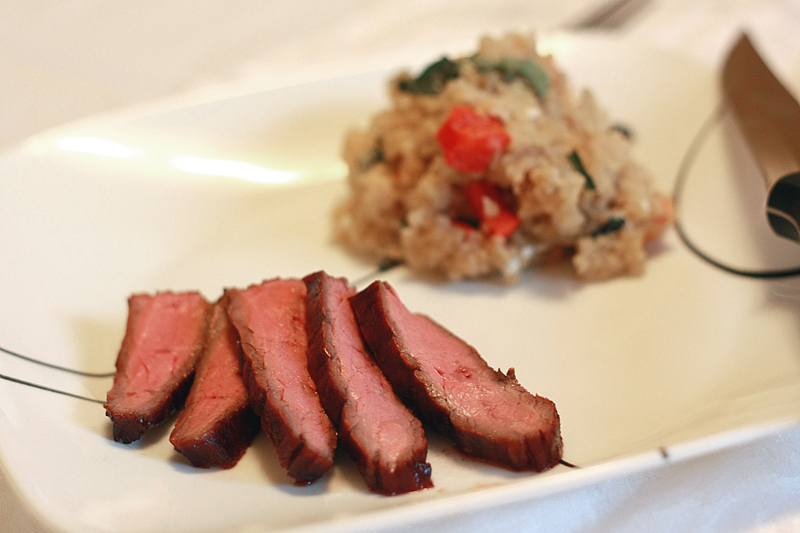
It took a bit of patience, and lots of testing with the meat thermometer, but we finally got the steak in the golden 130-135 degree range. After pulling it off and letting it rest a few minutes came the final test. We cut into the steak with breaths held -- was it overdone? Was it still completely rare? Instead, we were presented with a perfectly pink and juicy center with a nice outside crust full of balsamic flavor. Steak - 4, Us - 1.

Grilled Balsamic Flank Steak


Adapted from: Cooking Light, May 2010

1/3 cup blasamic vinegar
1 1/2 tablespoons Worcestershire sauce
3 teaspoons brown sugar
2 small cloves garlic, minced
1 1/2 pounds flank steak, cut into 4 pieces
3/4 teaspoon kosher salt, divided
1/2 teaspoon ground black pepper

In a gallon-sized ziploc bag, combine balsamic vinegar, Worcestershire sauce, brown sugar, and garlic. Add steak and seal bag. Flip bag several times to coat steak. Let steak marinate at room temperature for at least 30 minutes, turning once. Meanwhile, pre-heat grill (to medium-high if using a gas grill).

Remove steak from ziploc and place on a plate. Sprinkle both sides of steak with salt and pepper. Set aside. Pour remaining marinade into a small saucepan over medium-high heat. Bring to a boil and cook for 5 minutes. Remove from heat.

Transfer steak from plate onto the grill once hot. Cook steak for 5 minutes on each side, basting with reduced marinade every few minutes, or until steak reaches an internal temperature between 130 and 135 degrees F. Remove steak from grill and allow to rest for 10 minutes prior to serving. Cut steak diagonally across the grain into thin slices.


Serves: 5


I wanted a little something else to go with the steak that wasn't my typical go-to bagged salad. I decided to make quinoa again, this time off the cuff with things from our fridge. Since the hubby actually had to debate going back for seconds versus a bowl of ice cream, I figured it must be pretty dang good. And if it's good, why then, I must share it with you! :)

Quinoa with Basil, Feta, and Roasted Red Peppers

In a medium saucepan, bring 2 cups fat-free reduced-sodium chicken broth and 1 cup rinsed and drained quinoa to a boil over medium-high heat. Cover, reduce heat to medium-low, and cook for 20 minutes. Remove from heat and stir in 1/4 cup crumbled feta, 2 tablespoons chopped basil, and 1/4 cup chopped roasted red peppers. Drizzle with 1 teaspoon balsamic vinegar and stir well to mix.

Serves: 10 as a side


Nutrition Facts - Balsamic Flank Steak
Serving Size 161g
Amount per serving
Calories 279Calories from fat 102
% Daily Value
Total Fat 11.3g17%
Saturated Fat 4.7g24%
Cholesterol 75mg25%
Sodium 485mg20%
Total Carbs 3.0g1%
Sugars 2.7g
Protein 37.9g
Vitamin A 0%Vitamin C 0%
Calcium 2%Iron 15%

Nutrition Facts - Quinoa
Serving Size 71g
Amount per serving
Calories 71Calories from fat 16
% Daily Value
Total Fat 1.8g3%
Saturated Fat 0.7g3%
Cholesterol 3mg1%
Sodium 168mg7%
Total Carbs 10.9g4%
Fiber 1.2g5%
Protein 2.9g
Vitamin A 4%Vitamin C 13%
Calcium 3%Iron 4%

LinkWithin

Related Posts with Thumbnails
 
Pin It button on image hover