You know how I mentioned the other day that we were cloth diapering? Well, one of the big differences between using cloth and disposables is the need for a wet bag when you're out and about. With disposables you simply just chuck the dirty diaper, but you can't exactly do that with cloth (okay, well I suppose you could, but that's an awful expensive way to go about things). So instead of sticking the dirty diaper back into your diaper bag or laying it on a floorboard of your car and smelling it the entire drive home, you can tuck it away inside a waterproof bag that locks in the smell. Then deal with it as you want when you get home.
What's even better about wet bags, is that once your child outgrows diapers, there are still a ton of uses for them. Like going to the beach or gym and needing a place to stick your wet towel and/or bathing suit so everything else in your bag doesn't get wet. Or if your kid has an accident in the car (whether it be bodily fluids or juice), once again, you have a place to put all the wet dirty items so it's not getting all over everything else.
Of course, like everything else, you could easily buy one or three to have on hand, or you can choose to make them yourself. A typical wet bag is constructed from polyurethane laminate fabric and is closed by a zipper. Some (but not all) come with a handle for easy carrying or hanging from a door knob. A few bags also have a cotton overlay fabric which is really just purely for show since there isn't an overabundance in print PUL options.

Basically, you can go as fancy or as simple as you want with these. We all know which direction I wanted to go. Too bad all the ones I liked were easily crossing the $30 mark. (Which, when you are going to be needing more than one, that really adds up.)
So once again, I decided to tackle this beast on my own.
Things You'll Need
1/2 yard cotton fabric for the main body (washed & dried)
1/3 yard cotton fabric for accent piece and handle (washed & dried)
2/3 yard PUL fabric
1 coordinating zipper the length of the width of your bag (i.e. 18" zipper for 18" wide bag)
Spool of polyester thread in matching color
Scissors
Tape measure
Tape
Seam ripper
The above quantities are for a 18" x 18" wet bag.
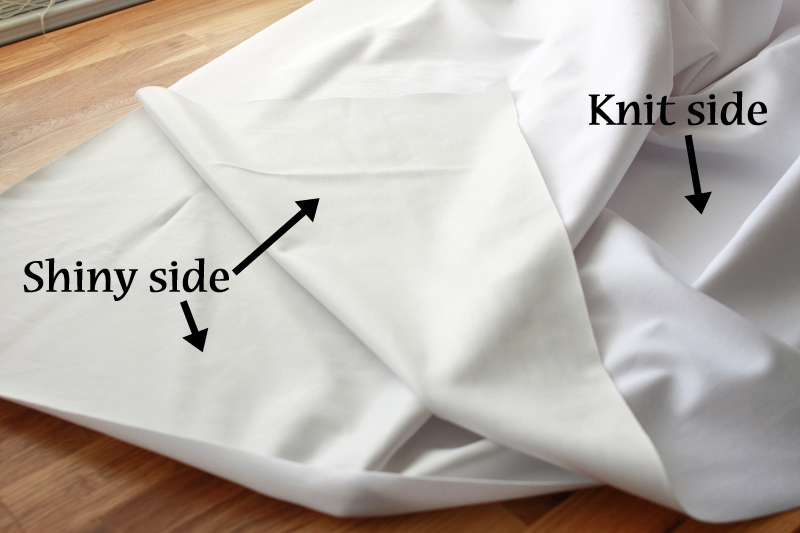
Note: this is the same little spiel I gave last week for the diaper pail liner, so if you caught that, go ahead and pass GO and skip down to below the next pic. Before we begin, let's familiarize ourselves with polyurethane, or PUL, fabric. There are two sides to PUL, a shiny waterproof side (that's very slippery), and a dull knit-like side. I purchased mine from Joann's (Babyville Boutique), which I found in a completely different area than the rest of the fabric.
Now, some people have noted that this type of fabric tends to be "sticky" going through their machine, and it can tend to gather a bit if this happens. A few solutions if you find you're running into this: 1) use a walking foot (it has extra feed dogs which help keep the fabric moving), 2) use tissue paper on top between the fabric and foot, or 3) sprinkle fabric with baby powder where you plan to sew.
One more note: since this fabric is waterproof and any punctures to the fabric (from needles) will not disappear, it is crucial that you try and make as few holes in it as possible. This is where not pinning the fabric comes into play. You can use other items like hair clips or bobby pins to keep the fabric together, but try to stay away from anything that goes through the fabric.
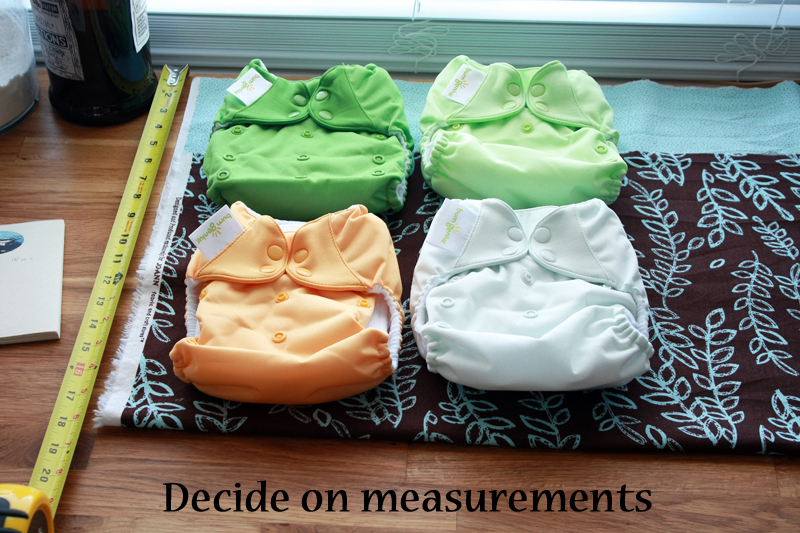
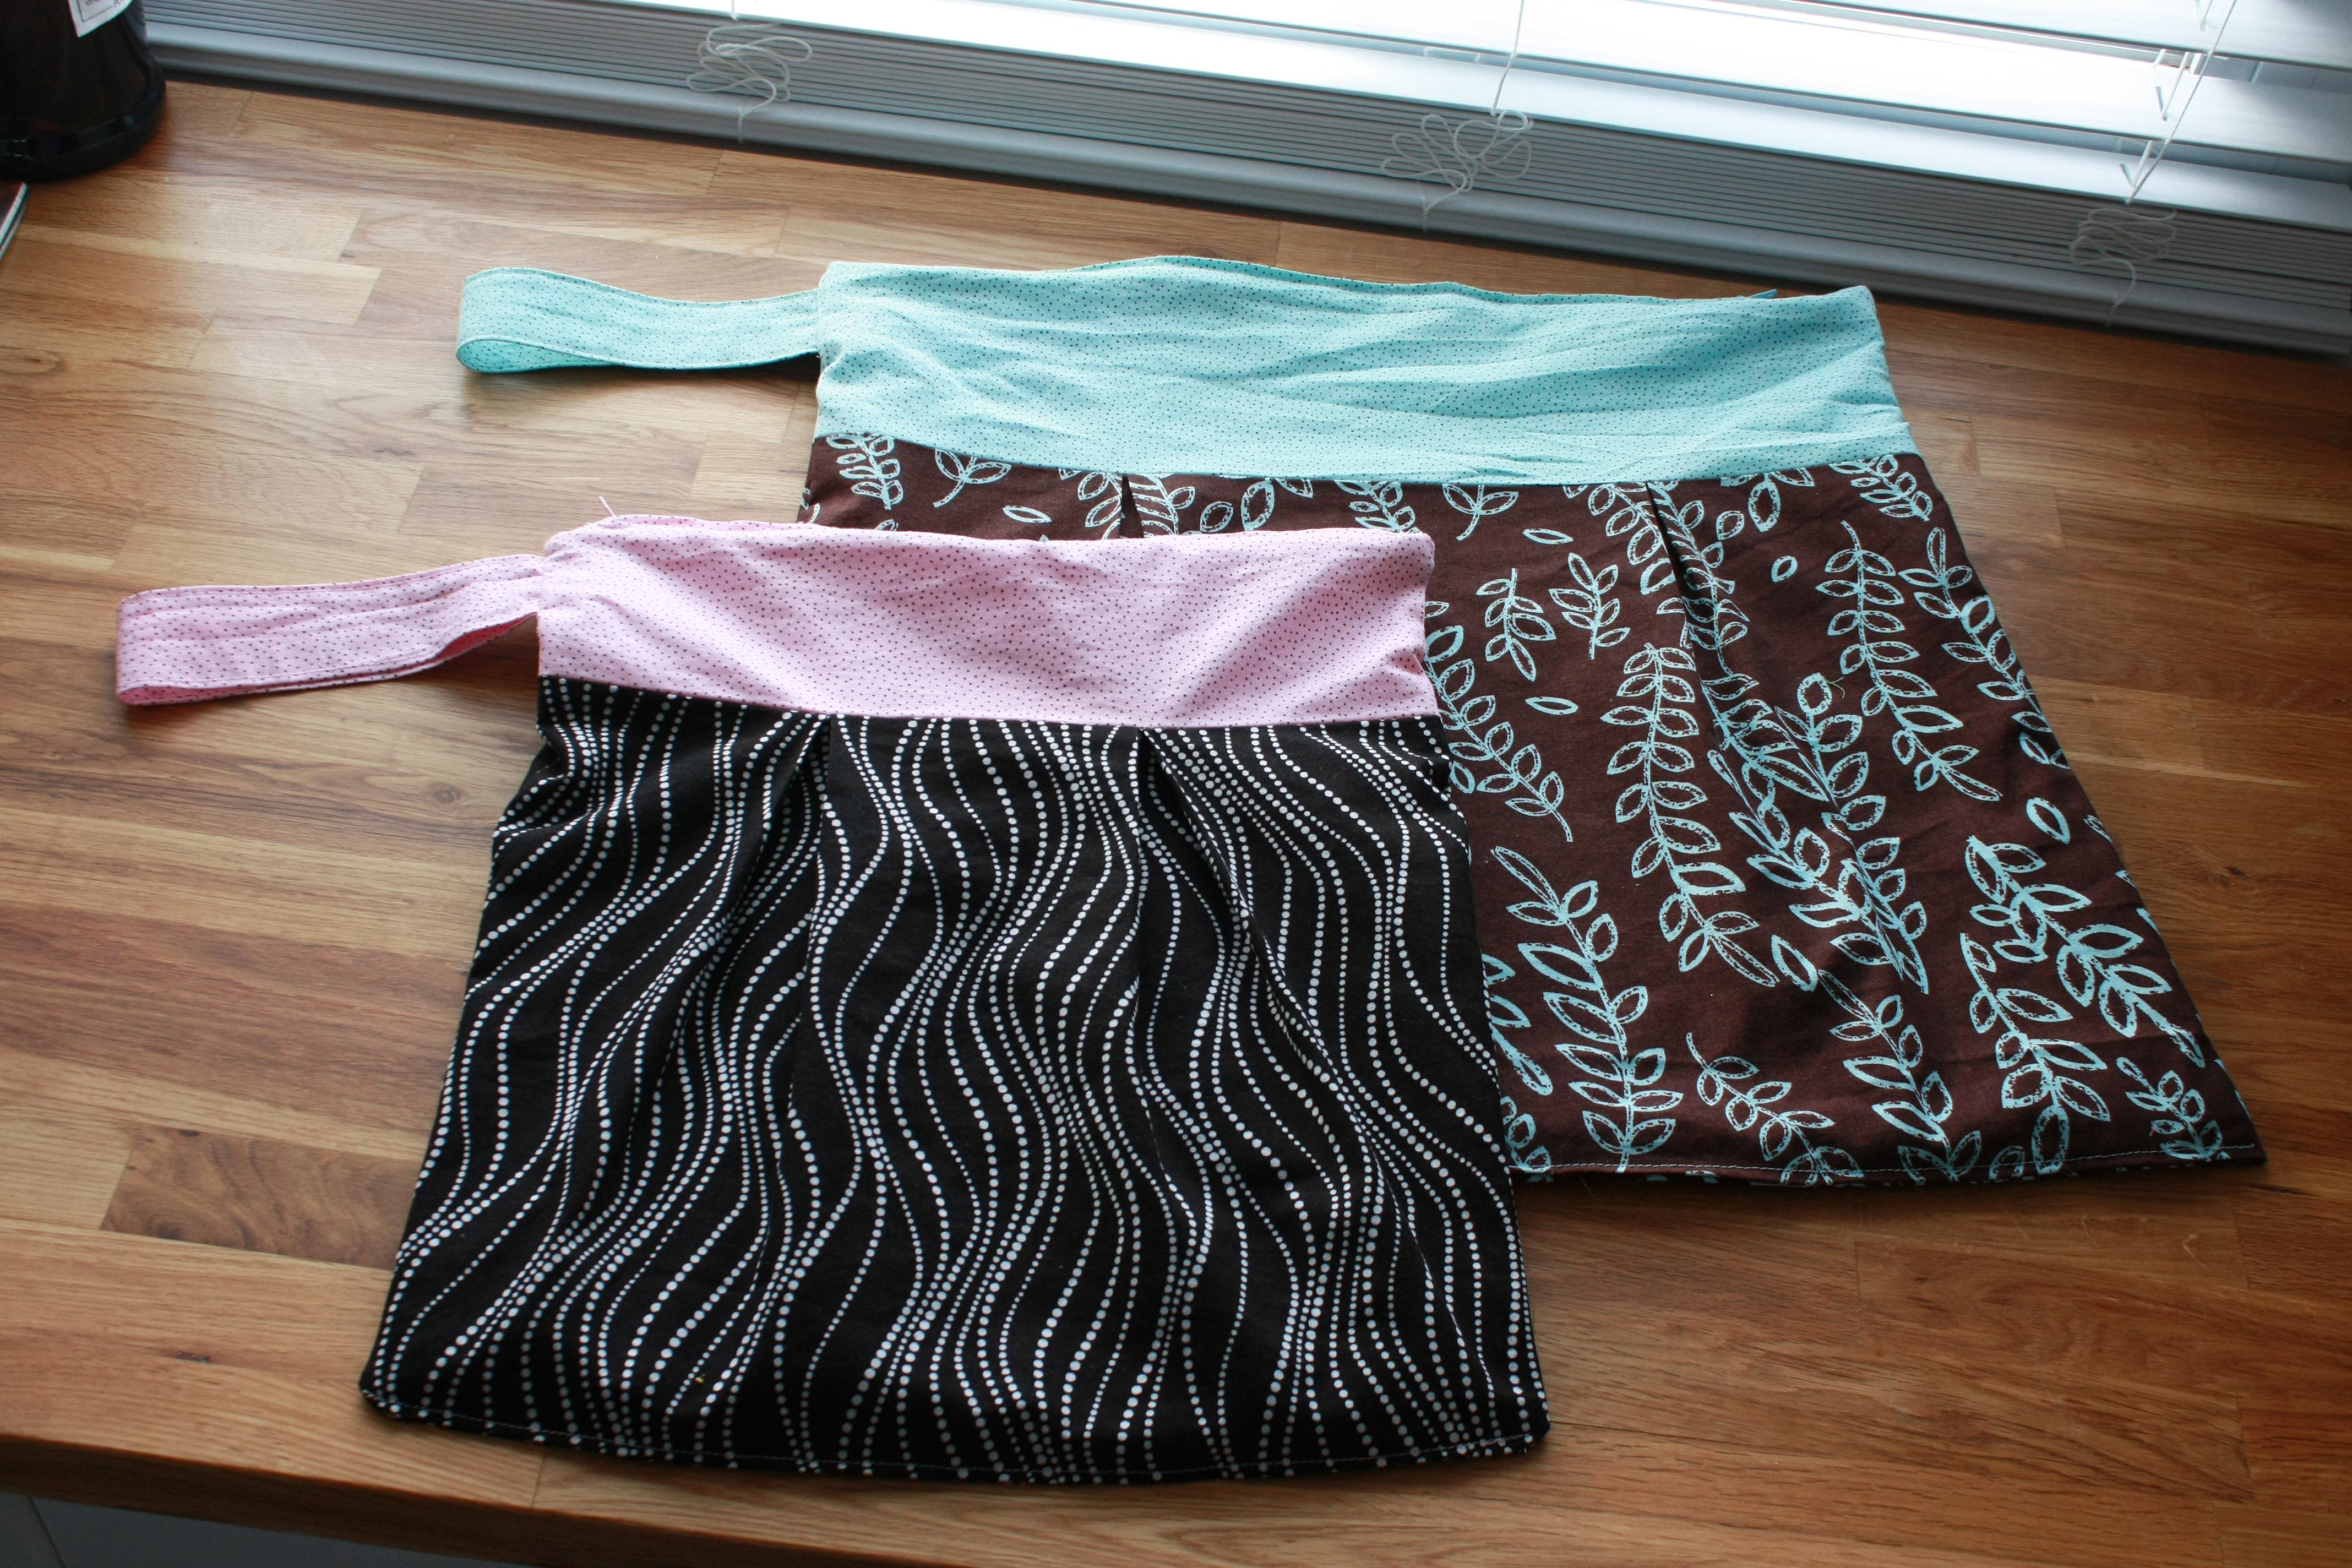
To get started, there are a couple key things we need to think about. 1) We definitely don't want any wicking or leaking (which means we'll be utilizing French seams again). This also means that our PUL inner layer and cotton outer layer shouldn't be sewn together at any place (except at the zipper). 2) What size do I want? Typical "brand name" bags run small/medium/large which are roughly 8" x 10"/13" x 16"/18" x 21". Smalls usually only hold 2-3 diapers, whereas mediums hold 6-8 and the larges 16-17 (of course this all depends on what kind of diapers you're using, too). So you need to decide which size fits your needs. I decided to go with two different sizes - an 18" x 18" and a 13" x 15". This tutorial walks you through the 18" x 18", but I'll include the measurements for the 13" x 15" at the end.
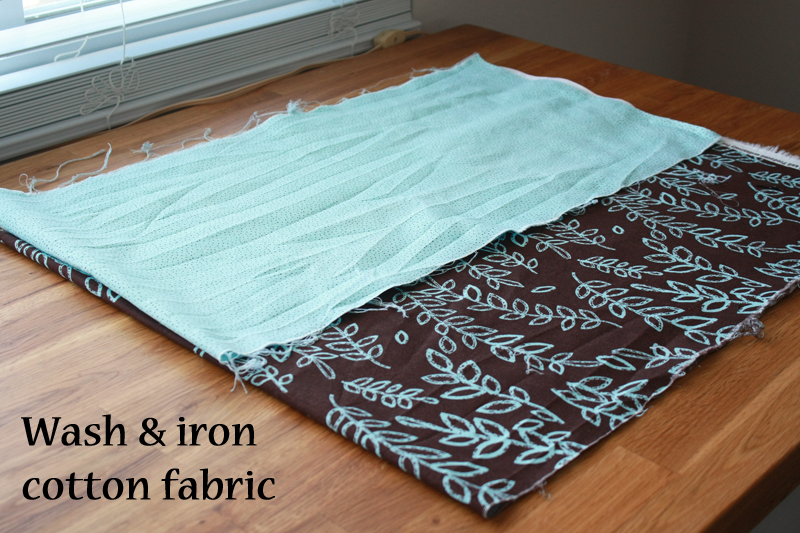
Now that you've determined the size of bag you want, go ahead and lay out your cotton fabric that has been washed, dried, and ironed (yes, I actually did iron my accent fabric it just refused to lay flat). We don't want any shrinkage when we wash this bag for real. We're going to start by making a fancy-schmancy cotton outer layer, then assemble the bag.
Measure out your accent and body pieces. Keep in mind that the final measurement of each cotton piece when assembled needs to be 19" x 19" (which includes seam allowances). I decided that a 5" high accent piece and a 13" high body piece looked like the proportions I was going for, so my final height measurements were 6" and 14", respectively.
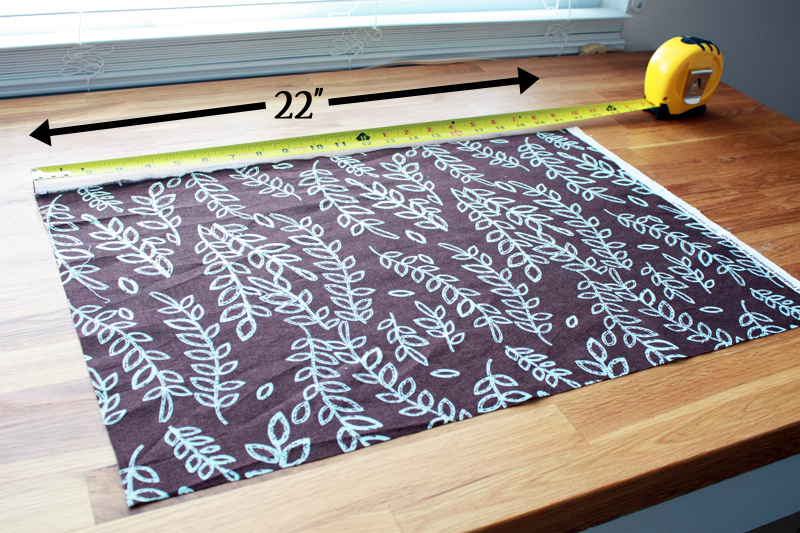
Width wise, the accent piece is easy - we want an 18" bag, so we're going with 19" (to include seam allowances). As for the main body piece, I wanted to add in pleats, so I left the fabric as wide as possible and simply cut it in half. If you used a 44" bolt of fabric, this will give you roughly 22".
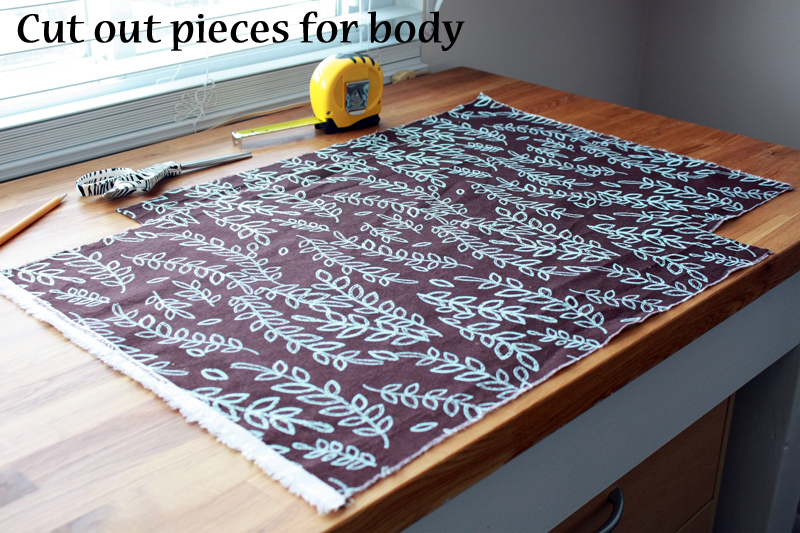
Cut out your fabric pieces:
(2) 6" x 19" accent pieces
(2) 14" x 22" main body pieces
Go ahead and set aside your accent pieces. We'll get to those in a minute. Measure out the width exactly of your main body pieces. After a bit of shrinkage in the dryer, mine ended up being more like 21.5".
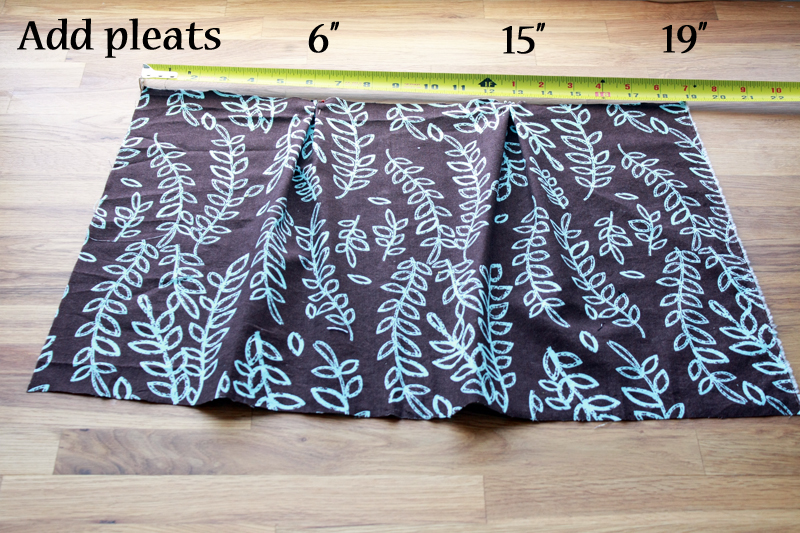
Working with one piece at a time, add one pleat at 6" and 15". To do this, lightly mark your fabric at the 6" or 15". Pinch fabric on one side of your mark about 3/4" away and fold over to the mark. Repeat on the other side. Pin into place. Repeat with the second pleat. Depending on how wide your fabric ended up being after washing, your pleats may be a little bigger or a little smaller. What's most important is that your final width ends up to be 19".
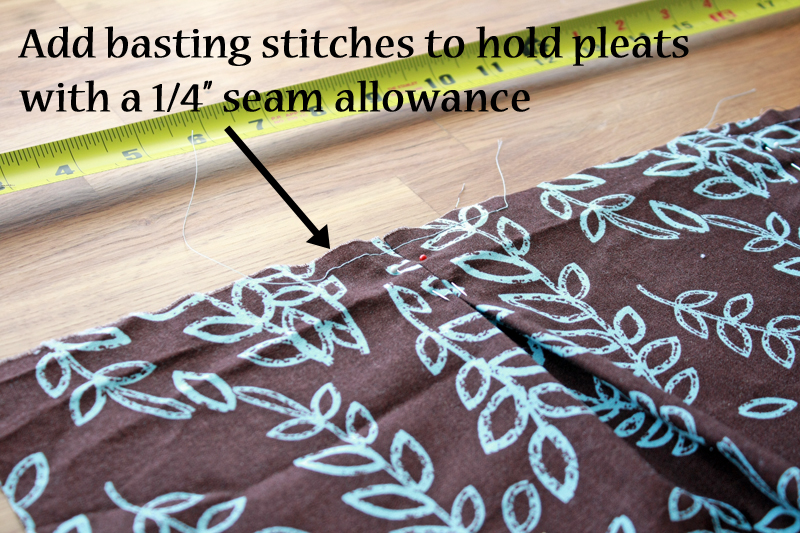
Baste (set your machine to the longest stitch length and don't back tack at the beginning or end) across the top of your pleats with a 1/4" seam allowance. This will allow you to remove your pins with the pleats staying in place.
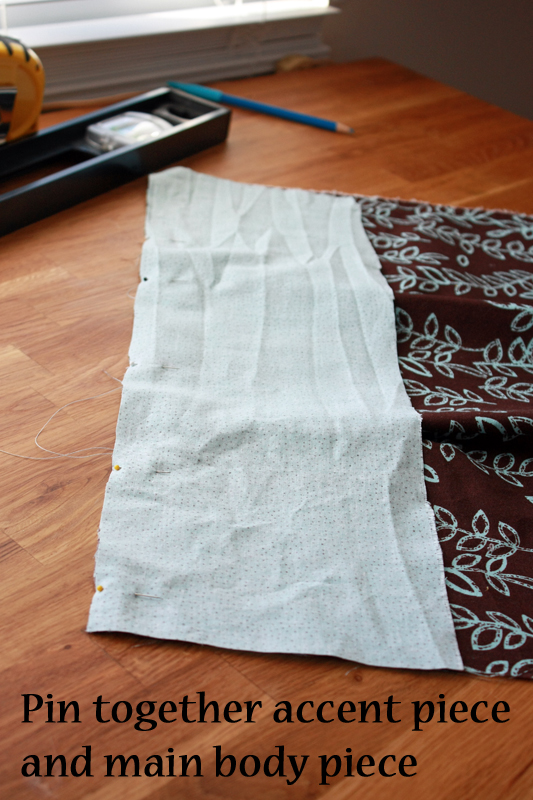
Pin your accent piece to the main body piece (the side with the pleats) with right sides together.
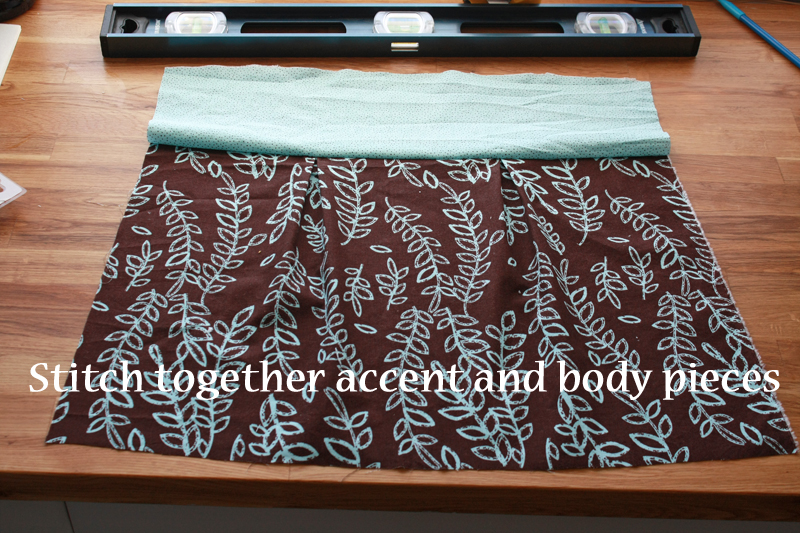
Stitch together with a 1/2" seam allowance. Remove your basting stitches. Repeat with other accent and main body piece. Press your seams open flat.
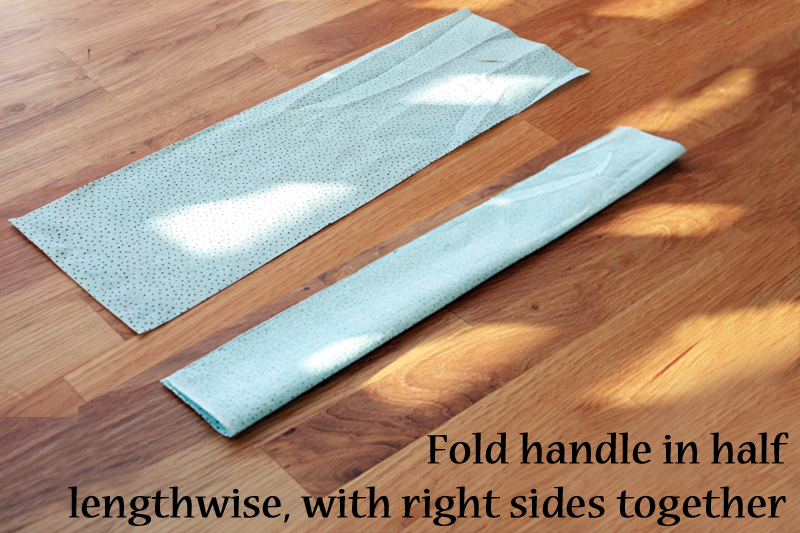
Go ahead and set your cotton body pieces aside. Let's make the handle really quick. Cut a 4" x 14" piece from your left over accent fabric. Fold fabric in half lengthwise with right sides together and press.
Stitch down the open length of the handle with a 1/4" seam allowance. Turn handle right-side out. Press.
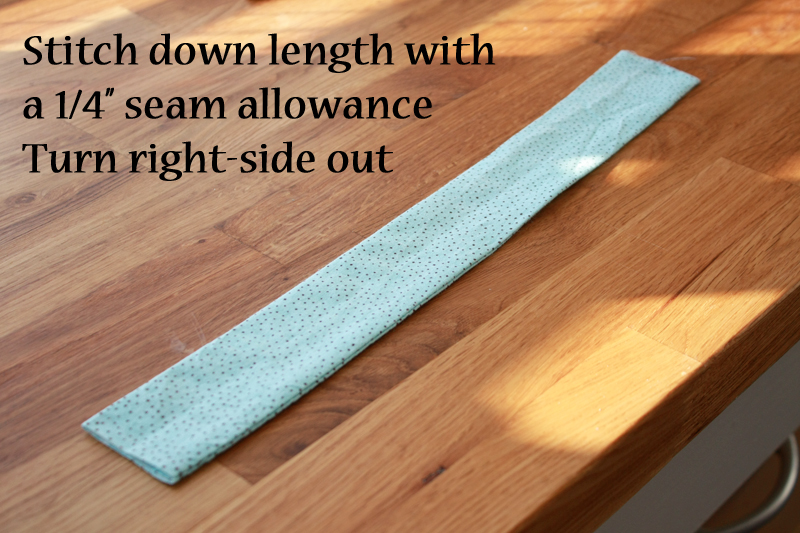
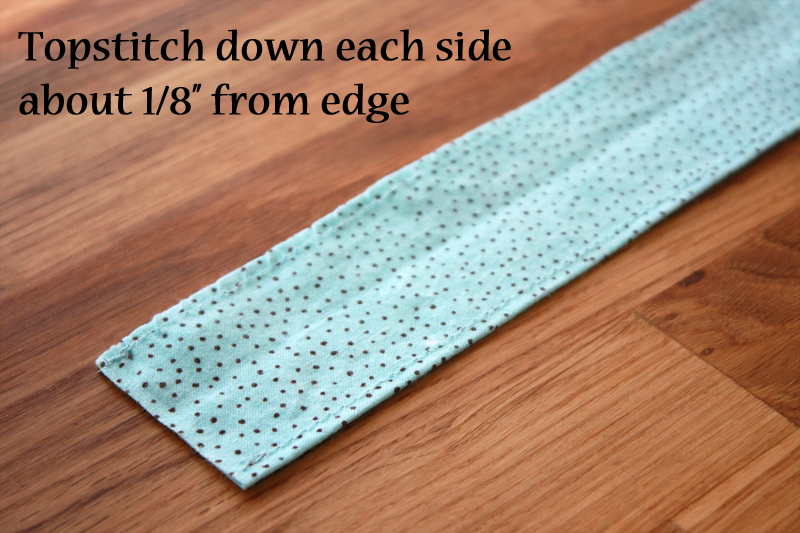
Topstitch down each length about 1/8" from the edge. This helps to reinforce your original seam as well as gives a bit more of a finished look.
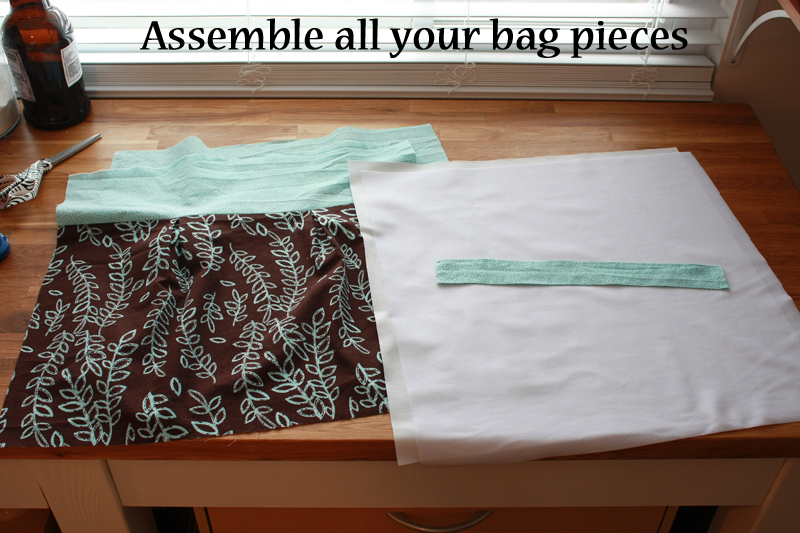
Okay. So now that we have our fancy cotton outer layer all finished, it's time to actually put our bag together. Remember, we have two goals here: 1) not to have the two layers stitched together (except at zipper) to help prevent wicking, and 2) French seams for the inner PUL layer to also help prevent wicking.
Since our inner layer needs to fit nicely inside of our outer cotton layer without bunching, I decided to go a little bit smaller with the PUL than the cotton - cutting two 18" x 18" pieces.
Now I know I've covered installing a zipper before, but since we're adding an additional kink to it with multiple layers, we'll go over it again.
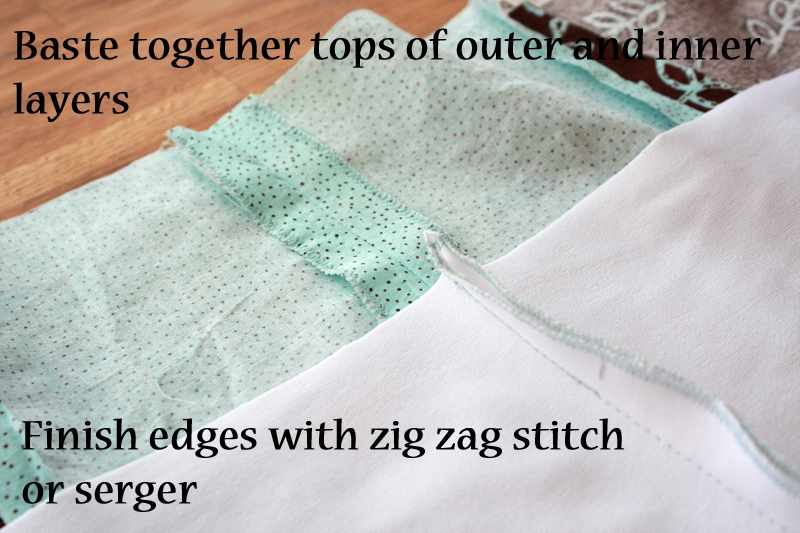
Start by basting together the tops of your outer cotton layer, right sides together with a 5/8" seam allowance. Using regular stitches, go back over the first and last 1" of your basting stitches, making sure to back tack. Finish your raw edges using a zig zag stitch or a serger.
Repeat with your PUL pieces. For these pieces, the slick waterproof sides are considered the "right" sides.
Press the seam of your cotton layer flat. Do NOT do this with your PUL layer.
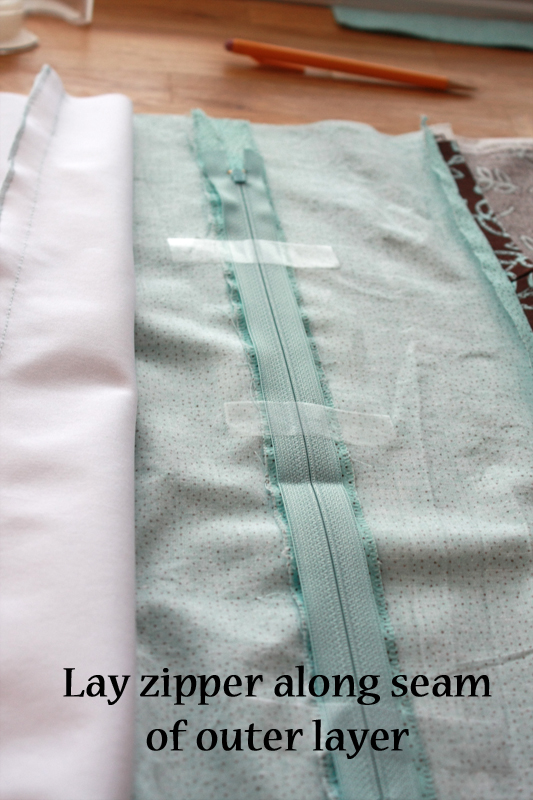
Lay your cotton layer flat, wrong side up. Place your zipper facing down over the seam of the outer layer, lining up the center of the teeth with the seam. The top of the zipper pull should be lined up to the bottom of one of the 1" of regular stitches and the stopper (metal end piece) should be lined up with the bottom of the regular stitches on the opposite side. (If your zipper is too long, you can always set your machine to a wide zig zag stitch and "0" stitch length and create a new stopper.) Use tape or pins to hold in place, leaving 2" below the pull tape/pin free.
Then, lay your inner PUL layer with right side facing up in the same manner over the zipper (basting seam in line with zipper teeth, and regular stitches matching up with zipper pull and stopper). This is a wee bit
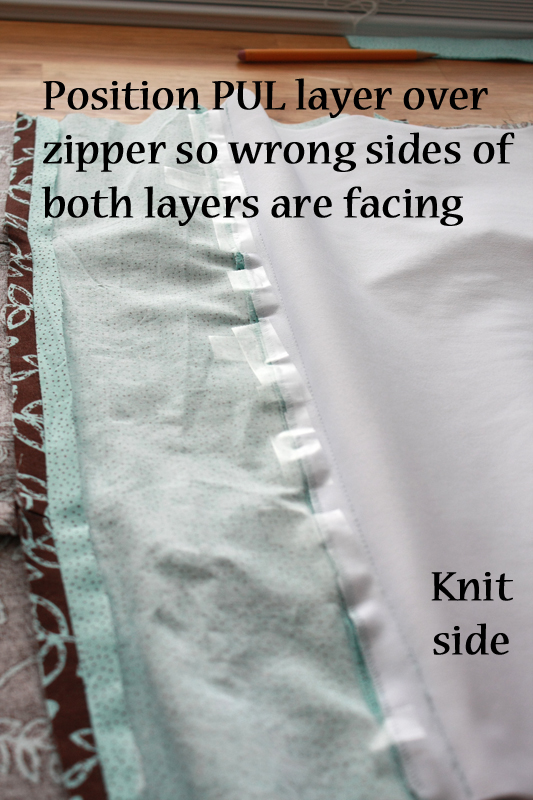
To recap, you should have your cotton outer layer laying face down on your work surface. The zipper should be next, also laying face down, lined up with your seam. And last should come your PUL layer, facing right side up (slippery waterproof sides) with the seam lined up with your zipper. The wrong sides of your two layers should be facing each other.
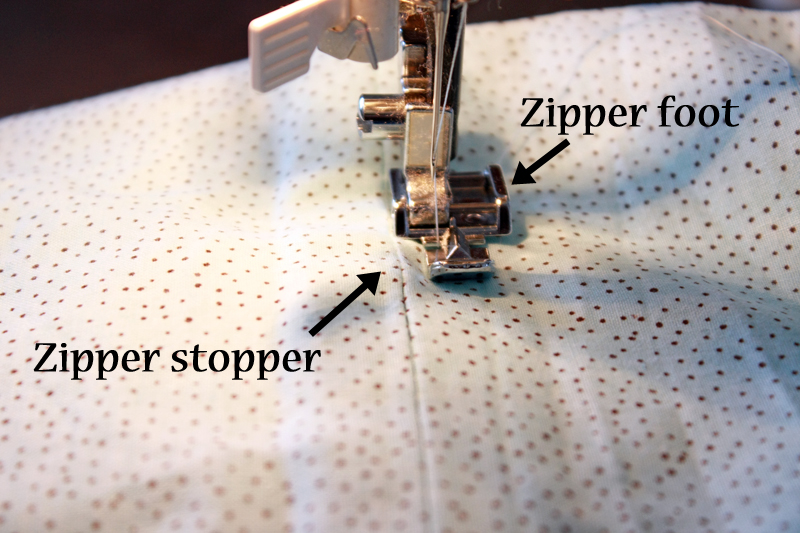
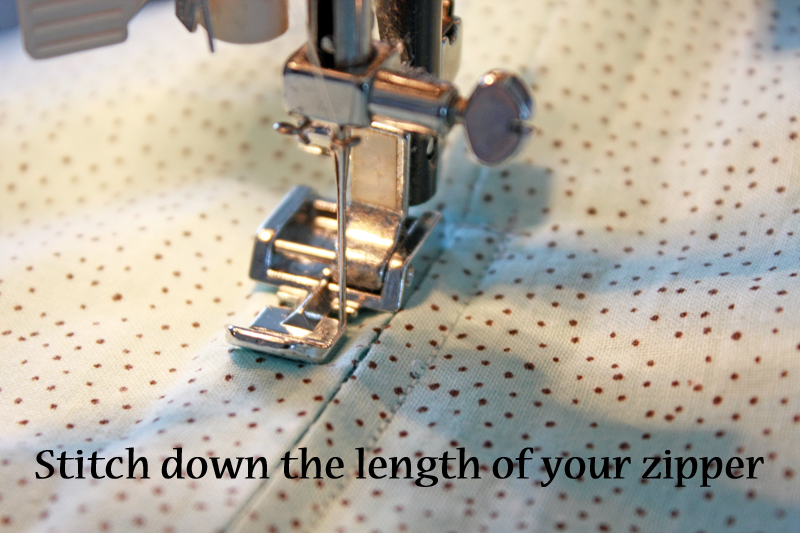
Whew, okay. The hardest part is now behind us. Now, switch out the regular presser foot on your machine for your zipper foot. This is going to allow you to get nice and close to those teeth. Swing your needle all the way to the left. Slide your fabric underneath the foot so your cotton outer layer is facing right side up. Line up the zipper stopper so it is slightly behind your needle.
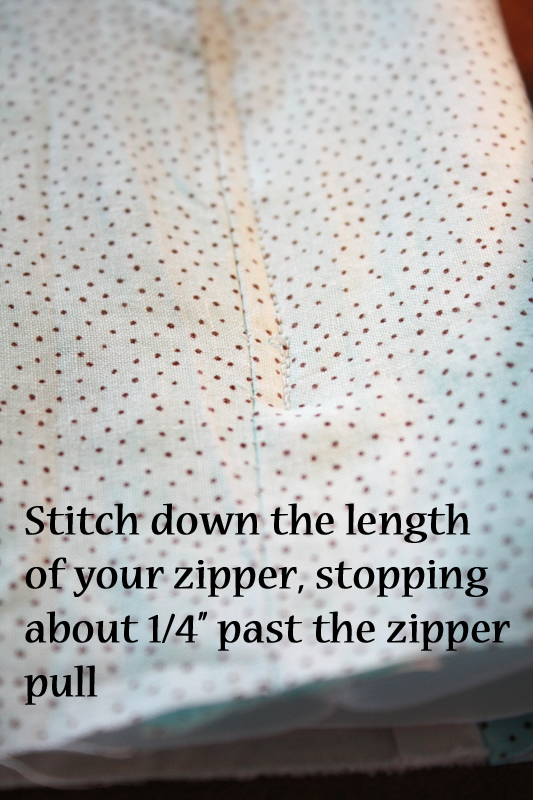
Stitch down the length of your zipper (making sure to back tack first), stopping about 2" before you reach the zipper pull. Leave the needle in down position, so it is going through your fabric. Lift up your cotton layer and unzip the zipper so the pull goes back behind your foot (you may need to raise your foot to get the pull to go back that far). Remember how we didn't tape down the zipper for 2" below the pull? This is why.
Lay your fabric back down, making sure the teeth of your zipper still line up with both your cotton and PUL seams. Continue stitching down the remaining length of zipper, stopping right after you pass the heavy metal teeth where the zipper pull stops (don't forget to back tack). Zip the pull back to the start.
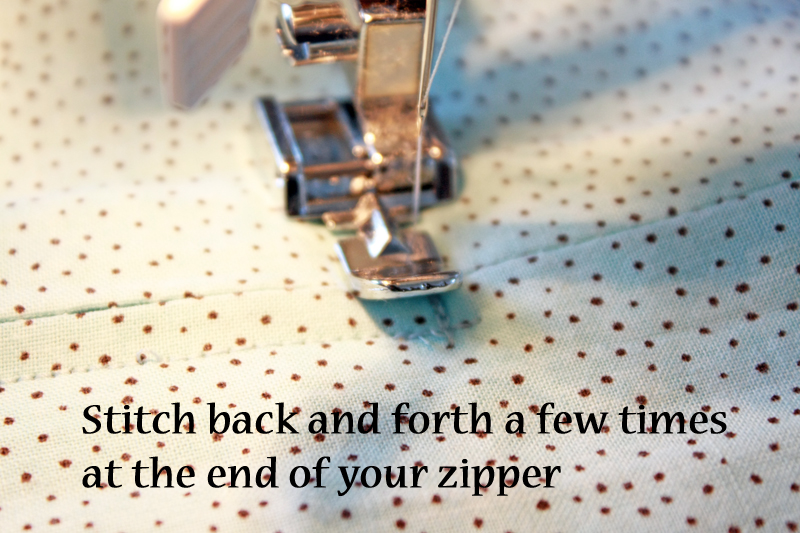
Slide your fabric back up to the end of the zipper (where you started stitching), and rotate it 90 degrees (so it is now perpendicular to your zipper). With your needle lined up even with where you started stitching, run your needle slowly back and forth across the zipper (using forward and backward stitching) a few times. This will help prevent your pull from sliding under the fabric.
Turn your fabric back, so it is now parallel with your zipper. Slide your zipper foot over, if necessary, and swing your needle all the way to the right. Stitch down the length of your zipper, once again stopping 2" from the pull.
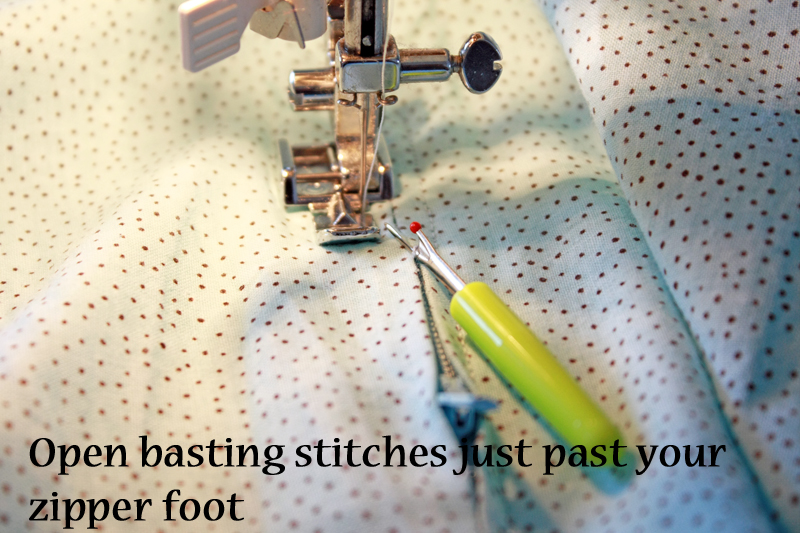
This time, get out your seam ripper and open those basting stitches in the cotton layer (careful not to rip open your regular stitches) from the top of your pull through to just behind your zipper foot. Unzip the pull to back behind the zipper foot again. Line the teeth of the zipper back up with both your layers, then continue stitching until you reach just past the metal teeth.
Turn your fabric perpendicular, and run your needle back and forth across the zipper to the other stitch line (like you did at the other end). You've now just installed a zipper.
Rip out those basting stitches on both your layers (be careful not to rip out your regular stitches at the ends).

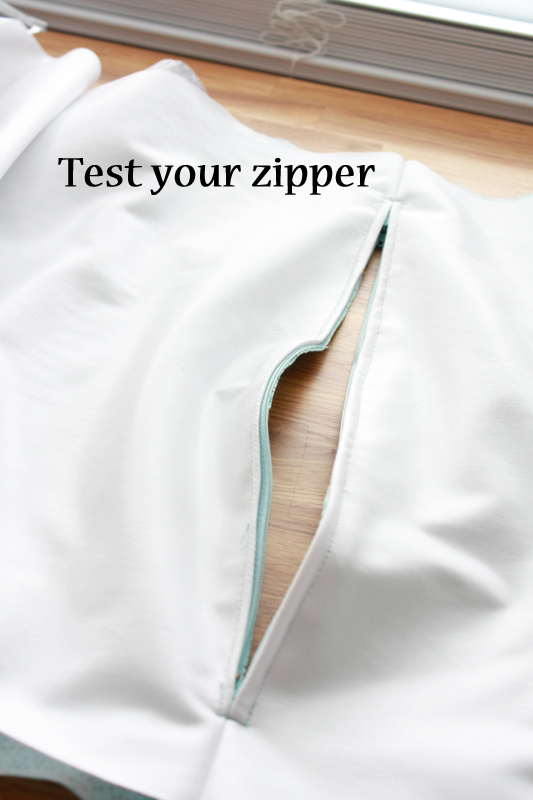
Test out that zipper to see if it works! Hooray!
(If this quick and dirty tutorial on installing a zipper just confused you, check out this one instead.)
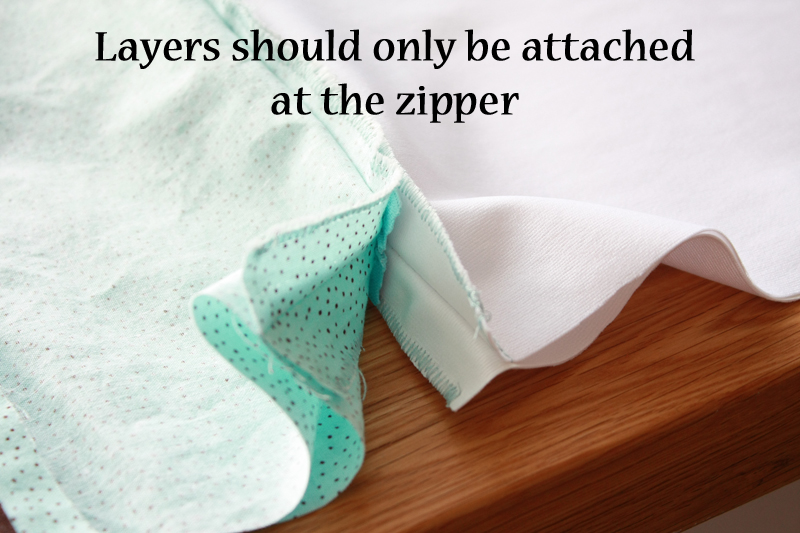
One more check and then we can move on. Double check to make sure that your cotton and PUL layers are only held together by the zipper. Any excess material past the zipper should be separate to help prevent wicking.
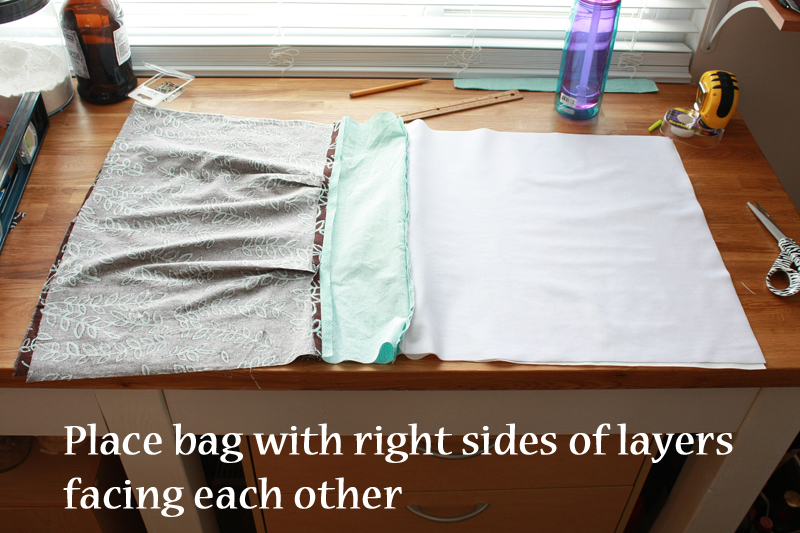
Let's get on to finishing the rest of this bag, shall we? Lay your bag out so that the right sides of your cotton layer and the right sides (waterproof sides) of your PUL are facing each other.
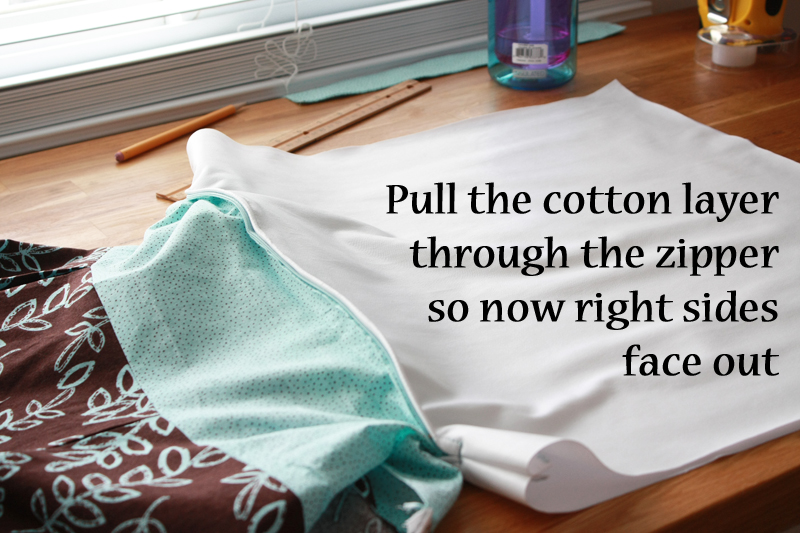
Pull the cotton layer through your zipper and flip over your PUL layers. Now both layers should have their right sides facing out, and it kind of looks like the PUL layer is spitting out the cotton one through the zipper.
With the right sides of the PUL (slippery sides) facing out, stitch a seam (with a 1/4" seam allowance) all along your 3 open sides. Trim your raw edges down to about 1/8" (I just eyeballed it).

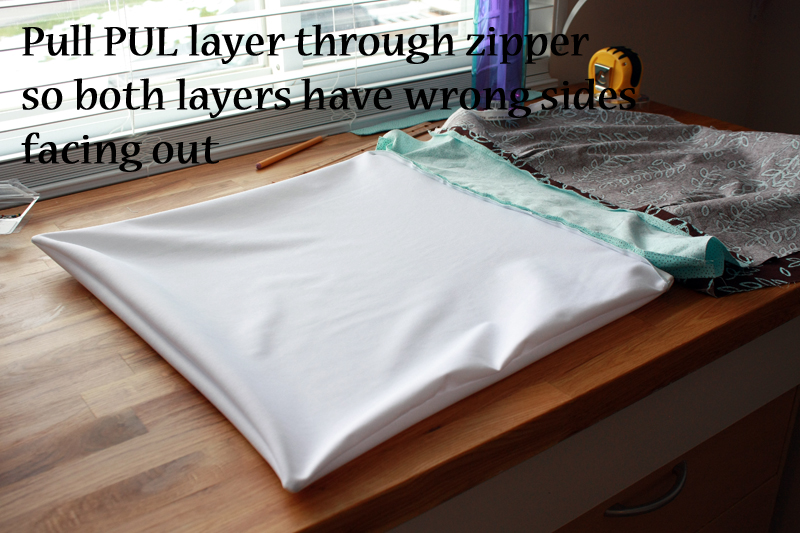
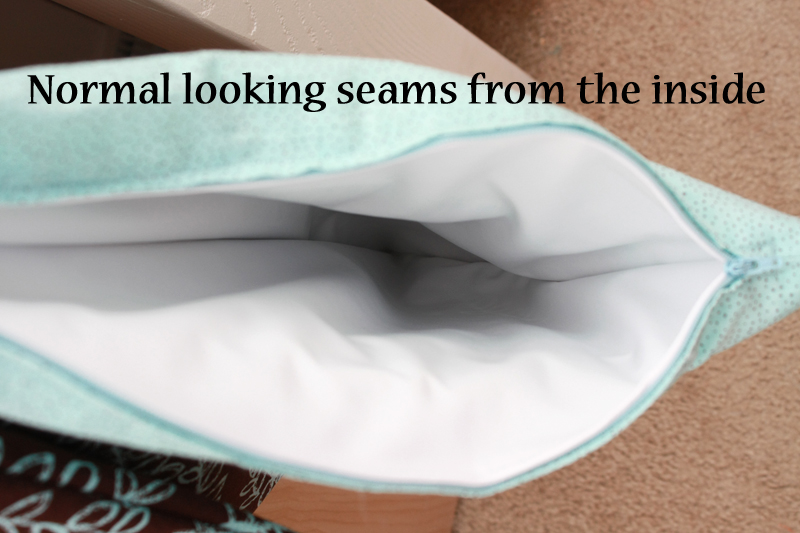
Pull your PUL layer through the zipper this time so that your layers are now back to having the wrong sides facing out. You should see a normal (albeit poofy) looking seam on your PUL layer.
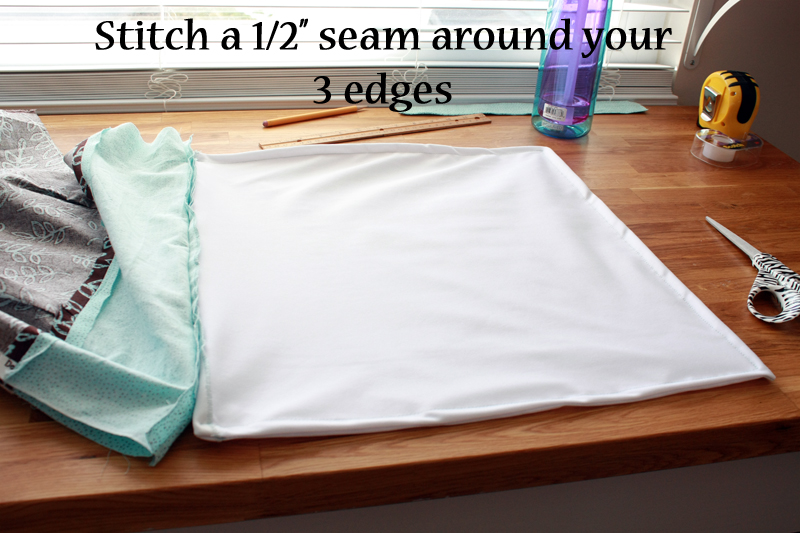
In order to make a French seam, we're going to make another seam, this one with a 1/2" seam allowance, around the same 3 edges. You may need to roll the fabric between your fingers a bit to bring the first seam out as far as possible to help the fabric lay flat.
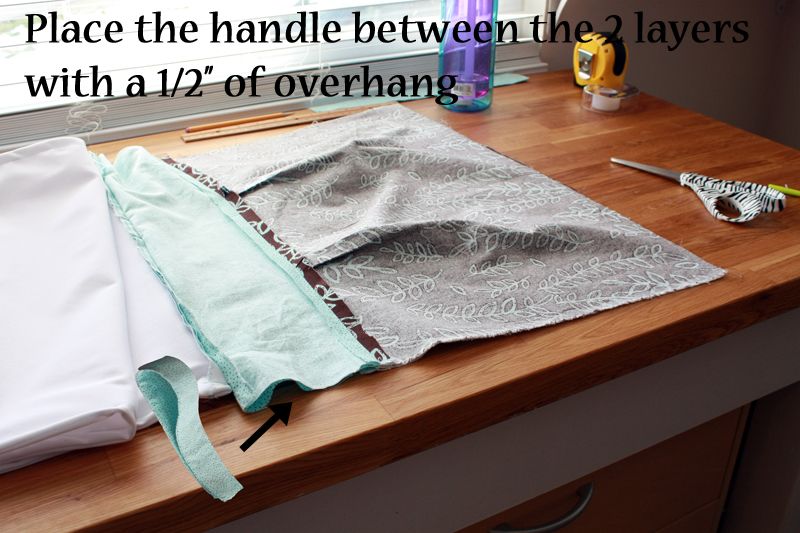
Now it's time to insert your handle and finish up the outer layer. Line up your two outer layers so the seams and edges line up (right sides should still be facing each other). Fold your handle in half hamburger style. Slide your handle in between your two layers, about 1/2" below your zipper. The two raw ends should overhang the edges about 1/2", and the folded end should be inside the layers. Pin into place.
Stitch down the length of each open side with a 1/2" seam allowance, but not across the bottom. When you get to the handle, stitch forwards and backwards a few times across to help reinforce it.
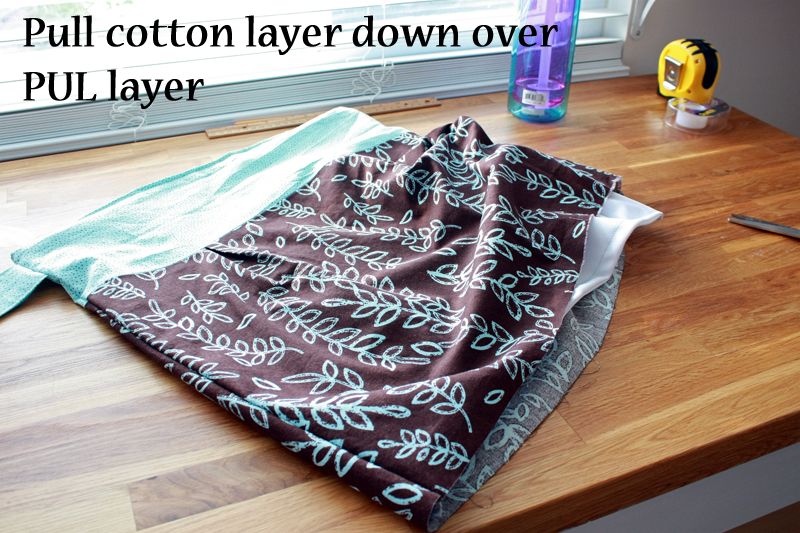
Once you have finished making your two seams, pull the cotton outer layer over the zipper and down around your PUL layer.
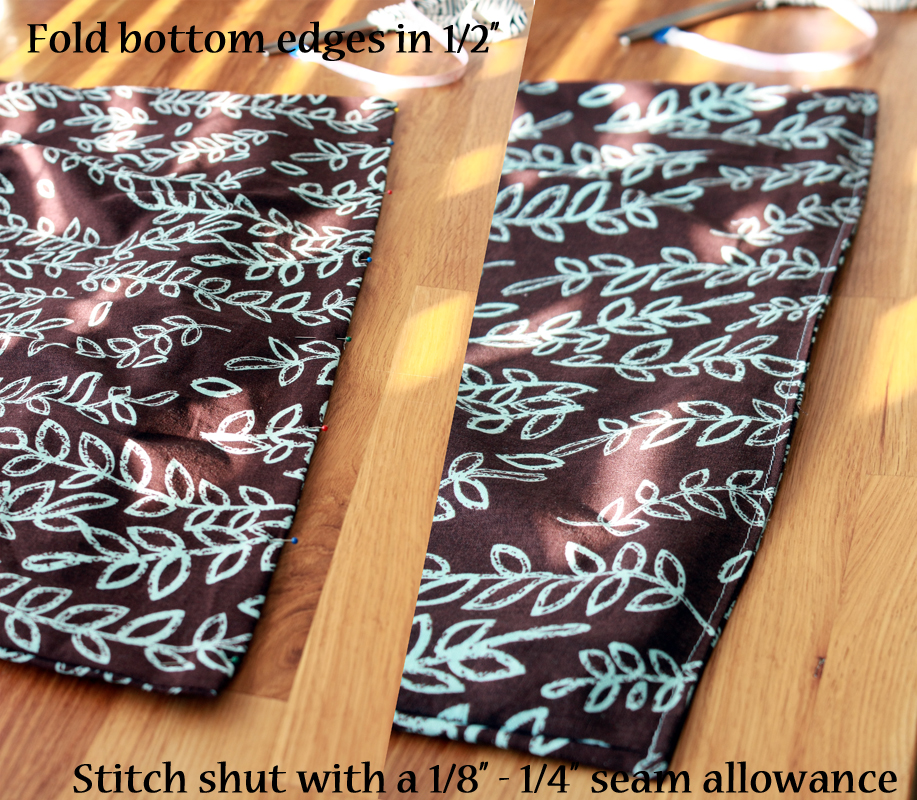
Tuck your raw edges along the bottom in 1/2". Pin in place.
Stitch across the bottom (you can using matching thread if desired, I just got lazy) with a 1/8" - 1/4" seam allowance.
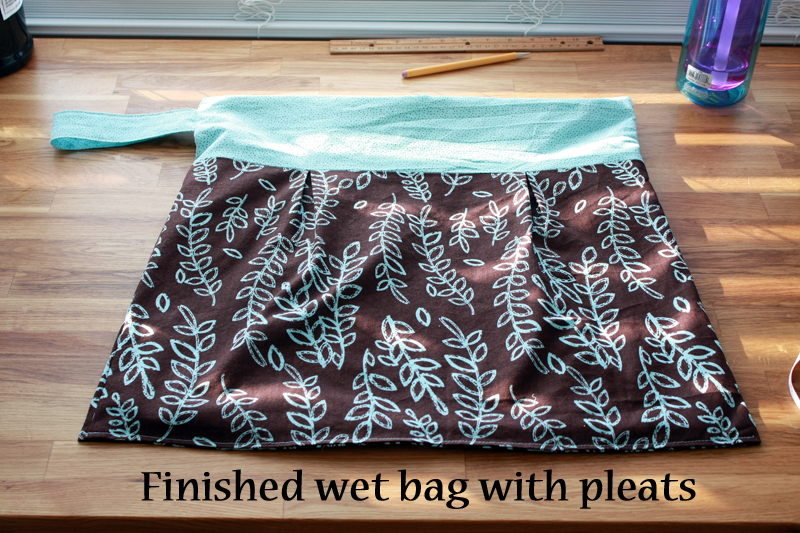
Annnnnd that's it! You now have your very own fancy-schmancy wet bag.
Let's take a peek inside. You should see your shiny waterproof side and what appear to be normal seams. But we know better, don't we?
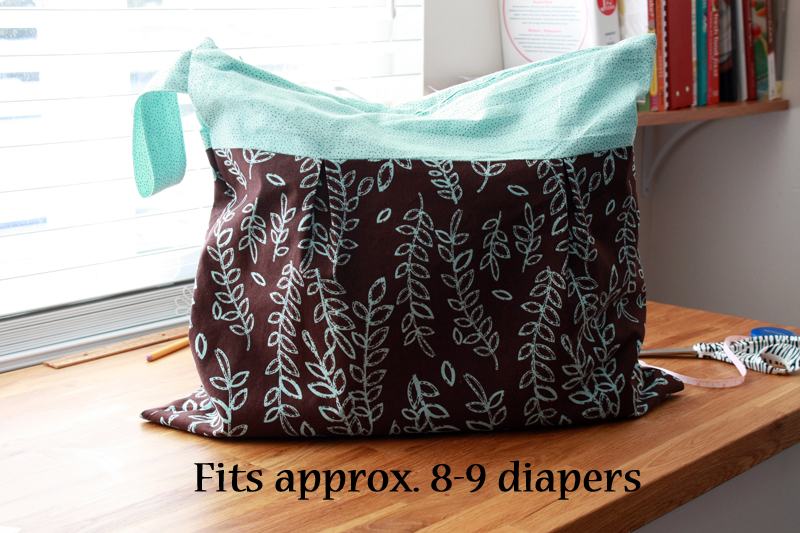
This final wet bag ended up being a little closer to 16 3/4" x 16 7/8" than the planned 18" x 18" (inside PUL seam-to-seam measurements), though it still holds roughly 8-9 diapers. Definitely plenty of room if you're out and about for the day. Note: The outside layer of the bag is slightly bigger than the PUL layer, so you may feel some shifting around when you pick it up. The bottom of your cotton layer is also wider (closer to 20 1/2" than it is at the top) due to adding in the pleats. If you don't like this look, you can always adjust your seams to make the bottom of the bag narrower (I actually did this on a smaller wet bag).
What if you don't need such a big bag?
As mentioned at the beginning, I also made a smaller quick-out-and-about wet bag, with the original measurements aiming for a 13" x 15" bag. This size holds roughly 4-5 diapers. You can find the necessary measurements for the smaller size below, then just follow the same directions as above, keeping all the seam allowances the same.
(2) 5" x 14" accent pieces from cotton fabric
(2) 12" x 22" main body pieces from cotton fabric (I just cut my fabric in half again and with shrinkage it gave me 20.5" - this is fine)
(1) 4" x 14" handle cut from accent fabric
(2) 13 1/2" x 15 1/2" PUL layer pieces
(1) 12" or 14" zipper
Pleats for the main body piece should once again be around the 6" and 15" points (depends on final width of your fabric). Pinch fabric from about 1 1/2" away from mark on each side and fold to center of pleat.
So really, how much is all of your hard work going to save you?
Large Bag Medium Bag 2/3 yard PUL fabric $5.20 1/2 yard PUL fabric $3.90 1/3 yard cotton accent fabric $1.40 $1.40 1/2 yard cotton body fabric $2.10 $2.10 zipper $3.29 $1.99 spool of polyester thread $2.99 $2.99 Final Price $14.98 $12.38
First and foremost, don't forget to use a 40% off coupon on your PUL fabric. Otherwise you're easily looking at $12.99/yard for that stuff. Nooo thanks.
As for the price comparison, even over name brand wet bags, you're still going to save a few dollars. And that's just for ones that are plain, simple, and straight forward -- many of them without a cotton outer layer. Though when you start buying more than one, which I recommend, you're going to see those savings start to add up.
When comparing against other wet bags that have a bit more "flair" than others though, that's when you really see a price drop. In a lot of cases over 50% savings. Think of it like a 2 for 1 sale, with a little bit of hard work thrown in. :)
1) Turn wet bags with PUL liner inside out and wash on a Warm/Cold (or Hot/Cold) cycle, followed by an extra rinse. Use a cloth diaper friendly detergent. Do not use the Sanitize cycle as the water can get too hot. Do not use any softeners, bleach, or other cleaning agents that contain brighteners/additives.
2) You can dry your wet bags on LOW in the dryer or line dry. Do not dry on high, as this will delaminate the PUL layer. Do not use dryer sheets (such as Bounce) if drying in the dryer.


This is amazing! I wish I could make one. Do you sell them ? email me if you do :) chloe4489@gmail.com
ReplyDeleteI like your tutorial. I have been sewing wetbags to give as beach bags for kids birthdays but I only have girly PUL so giing to try to cover all that pink with some superheroes tonight.
ReplyDeleteHopefully it works out for you! That's a really cute birthday present idea!
DeleteGoing to give this a try today. I am not planning on making it nearly as fancy as yours but I think this tutorial will help. I am glad I found this because that definitely was not how I was going to try to sew on the zippers! I have 4 pregnant friends who ( if this turns out) will be getting 2 each of these!
ReplyDeleteHi there! Here's what i made using your tutorial. Thanks!
ReplyDeletehttp://i58.tinypic.com/2nrkajt.jpg
Hi! I was reading through your tutorial because I'd like to made the smaller 13x15 bag, and wondered if the measurements for the main body pieces are correct? 12x22"? 22" seems really long for a 13" wide bag, even with pleats?
ReplyDeleteI think my pleats were much deeper on the smaller bag. You could probably go all the way down to 17" and still be ok.
Delete