Thursday, March 10, 2011

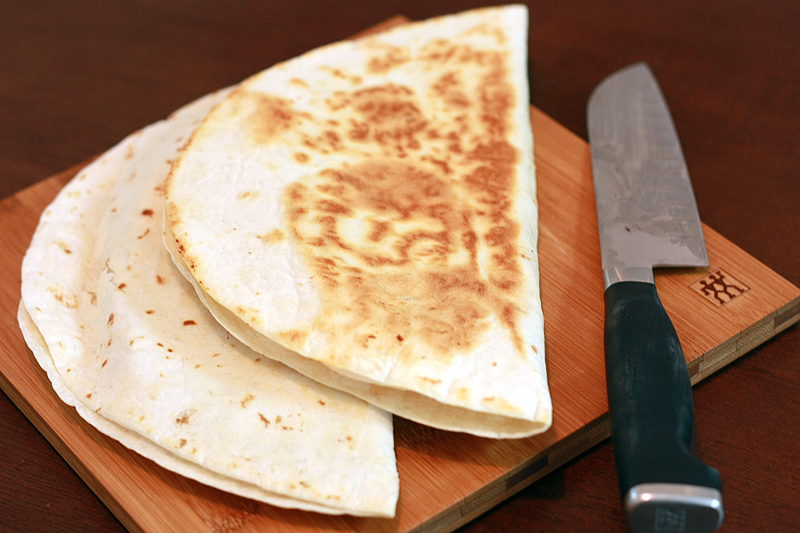
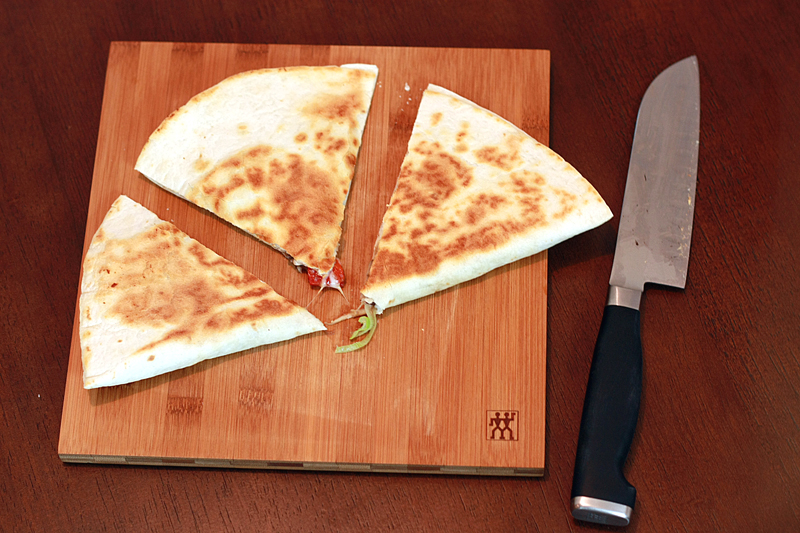
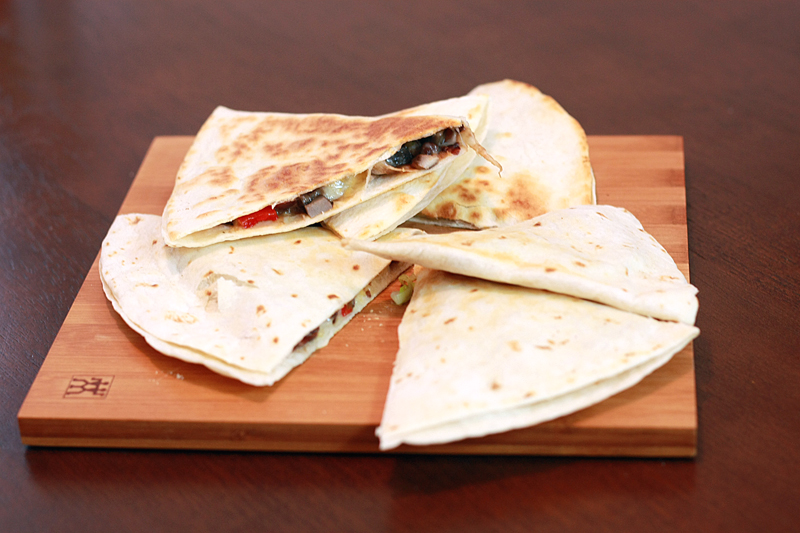
Portobello & Black Bean Quesadillas


Apparently it has been deemed "mushroom week" here at casa de Runs With Spatulas. Good thing I finally decided to start liking them. Monday started out with these fantastic Portobello and Black Bean Quesadillas, followed by, surprise!, mushroom pierogies at our weekly pierogie night, which were then followed by a pasta dish containing them last night. It's a good thing dinner tonight does not contain mushrooms in any shape or form. I think I might be getting a little mushroomed out.

Recently, it had been a struggle to figure out what's going on my weekly menu. I've exhausted my usual suspects of places to look for recipes, and nothing really sounds all that good. While rummaging around looking for recipes, I spotted a cookbook I had purchased a while ago, marked tons of recipes, then promptly forgot about. After flipping through, I picked out two recipes which of course, were not any of the ones I had bookmarked. Go figure. Maybe because I did all my bookmarking before I realized I liked mushrooms? Sounds about right.

Portobello and Black Bean Quesadillas
Adapted from: Cooking Light's Fresh Food Fast

4 (8-inch) flour tortillas
2 (4 1/2-inch) portobello caps, chopped
2 tablespoons light balsamic vinaigrette
1 cup black beans, rinsed and drained
3 ounces pimiento, diced
1 cup (4 ounces) Mexican blend cheese, shredded
1/4 cup thinly sliced green onions

Stack tortillas and microwave on high 1 minute. Leave in microwave to keep warm while preparing filling.

Heat a large non-stick skillet over medium-high heat. Once at temperature, coat pan with cooking spray. Add mushrooms and sauté 5 minutes, or until tender. Add vinaigrette, beans, and pimiento. Sauté about 2 minutes, stirring constantly, or until the liquid is absorbed. Mash bean mixture slightly with the back of a fork.

Spoon 1/3 cup bean mixture onto each tortilla and spread even across half of tortilla. Sprinkle each with 1/4 cup cheese and 1 tablespoon onions. Fold tortillas in half.

Wipe the skillet clean with a damp paper towel, then bring to medium heat. Spray pan with cooking spray. Place 2 quesadillas in pan, cooking 2 to 3 minutes on each side or until golden and cheese melts. Repeat with remaining 2 quesadillas. Cut each quesadilla into 3 wedges. Serve immediately.

Serves: 4


Both of us really enjoyed the flavor of these quesadillas, and they were surprisingly very filling. I assumed going into this dish that we wouldn't have any leftovers, especially with the way Adam's been eating as of late. But I was wrong, and Adam was the lucky winner of the last quesadilla for lunch the next day. I just kind of wish there was just a bit more filling in each of these, though. Maybe use only 3 tortillas instead of 4? Regardless, these were still delicious and came together, as promised, quick and easy.


Nutrition Facts
Amount per serving
Calories 480Calories from fat 135
% Daily Value
Total Fat 15.0g23%
Saturated Fat 7.1g35%
Cholesterol 35mg12%
Sodium 498mg21%
Total Carbs 67.0g22%
Dietary Fiber 12.8g51%
Sugars 4.9g
Protein 22.5g
Vitamin A 16%Vitamin C 47%
Calcium 35%Iron 21%

Wednesday, March 9, 2011

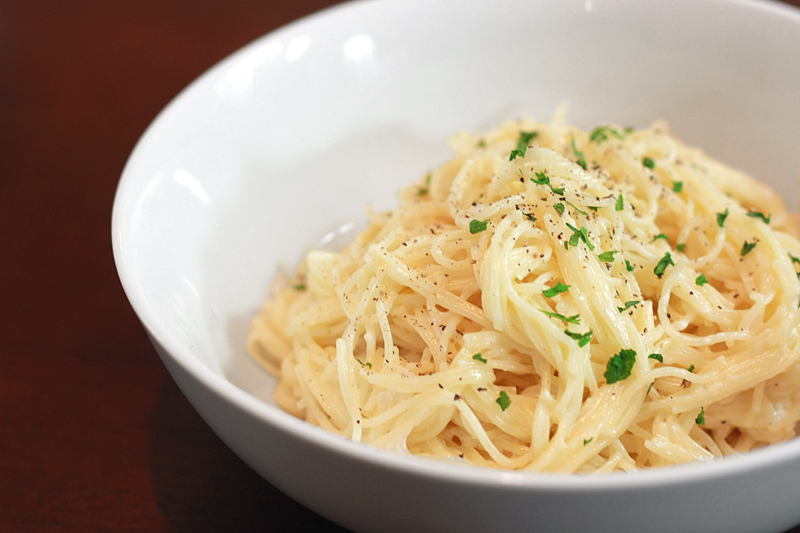
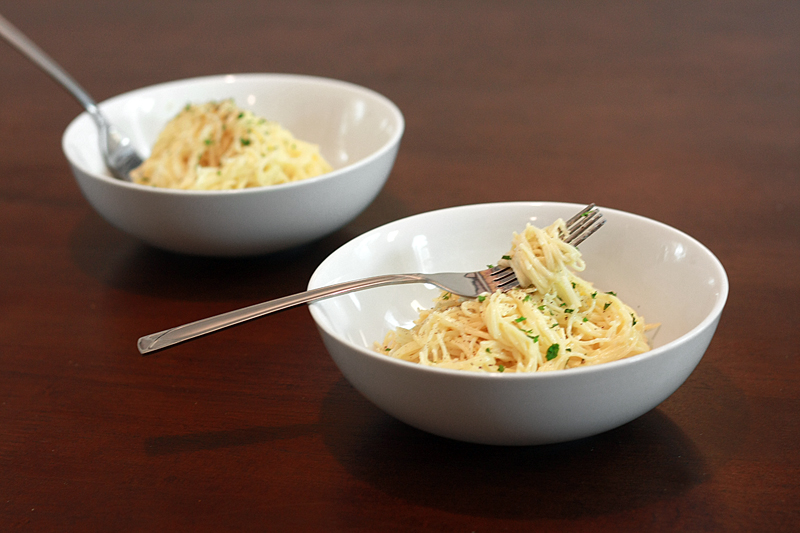
Pasta ai Quattro Formaggi


My, it's a busy week over here at Runs With Spatulas. Not only are we in the middle of a giveaway, but have also made homemade bagels and now have been awarded not one, but two Stylish Blogger Awards from Vanilla Clouds and Lemon Drops and Picture-Perfect Meals.

Rules, rules. There are always rules:

1. Thank them, make a post, and put a link back to the person/s who gave us this award.
2. Share 7 things about myself.
3. Pass the award to 10 recently discovered great bloggers.
4. Contact these bloggers and personally tell them about the award.

So as for the 7 things about myself... (I hate these things, I can never think of anything!)

{1) I am currently training for my second marathon with my husband (his first). He's not a huge fan of running, so why do this? Reason: he wants to eat two Qdoba burritos in one sitting. I kid you not.
{2} I apparently love to take the hard road for everything. My masters thesis (that I am still working on) is the perfect example of that. (And I didn't even have to do one -- case in point.)
{3} I love DIY projects.
{4} I am definitely a bargain hunting queen (except when it comes to food for some reason). It pains me to pay full price for anything.
{5} We go out for $0.25 pierogies every week with friends. And I wonder why the scale is moving the wrong way.
{6} Even though we swear we don't, Adam and I love to spoil our nephews.
{7} When I go grocery shopping I have to have a list. I am completely lost without one and only come home with half of what I need.

Now I get to pass along this lovely little award to 10 recently discovered bloggers. And they are:

Whew. Well that made me tired. And hungry. If I had any of this pasta left in my fridge it would be gone in the blink of an eye. Except, it was gone in the blink of an eye two days ago. Problem.

Easy solution: make more. Real solution: I don't have the urge to go back to the store and spend another $15 on cheese alone just for this. Soooo, looks like a sandwich is in order...

But don't let that stop you.


Pasta ai Quattro Formaggi
Adapted from: The Pioneer Woman

1 pound Angel Hair pasta
1/2 cup grated Fontina cheese
1/2 cup grated Parmesan cheese
1/2 cup grated Romano cheese
1/2 cup Goat cheese (chevre), crumbled
2 tablespoons butter, divided
1 cup heavy cream
1 clove garlic, minced
1/2 teaspoon kosher salt
1/2 teaspoon ground black pepper
Parsley (optional)

Bring a large pot of water to boil over high heat. Cook pasta according to package directions to al dente. Drain pasta, reserving at least 2 cups of the water. Return to pot.

Meanwhile, melt 1 tablespoon butter over medium heat in a small skillet. Add the garlic, and sauté for 1 minute, or until fragrant. Remove from heat and set aside.

Add the cream, butter, cheeses, salt, and pepper to the pot with the pasta. Stir gently to combine, adding hot pasta water as needed for consistency. Pasta is done when all the cheeses have melted, except for the goat cheese, which may still have a few clumps.

Turn pasta into large serving bowl. Sprinkle with parsley and serve immediately.

Serves: 8


While at first the ingredient list may give the appearance of a something-akin-to-an-alfredo-sauce, don't be fooled. Alfredo it is not. Overall the pasta was alright, a little less flavorful than I was expecting. I think maybe doubling the goat cheese next time would be just the ticket, ooh, and adding another clove of garlic. Yes, that would be perfect.


Nutrition Facts
Amount per serving
Calories 414Calories from fat 204
% Daily Value
Total Fat 14.9g74%
Saturated Fat 2.0g10%
Cholesterol 113mg38%
Sodium 665mg28%
Total Carbs 32.3g11%
Protein 18.8g
Vitamin A 18%Vitamin C 0%
Calcium 38%Iron 13%

Tuesday, March 8, 2011

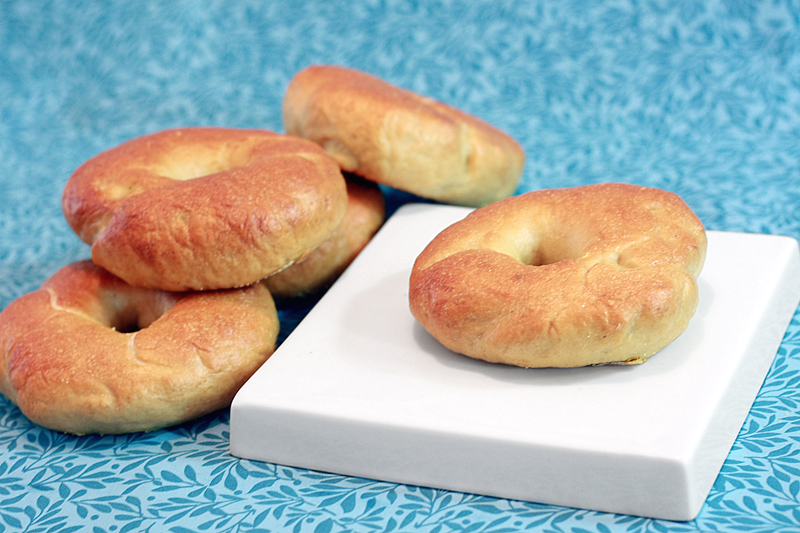
Bagels


When I was in school I absolutely refused to eat school lunches. I wasn't the kid that was embarrassed by my little brown paper sack and always longed to be like all the other kids eating their school-made food. Quite the opposite, in fact - I couldn't stand that greasy messy tasteless conglomeration they called "food" that showed up on my tray. But at that point, my parents decided I was old enough to prepare my own lunches, which turned out to be almost the exact same thing every.single.day. My mom still teases me about it. A sandwich, chips, drink, and a dessert.

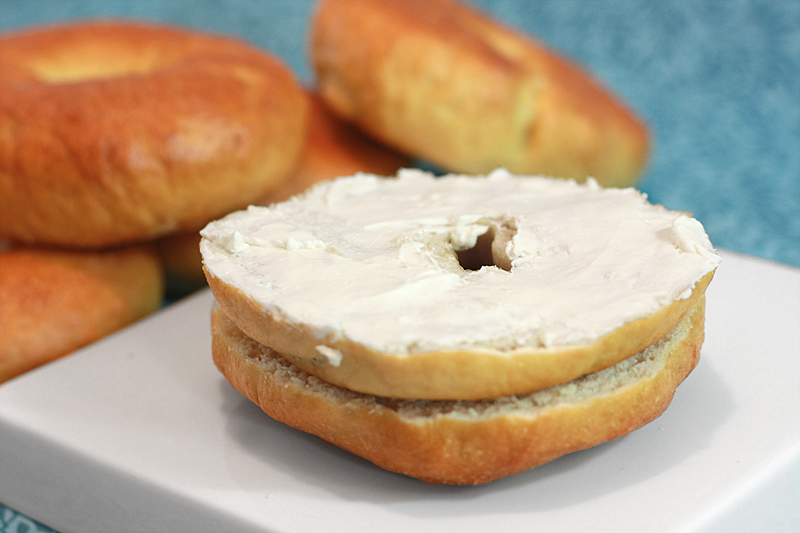
Sure the type of sandwich varied day to day - turkey or ham and cheese, peanut butter (no jelly, thankyouverymuch), or one of my all time favorites, a plain bagel with plain cream cheese, but that's about as creative as I got. It's true, I loved my bagels. And I still do to this day.

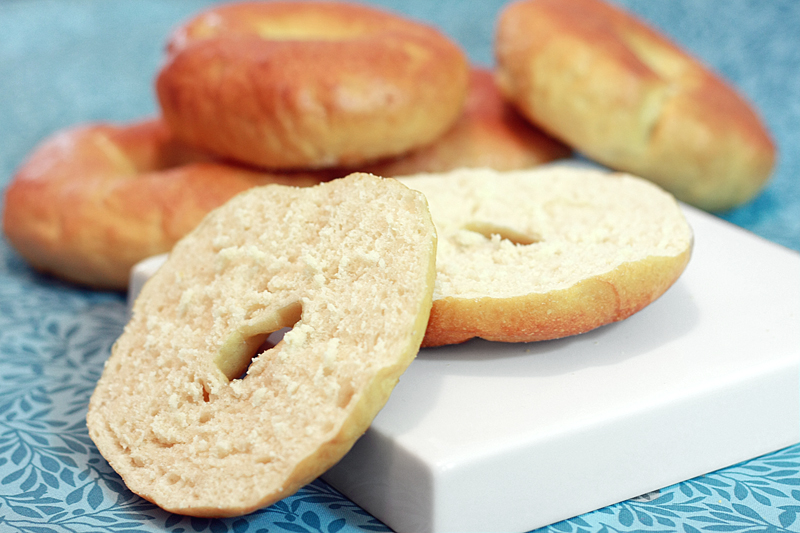
My parents would always buy bagels from the store, and I never really thought about eating any other kind. Those existed? Then I ate an actual bagel from an actual bagel shop. Wow. There is really no comparison. The real bagel is soft on the inside with a nice chewy outside -- those store-bought things simply can't compare.

After eating at such a bagel shop while visiting a friend a while back, I have had nothing but those deliciously fluffy yet chewy bagels on my mind. I just haven't been able to bring myself to buy store-bought or even Panera-bought ones since. It was time to tackle them myself if I wanted the real thing.

Peter Reinhart's Bagels
Adapted from: The Bread Baker's Apprentice

1 teaspoon instant yeast
4 cups bread flour
2 1/2 cups water, room temperature

1/2 teaspoon instant yeast
3 3/4 cups bread flour
2 3/4 teaspoons salt
1 tablespoon honey

1 tablespoon baking soda

Cornmeal or semolina flour for dusting

Note: This recipe is a two day process.

Day One:
In the work bowl of a mixer, stir together 1 teaspoon yeast and 4 cups flour. Add water, and stir until a smooth, sticky batter forms. Cover the bowl with plastic wrap and place in a draft free area at room temperature for approximately 2 hours, or until the sponge is foamy and bubbly, and almost double in size.

Add the remaining yeast to the sponge and stir. Slowly add 3 cups of flour, salt, and honey. With the dough hook, mix on low until the ingredients form a ball. Working in the remaining 3/4 cup flour, a little at a time, to stiffen the dough.

Transfer the dough to a work surface, and knead for at least 10 minutes (or for 6 minutes by machine) (be prepared to knead quite a bit longer). The dough should be firm, but elastic and smooth. There should be no raw flour – all ingredients should be hydrated. If the dough seems too dry and rips, add a few drops of water and continue kneading. If the dough seems tacky or sticky, add more flour to achieve the stiffness required (dough will be very stiff). The kneaded dough should feel satiny and pliable but not be tacky.

Divide the dough into 4 1/2 ounce pieces and shape into rolls. Cover with a damp towel and allow to rest for about 20 minutes.

Line two baking pans with parchment paper and spray lightly with cooking spray. Poke a hole in the center of each ball of dough and gently rotate your thumb around the inside of the hole to widen it. The holes should be approximately 2 1/2 inches in diameter, and the dough should be as evenly stretched as possible.

Place each of dough rings 2 inches apart on the pans. Spray the bagels very lightly with cooking spray and cover the pans loosely with plastic wrap. Let the dough rest at room temperature for about 20 minutes.

Use the “float test” to see if the bagels are ready to be refrigerated. Fill a small bowl with cool or room-temperature water. The bagels are ready to be refrigerated when they float within 10 seconds of being dropped into the water. Take one bagel and test it. If it floats, immediately return the tester bagel to the pan, pat it dry, cover the pan, and place it in the refrigerator overnight (it can stay in the refrigerator for up to 2 days). If the bagel does not float. Return it to the pan and continue to proof the dough at room temperature, checking back every 10 to 20 minutes or so until a tester floats. The time needed to accomplish the float will vary, depending on the ambient temperature and the stiffness of the dough.

Day Two:
Preheat the oven to 500 degrees F. Bring a large, wide pot of water to a boil. Add the baking soda.

Remove the bagels from the fridge. Gently drop the bagels into the water, boiling only as many as comfortably fit (they should float within 10 seconds). Flip each bagel after 1 - 2 minutes, depending on how chewy you prefer them (longer = chewier). Boil for the same amount of time on the other side.

Meanwhile, sprinkle the same parchment-lined pans with cornmeal or semolina flour. If you are adding any toppings to your bagels, do so as soon as they come out of the water.

When enough bagels to fill one pan have been boiled, place pan on middle rack in the oven. Bake for approximately 5 minutes, then rotate the pan 180 degrees, lower the temperature to 450 degrees, and bake for another 5 minutes. Bagels are done when they turn light golden brown, although you may bake them darker if you prefer. Remove the pan from the oven, and transfer the bagels to a cooling rack for at least 15 minutes before serving.

While the first pan of bagels is in the oven, finish boiling the second pan, and repeat the baking process, remembering to turn the oven heat back to 500 degrees F before baking.

Makes: 14 bagels


Every where I searched for a bagel recipe, it seemed this one kept popping up. I did make a few changes, as I wasn't able to find all the ingredients necessary. I switched out high-gluten flour for bread flour, and honey for malt powder. Usually not a huge deal. In this case, I think the honey for malt powder switch really changed the flavor of these bagels. There is just something about a bagel that has a very particular flavor -- and now I know for sure it comes from malt powder (or syrup). Next time I try these, this will definitely be a must-have ingredient to hunt down.

I also ended up hand-kneading the dough and adding a lot of extra water (yes, it really was that stiff I didn't trust it in my mixer). Let's just say you get quite the work out kneading this dough. I never did get my dough to pass the windowpane test, but the end result seemed as it should be.

Adam really really liked these (taking down two of these for breakfast alone). I did like them, except for that tiny little bit about the flavor part. The texture and chewiness were right on. However, I wouldn't let these sit around very long as they seemed to dry out a little bit by the following day (I ended up freezing the remaining bagels).


Nutrition Facts
Amount per serving
Calories 258Calories from fat 6
% Daily Value
Total Fat 0.7g1%
Cholesterol 0mg0%
Sodium 731mg30%
Total Carbs 54.2g18%
Dietary Fiber 2.0g8%
Sugars 1.4g
Protein 7.3g
Vitamin A 0%Vitamin C 0%
Calcium 1%Iron 18%

Monday, March 7, 2011

Chocolate Battenberg Cake & a Giveaway!


Boy do I ever have a treat for you today! A couple of weeks ago I was contacted by Storey Publishing asking if I was interested in reviewing one of their cookbooks -- A World of Cake by Krystina Castella. A book about cakes? Why of course!

Now, this isn't exactly your typical cake cookbook. Instead of solely focusing on cakes most Americans are used to, she goes around the globe searching for famous and traditional cakes from other countries such as Tamale Corn Cakes from Guatemala, Dobos Torte from Hungary, Groundnut Cake from Uganda, and Mooncakes from China. She doesn't merely present these cakes, but she also gives the history behind them and shows how certain cakes are related and how they all evolved from one base cake.
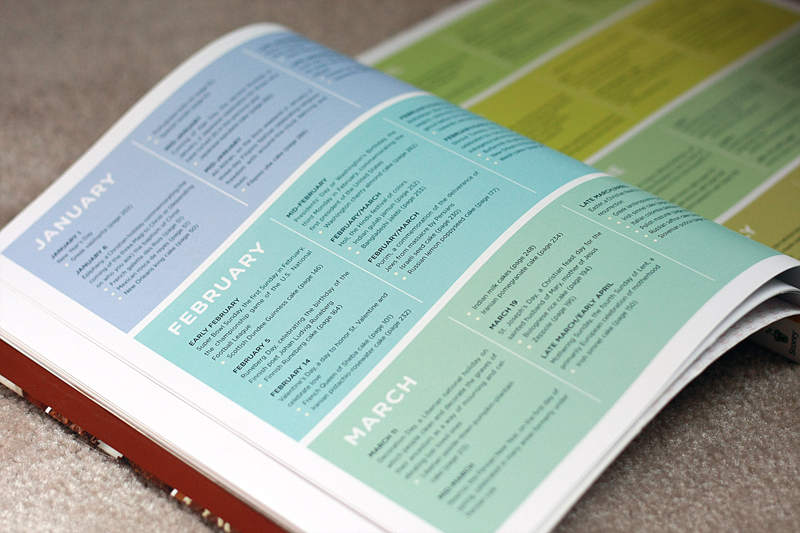
One of my favorite parts of this book is the Cake Holiday calendar found near the beginning of the book. I'm always looking for excuses to make things, and now I have a whole calendar full of them. :)


Not only were the people at Storey Publishing kind enough to send me a copy, but they are also providing another one for me to giveaway! I am super excited, as I'm sure you will find this book just as fascinating as I did!

Giveaway Rules:

{1} Leave me a comment below. You can just say "hi!" or anything else your heart desires (appropriate please, and no spam), once per day.
{2} Head over to Facebook and Like Storey Publishing. Then come back here and leave a separate comment that you did so. (This is a one time only entry.)
{3} While you're on Facebook anyways, Like A World of Cake, then leave a separate comment telling me you did. (This is a one time entry.)
{4} Tweet/Re-tweet about this giveaway: Enter to win a copy of A World of Cake at Runs With Spatulas! http://bit.ly/e036tL. Then comment back here again that you did. You can do this once per day.

So you have 4 different ways and up to 14 chances to win this cookbook! Just don't forget that each entry needs to have it's own separate comment. (If you are already a Fan of either Facebook page, you can still enter using methods #2 & #3, just make sure to tell me in separate entries!)

Giveaway closes Sunday, March 13, midnight PST.

Make sure you fill in the email address in the comments form, or leave it for me so I am able to contact you in case you win! The winner will be notified on Monday, March 14, and will have 24 hours to respond before another winner is chosen.

Giveaway is only open to US residents.

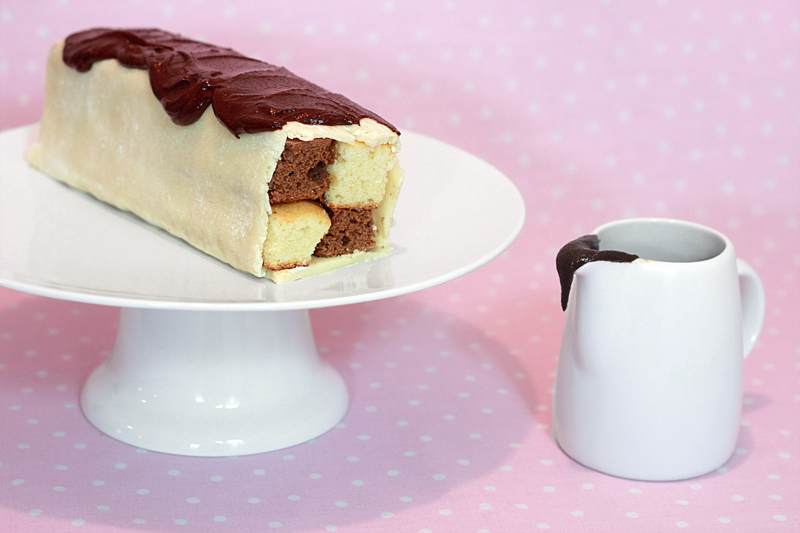
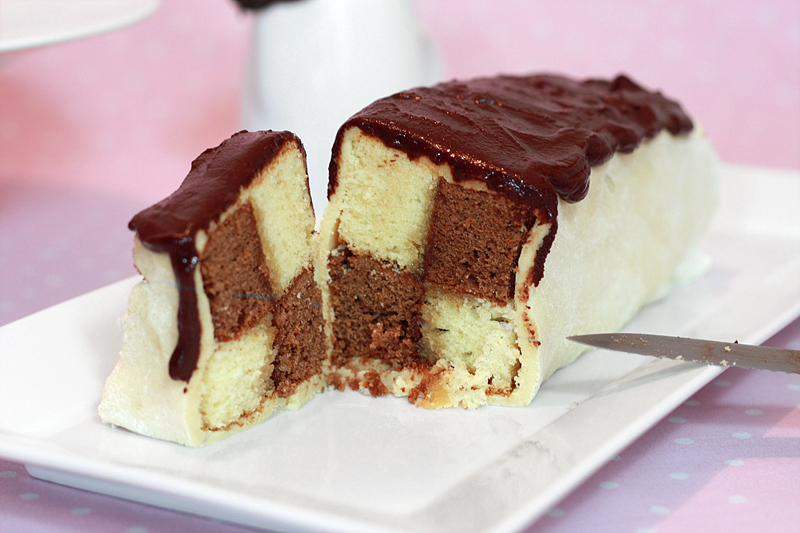
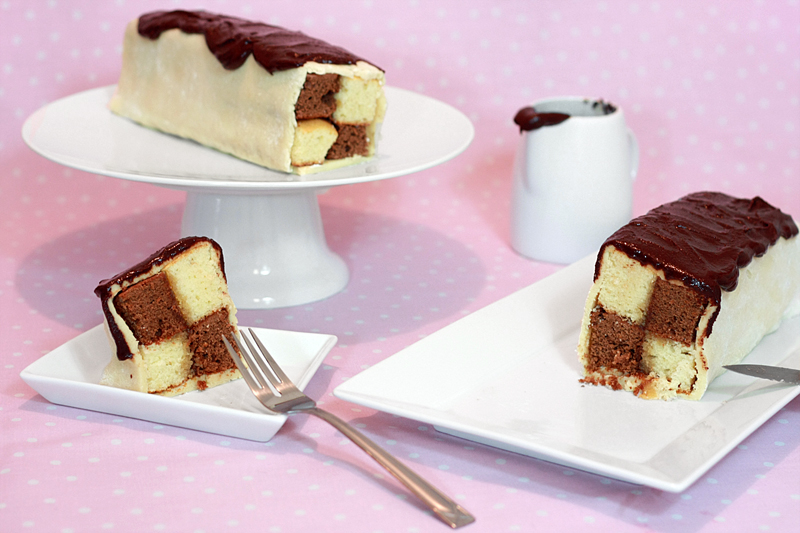
Now on to what we're really here for. Of course I wanted to try every other recipe in this book, which made actually choosing one that much more difficult. I eventually settled on this recipe for a Chocolate Battenberg Cake as I was loving the checkerboard appearance.

The Battenberg Cake is a classic English tea cake, and thought to have been created "to celebrate the marriage of Princess Vitoria of Hesse and by Rhine, granddaughter of Queen Victoria, to Prince Louis of Bettenberg in 1884."

Let's just start off by saying I am not exactly the world's greatest cake decorator by any means. Quite the opposite in fact. My cakes always lean and I tend to lose interest in any fancy decorating after a while. Which is why I stick to cupcakes if I'm making a cake batter. Which is why cutting and leveling and wrapping the cake in marzipan is waaaay outside this kid's comfort zone. I probably should have thought about that ahead of time, but I guess that's how we learn.


Chocolate Battenberg Cake
Slightly adapted from: A World of Cake, by Krystina Castella, page 142

3 cups all-purpose flour
1 1/2 teaspoons baking powder
1/4 teaspoon salt
1 1/2 cups (3 sticks) butter, at room temperature
1 1/2 cups granulated sugar
4 eggs, at room temperature
1/2 cup milk
1 teaspoon vanilla extract
1/4 cup unsweetened cocoa powder

1 3/4 cups caramel topping
5 1/2 cups marzipan (a recipe is included in the book)
2 1/4 cups chocolate ganache (recipe is included in the book)

Preheat oven to 350 degrees F. Grease two 9-inch square cake pans and set aside.

In a medium bowl, stir together the flour, baking powder, and salt. In the large work bowl of a mixer, cream the butter and sugar together until light and fluffy. Beat the eggs in, one at a time, making sure each is fully incorporated before adding the next. Beat in the milk and vanilla.

Divide the batter into two equal portions. (A kitchen scale is a Godsend here.) Place the first batter portion in one of the cake pans. Add the cocoa powder to the second half of the batter, and mix until fully incorporated. Transfer batter to the second cake pan.

Bake for 25-30 minutes, or until a toothpick inserted in the center come out clean. Cool the cakes in the pan on a cooling rack for 10 minutes. Remove from pans and let finish cooling on the rack.

Once cakes have cooled, stack the two cakes, and trim until they are both square. Placing the cakes next to each other, trim the tops of the cakes until they are both the same height and flat. Cut each cake into strips that are as wide as the cake is tall (my strips ended up being 1-inch by 1-inch).

Coat one side of a golden cake strip with caramel sauce. Set a chocolate cake strip next to it and press together so the caramel binds the two. Spread caramel on top of the two strips. Coat one side of another golden cake strip, then set it on top of the chocolate strip, with the caramel side facing in. Finally, place a chocolate cake strip on top of the first golden cake strip, and press it against the second golden cake strip. The strips should form a checkerboard pattern. Repeat with remaining strips to make a second, and if enough, a third cake.

Lightly sprinkle a work surface with powdered sugar. Separate the marzipan into two or three sections, depending on how many cakes you made. Wrap the unused section in plastic wrap and set aside. Roll out one section of the marzipan to 1/8-inch thickness. Cut the marzipan so it will wrap around one entire cake, leaving the ends open. Set the cake on a short end of the marzipan and gently wrap the marzipan around the cake. Pinch together the seams. Repeat with the remaining cake and marzipan. Drizzle each cake with 1/2 - 1/3 of the chocolate ganache.

Makes: 2-3 cakes (serves 4-6 each)

Note: I was able to make three cakes from this recipe, and I still feel that each would serve 4-6.


Despite the fact that my cakes still weren't completely level and still leaning, I thought they turned out pretty cute. Although, I do have to admit they are quite the undertaking -- especially when you are making the marzipan yourself (yet another reason I need more counter space). These cakes turned out pretty good, although a tad bit drier than I am used to. Adam thought the marzipan tasted weird, but after reminding him it serves the same purpose as fondant (looks pretty but probably isn't the best tasting thing around) he was okay with it. Overall I thought the concept was really cute, although I would probably make it again with my own butter cake recipes, add buttercream between the strips rather than glaze, and use fondant instead of marzipan. (Yeah, I almost died when I saw how much almond flour cost...) But then again, that's just my huge sweet tooth talking.


Nutrition Facts - 3 cakes, serves 6 each
Amount per serving
Calories 750Calories from fat 286
% Daily Value
Total Fat 31.8g49%
Saturated Fat 13.9g69%
Cholesterol 90mg30%
Sodium 290mg12%
Total Carbs 110.3g37%
Dietary Fiber 2.4g9%
Sugars 24.2g
Protein 8.9g
Vitamin A 13%Vitamin C 0%
Calcium 8%Iron 9%

Disclaimer: Storey Publishing provided me a copy of A World of Cake, however, all thoughts and opinions are mine.

Friday, March 4, 2011

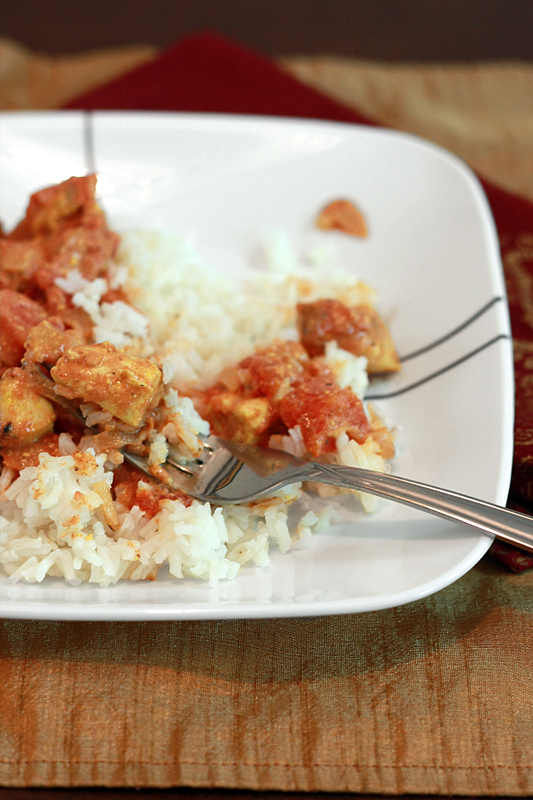
Chicken Tikka Masala


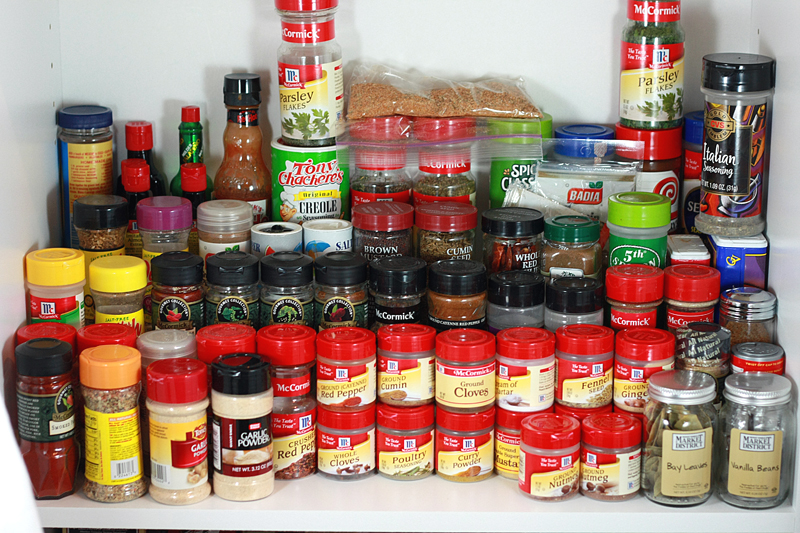
I have kitchen issues. And no, this time it doesn't involve my fridge (although I did get that business cleaned out). I have a small tendency to buy things (or ask for them as presents) I don't have room for in my kitchen. Such as a second bowl for my stand mixer, or a dutch oven, or... well, you get the idea. It's not that I don't use these items, I just don't really have a place to put them. It's so bad that we don't have any actual food in our kitchen cabinets. Only dishes. That's what our little stand-alone pantry is for.

Except then I did this:


And that doesn't even include the little turn-style-thing-a-ma-jig I have on the counter. I counted them this morning... 63 different spices. This doesn't even include extracts and doubles of spices I have. Who on earth needs that many spices? Apparently I think I do.

Send help.

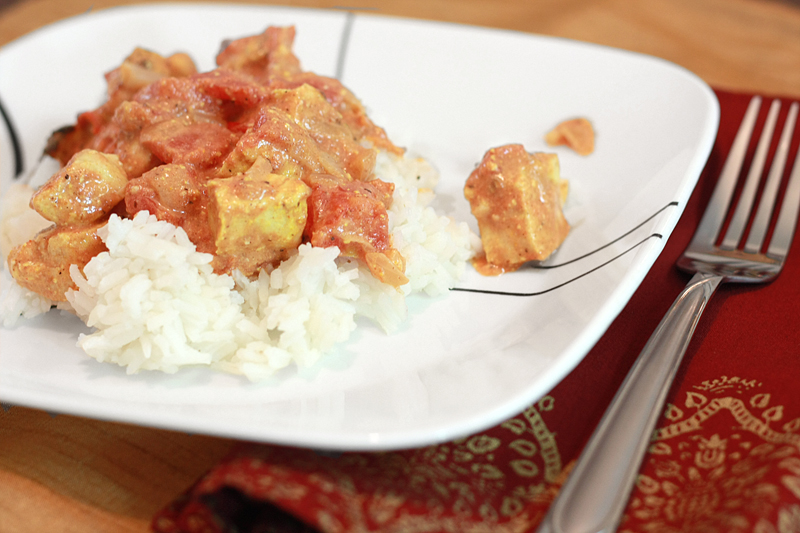
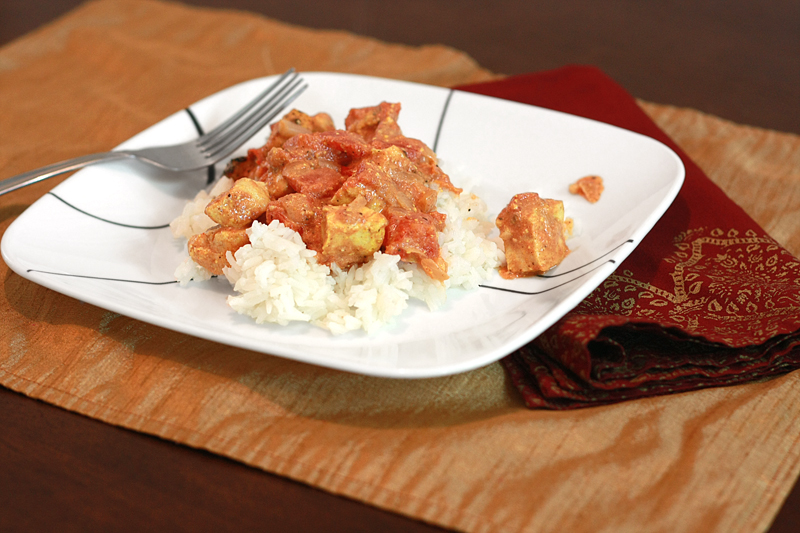
Or better yet, you can follow in my footsteps and buy some spices you normally wouldn't use and put them to work in this fantastic popular Indian British dish. (What, don't believe me? Wikipedia it.)

Chicken Tikka Masala
Adapted from: Eat Live Run

1/2 teaspoon cumin seeds
1/2 teaspoon coriander seeds
1 cup plain yogurt
2 cloves garlic, smashed
1 tablespoon canola oil
2 tablespoons lime juice
3/4 teaspoon kosher salt
1/4 teaspoon ground black pepper
1/4 teaspoon cayenne pepper
1/4 teaspoon garam masala
1/2 teaspoon turmeric
1 teaspoon ground ginger
1 1/2 pounds boneless, skinless chicken breast, diced into one inch cubes

wooden skewers
1 tablespoon canola oil
1 cup onion, diced
2 cloves garlic, minced
1 teaspoon ground ginger, minced
1 tablespoon garam masala
1/2 teaspoon cayenne pepper
1 1/4 teaspoon kosher salt
1/4 teaspoon ground black pepper
1 (28 ounce) can diced tomatoes, drained
3/4 cup cream (heavy or whipping cream will work)
2 tablespoons lime juice

Heat a small skillet over medium heat. Once it is hot, add coriander and cumin seeds and toast for 3-4 minutes.

Transfer seeds to a blender and pulse for 30 seconds or until mostly ground. Add yogurt and next 9 ingredients (through ginger) to the blender. Blend for 30 seconds, or until the mixture is smooth.

Place the chicken in a medium bowl, and cover with the marinade. Stir until all the chicken is coated. Cover the bowl with plastic wrap and refrigerate for at least 3 hours (up to overnight).

Preheat broiler. In a large bowl or pan, immerse wooden skewers in cold water for at least 30 minutes. This is to prevent burning while the chicken is cooking. Line a pan large enough to accommodate the skewers with foil and set aside.

Once skewers have be soaked thoroughly, slide on 3-4 pieces of chicken onto each, then place in the foil-lined pan. Broil the chicken for about 6 minutes on each side, or until cooked through.

Meanwhile, in a large saucepan, warm 1 tablespoon of canola oil over medium heat. Add the onion and sauté about 5 minutes, or until starting to soften. Add the garlic and cook until fragrant, about 30 seconds. Add 1 teaspoon ginger, 1 tablespoon garam masala, 1 1/4 teaspoon salt, 1/4 teaspoon pepper, 1/2 teaspoon cayenne and sauté another 30 seconds. Stir in the tomatoes and cream. Reduce heat slightly, and simmer for 10 minutes. Stir the cooked chicken and lime juice into the sauce. Serve over hot rice.

Serves: 6


Indian-inspired food is not typically something Adam and I eat, so this dish really kind of came out of the blue. I still don't know why I decided to put it on the menu for the week, but am I ever so glad I did. We typically tend to shy away from Indian and Thai foods as many of the recipes call for coconut or coconut milk. Lucky for us, this recipe didn't (although I'm sure you could easily sub out the cream for coconut milk if you wanted to).

Both Adam and I really enjoyed this random change of pace, not to mention the dish itself! The flavors are very warm, a little spicy with just a hint of almost sweetness and cinnamon. While I'm not sure this cuisine will be regularly making it to our table, it's definitely a good start.


Nutrition Facts - does not include rice
Amount per serving
Calories 315Calories from fat 103
% Daily Value
Total Fat 11.4g18%
Saturated Fat 3.0g15%
Trans Fat 0.0g
Cholesterol 105mg35%
Sodium 908mg38%
Total Carbs 13.2g4%
Dietary Fiber 2.2g9%
Sugars 8.0g
Protein 39.3g
Vitamin A 26%Vitamin C 38%
Calcium 13%Iron 11%

Thursday, March 3, 2011

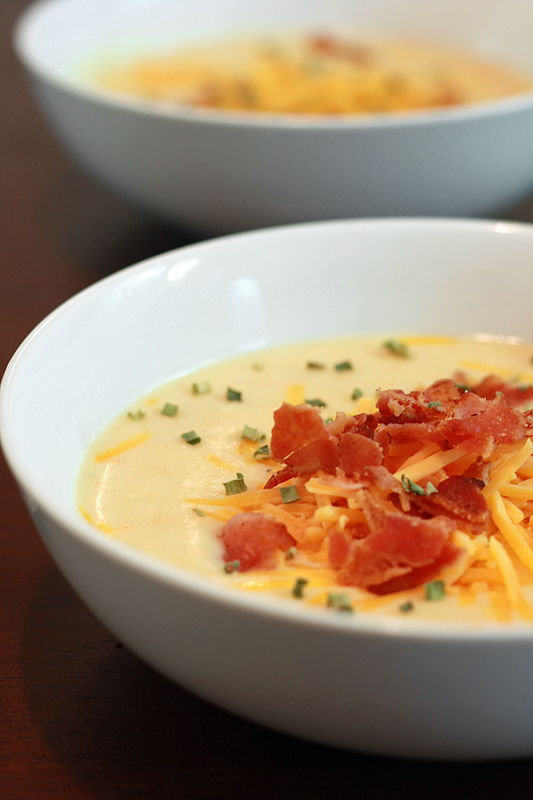
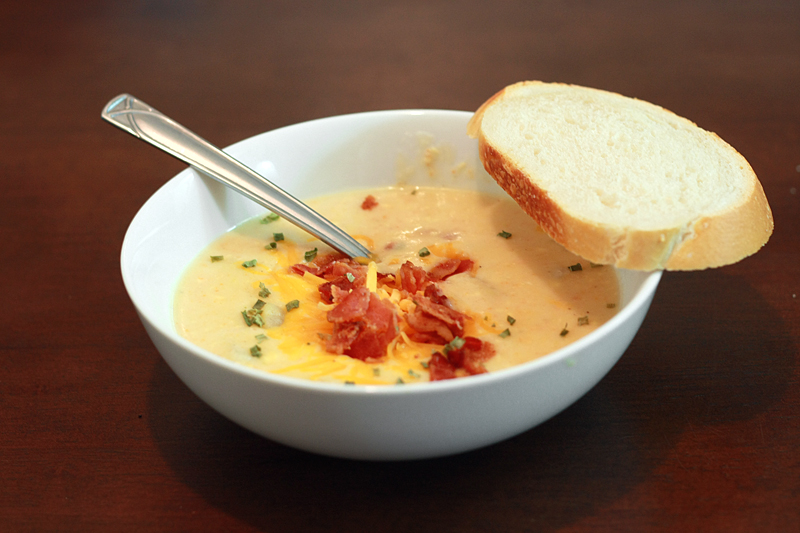
Potato Bacon Soup


Even though the past week has been full of sun and slightly (oh-so-slightly) warmer temperatures, I still get that craving for soup. For some reason, there's nothing more satisfying after a semi-long run in chilly weather than a bowl full of warm soup. Especially when potatoes and bacon are involved.

I do have another recipe for potato soup on my site, but let's consider that a "light" version. As for this one? Yeah, not so much on the light side. This is the soul-satisfying, no-excuses, cheesy potato bacon soup goodness. I mean, let's face it, we're putting a POUND of cheese into this soup, then topping it with more. And adding bacon. As for veggies? They're in there, just hidden by the end (perfect for those fickle kids or hubbies who insist they will not eat them).

With all its richness, this may not be a soup to put on the menu every week, but every once in a while it is oh-so-nice to splurge and have "the real thing".


Potato Bacon Soup
Adapted from: Scott Nems Doots

10 strips bacon, divided
1 cup onion, diced
2 carrots, diced
2 stalks celery, diced
5 cups potatoes, peeled and diced
6 cups reduced-sodium fat-free chicken broth
1/4 teaspoon ground black pepper
1/2 teaspoon seasoning salt
1/4 teaspoon cayenne pepper
8 ounces reduced-fat cream cheese, cut into 1-inch cubes
8 ounces Velveeta, cut into 1-inch cubes
4 cups potatoes, cubed (peeled or unpeeled)
1 cup shredded sharp cheddar cheese
2 tablespoons + 2 teaspoons dried chives

In a large stock pot, cook the bacon over medium heat (may take multiple batches). Once bacon has finished cooking, remove from the pot and set aside on a paper towel-lined plate. Leave the drippings in the pot. Add in the onions, carrots, and celery and sauté until soft, about 10 minutes. Add 5 cups diced potatoes, broth, pepper, salt, and cayenne pepper and bring to a boil. Reduce heat and simmer, 15-20 minutes, or until the potatoes are fork tender.

Using an immersion blender, puree the soup base until it is completely smooth. (If you don't have an immersion blender, you can transfer the soup in batches to a regular blender and puree, then return to the pot.) If the base is too thick, you can add more broth to thin it out.

Add the remaining 4 cups potatoes, cream cheese, and Velveeta. Let simmer, stirring frequently, for 25-30 minutes, or until the potatoes are fork tender and the cheeses have melted. Crumble 6 strips of bacon and stir in.

Serve topped with 2 tablespoons of shredded cheddar and 1/2 crumbled strip of bacon.

Serves: 8


I finally got an immersion blender for Christmas, after months of insisting and thinking that it really wasn't a necessary tool to have in the kitchen. Which, honestly, it isn't necessary -- but it most definitely is handy. I took my new and unused present to my sister's back in January to make this soup among other things for her to freeze while she was in the hospital. And then I promptly forgot it when we left. Of course.

Well, I am happy to report that it is back in my possession. Right off the bat Adam asks for spaghetti and meatballs. Now that I have my immersion blender back, wouldn't it be just so easy to make marinara (it is after all, his favorite meal)? Followed by puppy dog eyes... So I did. And didn't take pictures. Such is life.

But I wasn't done playing with my new toy yet, and decided to put this on the menu so I could. Ha, I love excuses to make things. :) Let me just say, I leave the kitchen about 50 times cleaner with about half as many dishes when I use the immersion blender versus the regular one. And that, my friends, is a feat all in itself.


Nutrition Facts
Amount per serving
Calories 511Calories from fat 279
% Daily Value
Total Fat 31.0g48%
Saturated Fat 16.6g83%
Trans Fat 0.0g
Cholesterol 95mg32%
Sodium 1370mg57%
Total Carbs 34.4g11%
Dietary Fiber 4.9g19%
Sugars 5.8g
Protein 23.8g
Vitamin A 70%Vitamin C 60%
Calcium 29%Iron 12%

Wednesday, March 2, 2011

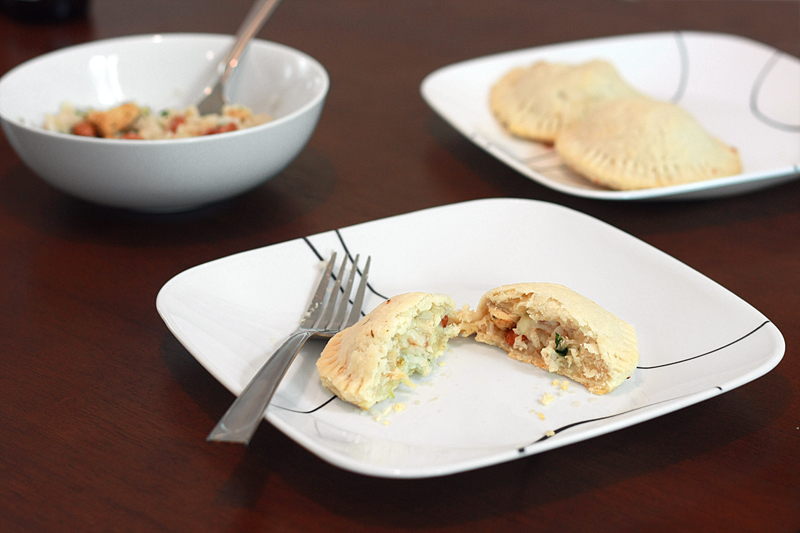
Spicy Garlic Lime Chicken Handpies


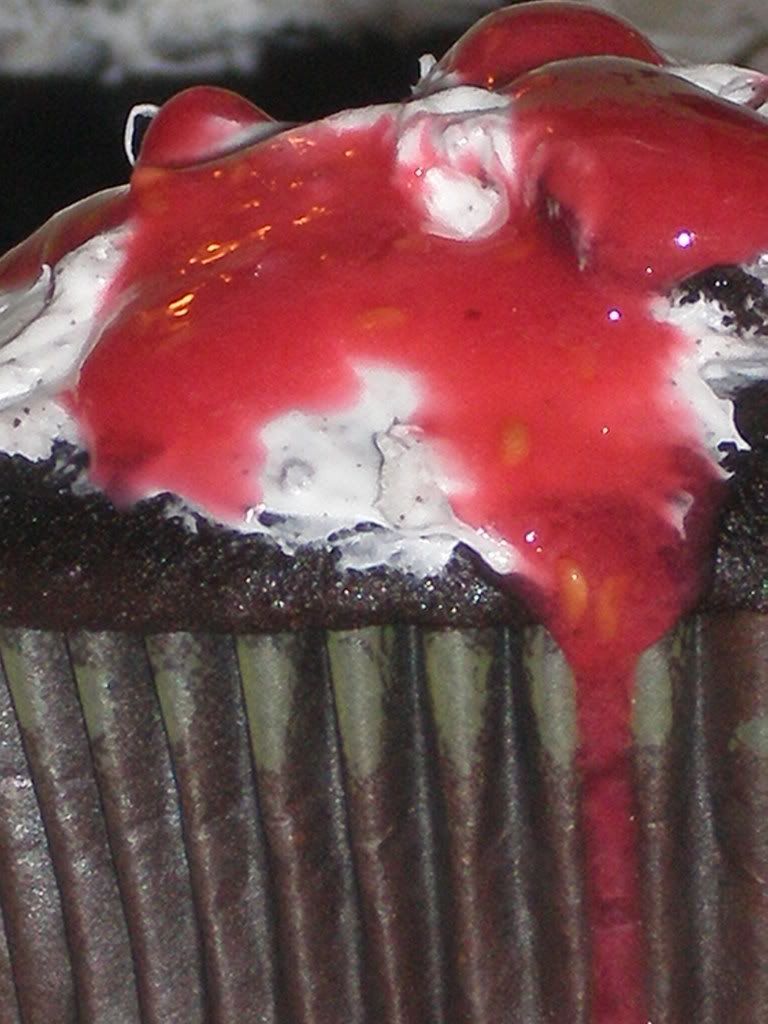
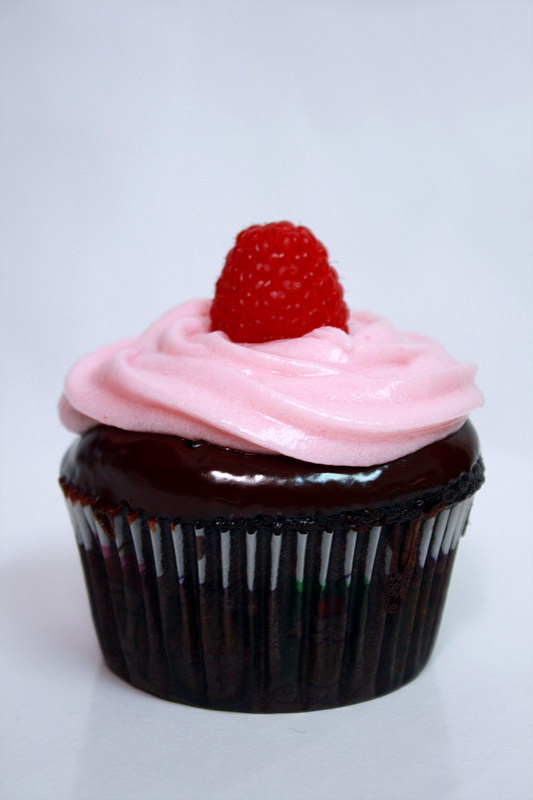
Back in September I re-made my very first food post, Dark Chocolate Cupcakes with Oreo Raspberry Glaze, into Chocolate Dipped Chocolate Raspberry Cupcakes for the first challenge of Project Food Blog.


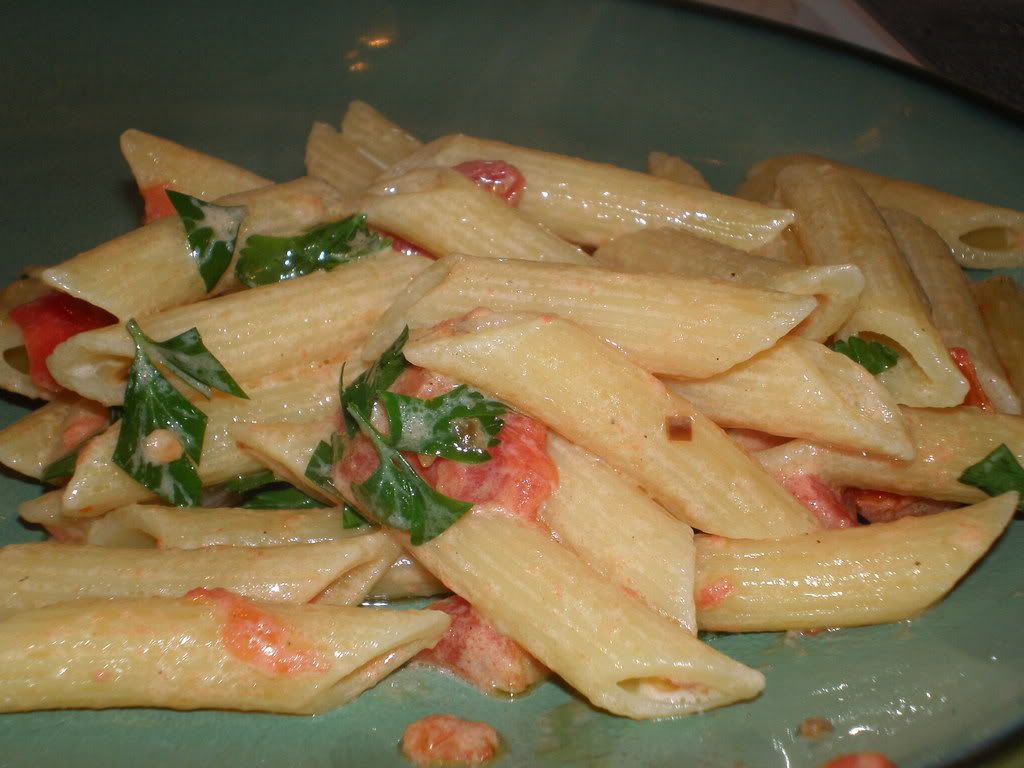
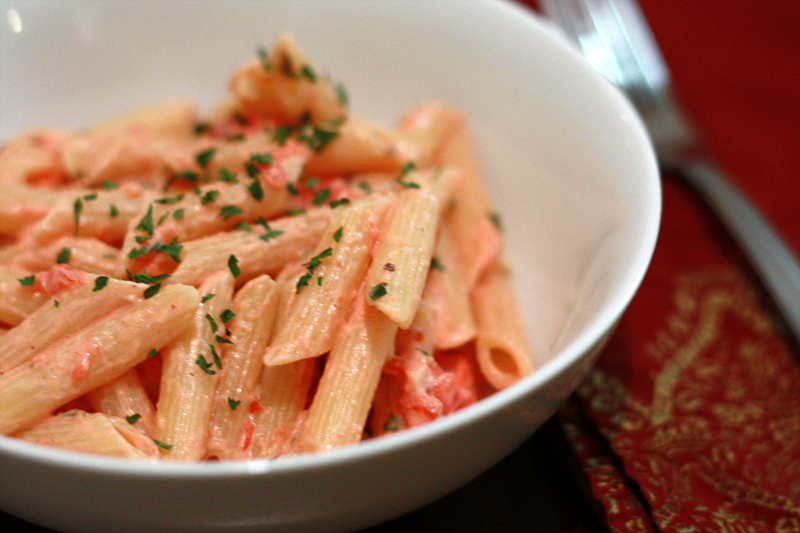
I had so much fun with it I decided to try again in November by remaking my second-ever food post, Penne Alla Vodka into a Creamy Penne Alla Vodka.


Now here I am again, going after my third-ever food post: Spicy Garlic Lime Chicken. This post is so old, it doesn't even have a picture. Just imagine some lonely looking chicken breasts sprinkled with spices and you've got it. :)

I actually wanted to do this recipe re-do much sooner than now, but to be honest, I was quite stumped when it came to this dish. What to do different? The chicken itself is really quite tasty, and I wasn't sure how much I wanted to change that aspect. After thinking and thinking, then thinking some more, I decided to simply dice the chicken and serve it mixed in with other complementary items - such as rice, beans, and cheese. Then at the last minute, while perusing through my Foodbuzz inbox, I came across a post for empanadas. Lightbulb.

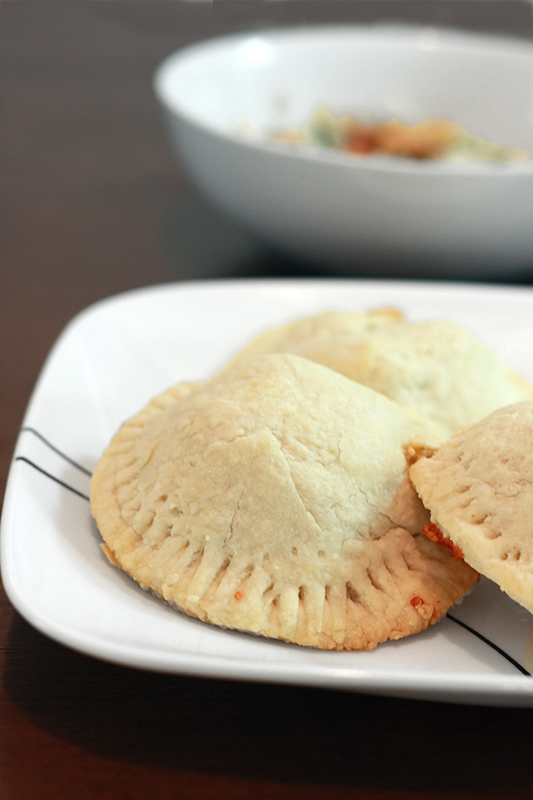
I kept my original idea for the mix-ins the same, but instead of serving as-is, they would all be tucked away nicely inside little pouches of dough you could pick up and eat. It didn't feel right calling them empanadas, as they're baked, not fried, so we're going to go with hand-pies on this one.


Spicy Garlic Lime Chicken Handpies
Original Recipe

1 cup long-grain white rice, uncooked
2 cups water
zest from 1/2 lime
1/2 cup cilantro, chopped

1 tablespoon olive oil
3/4 teaspoon salt
1/4 teaspoon black pepper
1/4 teaspoon cayenne pepper
1/8 teaspoon paprika
1/4 teaspoon garlic powder
1/8 teaspoon onion powder
1/4 teaspoon dried thyme
1/4 teaspoon dried parsley
2 (4 ounce) boneless, skinless chicken breasts cut into 1-inch cubes
2 tablespoons lime juice

3 cups all-purpose flour
1 1/2 teaspoon salt
9 tablespoons shortening
9 tablespoons butter
6-9 tablespoons cold water

1 (15 ounce) can pinto beans, drained and rinsed
4 ounces pepper jack cheese, shredded
1 egg, lightly beaten
1 tablespoon water

Preheat oven to 350 degrees F. Line a baking sheet with parchment paper and set aside.

In a small saucepan, bring the rice and 2 cups water to a boil. Cover and reduce heat to a simmer (medium-low); cook for 20 minutes or until water is absorbed. Remove from heat, fluff rice with a fork, recover, and let sit for another 5 minutes. Stir in lime zest and cilantro.

Meanwhile, in a medium skillet over medium heat, warm the olive oil. In a small bowl, combine the salt and next 7 ingredients (through parsley), mixing well. Sprinkle the seasoning mix over the cubed chicken. Cook the chicken in the skillet about 5 minutes, or until almost cooked through. Drizzle with the lime juice, then cook until done, about 1 minute more.

In a large bowl, mix together the flour and salt. Using a pastry blender, cut in the shortening and butter until the mixture turns into a fine crumb. Add 4 tablespoons of cold water, mixing until all the dry ingredients are hydrated. If the dough is still too dry, add cold water, 1 tablespoon at a time, until the dough is able to fully come together.

Transfer dough to a lightly floured work surface and roll out with a lightly floured rolling pin to a thickness of about 1/4-inch. Using a large biscuit cutter (or anything that will give you a 4-inch circle), cut a round from the dough and transfer to the baking sheet. Top with 1 1/2 tablespoons cilantro-lime rice, 1/2 tablespoon pinto beans, 1 tablespoon (about 3 cubes) of chicken, and 1 tablespoon cheese, leaving about 1/4-inch from the edge on all sides.

In a small bowl, whisk together the egg and water. This will serve as your egg wash. Using a pastry brush (or your finger), brush egg wash along the outside edge of the pastry. Cut another round from the dough (I made mine about 4 1/2-inches) and lay on top of the filling. Press the edges down into the bottom round, then seal together with the tines of a fork. Brush with the egg wash. Repeat with remaining dough and filling ingredients. Bake at 350 degrees for 15 minutes, or until the hand-pies become golden brown. Let cool for 5 minutes before serving.

Makes: 10 hand-pies (plus leftover filling)


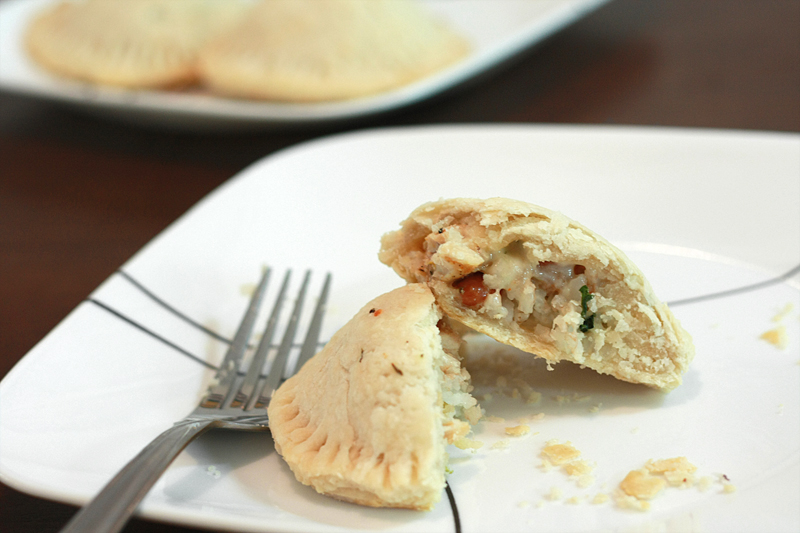
Lucky for me, these turned out much the way I envisioned them - light flaky dough surrounded rice with oozy cheese and chicken. Kind of like a Chipotle burrito, but pie-style.

While the concept behind these and actually eating them is fun and cute, making them is a different story. Or maybe that's just because I have almost zero counter space. They actually come together pretty easily once you have everything lined up ready to go, it's just getting there that takes a bit (*ahem*rolling out dough). Which is why there is no egg wash on these -- I didn't have any more room or energy to get one more bowl out. But I highly recommend you add it for that nice golden color. Sigh, I desperately need a bigger kitchen.

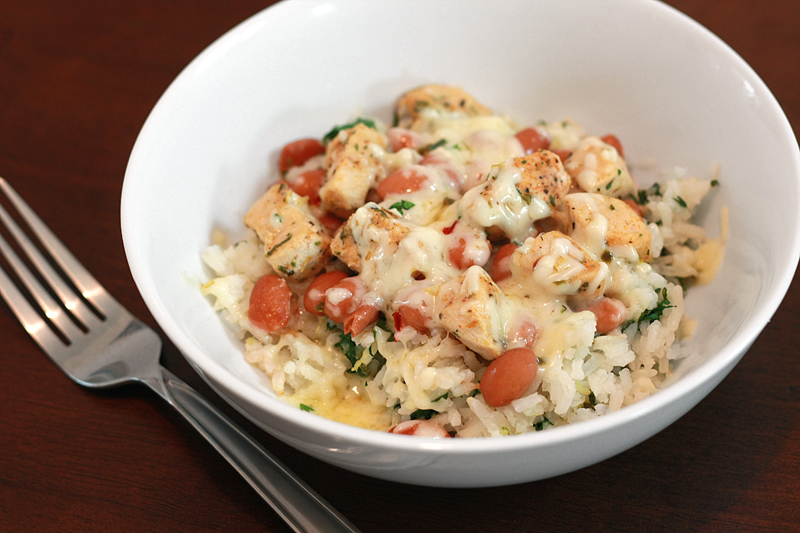
And, if you get tired of rolling out dough, or simply run out of dough before filling ingredients (which I may or may not have done), this is also fantastic without it. Just mix everything together and pop in the microwave to melt the cheese for a few seconds. Either way, delicious.


Nutrition Facts - there are no nutrition facts for this dish, as the entire quantity of certain ingredients may not be used (i.e. there will most likely be leftover beans and rice).

LinkWithin

Related Posts with Thumbnails
 
Pin It button on image hover