Friday, November 9, 2012

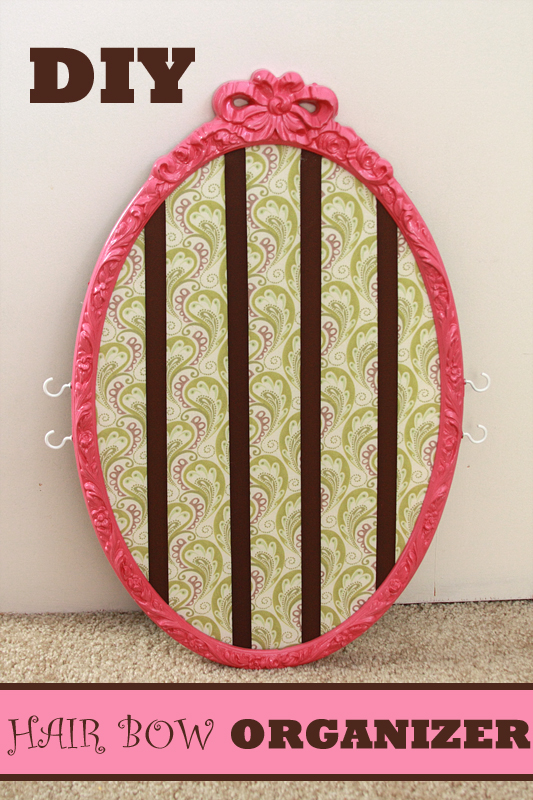
Crafty Fridays: DIY Hair Bow Organizer


I for one, cannot believe that we're already in November. Seriously. Where did October go? BUT, being that we're now in November we can start looking at Christmas presents! I know you probably want to knock me a good one in the head for even suggesting such a thing, but if you're going to go the DIY route for presents, it doesn't hurt to get an early start.

That said, we have a new little niece to get presents for this year, and seeing as her mom loves her some hair bows and head bands, this gift idea came pretty easily. (Poking around on Pinterest doesn't hurt either.)

I think the best part of making this is hunting down just the right frame to use. I got lucky at the first thrift store I stopped at and found a... not so pretty three-piece vanity mirror set. It was gold and tacky, but with some spray paint it would turn back into something cute and girly (not to mention I got 3 mirrors out of the deal so I was actually able to make 3 of these if I wanted).
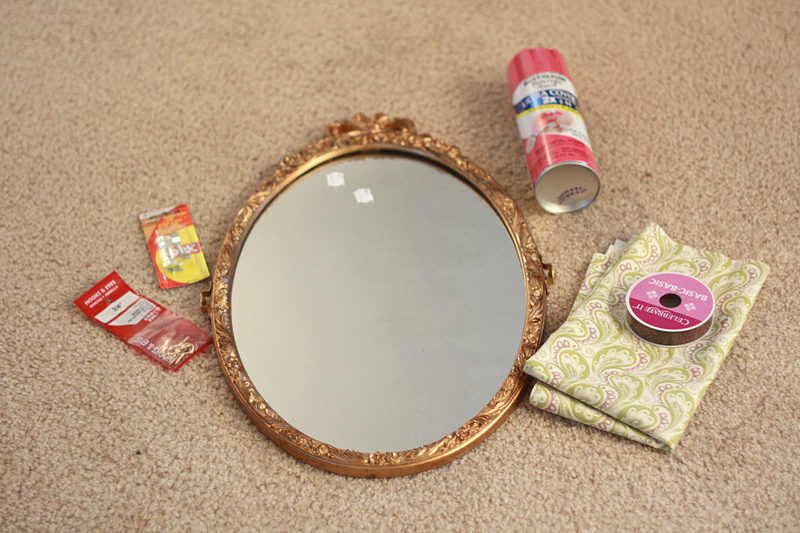

Things you need

Old picture frame or mirror (can be found at Goodwill for cheap)
Spray paint
1/2 yard of fabric (or roughly a little bigger than your frame)
Hot glue gun
5/8" - 7/8" grosgrain ribbon (I opted for grosgrain as satin may snag on the clips)
Scissors
Small screw-in hooks (about 3/4")
Picture hanger (if needed)


First things first. Disassemble your picture frame/mirror, making sure to keep all the parts (frame, backing, and glass or mirror).
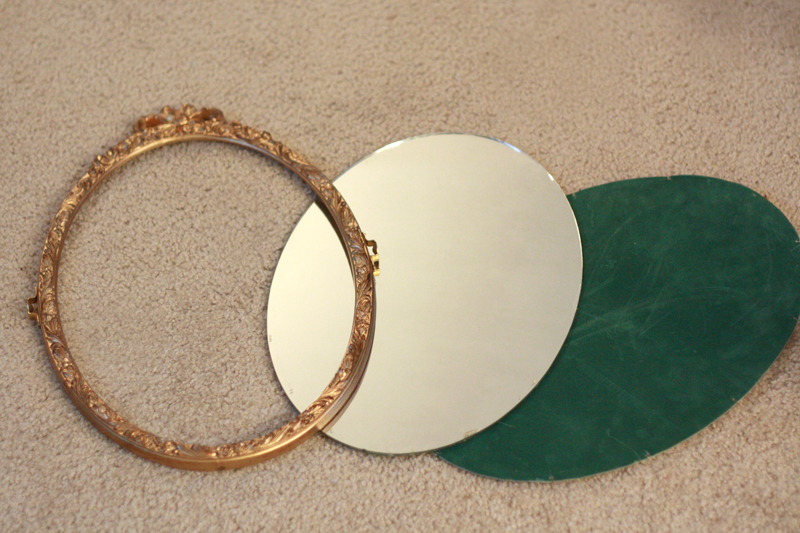

Spray paint a couple coats onto your frame (front and back) until completely covered. Follow the directions on the can for drying and re-coating times.

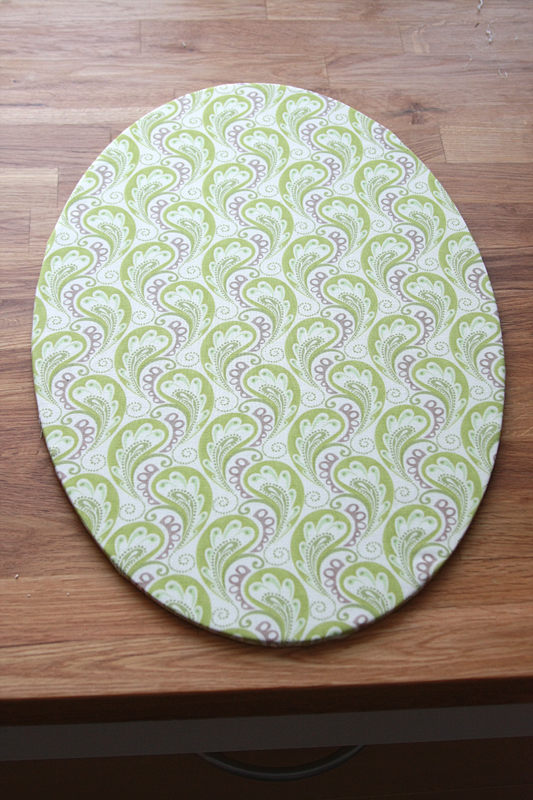
Now, gather up your frame, glass/mirror, and fabric. (Doesn't that frame already just look a million times better?)
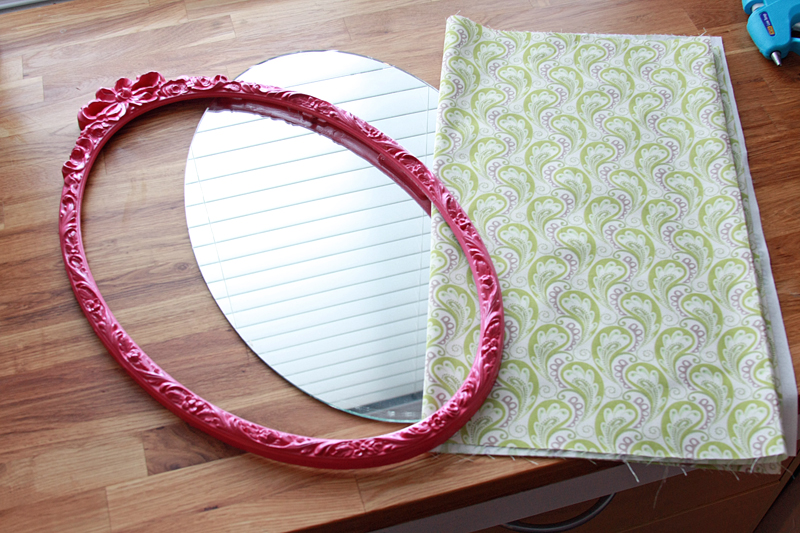

Lay out your fabric right side down. Place your glass/mirror facing down on top of the fabric, with any patterns on the fabric running in the direction desired.
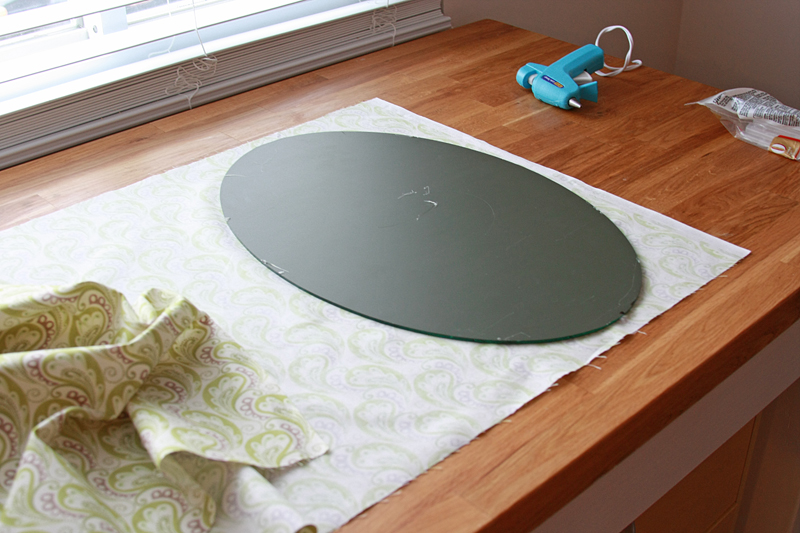

Pull the material taut and begin hot gluing the edges to the back of the glass/mirror. This is obviously much easier if you're working with a square piece of glass.
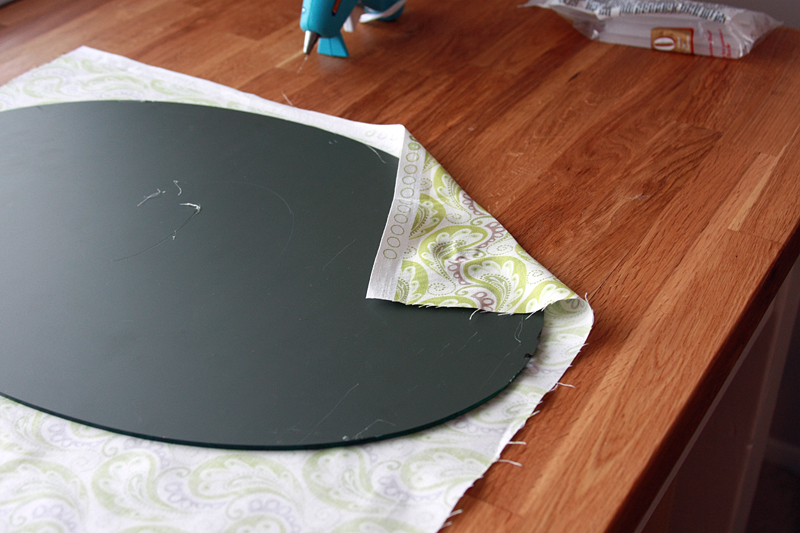

Continue all the way around the glass, don't worry about those bumps and folds on the backside. As long as the material is laying flat on the front side of the glass, that's all the matters. Cut off any excess fabric.
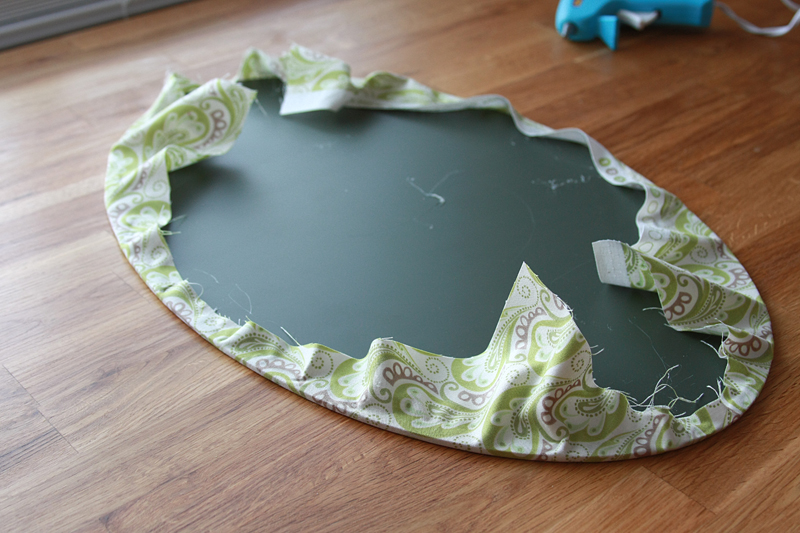

Now it's time to go back and take care of all those bumps I told you not to worry about. And the only reason we're doing this is so the back lays flat when we put it back on, so no need to make this look pretty. I just folded any extra material over and glued it down. (Another reason I use a low-temp hot glue gun is so when I get the glue on my fingers it hurts, but it's not ridiculously painful and leaves blisters.) And hey, if you're using a square piece of glass, you can skip this all together!
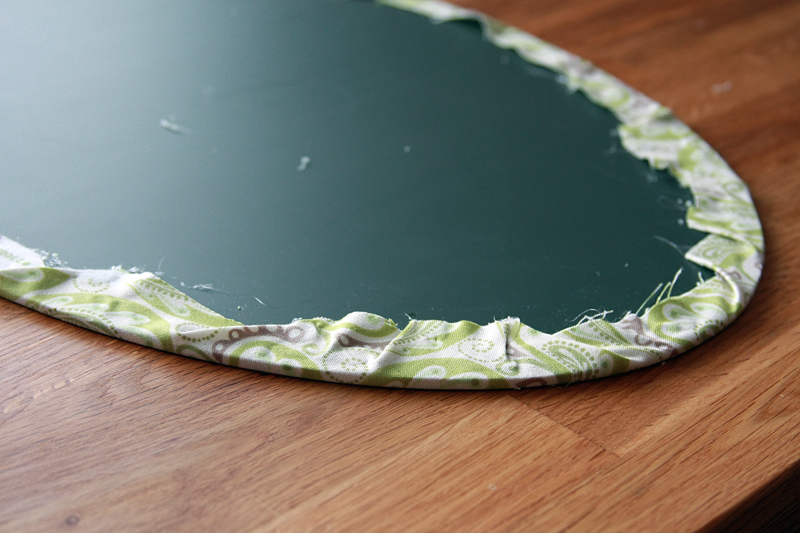

Alright, flip it over and check out your handy work. Even if the edges aren't perfectly smooth that's okay, the frame will cover this up. Go ahead and set the covered glass piece aside.

For the next step, I was going to tell you to measure out your width and do some math to figure out how many strips you want going down your frame, but honestly, it's really just easier to eyeball it with the same results. Especially when you're not working with a square piece. However, you do want about 2" between each ribbon (I did from about center to center of the ribbons... roughly). This gives your pretty bows and hair pieces room to breathe.

So, cut a few strips (I decided to go with 4) of ribbon and lay them length-wise across the back of your frame. Make sure you have enough ribbon to reach completely across and leave little "tails" for you to glue to the frame.
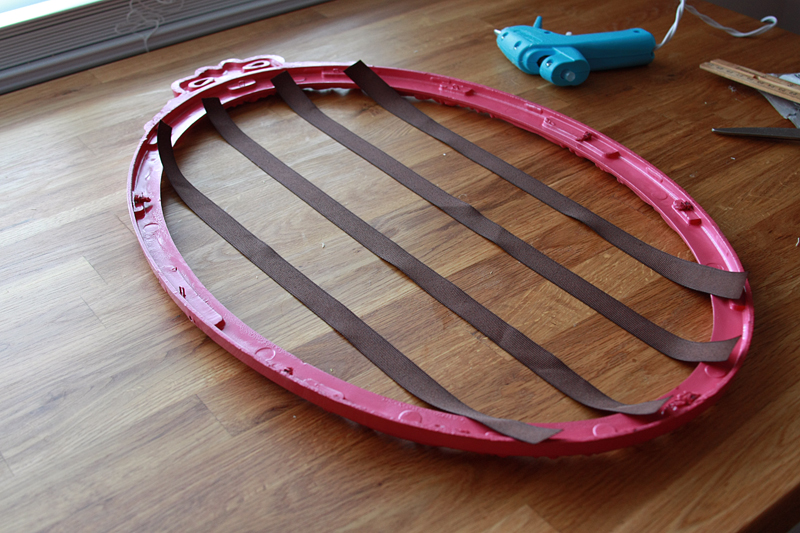

Once you have your ribbon where you want it, begin gluing the tails down to the back of the frame. (There should be a small lip on all frames where the glass and backing rest so they don't fall through the opening. This is the part of the frame I'm referring to.)
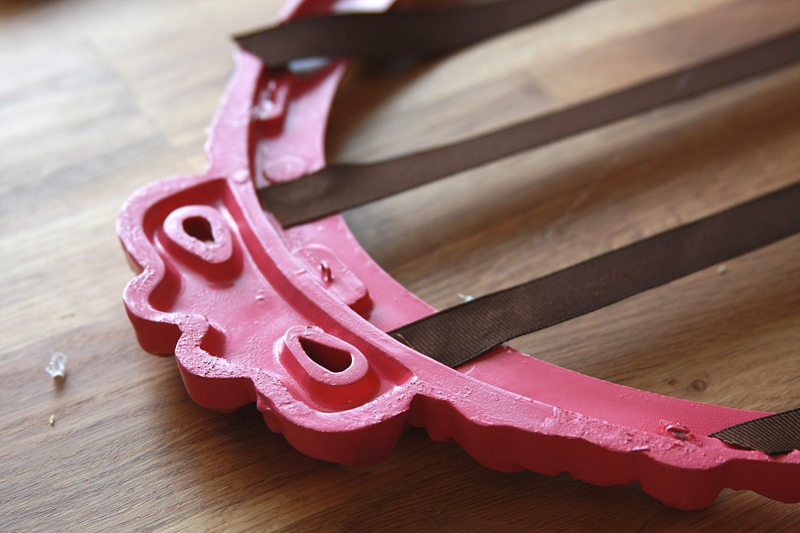

Once you have all your ribbons glued down, cut off any excess that sticks out above that lip on the frame.
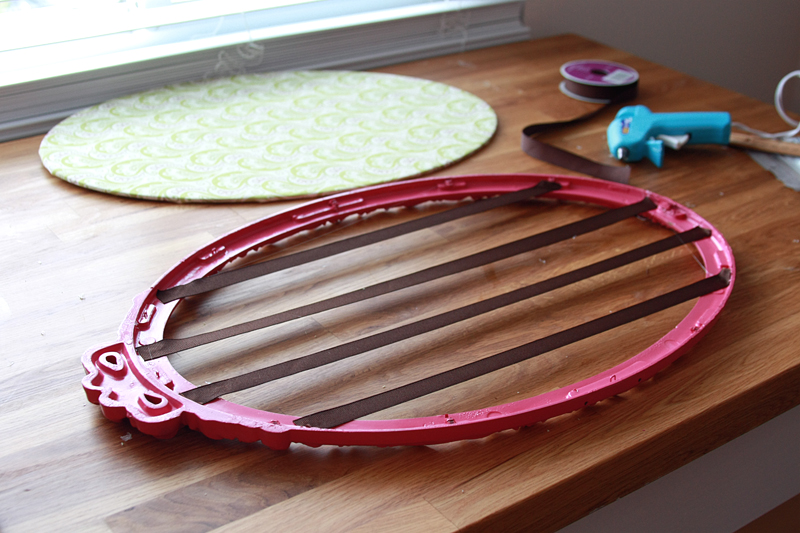

When all the glue is completely dry, place your covered glass piece back in the frame, right side down. We're just making sure everything still fits.
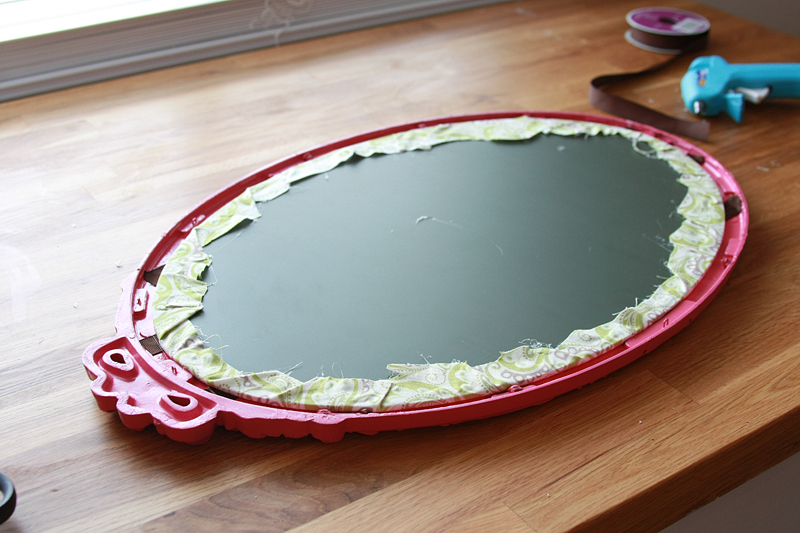

If you're using a typical picture frame, with a back that slides in and hold the glass in place, you can skip this next part. If you're like me and the backing was stapled on and you have no way to re-staple it, go ahead and secure your covered glass into place with glue.
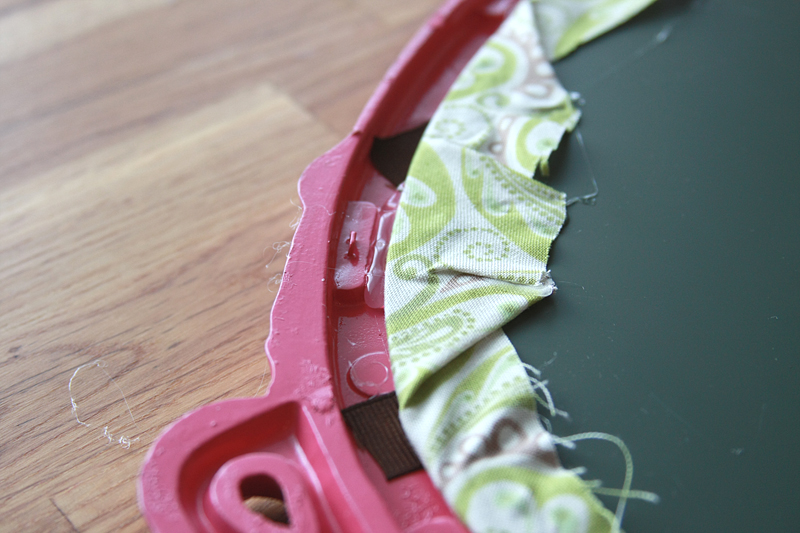

Slide the back into your frame, and you can call it a day! Unless you went with a mirror, then glue your backing on with a ridiculous amount of hot glue. If you also happen to be missing a way to hang up your masterpiece, attach a picture hanger with either crazy glue or hot glue. Just make sure to get it on nice and straight. (You can find the metal picture hanger piece at Lowe's or Home Depot.)
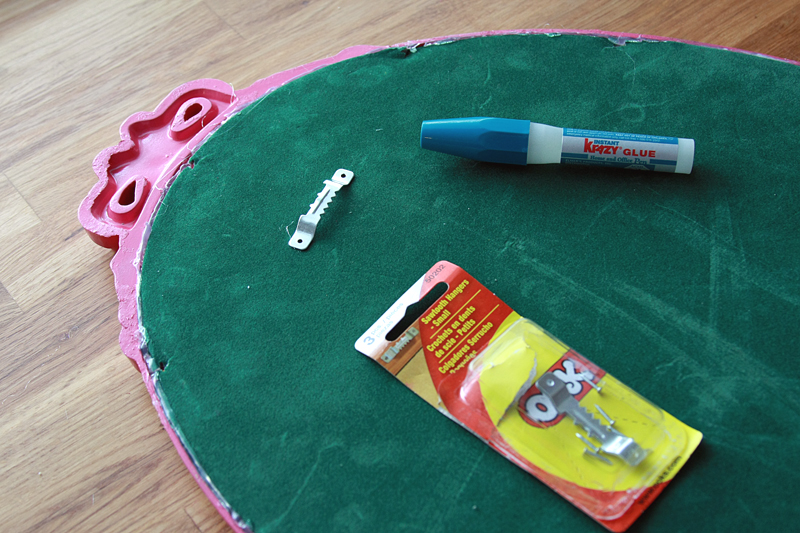

Now, one last thing, and this is completely optional. Since my niece has no hair to speak of, my sister loves to use thin stretchy bands to clip her hair pieces onto. I decided to add little hooks to hold those. Luckily, I already had pre-drilled holes from where the mirror attached to the other pieces of the vanity set, but you can also just screw them into the frame along the bottom.

Annnnnd you're done! All that's left is for you to clip on some fancy hair bows.
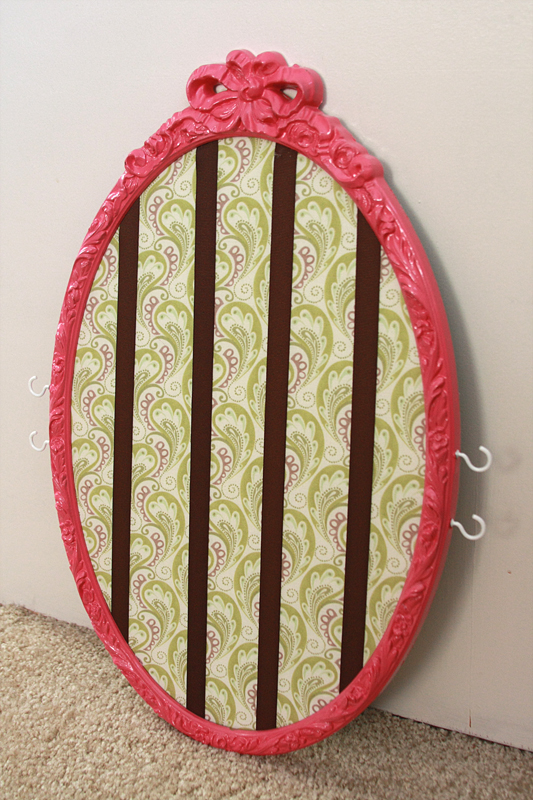

Final price to make your own Hair Bow Organizer?

1 thrift store picture frame (1 @ $3.00) = $3.00
1 can spray paint (1 @ $3.87) = $3.87
1/2 yard fabric (1 @ $4.50) = $4.50
1 spool grosgrain ribbon (1 @ $3.99) = $3.99 (I bought this at full price, you can totally get this for much cheaper and you don't even need close to a full spool)
1 8-pk "cup" hooks (1 @ $0.97) = $0.97 (Can find these at Lowe's, Home Depot, or even Walmart)
1 pk sawtooth picture hanger (1 @ $1.94) = $1.94

Final Price = $18.27


Well, this time around it's really going to vary, mostly due to the price of your frame. Mine ended up being about $8, but that included 3 frames. I'm going to ball park $3 for the frame, as that was about the price of some of the other ones I saw there. What fabric you get (and how much) will also really affect the price as well. Mine was full price, so once again, bust out that 40% off coupon and you can do this much cheaper.

Wednesday, November 7, 2012

Butternut Squash Soup


Speaking of comfort food, I have been massively crushing on any and all kinds of soup as of late. It never fails, every time we go out to Panera, I get a large bowl of Chicken Noodle soup and a baguette. Even when it was 80+ degrees out in the middle of August.

Now that the weather is going full on chilly, it's time for everybody else to enjoy what I have been for months. For the past year or two, I keep telling myself I am going to try my hand at a butternut squash soup, and it never happens. Then squash is out of season and I'm forced to wait until the leaves starting turning colors again. Not this year.

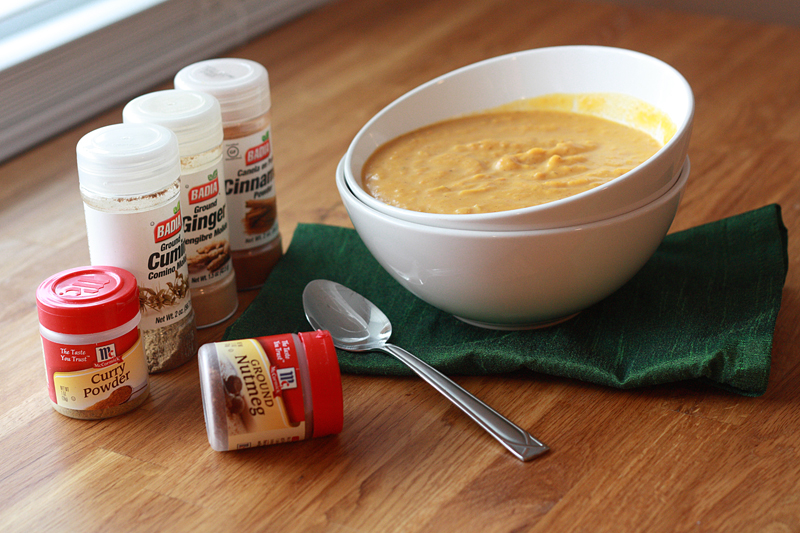
I thought I had a recipe all picked out and ready to go when I got started, but one thought led to another, and all of a sudden it was totally and completely different. I just added a bit of this here, that there, and doesn't this sound like it would go in great with all the flavors? I have to admit, I'm not sure I've ever been happier with an original dish outcome.

Butternut Squash Soup
Original Recipe

1 medium to large butternut squash (about 4-5 pounds whole)
1 1/2 tablespoons brown sugar
3 tablespoons butter, divided
1 stalk celery, diced
1 cup onion, diced
3 cloves garlic, minced
1 cup carrots, diced
4 cups fat-free, reduced-sodium chicken broth
1/2 teaspoon kosher salt
1/2 teaspoon ground black pepper
1/4 heaping teaspoon ground ginger
1/4 teaspoon ground cinnamon
1/2 teaspoon ground curry
1/8 teaspoon ground nutmeg
1/2 teaspoon ground cumin
1/4 cup heavy cream

Preheat oven to 400 degrees F. Line a rimmed baking sheet with aluminum foil. Cut the squash in half lengthwise and scoop out the seeds. Top each half with 1 tablespoon butter (cut into pieces), and about 3-4 teaspoons of brown sugar. Place squash in oven and roast for 1 hour.

Once the squash is done roasting, melt the remaining 1 tablespoon butter in a large pot over medium heat. Add the celery, onion, garlic, and carrots. Saute for about 5 minutes, or until the vegetables begin to soften. Add the chicken broth to the pot. While the broth is coming to a simmer, scoop out the squash and add it to the pot, discarding the skin. Cover pot, reduce heat to medium-low and let simmer for 40 minutes.

Transfer mixture in batches to a blender to puree until smooth, or use a hand blender. Add seasonings and spices to taste (add more ginger or cayenne pepper if you want the soup to have a little kick). Stir in the heavy cream and serve.


Serves: 6


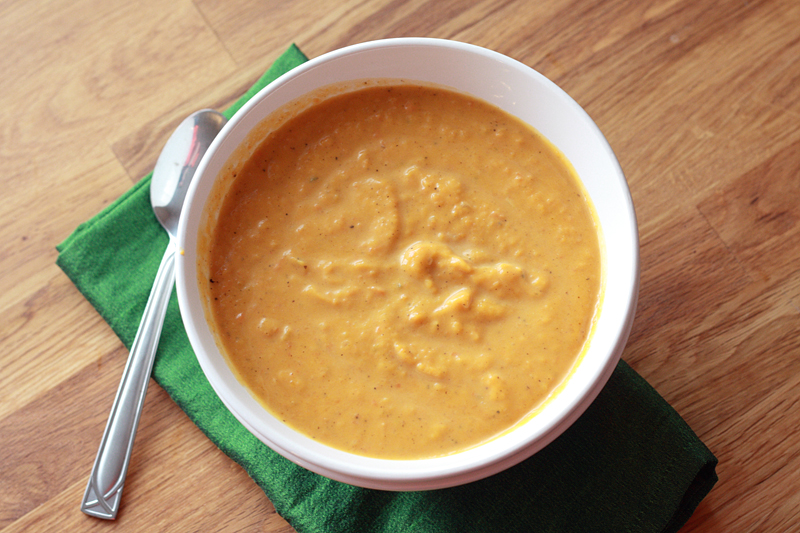
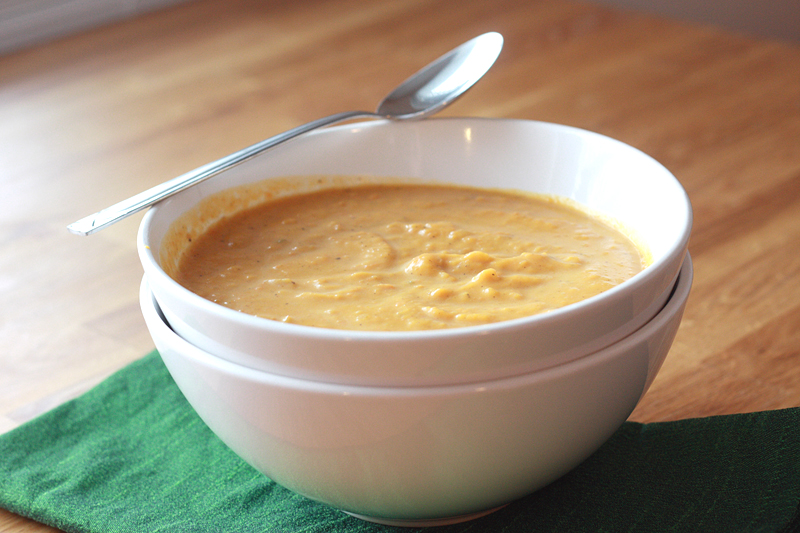
This soup is thick and hearty, and I added close to (if not more than) a 1/2 teaspoon of ginger, so it definitely had a bit of a bite to it. The flavors all come together -- the sweet mixed with the savory, in such a perfect fall-ish way. Almost for a minute making me wish winter baking wasn't just around the corner. (But who am I kidding, cookies trump soup any day.)


Nutrition Facts
Serving Size 444g
Amount per serving
Calories 202Calories from fat 72
% Daily Value
Total Fat 8.0g12%
Saturated Fat 4.9g24%
Cholesterol 22mg7%
Sodium 563mg23%
Total Carbs 33.5g11%
Fiber 5.7g23%
Sugars 8.9g
Protein 3.7g
Vitamin A 549%Vitamin C 85%
Calcium 13%Iron 11%

Saturday, November 3, 2012

3 Cheese Beer Soup


Halloween in Pittsburgh over the past 4 or so years has been very disappointing. We've had a whopping 3 trick or treaters over that time period between 3 different places we've lived. All tonight, the year Halloween gets moved due to inclement weather (thankyouverymuch Sandy).

One good thing about inclement weather, however, is all the wonderful "comfort" foods that just sound oh so very appealing. Those foods that keep you warm and full and don't make you want to run out to the store at 9 at night for ice cream. Not that we'd ever do that. No, but really, we wouldn't. We're far too lazy.

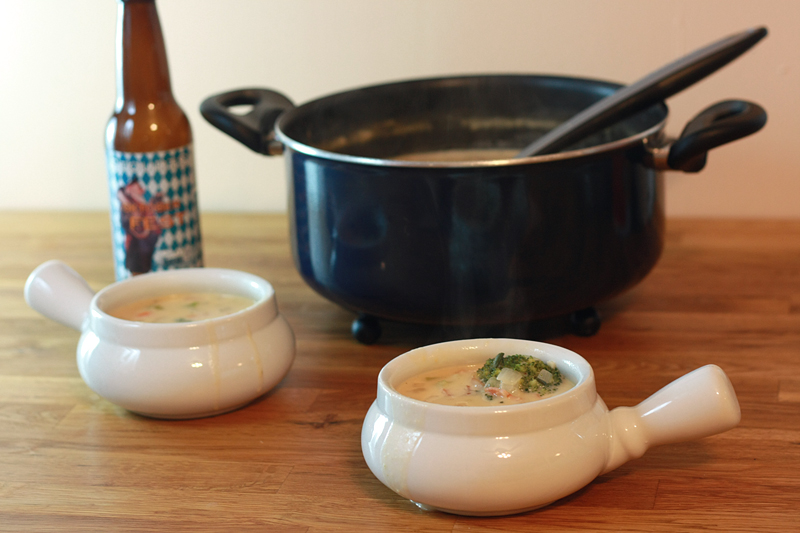
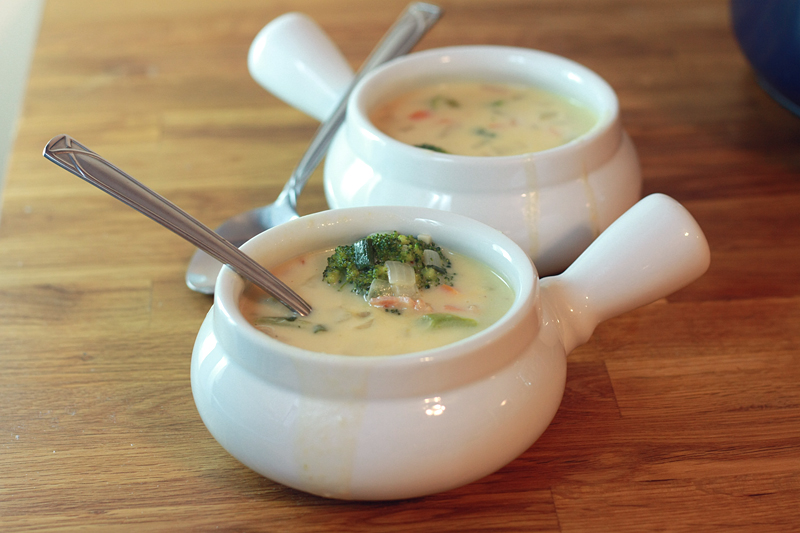
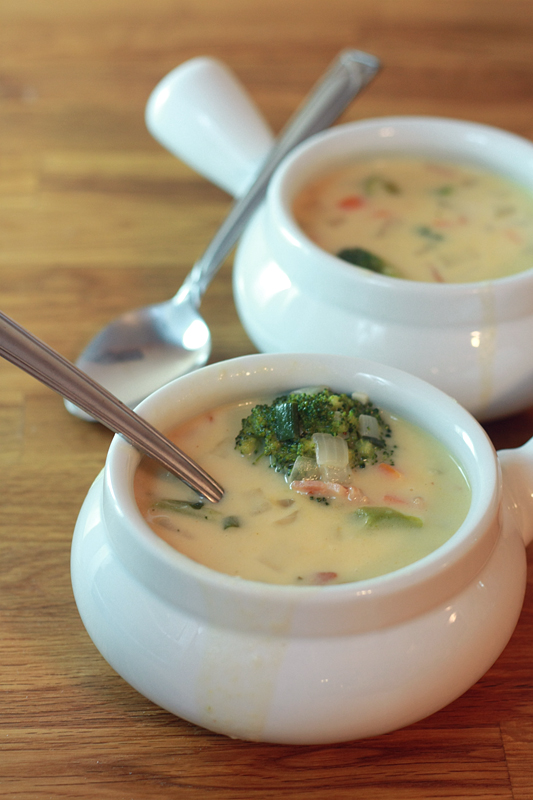
Although the sun is supposed to show it's face tomorrow, I have a feeling that the pre-Sandy week of 70+ degree temps are now long gone. But that's good news for comfort food. Especially when that category includes this soup. Creamy, cheesy, warm, and filling. And it has bacon. What else could you possibly want out of a soup? That's right. Nothing.


Three Cheese Beer Soup
Adapted from: Pass the Sushi

1 1/2 cups shredded sharp cheddar
1 1/2 cups shredded white cheddar
1/3 cup grated Parmesan cheese
4 tablespoons butter
1/3 cup onion, diced
1 medium carrot, diced
2 green onions, sliced
2 cloves garlic, minced
1/2 cup all-purpose flour
1/2 teaspoon dry ground mustard
5 cups fat-free reduced-sodium chicken broth
12 ounces beer
1 cup heavy whipping cream
1 1/2 cups frozen diced hash browns
1 1/2 cups small broccoli florets
10 slices bacon, cooked until crispy and drained, chopped
1/4 teaspoon hot sauce
1/2 teaspoon Worcestershire sauce

Shred cheddar cheeses and grate the Parmesan. Set aside for at least 30 minutes before using.

Meanwhile, in a stockpot over medium heat, melt the butter. Add the onions, carrot, green onions, and garlic. Stirring occasionally, cook for 8 to 10 minutes, or until vegetables are just turning soft.

Whisk in flour and mustard until mixture has thickened. While continuing to whisk, slowly pour in the broth. Continue whisking until no lumps remain. Once mixture begins to bubble, add the beer, cream, hash browns, and broccoli. Bring mixture to a boil, then reduce heat to medium-low and simmer uncovered for 5 minutes.

Stir in cheeses, a little bit at a time until completely melted. Add the bacon, hot sauce, and Worcestershire sauce. Mix together and cook for an additional 5 minutes.


Serves: 8


Yes, there is a little bit of prep-work that has to go into making this soup, but trust me, it is so worth it. Although for the most part, you could easily prep the chopped and shredded ingredients in advance to cut down on the prep time right before you start. Either way, we've made this soup multiple times and it has yet to get old.


Nutrition Facts
Serving Size 331g
Amount per serving
Calories 420Calories from fat 268
% Daily Value
Total Fat 29.8g46%
Saturated Fat 18.0g90%
Cholesterol 93mg31%
Sodium 952mg40%
Total Carbs 16.4g5%
Fiber 1.4g5%
Sugars 2.2g
Protein 18.2g
Vitamin A 47%Vitamin C 14%
Calcium 38%Iron 4%

Monday, October 29, 2012

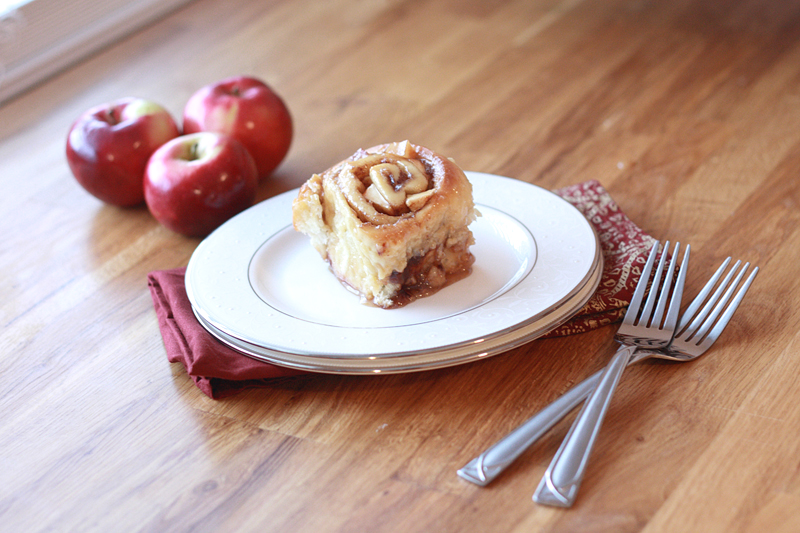
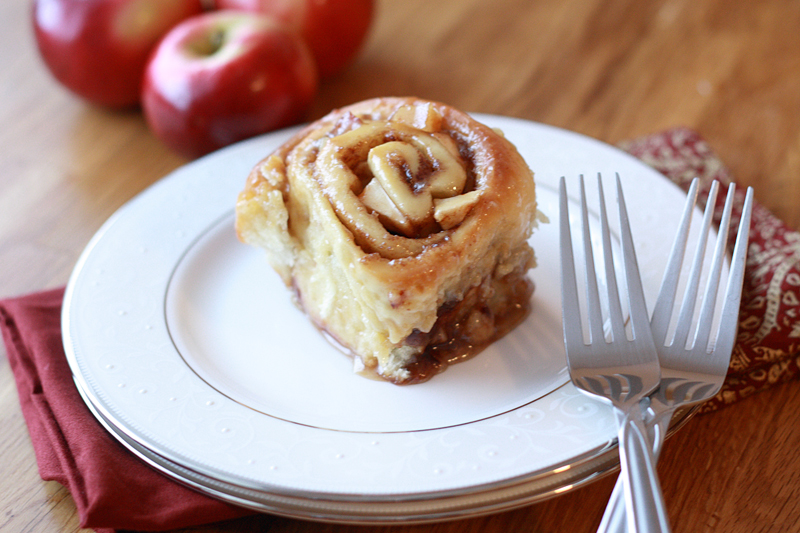
Caramel Apple Cinnamon Rolls


Over the past few years I have learned one very important lesson: if you're going to make sweets, make sure you have a place to take the majority of the batch. Otherwise, it will all end up in your belly. Which, while delicious, is probably not the wisest idea.

Occasionally, Adam and I argue on this point. This was one of those times.

Of the 12 cinnamon rolls, I gave away 5, and I totally suffered the husband stink-eye look when I gave any of them away. But, there's no way we each need 6 of these rolls. As much as we want to eat them.

I first saw the idea for this over on The Spiffy Cookie and couldn't get the thought out of my head. Of course throwing some diced apple into cinnamon rolls makes perfect sense, why oh why did I not think of this before? It took me less than a week to get into the kitchen and make my own.


Caramel Apple Cinnamon Rolls
Adapted from: Allrecipes.com

1 cup warm 1% milk (105 - 115 degrees F)
2 1/4 teaspoons active dry yeast
1/2 cup granulated sugar
2 eggs, at room temperature
1/3 cup butter, melted
1 teaspoon kosher salt
4 1/2 cups bread flour

1 cup brown sugar, packed
2 tablespoons ground cinnamon
1/3 cup butter, softened
4 small apples, peeled and diced (I used McIntosh)

1/2 cup whipping cream
1/3 cup granulated sugar
1 cup brown sugar
1 tablespoon butter

In a large mixing bowl, stir together the milk, yeast, and 1 tablespoon granulated sugar. Let sit for 5-10 minutes, or until the top of the mixture is foamy. Mix in the eggs, melted butter, salt, and remaining 1/2 cup of granulated sugar. Slowly add in the flour, one cup at a time, until a soft dough forms. If using a stand mixer, switch out the paddle attachment for the dough hook, add any remaining flour, and knead on medium speed for 6-8 minutes. Otherwise, turn out the dough onto a lightly floured work surface, add any remaining flour, and knead for 8-10 minutes, or until dough is slightly tacky and elastic.

Coat a large bowl with cooking spray. Shape the dough into a ball, then transfer to the bowl and cover with plastic wrap. Place bowl in a warm, draft-free area and let dough rise until doubled, 1-2 hours.

While the dough is rising, combine 1 cup brown sugar and cinnamon in a small bowl; set aside. Once the dough has doubled in size, turn out onto a lightly floured work surface. Punch down, then let cover and rest for 10 minutes.

Roll dough out into a 16 x 21 inch rectangle. Spread 1/3 cup butter evenly across the dough leaving a 1/4-inch margin on the shorter sides. Sprinkle the brown sugar and cinnamon mixture evenly across the butter. Spread diced apples across the dough, making sure they are evenly spaced. Starting from a short side, roll dough up, pressing the final 1/4-inch margin of dough gently into the roll to seal. Cut dough with a serrated knife into 12 slices. Coat a 9 x 13 inch baking pan with cooking spray. Transfer the rolls to the pan. Cover pan with a towel and let the rolls rise until they have about doubled, 30 minutes.

Preheat oven to 400 degrees F. Bake rolls for 15 minutes, or until tops are golden brown. Let cool slightly.

Meanwhile, in a small saucepan over medium-low heat, combine whipping cream, 1/3 cup granulated sugar, 1 cup brown sugar, and 1 tablespoon butter. Cook until the butter is completely melted and sugars have dissolved.

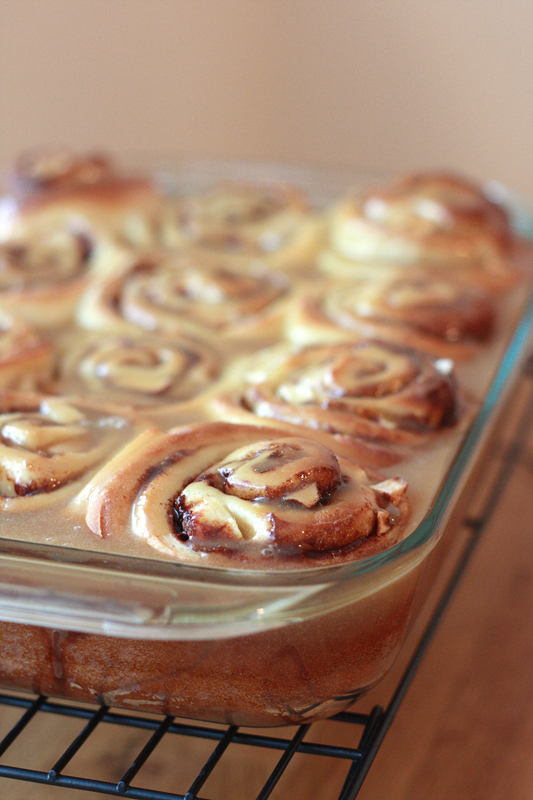
Drizzle tops of warm rolls with caramel sauce.


Serves: 12


I ended up using 3 apples for my rolls, but I really think adding more would really bring out the apple flavor (this change is reflected in the ingredient list above). I also think I might play around with the caramel sauce next time as mine turned out pretty thin.

Even with these additional changes I might make, there was no denying that these were some very tasty rolls. Perfect for a chilly fall day.


Nutrition Facts
Serving Size 183g
Amount per serving
Calories 480Calories from fat 128
% Daily Value
Total Fat 14.3g22%
Saturated Fat 8.5g43%
Cholesterol 64mg21%
Sodium 303mg13%
Total Carbs 82.6g28%
Fiber 3.2g13%
Sugars 43.8g
Protein 7.2g
Vitamin A 10%Vitamin C 4%
Calcium 8%Iron 15%

Friday, October 26, 2012

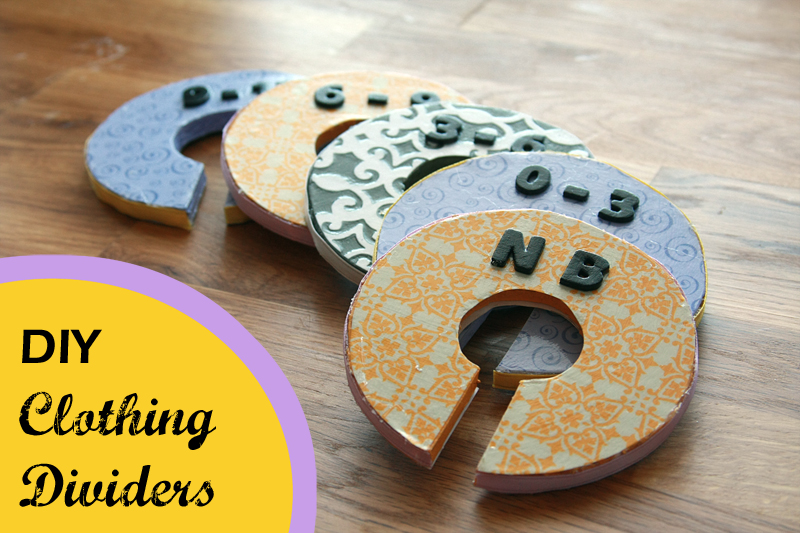
Crafty Fridays: DIY Clothing Dividers


Making the bedding isn't the only DIY thing I've decided to do for baby girl's nursery. There are other little oddball things here and there I would like to tackle -- not only to save money, but also so everything coordinates without being so matchy-matchy.

I came across a couple tutorials for clothing dividers for closets and thought they were super cute. Are they necessary? Absolutely not. But if it's something that's going to help me stay organized from the get-go rather than trying to figure it out later, then I'm all for it.


And you don't necessarily need to have a nursery in order to have an excuse to make these. I'm weirdly anal about my closet, and have everything organized by type of clothing and color. I still get grief about it from Adam. But it makes sense to me, so I stick with it. I can totally see making another set of these for myself someday, only with the adult version labels: tank tops, short sleeves, long sleeves, sweaters, etc. You could even use this for your guy's side of the closet with "polos", "dress shirts", "dress pants", and so on. That's what's so great about these - you can customize them any way you want.


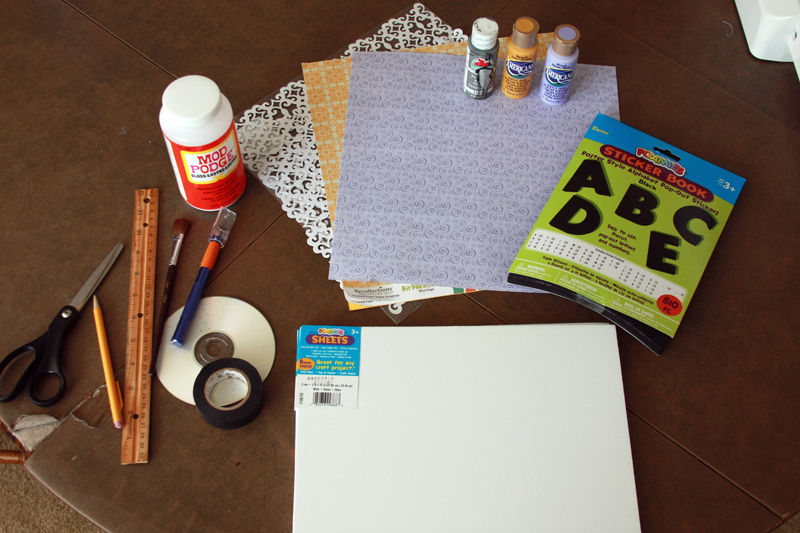
Things you need (to make 5 dividers)

2 6mm-thick pieces of foam board (9"x12")
An item or pattern in the shape you want your dividers to be (I used a CD red solo cup)
A circular item that is larger than the widest part of your closet bar (I have a 1" square bar, so I used the inside of a roll of tape, which was 1 1/2")
Pencil
X-acto knife
Cutting board or mat
Scrapbook paper (~2 sheets 12"x12" paper or however many print you want)
Acrylic paint (that matches your scrapbook paper)
Small paint brush
Scissors
1/2" foam number and letter stickers
Mod Podge (I used glossy, but matte would also work)
1/4"-wide ribbon that matches or coordinates with scrapbook paper
Hot glue gun


All of the tutorials for making these I had found involved using small wooden "O" letters from the craft store. While great in theory, how do you get them on the closet bar without taking it down? Unless you cut a wide enough gap at the bottom to slide it down over (and any time it spins it will fall off), you can't. Problem. So while wandering one of the 3 craft stores I went to yesterday, I discovered thick 6mm foam board. Perfect. It's thick enough to stand on it's own without bending, and it's pliable enough to cut a small slit into then twist slightly to get it onto the bar. Sold. (I also think thick cardboard, such as from a heavy duty box, would work here.)

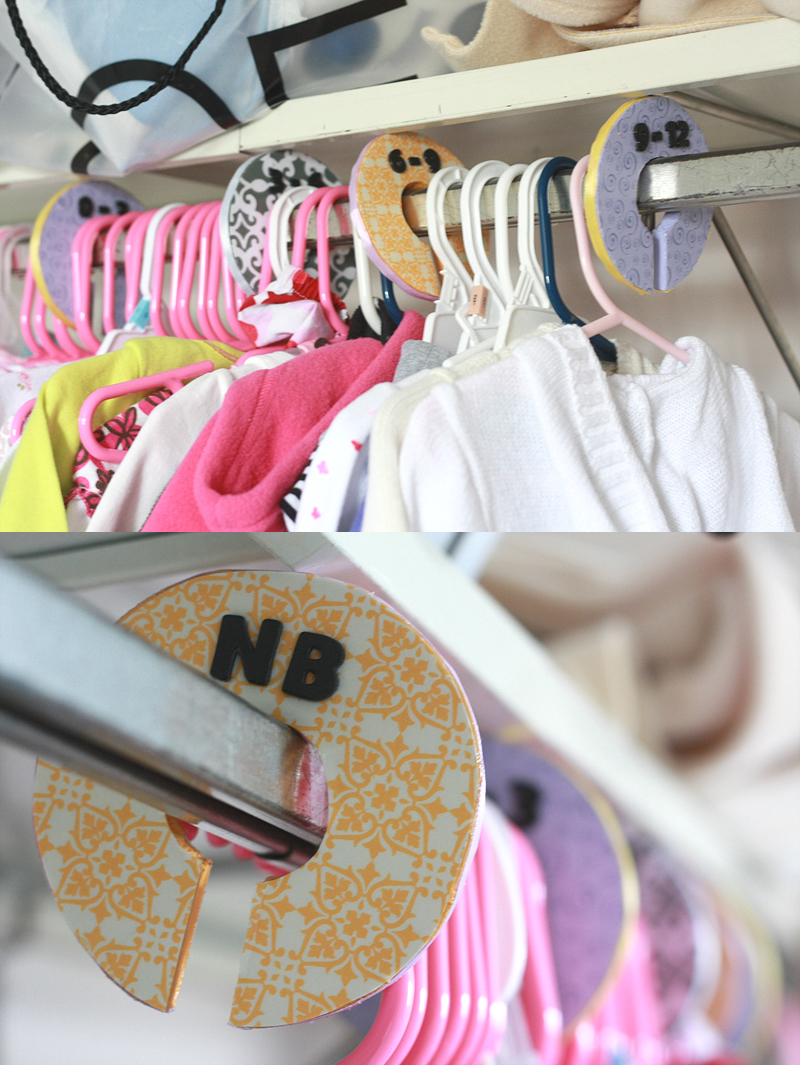
I decided to go with 5 dividers for my closet: newborn, 0-3 months, 3-6 months, 6-9 months, and 9-12 months. I figure after that point her growth with slow down considerably and I probably won't have as much hanging up. But, feel free to make however many you want, just adjust the amount listed above so you have enough materials.

The other great thing about using foam board is you can make these dividers into whatever shape you want. You could do squares, circles, ovals, stars, or any other custom shape. I went simple with circles.

Note: If you have a shelf over your closet bar, you may want to make sure your desired shape will fit. I did not do this and had to cut all my circles down to a smaller size.

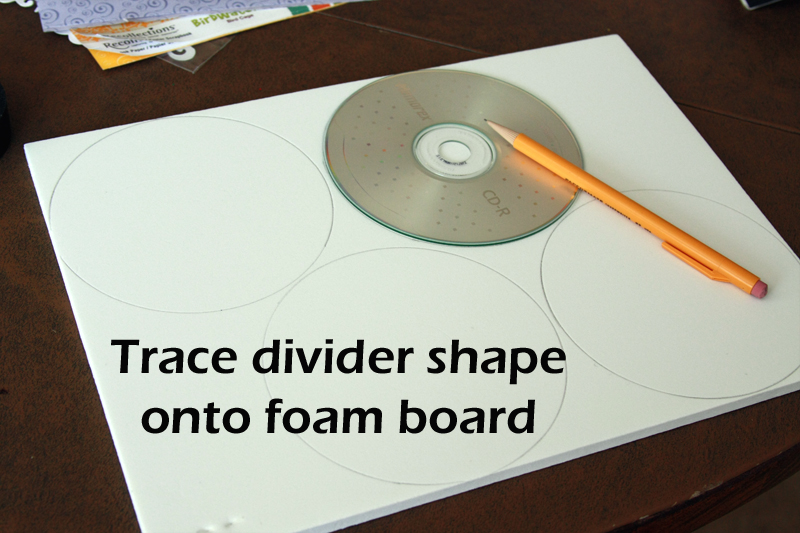
To start, trace your shape or pattern onto the foam board.


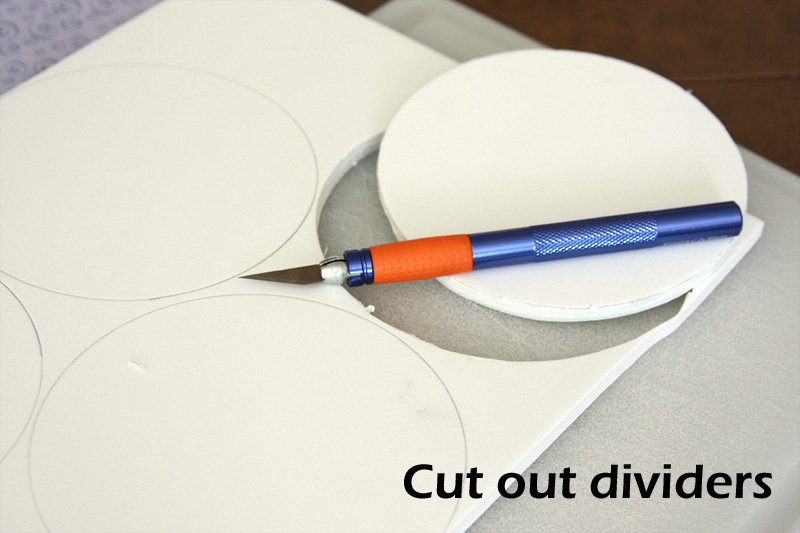
Using the X-acto knife, cut out each divider. Make sure you place your cutting board or mat underneath before you start!


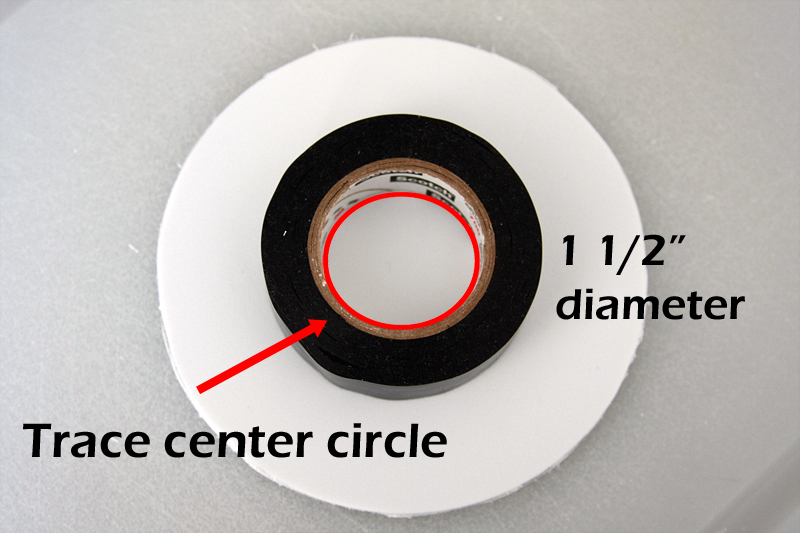
Now trace out the circles for the center hole for the bar to pass through. I used the inside of a roll of tape, which had a 1 1/2" diameter, but double check the size of your bar. Cut the circle out.


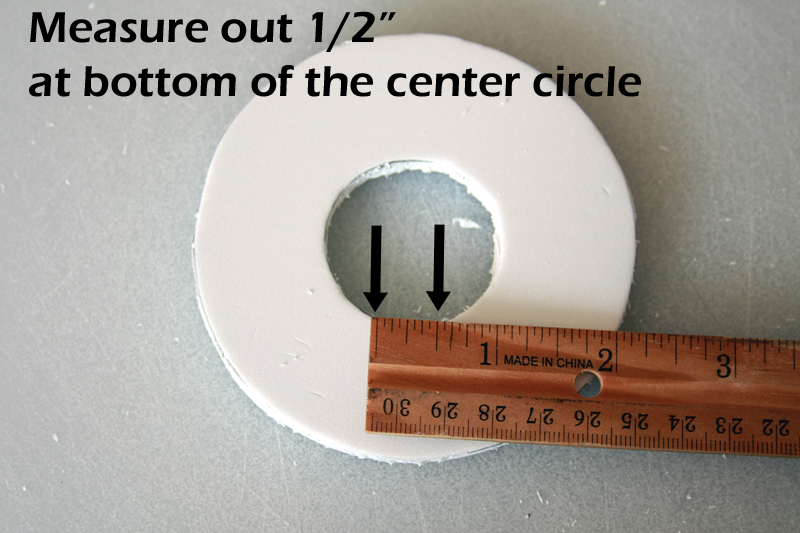
At the bottom of the inner circle, measure out 1/2" as centered as possible.


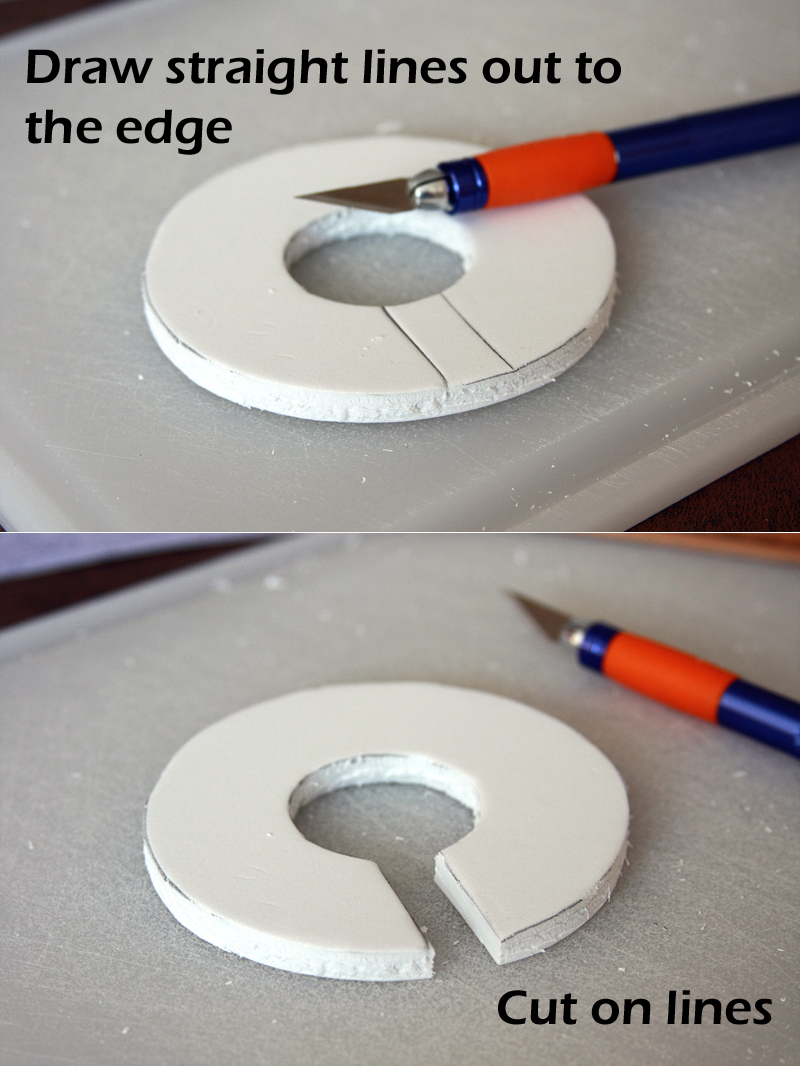
Draw lines from the 1/2" marks straight out to the outer edge. This will be the small gap that allows you to get the divider on the bar. Cut on the lines.


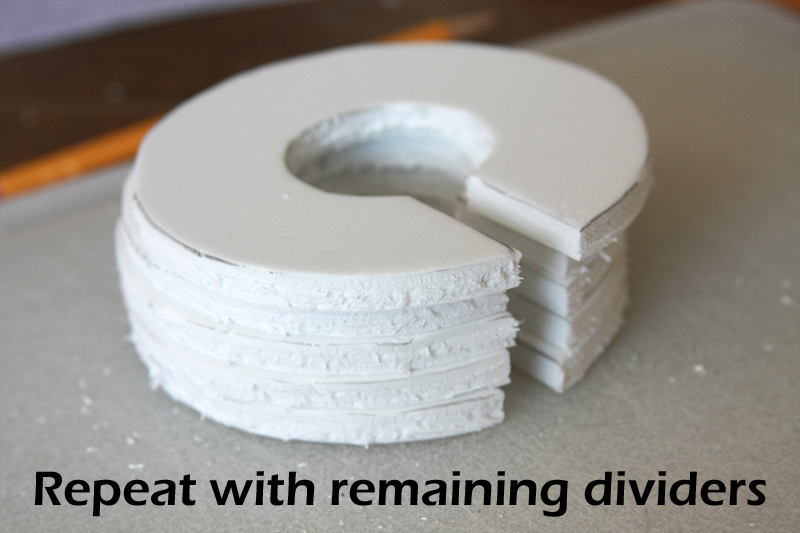
Repeat with remaining dividers. I simply traced the 1/2" portion I had cut out from the first divider rather than remeasuring each one.


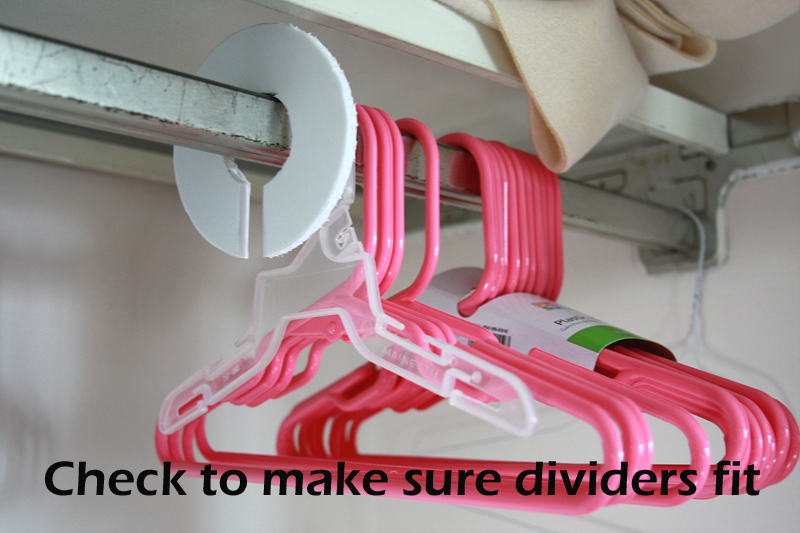
Check to make sure your dividers fit. It's pretty easy at this point to readjust - not so much if you finish them then realize they don't fit.


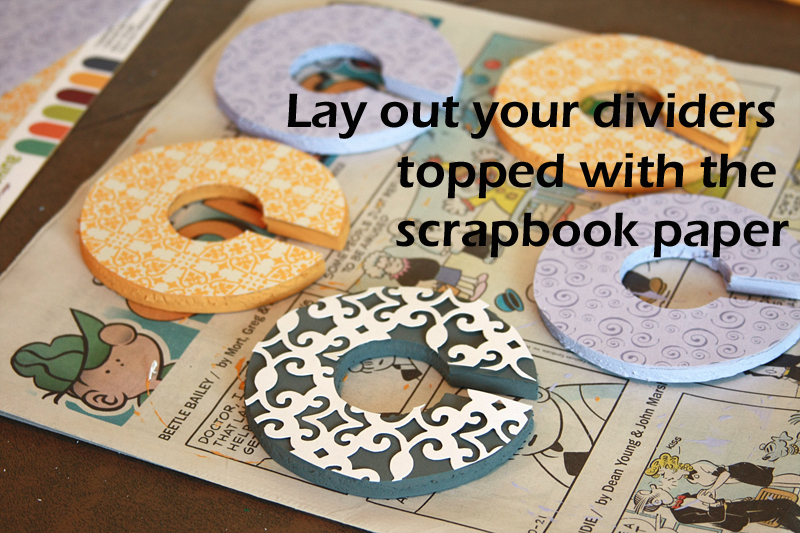
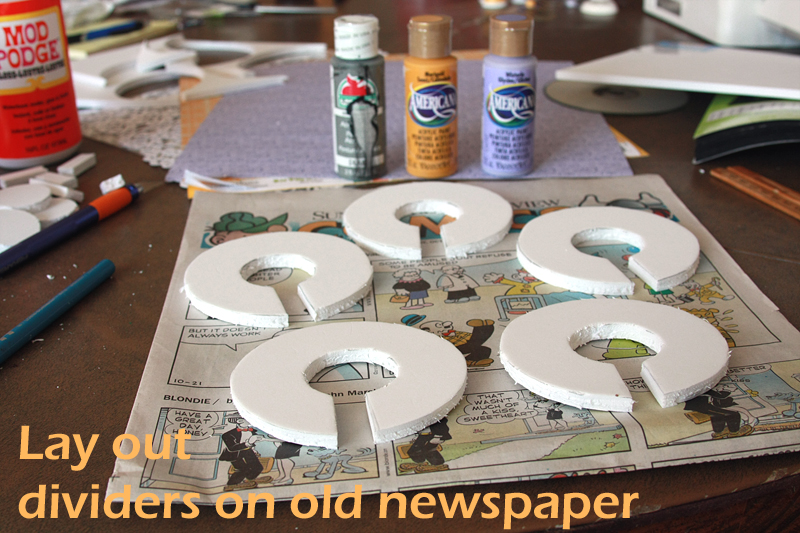
Now it's time to start decorating. Lay out an old piece of newspaper, and place the dividers on top in a single layer.


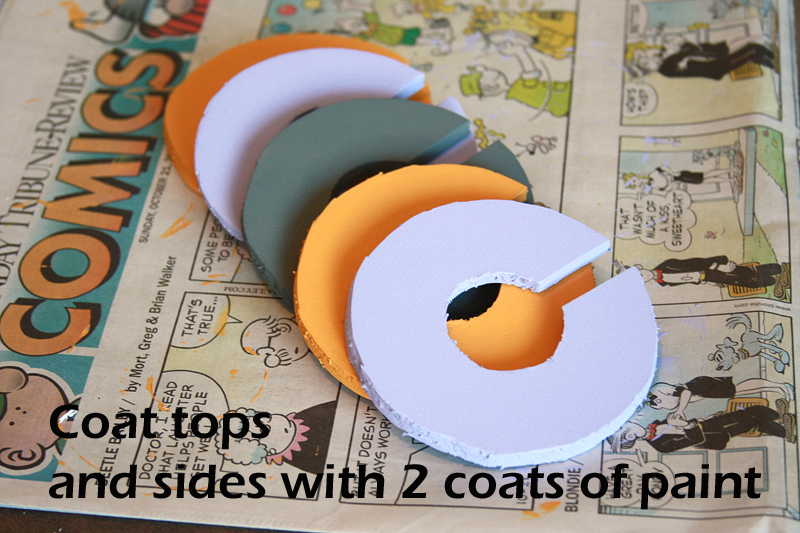
Coat each divider (including front, back, and sides) with 2 coats of paint. Let paint dry 1 hour between coats. This may seem pointless, and you could probably skip this step, but I like to have the back-up in case I misalign/mis-cut the scrapbook paper or ribbon. That way you don't see bright white peeking through.


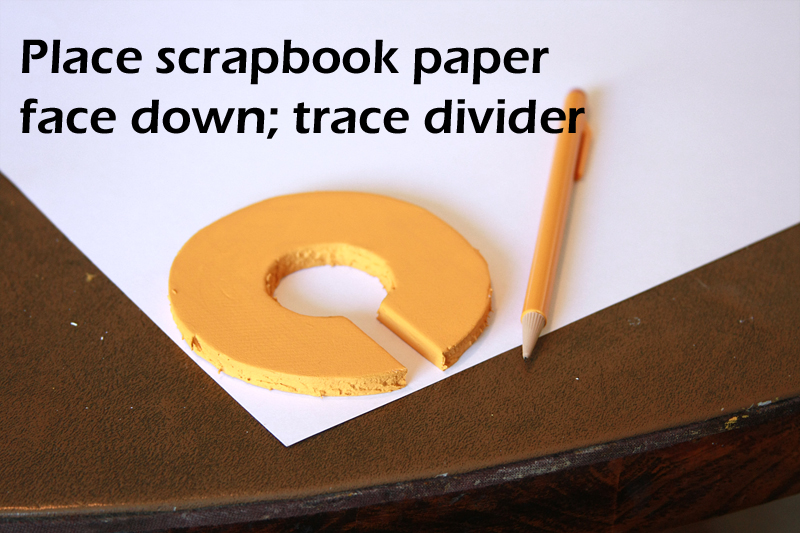
Once the paint is completely dry, place one divider on top of the matching scrapbook paper that is face down. Trace along all the edges of the divider (outer edge as well as gap and inner circle). I traced each divider separately, rather than just using my original shape, as I noticed I am unable to cut perfect circles. So just trace one side of each divider for now, we'll get to the other side in a bit.


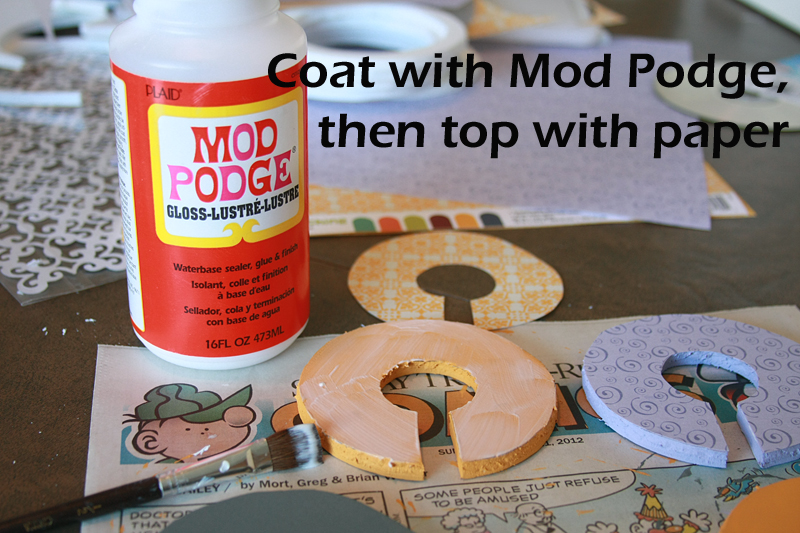
Cut out each traced piece from the paper, flip the divider over, and place the paper on top.


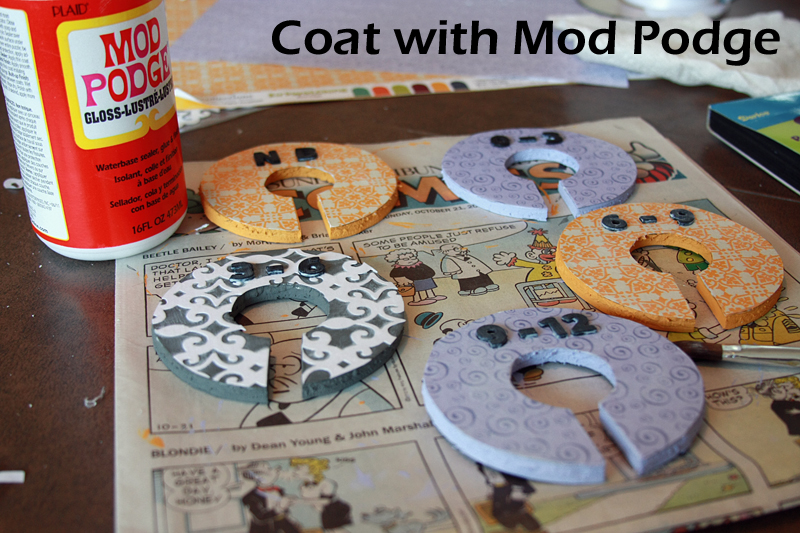
Remove the paper from the top of a divider and paint a thin coat of Mod Podge on the top (don't worry about the sides, we'll take care of those later). Place the paper back on top of the divider, lining up as best possible with the divider. Smooth out, making sure there are no air bubble trapped beneath. Repeat with remaining 4 dividers. Let dry for 15-20 minutes.


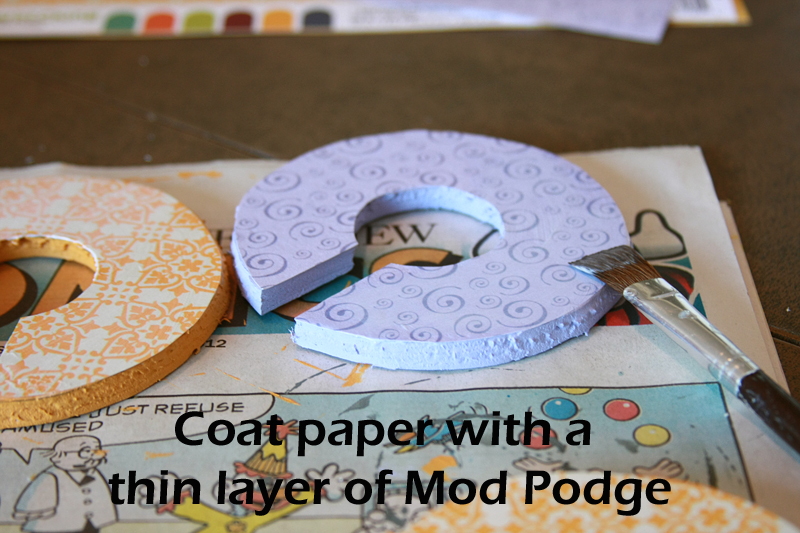
Once dry, coat the paper on each divider with a thin layer of Mod Podge. Let dry for 15-20 minutes (it should no longer be tacky to the touch).


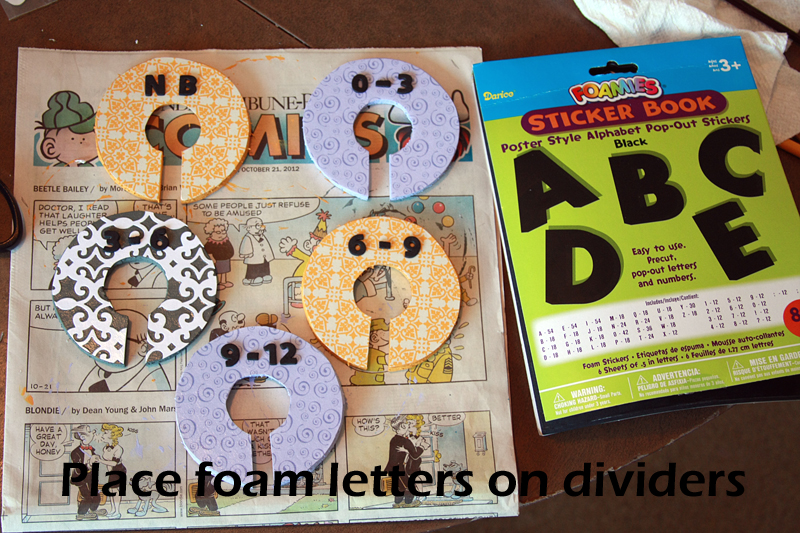
Place foam letters/numbers on each divider in desired location (I used the "I" cut in half for the dashes). You can do this before the first Mod Podge coat, but it's much easier to move them on top of the Mod Podge if necessary. You can also wait and put your wording on after all the Mod Podge coats, but I just don't trust the stickiness to last very long, so I'm using the Mod Podge to help glue them to the dividers. (You could also use letter stickers here, but I couldn't find any I liked in the right size, and they're more expensive.)


Top with another thin coat of Mod Podge, making sure to go around the sides of the letters/numbers. Let dry 15-20 minutes. Repeat 3 more times.


After you finish one side, flip over and repeat with the other side. When finished, each side should have a total of 5 coats of Mod Podge.

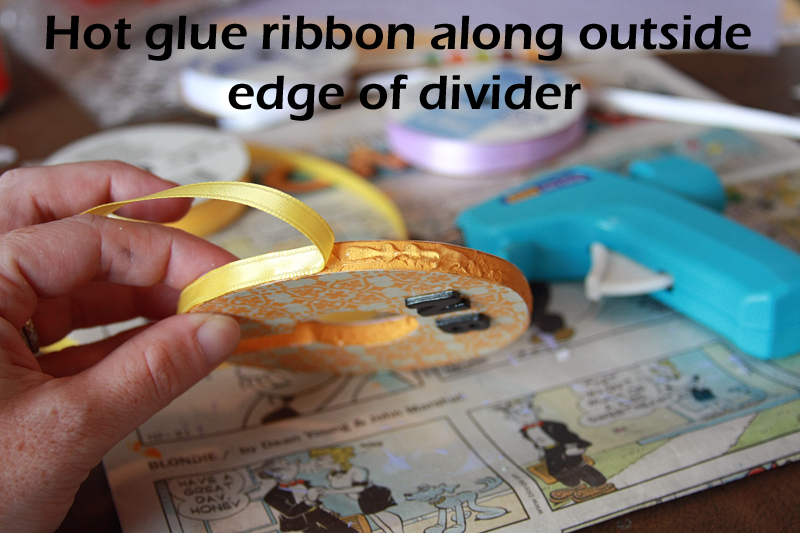
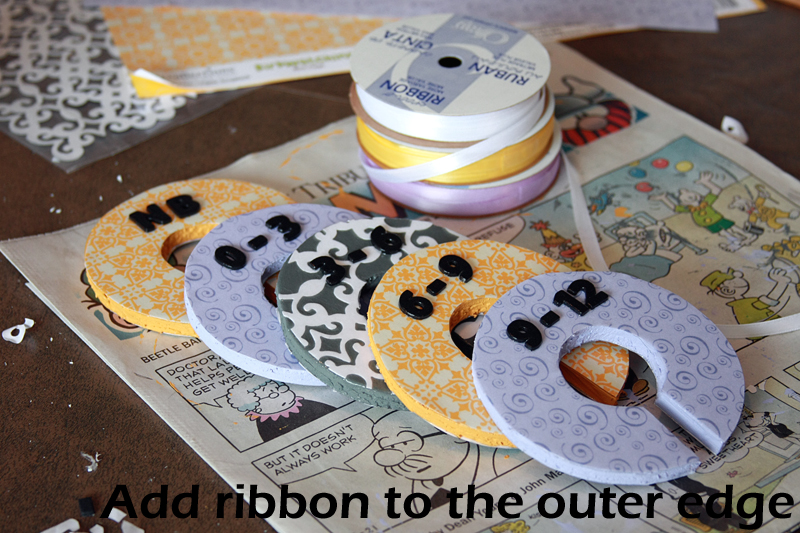
Last step here! Pick out coordinating 1/4"-wide ribbon to cover up those lovely rough edges. After covering all the edges with matching ribbon, I decided a coordinating-but-not-matching color actually looks better. So ripped it all off and did it again.


Using a hot glue gun (I like the low heat version), generously glue the ribbon along the outer edge of each divider. Press down firmly.


And ta da! Finished clothing dividers. Place them in your closet and admire your handy work.


Final price to make your own dividers?

2 6mm-thick pieces of foam board (2 @ $0.89) = $1.78
3 sheets Scrapbook paper (3 @ $0.59) = $1.77
3 colors acrylic paint (3 @ $1.00) = $3.00
1/2" foam number and letter stickers = $2.39
3 spools 1/4"-wide ribbon (3 @ $0.50) = $1.50

Final Price = $10.44


Of course, if you plan ahead and hit up some sales or use 40% off coupons, you can always do this for cheaper. In comparison, you can buy 5 plastic rings with stickers printed and stuck on for about $13.50 from Etsy. Not a huge difference in the long run, but I still like picking my own coordinating pieces.
Wednesday, October 24, 2012

Chocolate Peanut Butter Whoopie Pies


A little over a month ago, we found out the bad news that one set of our good "couple" friends was moving. To Texas. Forever far away. Sad day.

When you're not from the area originally, it's kind of nice to have other friends in the same boat as you that you can lament to about the horrible drivers, ridiculous roads, and Pittsburgh-ese accent. It's also nice when these friends will come over to help you finish getting ready for a beer tasting party or help you throw a baby shower or play soccer with you on Thursday nights.

We found out about their decision with not a ton of time before the husband left to begin training at his new job, so his going away party was unfortunately squeezed into the middle of a week when we knew everybody could make it. (I swear free weekends are like gold around here!) However, with the departure date for his wife looming at the end of this month, some of our other friends decided to throw one last small get together. I, of course, waited until the last minute to decide on what to bring, but I knew it had to be dessert.
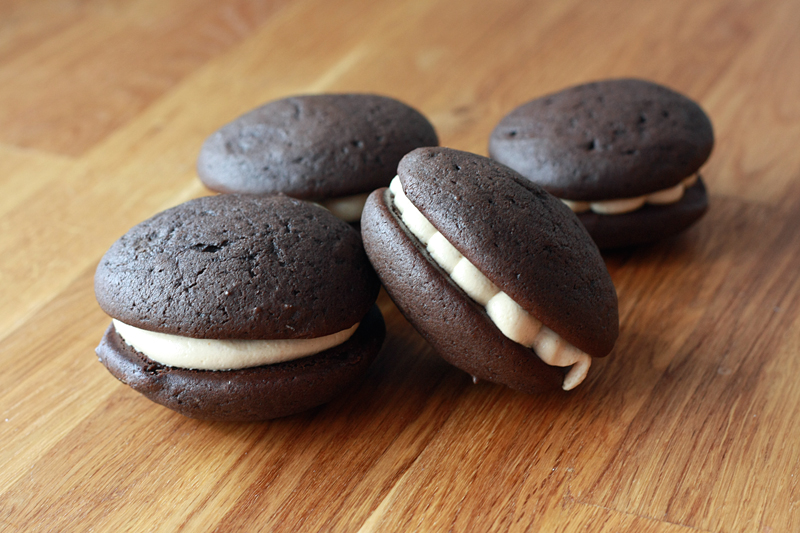
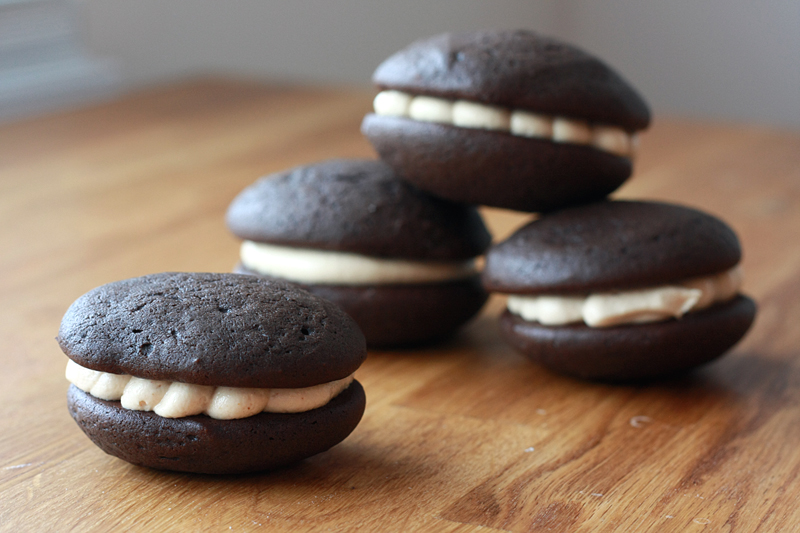
After some scrolling through my recipes and pins on Pinterest, I opted to go with these Chocolate Peanut Butter Whoopie Pies. a) They're portable and easy to grab as you walk by, b) I knew she was a fan of the chocolate peanut butter combo as she's made a killer chocolate peanut butter pie before, and c) I've been craving baby girl loves her some chocolate and peanut butter together. What can I say? It was an easy decision.

Chocolate Peanut Butter Whoopie Pies
Adapted from: Eats Well with Others

2 cups all-purpose flour
1/2 cup Hershey's Special Dark cocoa powder
1 1/4 teaspoons baking soda
1 teaspoon salt
1/2 cup unsalted butter, at room temperature
1/2 cup granulated sugar
1/2 cup brown sugar, packed
1 large egg
2 teaspoons vanilla extract, packed
1 cup buttermilk

1/2 cup unsalted butter, at room temperature
7 ounces marshmallow fluff
1/2 cup smooth peanut butter
1/2 teaspoon salt
1 cup powdered sugar
1 teaspoon vanilla extract

Preheat oven to 350 degrees F. Line two baking sheets with parchment paper (or silpats), set aside.

In a medium bowl, combine the first four ingredients (through salt).

In the large bowl of a mixer, cream together the butter, granulated sugar, and brown sugar until light and fluffy, 3 - 5 minutes. After scraping down the sides of the bowl, add the egg and beat on low for one minute. Stir in vanilla.

Add half of the flour mixture to the mixing bowl and stir at a low speed. Once ingredients have mostly combined, slowly pour in the buttermilk. As soon as the buttermilk is fully incorporated into the batter, add the remaining flour mixture. Stir until all ingredients are well blended.

Scoop a heaping tablespoon of batter onto the prepared baking sheets. Leave at least 1 inch of space between cookies. Bake for 12-14 minutes, or until centers of cookies are cooked, but still soft. Repeat with remaining batter. Allow cookies to cool for 10 minutes on the pan before transferring to a wire cooling rack to cool completely.

Meanwhile, in a large bowl, beat together 1/2 cup butter, marshmallow fluff, peanut butter, and salt. Once there are no more lumps, slowly add in the powdered sugar and vanilla. Increase mixer speed to medium and beat for 3 minutes, or until fluffy.

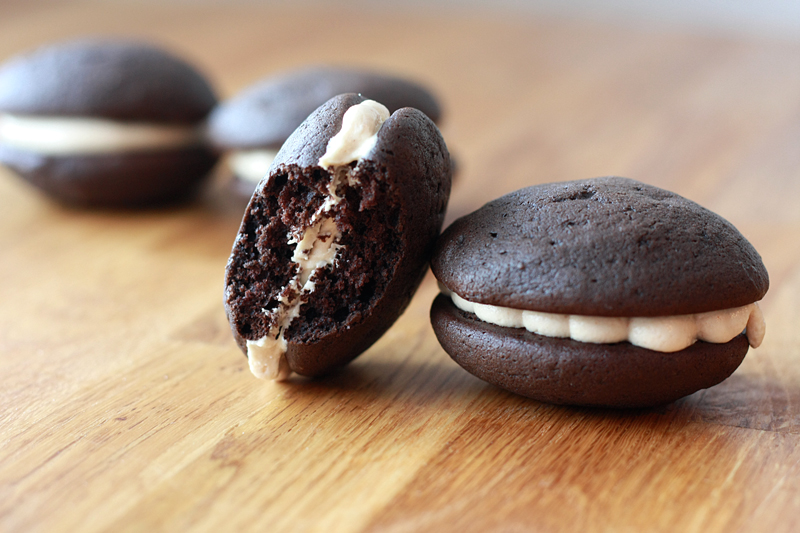
Once the cookies are completely cool, pipe the filling onto the upturned bottom of one of the cookies. Top with a second cookies. Repeat with remaining cookies and filling.


Makes: 18-22 whoopie pies


The problem with great dinners thrown by friends is that there is never enough room to eat everything you want. As was the case this time. But, after sitting around the awesome fire pit for a while, there seemed to be juuuust enough room for dessert. Several disappearing and one toasted whoopie pie later, and it was determined that these were a hit. You know they're good when people who have a ton of leftovers actually want to keep a few for later.


Nutrition Facts (1 batch = 18 whoopie pies)
Serving Size 81g
Amount per serving
Calories 301Calories from fat 134
% Daily Value
Total Fat 14.8g23%
Saturated Fat 7.6g38%
Cholesterol 38mg13%
Sodium 395mg16%
Total Carbs 39.1g13%
Fiber 1.2g5%
Sugars 23.1g
Protein 4.1g
Vitamin A 7%Vitamin C 0%
Calcium 3%Iron 6%

LinkWithin

Related Posts with Thumbnails
 
Pin It button on image hover