Saturday, August 14, 2010

Pasta with Roasted Garlic, White Cheddar & Wine Sauce


Shhh don't tell Adam -- I have a little crush. Okay, maybe a big one. On roasted garlic. The first time I made it (for the Manchego Cheese and Garlic Dogs) I was worried that my place would just reek of garlic for days. But it didn't. I was nervous that adding two whole heads of garlic to a dish would completely overpower it. But it didn't. Instead, those little cloves of garlic happily popped out of their wrapping, mashed up beautifully, added a wonderful mellow and sweet garlicky flavor to the dish. So when I saw another dish pop up on my Google Reader incorporating a ton of my favorite ingredients, I knew I had to try it.



Pasta with Roasted Garlic, White Cheddar & Wine Sauce

From: Annie's Eats


8 oz. penne, or other medium-sized pasta
1 1/2 tbsp. butter
1/4 cup roasted garlic paste (made from 2 heads of garlic)*
1 1/2 tbsp. flour
1/4 cup dry white wine
1 cup low-sodium, fat-free chicken broth
1 cup white cheddar cheese, shredded
1/2 pound frozen broccoli cuts, thawed
1 (4 oz) boneless, skinless chicken breast, cooked and cut into bite size pieces
Salt and pepper, to taste

Bring a large pot of salted water to boil. Cook the pasta until al dente according to the package directions.

Meanwhile, in a large skillet or saucepan set over medium heat, melt the butter. Once the butter is melted, whisk in the roasted garlic paste and cook just until fragrant, 30-60 seconds. Whisk the flour into the mixture and cook, stirring constantly, until the mixture begins to turn golden brown, 1-2 minutes. Stir the white wine and broth into the pan. Bring to a simmer and cook, stirring frequently, until slightly thickened, about 2 minutes. Whisk in the cheddar, stirring until melted. Season the sauce with salt and pepper to taste.

Mix in the broccoli and chicken pieces, and cook just until heated through. Mix in the cooked pasta until evenly coated with the sauce. Serve warm.

Serves: 4

*To make roasted garlic paste, peel the outer papery skins off two heads of garlic, leaving the heads still intact. Slice about a quarter off the top of each head so that all of the cloves are partly exposed (may have to individually remove the tops off the small outer cloves). Places the heads on a square of foil and drizzle with olive oil. Wrap the heads in foil and bake at 350˚ F for one hour. Remove from the oven and let cool. Once cool enough to touch, squeeze the garlic cloves out of the peels and smash with a fork to make roasted garlic paste.


It's cheesy and tangy from the wine with that nice mellow garlic flavor that sneaks through. Definitely ready to make this dish again in the very near future.



Nutrition Facts
Amount per serving
Calories 477Calories from fat 152
% Daily Value
Total Fat 16.9g26%
Saturated Fat 9.4g47%
Cholesterol 119mg40%
Sodium 586mg24%
Total Carbs 48.0g16%
Dietary Fiber 2.2g9%
Sugars 1.5g
Protein 31.2g
Vitamin A 16%Vitamin C 100%
Calcium 30%Iron 21%

Thursday, August 12, 2010

Cookies & Cream Ice Cream Cone Cupcakes


Is it just me or is this summer a hot one? My little cupcake even agrees.


While most of my friends like to come home, turn on the TV and watch shows such as American Idol, The Bachelor/ette, any reality TV show on MTV... our TV gets turned to the Food Network. Or well, after we watch Lie to Me, or Leverage, or one of our other DVR-ed shows. Yes, we are "those kids", party of 2. We are more into the late night Food Network -- Iron Chef, The Next Food Network Star, and Good Eats (one of Adam's favorites). One of the new shows they debuted this summer was Cupcake Wars. I figured, I like cupcakes, let's watch it.

Definitely not what I was expecting, but interesting nonetheless. In one of the first episodes, one of the bakers made Root Beer Float cupcakes -- root beer cupcakes with a creamy frosting with a cherry on top. In an ice cream cone. All I could think was, did that just happen? I would have never thought of that! Right then and there I decided I had to try it. Well, come to find out, it's not exactly a new trick. They even make pans to hold the cones while baking.

When I decided to make these, I was faced with a dilemma. What flavor should I make? It has to be your typical ice cream flavor, or it's just going to be weird. Chocolate? No, I make those too often. Vanilla? Eh. Then I remembered I had a recipe for cookies and cream cupcakes starred in my Google Reader. Sold.


Cookies and Cream Ice Cream Cone Cupcakes
Adapted from: Annie's Eats


For the cupcakes:
2¼ cups all-purpose flour
1 tsp. baking powder
8 tbsp. butter, at room temperature
1 2/3 cup sugar
3 large egg whites, at room temperature
2 tsp. vanilla extract
1 cup milk
20 Oreo cookies, rough chopped (I quarter them)
24 regular-sized sugar ice cream cones

For the frosting:
8 oz. reduced-fat cream cheese, at room temperature
6 tbsp. butter, at room temperature
1 tbsp. vanilla extract
4 cups confectioners’ sugar, sifted
2 tbsp. heavy cream

For garnish:
Oreo cookie crumbs
24 Oreo cookies, cut in half

Preheat the oven to 350˚ F. Place the ice cream cones standing up on two baking sheets.

In a medium bowl, combine the flour and baking powder; stir together with a fork to blend and set aside. In the bowl of an electric mixer, combine the butter and sugar and beat together on medium-high speed until light and fluffy, about 2 minutes. Blend in the egg whites one at a time, beating well after each addition. Blend in the vanilla extract. With the mixer on low speed, beat in half of the dry ingredients just until incorporated. Add the milk and beat just until combined, then mix in the remaining dry ingredients. Gently fold in the chopped Oreos with a rubber spatula until evenly incorporated, being careful not to over-mix.

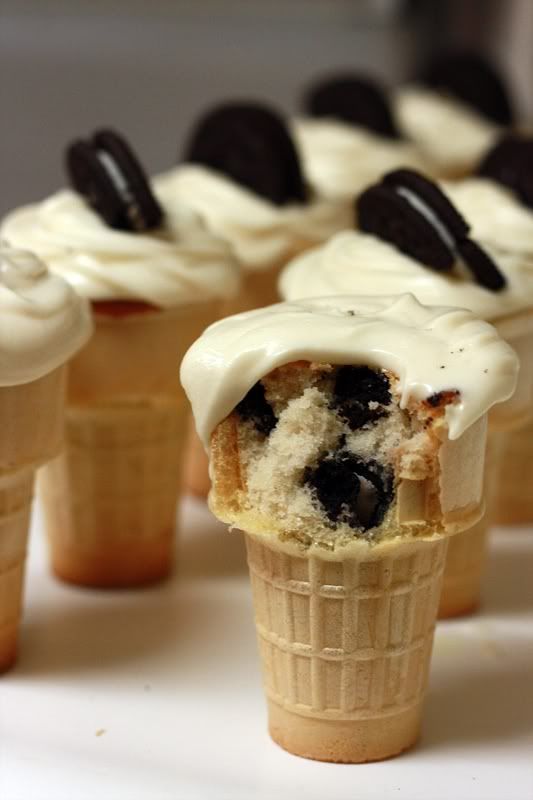
Fill each ice cream cone to the top with batter. (Don't worry about trying to get batter down into the bottom of the cone, the batter will spread and fill it during baking.) Lightly cover pans with foil. Bake for ~15 minutes; remove foil and bake for another 5 minutes, or until a toothpick inserted in the center comes out clean. (These may take longer than usual to bake.) Allow to cool on the pans 5-10 minutes, then transfer to a wire rack to cool completely.

To make the frosting, combine the cream cheese and butter in the bowl of an electric mixer and beat on medium-high speed until smooth, about 1 minute. Blend in the vanilla extract. Beat in the confectioners’ sugar until incorporated and smooth, 1-2 minutes. Add the heavy cream to the bowl and beat on medium-low speed just until incorporated, then increase the speed to medium-high and whip for 4 minutes until light and fluffy, scraping down the sides of the bowl as needed.

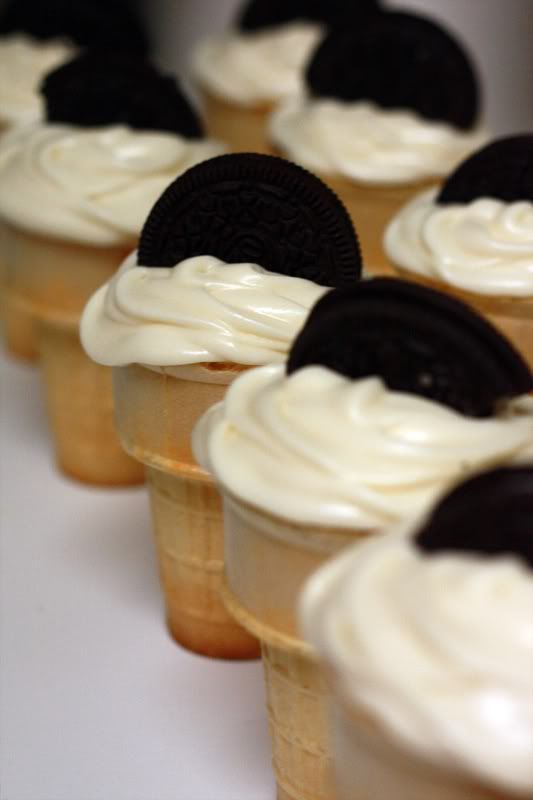
Frost the cooled cupcakes as desired. Sprinkle with Oreo crumbs and garnish with Oreo halves.

Makes: 24 cupcakes


So yes, this whole process was a trial and error. My first 12 cupcakes turned out a bit dark, so I added foil. And then I had one cone (that had to be in the back of course) that just insisted on falling over several times while trying to put these in the oven. Frustrating, yes.

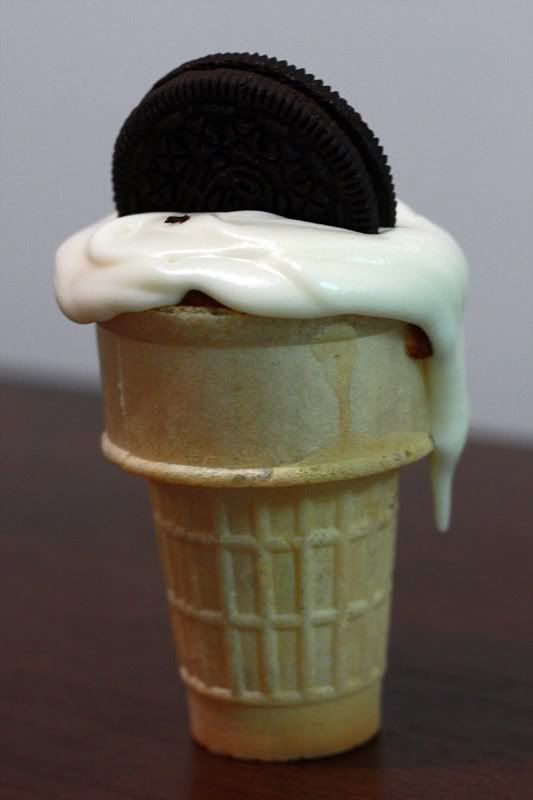
I think these would be super cute at a kid's birthday party. Although you kind of do have to get used to the idea of biting into an ice cream cone and getting cake, not ice cream. It's a little weird at first. And I need to figure out a way to get some frosting down into the bottom of the cone. The cup part of the cone was great, and you had a good frosting-to-cake ratio, but once you get down near the bottom, there's no frosting left. I guess that wasn't too bad of a thing though, as the actual cupcake was really delicious. The frosting wasn't bad, but it was very soft. That plus the high temps and humidity around here... well see the first picture in this post.

I definitely want to try this idea out again. I just need a party and a way to get them there...


Nutrition Facts
Amount per serving
Calories 475Calories from fat 143
% Daily Value
Total Fat 15.8g24%
Saturated Fat 7.7g39%
Trans Fat 0.8g
Cholesterol 31mg10%
Sodium 256mg11%
Total Carbs 78.0g26%
Dietary Fiber 1.7g7%
Sugars 42.3g
Protein 6.0g
Vitamin A 7%Vitamin C 0%
Calcium 4%Iron 13%

Wednesday, August 11, 2010

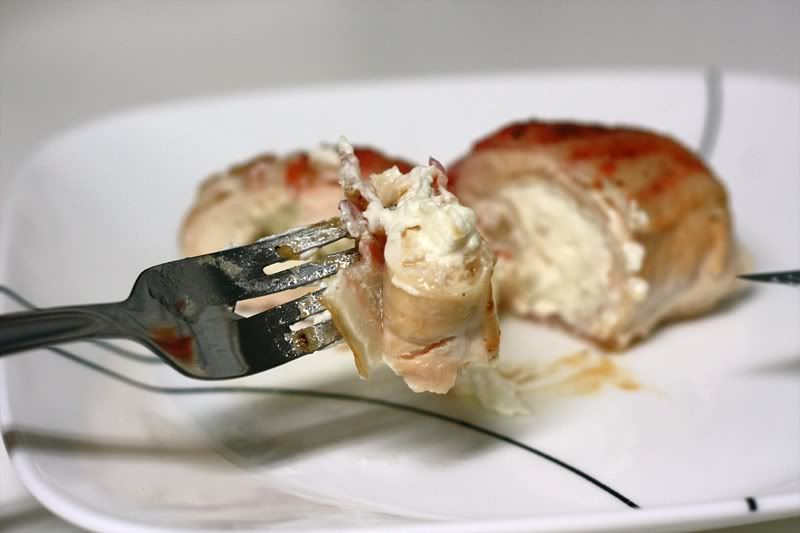
Chicken Bacon Roll-Ups


As Adam and I were driving to our soccer game the other night, we passed by an Outback Steakhouse, and I noted how we have never once been there. Don't get me wrong, it's not that they have bad food, but of all things that I don't crave, steakhouse-type meals top that list. And the fact that Outback is notorious for have ridiculously high calorie-content foods doesn't help those cravings all that much either.

Every once in a while I do crave a nice meaty entrée. Especially when there is bacon involved. Wrapped around chicken. With a cream cheese filling. My interest is piqued.


Chicken Bacon Roll-Ups

Adapted from: Taste of Home


12 slices of bacon
6 (4 ounce) boneless, skinless chicken breasts
1 (8 ounce) package reduced-fat cream cheese
1 cup sweet onion, diced
2 tsp olive oil
Dash of salt and pepper

In a large skillet over medium heat, cook bacon until done but not crisp. Remove to paper towels to drain.

In a small skillet, heat the oil over medium heat. Sauté the onions until translucent, about 5 minutes. Set aside.

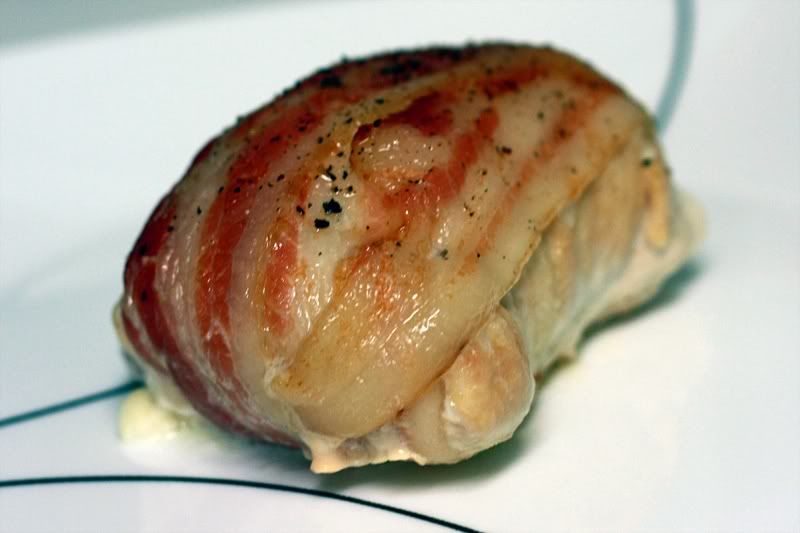
Flatten chicken to 1/8-in. thickness. Spread 1 1/3 ounces cream cheese down the center of each chicken breast; top with onion. Roll up from a long side; tuck ends in. Sprinkle with salt and pepper. Wrap two bacon strips around each piece of chicken; secure with toothpicks.

Place in a greased 13-in. x 9-in. baking dish. Bake at 350° for 35-40 minutes or until a meat thermometer reads 170°.

Serves: 6


I can't say that this dish fared much better in the calorie department, but it had bacon, so taste-wise, it wins hands down. The only thing about this dish that kind of got me was the crunchy fresh onions. Thus I have adjusted the recipe above to reflect a nice short sauté to soften them up a bit and bring out their sweetness. I think it would pair much nicer texturally with the cream cheese. Maybe some day when I'm ready to splurge on some meaty-fatty-goodness I'll give this another try.


Nutrition Facts
Amount per serving
Calories 675Calories from fat 421
% Daily Value
Total Fat 46.8g72%
Saturated Fat 18.6g93%
Trans Fat 0.0g
Cholesterol 205mg68%
Sodium 1520mg63%
Total Carbs 3.6g1%
Sugars 0.9g
Protein 56.9g
Vitamin A 12%Vitamin C 2%
Calcium 6%Iron 15%

Tuesday, August 10, 2010

Adam's First Guest Post: Homemade Donuts


If you couldn't tell by the ridiculous amount of good food presented in this blog, I eat pretty well for someone not far removed from bachelor-hood. Although Pizza Rolls and Hamburger Helper are delicious in their own way, I've grown accustomed to the fantastic meals I'm treated to almost nightly. That being said, I don't often get to contribute a recipe of my own to the rotation.

Growing up I was a fairly active Boy Scout. This was where I first was taught to plan a menu, shop for the ingredients, and throw something together out in the woods somewhere. Now anyone familiar with attempting to feed large amounts of young men, and the leaders who've had to corral them all day, knows that food needs to be delicious and in great supply. The following recipe was often used as a way to mainline dessert/breakfast into the bellies of the horde of scouts that would descend upon the camp kitchens at every meal. There's something, maybe a few things, to be said for the beauty and simplicity of a recipe that can be created via assembly-line...

- Adam


Homemade Donuts


1 can refrigerated biscuit dough
3-4 cups vegetable oil
3/4 cup cinnamon sugar (1/4 cup sugar to 4-ish teaspoon cinnamon ratio, depending on taste)

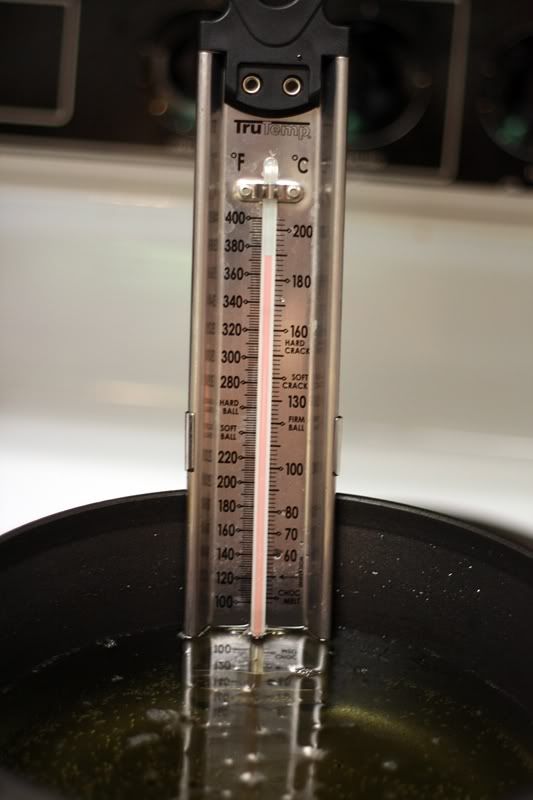
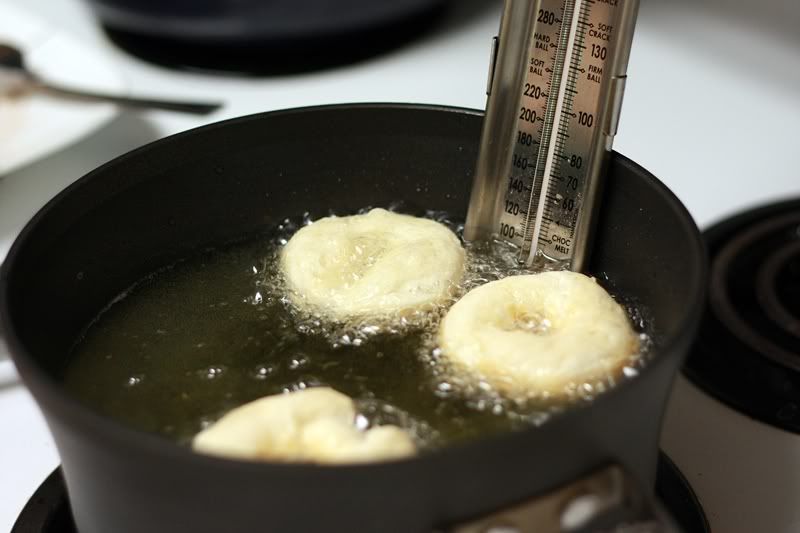
Heat oil to 370-375F (187.8-190.56C, sorry I'm an engineer) in a medium sauce pan. Using a candy thermometer throughout the process is recommended.


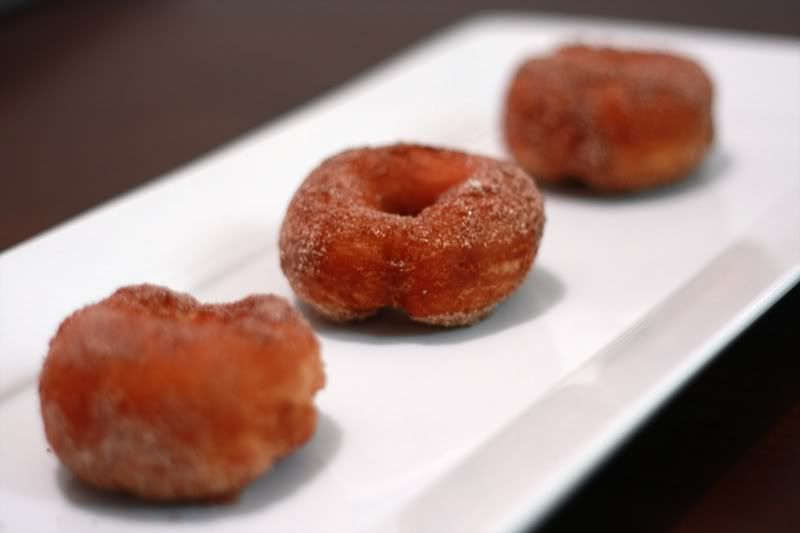
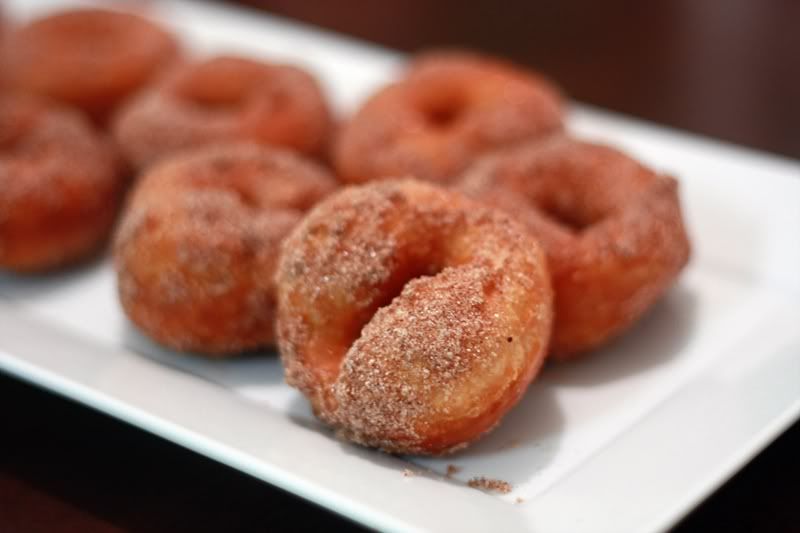
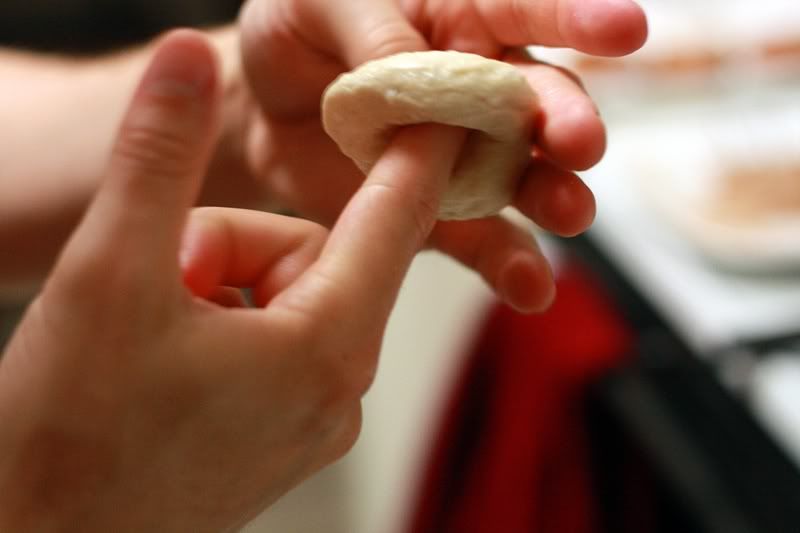
Take each round of biscuit dough and divide equally into three pieces. Poke a hole in the middle of each respective piece with a forefinger (using the middle is accepted if you're not a big fan of your guests). Proceed to spin the ring of dough on your finger to enlarge the diameter of the hole to 3/4" or 1". The larger the hole, the crispier the donut and the greater the surface area for the cinnamon sugar to adhere to.


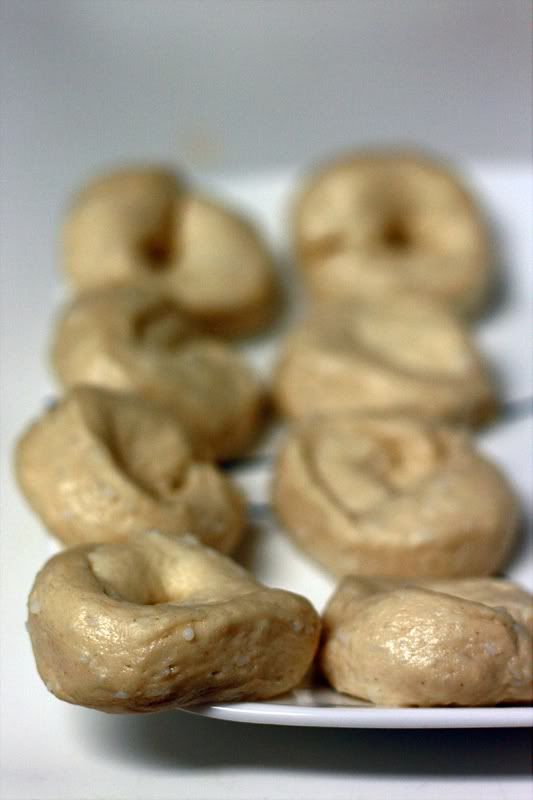
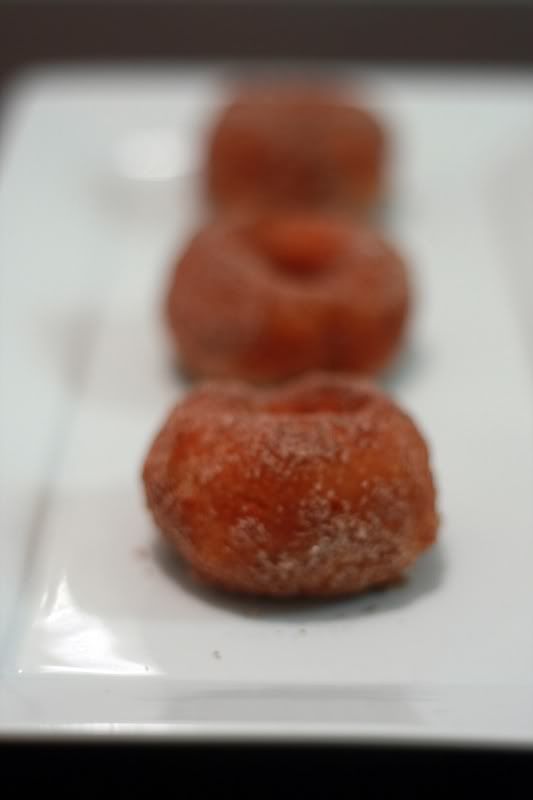
The figure below shows the donuts ready to go in the pool. Now I prefer to give all of the donuts their rough shape and then a finishing spin as I'm about to dump them in the oil. Obviously, as with any engineered process, a fair amount of optimization should be performed through repeated attempts to maximize donut production.


Fry the donuts for about 3 minutes, turning once, until they are golden and brown. Only put a few donuts in at a time as the energy stored in the heated oil is not enough to properly cook more than two or three at once. Allow the oil to return to temperature between groups.


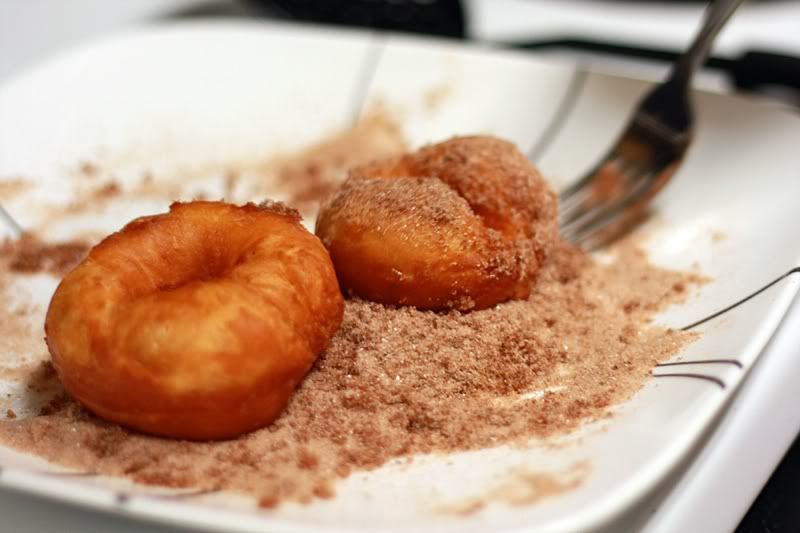
Once the three minutes have elapsed, yank them out using a utensil that will allow the oil to drain away (i.e., slotted spoon, or the like). Give the donuts a quick roll in the cinnamon sugar and set aside for a brief (1-2 min.) cool down.


I'd recommend consuming these little guys immediately because they do tend to get a little greasy as the day goes along.

Makes: 24 donuts

Monday, August 9, 2010

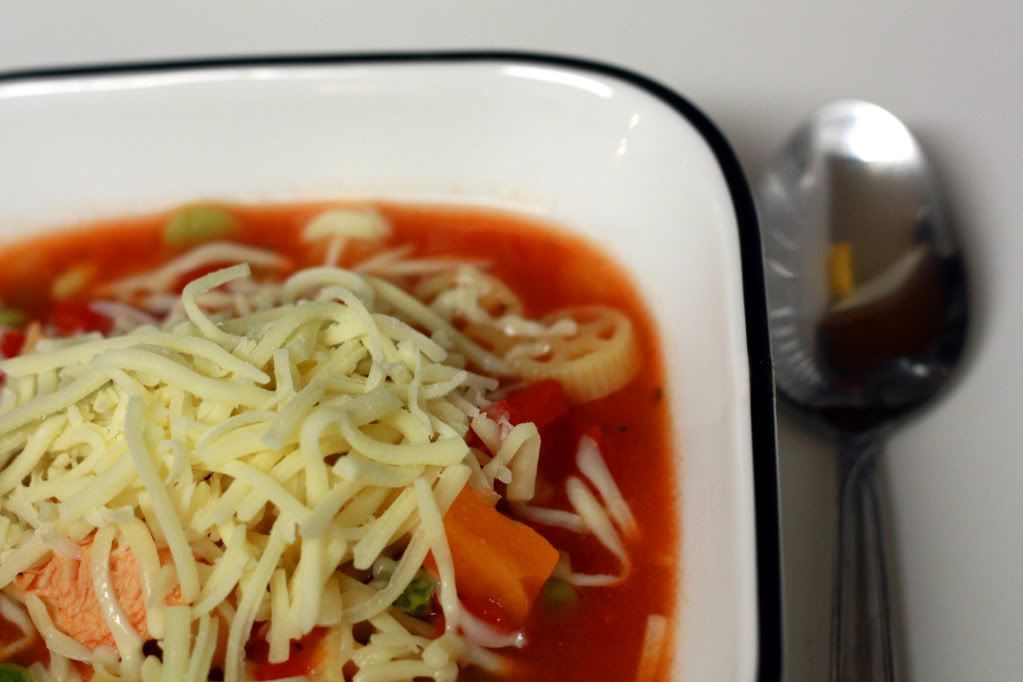
Minestrone Soup


Minestrone is one of those things that any and every Italian restaurant seems to have. It's like the "dime a dozen" version restaurant style. Not without good reason, however. Minestrone is light, yet hearty at the same time, and it is totally one of those quintessential Italian dishes. Every restaurant has their own version of minestrone, which undoubtedly has been passed down through the family for generations. But why bother going all the way out to a restaurant when I can make it at home in under 30 minutes?


Minestrone Soup

Adapted from: Kraft Foods


1 pound frozen Italian-style vegetable mix
2 (4 ounce) boneless skinless chicken breasts, cut into bite-size pieces
2 (14.5 ounce) cans fat-free reduced-sodium chicken broth
2 (14.5 ounce) cans diced tomatoes with basil and oregano, undrained
1 (15 ounce) can cannellini beans (white kidney beans), rinsed
1 cup medium-sized pasta, uncooked (such as rotini, wheels, medium shells)
1 (7 ounce) package Mozzarella cheese, shredded

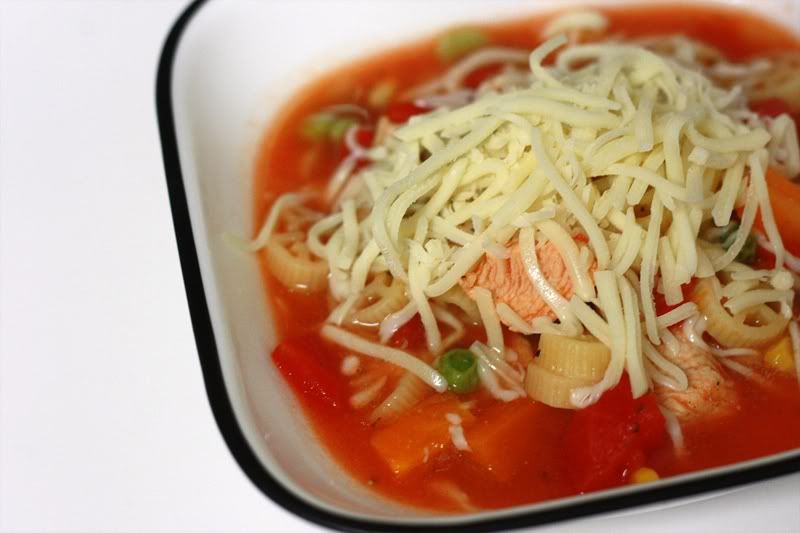
In a large saucepan, combine all ingredients except cheese. Bring to boil over high heat, stirring occasionally. Turn heat to medium and simmer for 10 minutes, or until chicken is done and pasta is tender, stirring occasionally. Top with cheese and serve.

Serves: 8


I mean really, how simple can you get? The only prep required for this meal is cutting chicken. And opening cans. Soooo difficult, I know. And at least with this version I can throw my own veggies in rather than suffering through squash or cauliflower or some other veggie I could really do without. Definitely going to be saving this to use again for a rainy day.


Nutrition Facts
Amount per serving
Calories 408Calories from fat 77
% Daily Value
Total Fat 8.5g13%
Saturated Fat 4.0g20%
Cholesterol 39mg13%
Sodium 520mg22%
Total Carbs 51.0g17%
Dietary Fiber 17.3g69%
Sugars 6.3g
Protein 32.9g
Vitamin A 68%Vitamin C 29%
Calcium 29%Iron 34%

Sunday, August 8, 2010

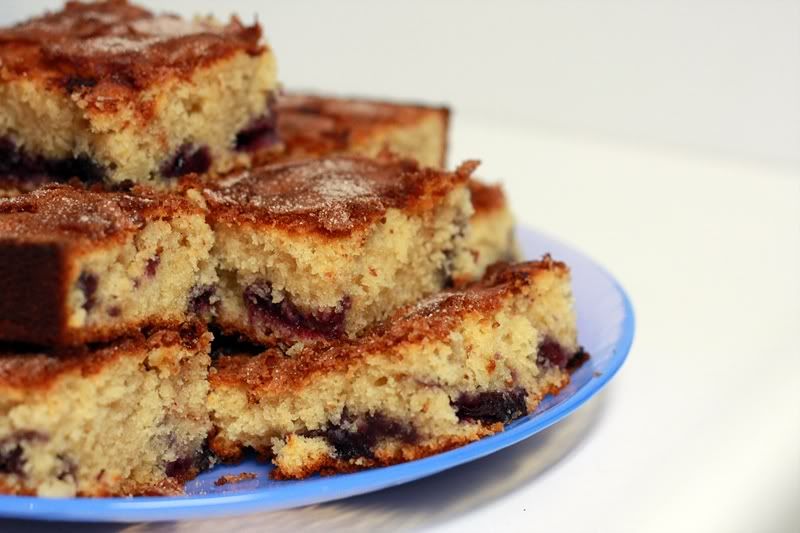
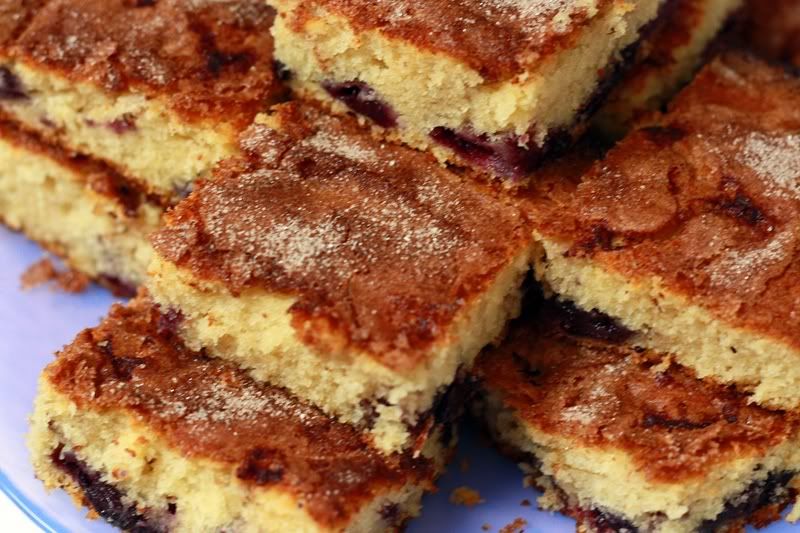
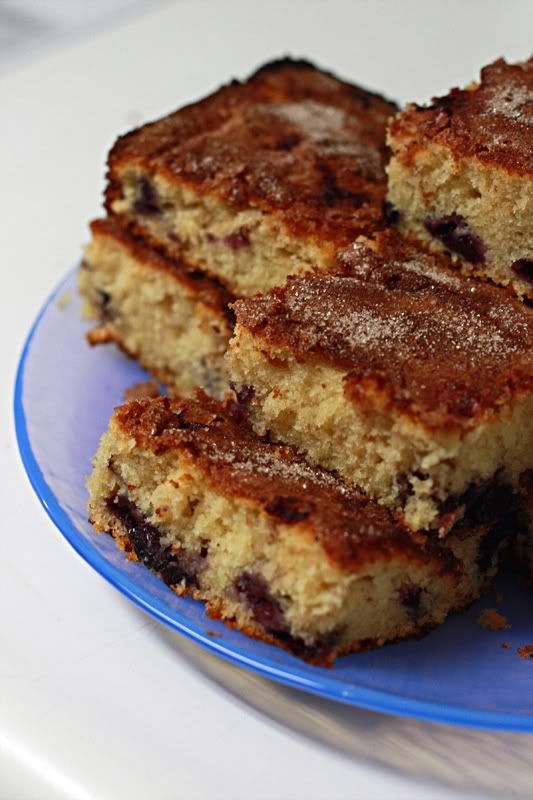
Blueberry Boy Bait


Ever see one of those recipes you just have to make? Right now? Every once in a while I get on a baking kick and just.have.to.make.it.right.now. Usually when this happens I simply send the majority of the goods with Adam to work the next day. Works for me as I get to make whatever it is I'm craving, but I don't get stuck eating the whole entire batch. As much as I would like to, it's really not the best of ideas.

And so for a while our little arrangement has worked out well. Until this recipe. Then Adam decided to go into hoarding mode and eat the entire plate of coffee cake by himself at work. With its juicy blueberries and crispy cinnamon-sugar topping, can't say I really blame him. Except that he didn't share with me either. Guess the whole "boy bait" part is really true.


Blueberry Boy Bait

From: Brown Eyed Baker


For the Cake:
2 cups all-purpose flour, plus 1 teaspoon
1 tablespoon baking powder
1 teaspoon table salt
16 tablespoons (2 sticks) unsalted butter, softened
3/4 cup packed light brown sugar
1/2 cup granulated sugar
3 eggs
1 cup whole milk
1/2 cup blueberries

For the Topping:
1/2 cup blueberries*
1/4 cup granulated sugar
1/2 teaspoon ground cinnamon

For the Cake: Adjust the oven rack to middle position and heat oven to 350 degrees F. Grease and flour a 13×9-inch baking pan.

Whisk 2 cups of flour, baking powder, and salt together in a medium bowl; set aside. With an electric mixer, beat the butter and sugars together on medium-high speed until fluffy, about 2 minutes. Add eggs, one at a time, beating until just incorporated. Reduce speed to medium and beat in one-third of the flour mixture until incorporated; beat in half of the milk. Beat in half of the remaining flour mixture, then remaining milk, and finally remaining flour mixture. Toss the blueberries with remaining 1 teaspoon flour. Using a rubber spatula, gently fold in blueberries. Spread the batter into the prepared pan.

For the Topping: Scatter the blueberries over top of the batter. Stir the sugar and cinnamon together in a small bowl and sprinkle evenly over the batter. Bake until toothpick inserted in center of cake comes out clean, 45 to 50 minutes. Cool in pan 20 minutes, then turn out and place on serving platter (topping side up). Serve warm or at room temperature. (Cake can be stored in an airtight container at room temperature for up to 3 days.)

Note: If using frozen blueberries, do not let them thaw, as they will turn the batter a blue-green color.

Serves:12


Not only were these good, but they are also really easy to throw together. I even had everything in my pantry ready to go, no grocery shopping necessary. (Now that's the kind of recipe I'm talking about!) I did use frozen blueberries vs. fresh, and I'm wondering if these would be even better with fresh berries. I would recommend making these the night before rather than day of if you're looking for breakfast, as these guys take a while to bake.


Nutrition Facts
Amount per serving
Calories 331Calories from fat 156
% Daily Value
Total Fat 17.4g27%
Saturated Fat 10.5g52%
Trans Fat 0.0g
Cholesterol 89mg30%
Sodium 331mg14%
Total Carbs 40.7g14%
Dietary Fiber 0.9g4%
Sugars 23.7g
Protein 4.4g
Vitamin A 11%Vitamin C 2%
Calcium 10%Iron 8%

Thursday, August 5, 2010

One more thing about those labels...

I've decided to add one more label to the previous four healthy symbols I talked about in my last post (omg stop already, I know). I've been going through and adding the nutrition facts to my previous posts and I've been coming across a lot of main course meals that are pretty healthy for you, but they're getting left out in the dark as the requirements for labeling are fairly low. Thus, in order to appease those out there looking for a lower calorie entrée I'm going to pull an Applebee's on you. I'm going to mark the main courses that may not technically qualify as "low-calorie" but is what you would expect out of an entrée. Sorry FDA, I don't know too many people who eat 80 calorie main dishes for dinner...


And done. Now go search and enjoy (you start your search simply by clicking the button above)!

LinkWithin

Related Posts with Thumbnails
 
Pin It button on image hover