When I was in school I absolutely refused to eat school lunches. I wasn't the kid that was embarrassed by my little brown paper sack and always longed to be like all the other kids eating their school-made food. Quite the opposite, in fact - I couldn't stand that greasy messy tasteless conglomeration they called "food" that showed up on my tray. But at that point, my parents decided I was old enough to prepare my own lunches, which turned out to be almost the exact same thing every.single.day. My mom still teases me about it. A sandwich, chips, drink, and a dessert.
Sure the type of sandwich varied day to day - turkey or ham and cheese, peanut butter (no jelly, thankyouverymuch), or one of my all time favorites, a plain bagel with plain cream cheese, but that's about as creative as I got. It's true, I loved my bagels. And I still do to this day.
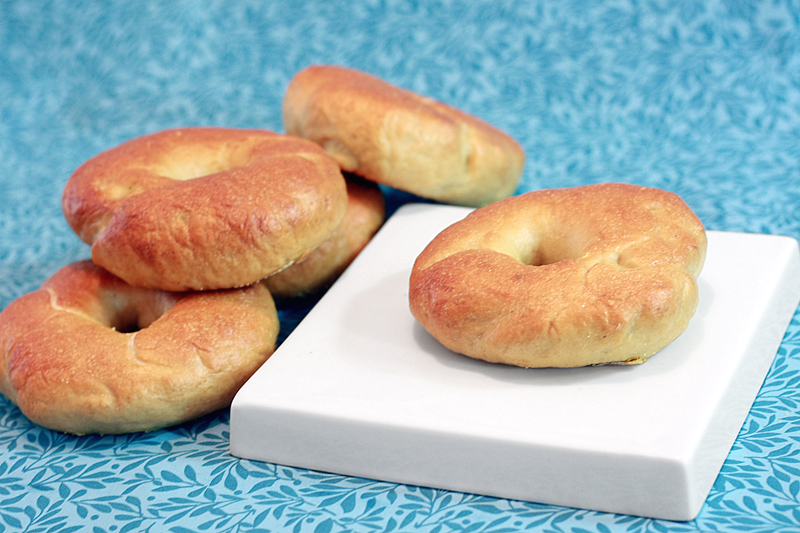
My parents would always buy bagels from the store, and I never really thought about eating any other kind. Those existed? Then I ate an actual bagel from an actual bagel shop. Wow. There is really no comparison. The real bagel is soft on the inside with a nice chewy outside -- those store-bought things simply can't compare.
After eating at such a bagel shop while visiting a friend a while back, I have had nothing but those deliciously fluffy yet chewy bagels on my mind. I just haven't been able to bring myself to buy store-bought or even Panera-bought ones since. It was time to tackle them myself if I wanted the real thing.


Peter Reinhart's Bagels
Adapted from: The Bread Baker's Apprentice
Adapted from: The Bread Baker's Apprentice
1 teaspoon instant yeast
4 cups bread flour
2 1/2 cups water, room temperature
1/2 teaspoon instant yeast
3 3/4 cups bread flour
2 3/4 teaspoons salt
1 tablespoon honey
1 tablespoon baking soda
Cornmeal or semolina flour for dusting
Note: This recipe is a two day process.
Day One:
In the work bowl of a mixer, stir together 1 teaspoon yeast and 4 cups flour. Add water, and stir until a smooth, sticky batter forms. Cover the bowl with plastic wrap and place in a draft free area at room temperature for approximately 2 hours, or until the sponge is foamy and bubbly, and almost double in size.
Add the remaining yeast to the sponge and stir. Slowly add 3 cups of flour, salt, and honey. With the dough hook, mix on low until the ingredients form a ball. Working in the remaining 3/4 cup flour, a little at a time, to stiffen the dough.
Transfer the dough to a work surface, and knead for at least 10 minutes (or for 6 minutes by machine) (be prepared to knead quite a bit longer). The dough should be firm, but elastic and smooth. There should be no raw flour – all ingredients should be hydrated. If the dough seems too dry and rips, add a few drops of water and continue kneading. If the dough seems tacky or sticky, add more flour to achieve the stiffness required (dough will be very stiff). The kneaded dough should feel satiny and pliable but not be tacky.
Divide the dough into 4 1/2 ounce pieces and shape into rolls. Cover with a damp towel and allow to rest for about 20 minutes.
Line two baking pans with parchment paper and spray lightly with cooking spray. Poke a hole in the center of each ball of dough and gently rotate your thumb around the inside of the hole to widen it. The holes should be approximately 2 1/2 inches in diameter, and the dough should be as evenly stretched as possible.
Place each of dough rings 2 inches apart on the pans. Spray the bagels very lightly with cooking spray and cover the pans loosely with plastic wrap. Let the dough rest at room temperature for about 20 minutes.
Use the “float test” to see if the bagels are ready to be refrigerated. Fill a small bowl with cool or room-temperature water. The bagels are ready to be refrigerated when they float within 10 seconds of being dropped into the water. Take one bagel and test it. If it floats, immediately return the tester bagel to the pan, pat it dry, cover the pan, and place it in the refrigerator overnight (it can stay in the refrigerator for up to 2 days). If the bagel does not float. Return it to the pan and continue to proof the dough at room temperature, checking back every 10 to 20 minutes or so until a tester floats. The time needed to accomplish the float will vary, depending on the ambient temperature and the stiffness of the dough.
Day Two:
Preheat the oven to 500 degrees F. Bring a large, wide pot of water to a boil. Add the baking soda.
Remove the bagels from the fridge. Gently drop the bagels into the water, boiling only as many as comfortably fit (they should float within 10 seconds). Flip each bagel after 1 - 2 minutes, depending on how chewy you prefer them (longer = chewier). Boil for the same amount of time on the other side.
Meanwhile, sprinkle the same parchment-lined pans with cornmeal or semolina flour. If you are adding any toppings to your bagels, do so as soon as they come out of the water.
When enough bagels to fill one pan have been boiled, place pan on middle rack in the oven. Bake for approximately 5 minutes, then rotate the pan 180 degrees, lower the temperature to 450 degrees, and bake for another 5 minutes. Bagels are done when they turn light golden brown, although you may bake them darker if you prefer. Remove the pan from the oven, and transfer the bagels to a cooling rack for at least 15 minutes before serving.
While the first pan of bagels is in the oven, finish boiling the second pan, and repeat the baking process, remembering to turn the oven heat back to 500 degrees F before baking.
Makes: 14 bagels

Every where I searched for a bagel recipe, it seemed this one kept popping up. I did make a few changes, as I wasn't able to find all the ingredients necessary. I switched out high-gluten flour for bread flour, and honey for malt powder. Usually not a huge deal. In this case, I think the honey for malt powder switch really changed the flavor of these bagels. There is just something about a bagel that has a very particular flavor -- and now I know for sure it comes from malt powder (or syrup). Next time I try these, this will definitely be a must-have ingredient to hunt down.
I also ended up hand-kneading the dough and adding a lot of extra water (yes, it really was that stiff I didn't trust it in my mixer). Let's just say you get quite the work out kneading this dough. I never did get my dough to pass the windowpane test, but the end result seemed as it should be.
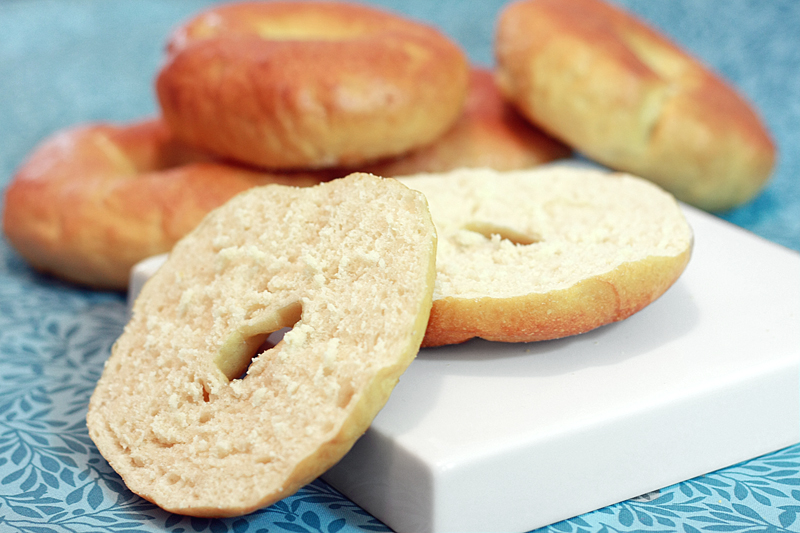
Adam really really liked these (taking down two of these for breakfast alone). I did like them, except for that tiny little bit about the flavor part. The texture and chewiness were right on. However, I wouldn't let these sit around very long as they seemed to dry out a little bit by the following day (I ended up freezing the remaining bagels).

| Nutrition Facts | |
| Amount per serving | |
| Calories 258 | Calories from fat 6 |
| % Daily Value | |
| Total Fat 0.7g | 1% |
| Cholesterol 0mg | 0% |
| Sodium 731mg | 30% |
| Total Carbs 54.2g | 18% |
| Dietary Fiber 2.0g | 8% |
| Sugars 1.4g | |
| Protein 7.3g | |
| Vitamin A 0% | Vitamin C 0% |
| Calcium 1% | Iron 18% |


I love bagels but I have never made them at home, I really should! Especially after seeing and reading this!
ReplyDeleteI love homemade bagels, haven't made them in a while but now when I saw yours I'm all for it again :) They look so good and yummy!
ReplyDeleteI have been wanting to make this recipe but the length of the recipe always scares me off! Yours turned out really great looking! (I loved my homemade lunches too, school lunches were gross!)
ReplyDeleteI've never thought to make my own bagels - might have to rethink that after seeing your ones - they look great!
ReplyDeleteI also wanted to let you know that I passed on the 'Stylish Blogger Award' to you and your lovely blog - http://vanillacloudsandlemondrops.blogspot.com/2011/03/pink-champagne-truffles-and-awards.html
The reason I don't make homemade bagels is because of the wait! 2 days is too long. I can't wait that long to have one...no patience... and my mouth just waters... kind of like what it's doing right now because I saw your photos and recipe.
ReplyDeletethey're beautiful!!! look better than store bought. can't wait to try the recipe!
ReplyDeleteOh my goodness, these turned out lovely. I think I know what I'll be up to this weekend!
ReplyDeleteIt looks to me they turned out great! I have made bagels a few times now and I love trying a different recipe every time and even if they don't turn out perfect for sure it's better than store bought ones!
ReplyDeleteThese look so perfect, like they were bought at a bagel shop! They look delicious, and now I want to make some:)
ReplyDeleteTake care,
Terra
I haven't made bagels in ages...we're talking years! These look wonderful...just the right texture....where's my cream cheese??
ReplyDeleteThat's what I miss moss about not living in the Northeast... there's no real bagel shops where I live in NC. I never thought to make my own! Yours look great!
ReplyDeleteI've been meaning to try my hand at making bagels, too...yours look picture perfect! You've inspired me :)
ReplyDeleteI love bagels but am a huge NYC bagel snob. I am actually going to try to make my own this weekend!
ReplyDeleteThere is no place to get a good bagel near where we live, so this recipe will be great to have on hand! We are passing on the Stylish Blogger Award to you! http://picture-perfectmeals.blogspot.com/2011/03/wed-like-to-thank-academy.html
ReplyDeleteI've made this same recipe a few times now and have the same problem with my mixer and kneading. One thing I've done to cope is make 2 half recipes simultaneously so the dough isn't so bulky on the mixer. The other thing I've discovered is to add a little bit of water every time you add a little bit of flour - let's say a tsp of water for each 1/2 cup of flour. This way, the dough gets enough moisture to achieve a proper bulk while maintaining its elasticity without killing your mixer, and toward the end you can add tiny bits of flour w/o water until the dough is no longer sticky to the touch.
ReplyDeleteThese are stellar! ♥- Katrina
ReplyDeleteI made bagels a couple of days ago too, not from Peter Reinhard but from one recipe in Baking with Julia. It's soft on the inside and has chewy skin. winner!
ReplyDeleteThey looked complicated, but sooo worth it! I love fresh bagels!
ReplyDeleteIt is a good thing that there are kinds of bread such as bagels that are not 'harmful' to our diet. Bagels are better than most kinds of bread made available today and it is good that more people are recognizing its importance as part of our daily diet.
ReplyDelete